
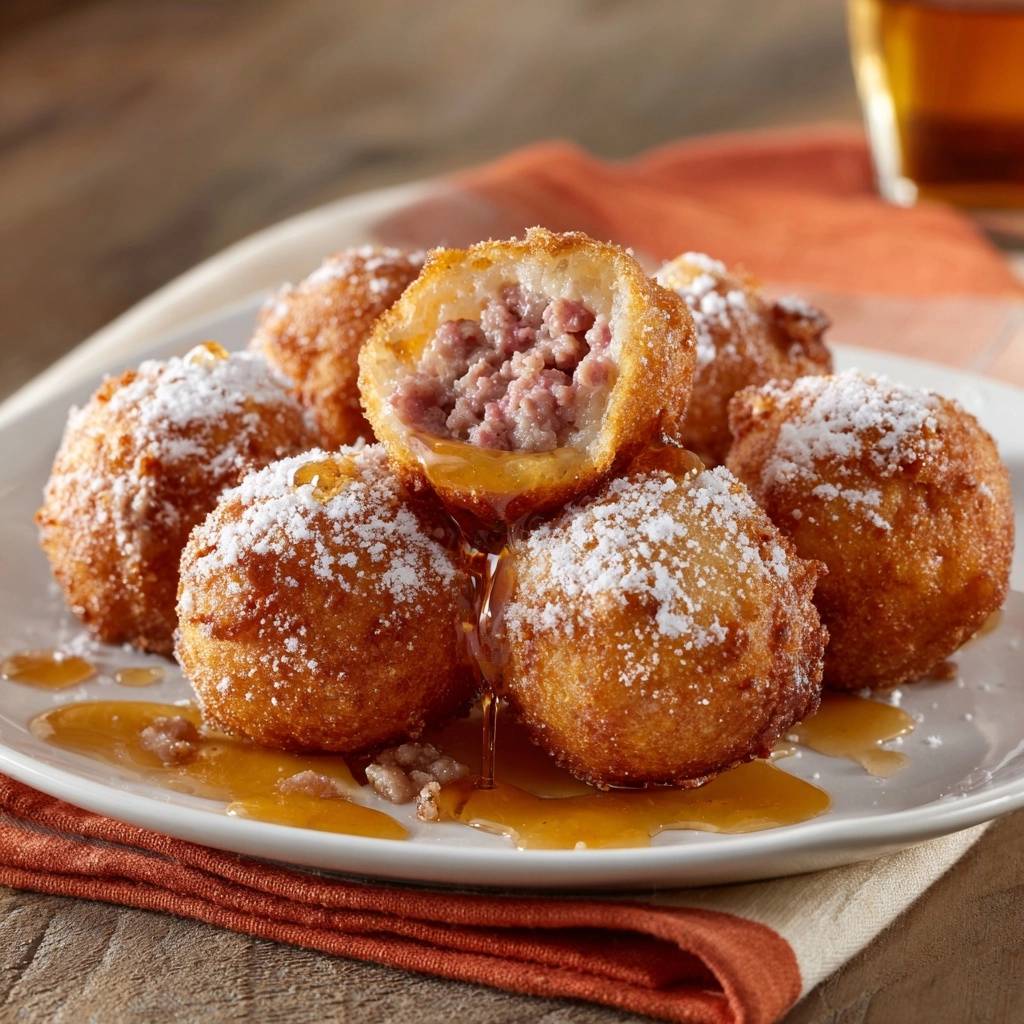
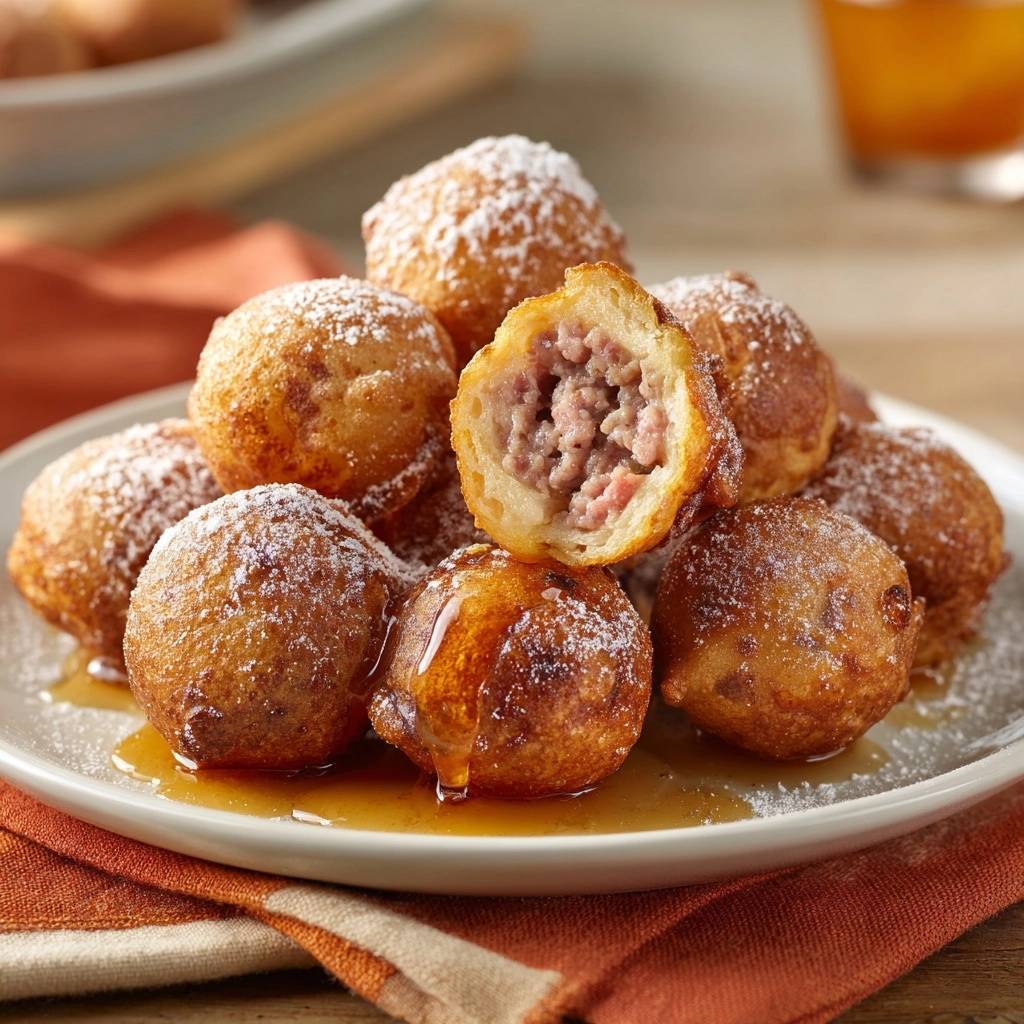
Imagine biting into a golden, pillowy cloud that immediately gives way to a savory, perfectly seasoned sausage center. These Sausage Pancake Breakfast Bites are the ultimate morning indulgence, offering a delightful contrast between the sweet, airy pancake shell and the salty snap of the meat. They’re essentially the sophisticated, homemade cousin of the classic corn dog, reimagined for the breakfast table.
However, many home cooks struggle with this dish because the timing is tricky. If you fry the batter until it’s golden, the meat inside often stays dangerously raw; if you cook it long enough to finish the sausage, the pancake exterior burns. This recipe solves that dilemma entirely. By using a strategic pre-browning method and a specifically engineered batter, you get a safe, juicy center and a crisp, lacey crust every single time.
The real secret to professional-grade results lies in the viscosity of your coating. Most people make the mistake of using a standard, runny pancake batter that slides right off the meat. I’ve found that adding a touch of cornstarch and reducing the liquid creates a “heavy-grip” batter that clings to the sausage like a second skin. This ensures you don’t end up with a hollow shell, but rather a solid, satisfying bite that holds its shape from the fryer to the plate.
Essential Components for Sausage Pancake Breakfast Bites
Success starts with choosing a “complete” pancake mix as your base. These mixes are formulated with specific leavening agents and dried milk solids that provide a consistent, predictable rise. Because we are deep-frying rather than griddling, this stability is crucial for maintaining a spherical shape in the hot oil. If the mix is too weak, the bites will deflate or become misshapen as they hit the heat.
While many pancake recipes call for water, you should always reach for whole milk here. The higher fat content in whole milk doesn’t just add richness; it actually aids in the Maillard reaction, which is the chemical process responsible for that beautiful deep-brown color. In addition, a splash of vanilla extract might seem out of place in a savory dish, but it acts as a bridge. It highlights the sweetness of the maple syrup while softening the aggressive spices in the breakfast sausage.
The Role of Cornstarch in Batter Adhesion
Cornstarch is the unsung hero of this recipe. By replacing a small portion of the flour’s role with cornstarch, you effectively lower the overall gluten development. This results in a much more tender, “short” crumb that snaps when you bite into it rather than feeling chewy or bread-like. Furthermore, cornstarch creates a moisture barrier that prevents the oil from soaking into the batter, keeping the bites light and grease-free.
Selecting and Prepping the Breakfast Sausage
When selecting your sausage, look for a high-quality ground roll with a good fat-to-lean ratio. Whether you prefer the warmth of sage, the sweetness of maple, or a spicy kick, the quality of the meat determines the final flavor. Aim for one-inch spheres when rolling; this size is the “sweet spot” for heat distribution. If they’re too large, the centers won’t heat through; if they’re too small, the meat gets lost inside the pancake coating.
The Pre-Browning Technique for Food Safety
This is the most critical step for ensuring your breakfast is both delicious and safe. Pancake batter only needs about three to four minutes in the fryer to reach a perfect golden brown. Unfortunately, that isn’t nearly enough time to bring raw ground meat up to the USDA-recommended internal temperature of 160°F. If you skip the pre-browning, you’re almost guaranteed a cold, raw center.
By browning the sausage balls in a skillet first, you give the protein a necessary “head start.” You aren’t looking to cook them until they’re dry and shriveled, but you want a firm, browned exterior. This process locks in the juices and ensures that the short time spent in the deep fryer is only needed to cook the batter and finish the internal heating process. It’s the only way to guarantee a “no-fail” result.
Achieving Uniform Firmness and Color
To keep your sausage balls round, don’t just let them sit in the skillet. Shake the pan frequently so they roll around and brown evenly on all sides. Once they’re firm, move them to a plate lined with paper towels. Draining the rendered fat is mandatory; if the sausage is greasy, the pancake batter will simply slide off in the fryer, leaving you with a mess of loose dough and naked meat.
Mixing the High-Viscosity Pancake Coating
The batter for these bites should look nothing like the batter you pour onto a Saturday morning griddle. It needs to be significantly thicker—think of the consistency of a heavy cake batter or a thick yogurt. When you lift your whisk, the batter should fall back into the bowl in a “ribbon” that holds its shape for a few seconds before disappearing. This high viscosity is what allows the coating to stay thick and even around the sausage.
Be careful not to over-mix the batter once you add the wet ingredients. You want to whisk just until the large lumps are gone. If you overwork the dough, you’ll develop too much gluten, which turns your light, airy breakfast bites into tough, rubbery nuggets. A few tiny lumps are perfectly fine and will disappear during the frying process.
The Double-Dredge Method for Maximum Grip
To ensure the batter stays put, I use a “primer” technique. Before dipping the sausage into the wet batter, roll it lightly in a bowl of dry pancake mix. This dry coating absorbs any lingering moisture on the surface of the meat. It creates a textured surface that the wet batter can fuse to, preventing that annoying “hollow shell” effect where the meat rattles around inside a loose crust.
Step-by-Step Frying and Temperature Control
Temperature control is the difference between a professional snack and a greasy disaster. You want your oil at exactly 350°F. If the oil is too cold, the batter will soak up the grease like a sponge before it has a chance to set. If it’s too hot, the outside will turn black before the heat can penetrate the center of the sausage. Use a clip-on thermometer to stay precise.
When you’re ready to fry, use a skewer or a toothpick to dip the dredged sausage into the thick batter. Swirl it around to ensure a heavy, even coat, then let the excess drip off for just a second. Carefully drop it into the oil, using a small spoon to help it slide off the skewer if necessary. The bite should immediately sizzle and rise to the surface.
Managing Batch Sizes and Oil Recovery
It’s tempting to crowd the pot to finish faster, but you must resist. Adding too many cold items to the oil at once causes “thermal shock,” dropping the temperature significantly. Fry only four or five bites at a time. This allows the oil to recover its heat quickly between batches and gives you enough room to use a slotted spoon to keep the bites rotating for an even, 360-degree tan.
Troubleshooting Common Texture Issues
If you find your bites are coming out with “soggy bottoms,” it’s likely because you’re draining them on a flat paper towel. The steam gets trapped underneath and softens the crust. Instead, drain them on a wire cooling rack set over a baking sheet. This allows air to circulate all the way around the bite, keeping the entire exterior shatteringly crisp.
If your batter is struggling to stay on the sausage, it’s probably too thin. Don’t be afraid to whisk in an extra tablespoon or two of dry mix to tighten it up. Conversely, if the batter is so thick it’s forming long, ugly “tails” when you drop it in the oil, thin it out with a teaspoon of milk at a time until it’s manageable but still heavy.
Flavor Variations and Savory Swaps
Once you master the base recipe, you can start getting creative with the flavor profile. For a “sweet and heat” vibe, try adding finely minced jalapeños or a pinch of cayenne pepper to the dry mix. If you’re a cheese lover, whisking in a half-cup of very finely shredded sharp cheddar creates a beautiful “cheesy-bread” effect that pairs perfectly with the savory sausage.
For those who don’t eat traditional breakfast sausage, this method works beautifully with turkey sausage or even seasoned ground beef. Just ensure whatever protein you choose has enough fat to stay moist during the two-stage cooking process. You can even use pre-cooked cocktail franks if you’re in a rush, though you’ll miss out on that signature breakfast sausage spice blend.
Make-Ahead Strategies and Freezing Instructions
These bites are fantastic for busy weekday mornings because they freeze exceptionally well. To store them, let the cooked bites cool completely on a wire rack. Place them on a baking sheet in a single layer and freeze for about an hour. Once they are firm to the touch, transfer them to a heavy-duty freezer bag. This “flash-freeze” method prevents them from sticking together in one giant clump.
When you’re ready to eat, skip the microwave! Microwaving fried dough makes it rubbery and tough. Instead, pop them into a 350°F oven or an air fryer for about 8-10 minutes. This reheating method restores the original crunch of the pancake exterior while gently warming the sausage center back to its juicy, delicious state.
Optimal Pairings for a Complete Breakfast
Because these bites are quite rich and savory, they pair best with something bright and acidic. A side of fresh raspberries, sliced strawberries, or a simple citrus salad provides a necessary palate cleanser. The acidity cuts through the fat of the fried batter and the sausage, making the whole meal feel much more balanced and less heavy.
For beverages, a strong, dark roast coffee is the classic choice to stand up to the bold flavors. However, if you’re serving these for a brunch, a chilled sparkling apple cider or a glass of fresh-squeezed orange juice adds a refreshing sparkle. The goal is to provide a contrast to the warm, comforting density of the pancake bites.
Expert Tips for Professional Results
Can I use a deep fryer instead of a pot?
Absolutely! A dedicated deep fryer is actually preferred because it has a built-in thermostat that maintains a consistent temperature. Just make sure to set it to 350°F and don’t overfill the basket. If you use a pot on the stove, a heavy-bottomed Dutch oven is your best bet for heat retention.
Why did my batter fall off in the oil?
This usually happens for two reasons: the sausage was too greasy or the batter was too thin. Make sure you’ve thoroughly patted the pre-browned sausage dry with paper towels. Also, ensure you’re using the “double-dredge” method by rolling the meat in dry pancake mix before dipping it into the wet batter to create a primer layer.
How do I keep the first batch warm while finishing the rest?
The best way to keep them crispy and warm is to set your oven to its lowest setting (usually 170°F to 200°F). Place the finished bites on a wire rack over a baking sheet and slide them into the oven. The wire rack is key here; it prevents the bottoms from getting soggy while they wait for the rest of the batches to finish.
Can I use links instead of ground sausage?
Yes, you can use pre-cooked breakfast links. Simply cut them into one-inch segments and follow the same dredging and dipping process. Since links are already fully cooked, you can skip the skillet browning step, though a quick sear in a pan still adds a nice depth of flavor and helps the batter stick better.
What is the best oil for high-heat frying?
You want an oil with a high smoke point and a neutral flavor. Vegetable oil, canola oil, or peanut oil are all excellent choices. Avoid using olive oil or butter for the deep-frying portion, as they have low smoke points and will burn at 350°F, giving your breakfast bites a bitter, scorched taste.
How long can I store leftovers in the fridge?
You can store these in an airtight container in the refrigerator for up to three days. To maintain the best texture, always reheat them in the oven or air fryer. If you find yourself with a large surplus, the freezer is a better long-term option to preserve the freshness of the pancake crust.

Sausage Pancake Breakfast Bites
Course: BreakfastCuisine: AmericanDifficulty: easy4
servings15
minutes15
minutes30
Minutes450
kcalAmerican
Ingredients
1 pound ground breakfast sausage
2 cups “complete” pancake mix
2 tablespoons cornstarch (for extra crispness and adhesion)
3/4 cup whole milk (reduced for a thicker batter)
1 large egg
1 tablespoon melted butter
1/2 teaspoon vanilla extract
Vegetable oil for frying
Powdered sugar for dusting
Maple syrup for drizzling
Directions
- Roll the ground sausage into small, uniform balls about 1 inch in diameter.
- Heat a non-stick skillet over medium heat. Add the sausage balls and cook for 5-6 minutes, shaking the pan frequently to brown all sides. They do not need to be 100% cooked through, but they must be browned and firm. Drain on paper towels and let cool for 5 minutes. This ensures the center is hot and safe by the time the batter is golden.
- In a medium bowl, whisk together the pancake mix and cornstarch. Add the milk, egg, melted butter, and vanilla. Whisk until mostly smooth; the batter should be very thick, similar to a heavy cake batter, to ensure it stays on the sausage.
- Heat 2-3 inches of vegetable oil in a deep pot to 350°F (175°C).
- Lightly dredge each slightly cooled sausage ball in a little extra dry pancake mix (this helps the wet batter stick), then dip into the thick batter using a toothpick or skewer. Swirl to coat heavily.
- Carefully drop the coated balls into the hot oil. Fry in batches of 4 or 5 to avoid dropping the oil temperature. Fry for 3-4 minutes, turning with a slotted spoon, until the exterior is a deep, uniform golden brown.
- Remove and drain on a wire rack or paper towels.
- Dust generously with powdered sugar and serve immediately with warm maple syrup for drizzling.
Notes
- The secret to success is the thick batter and pre-browning the meat. Ensure the oil stays at 350°F to prevent the bites from becoming greasy.


