
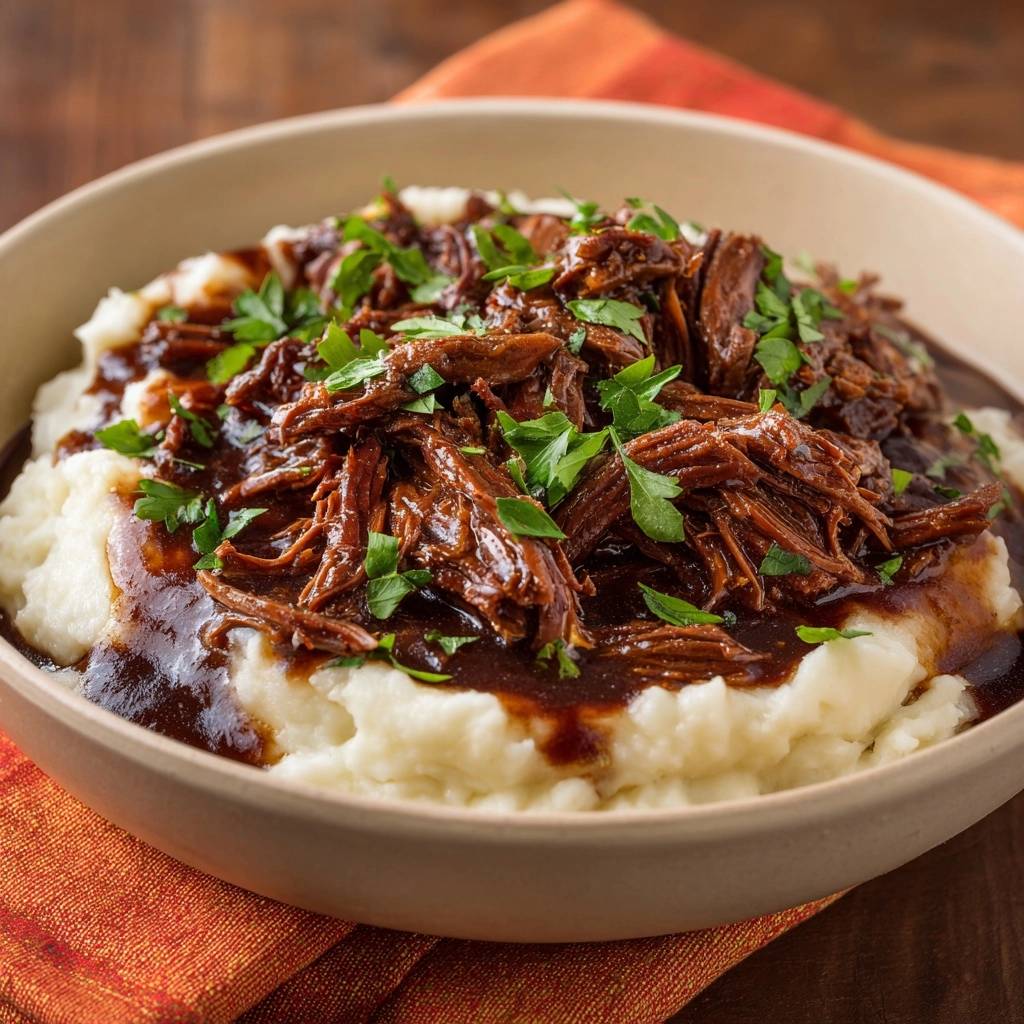
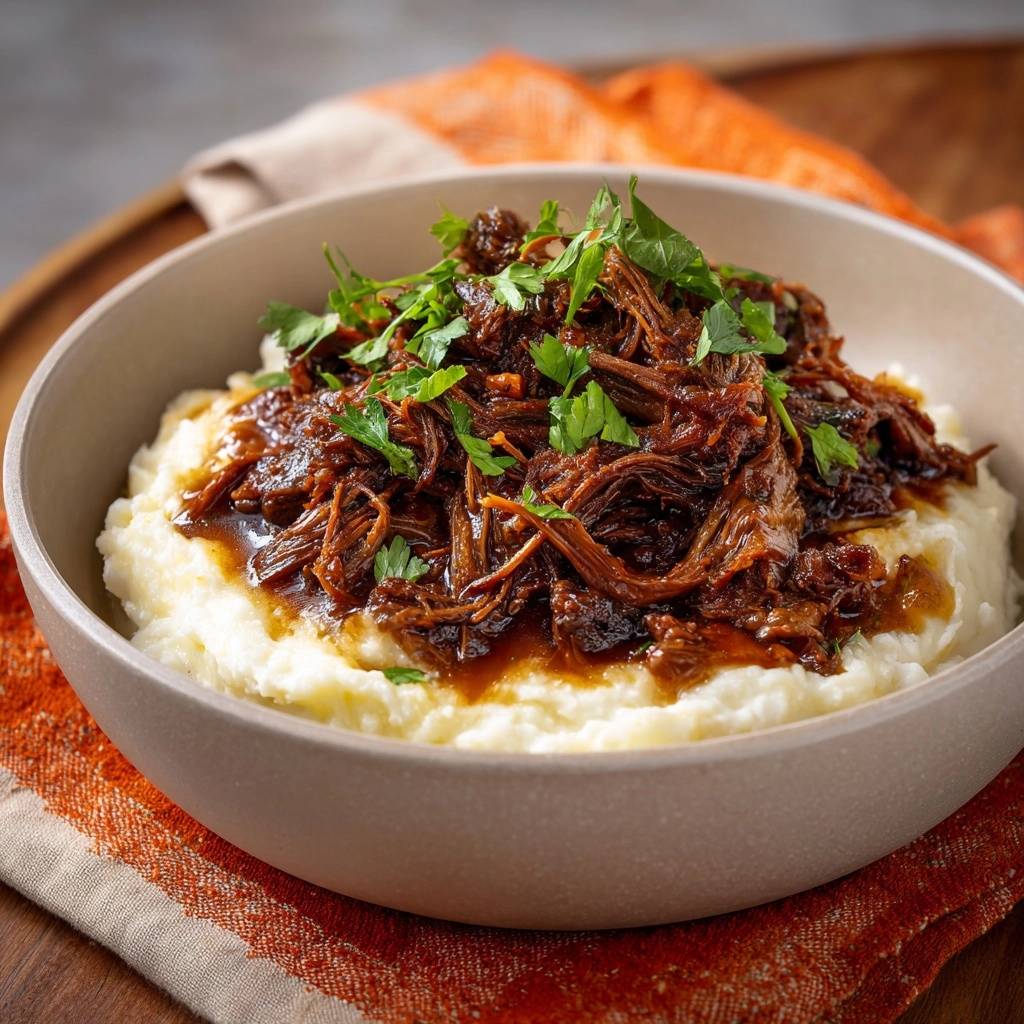
Imagine pulling a heavy pot from the oven and lifting the lid to reveal beef so tender it practically falls apart at the mere suggestion of a fork. The rich, dark gravy pools into a mountain of velvet-smooth mashed potatoes, creating the ultimate comfort meal. This isn’t just a pot roast; it’s a masterclass in patience and technique that transforms humble ingredients into something spectacular.
Many home cooks struggle with beef that turns out stringy or dry, even after hours of simmering. The frustration of waiting all day only to serve tough meat is real, but the fix is simpler than you think. We’re focusing on the science of collagen breakdown and starch management to ensure every bite is succulent and every spoonful of potato is creamy.
The secret to success lies in the temperature control and the initial sear. By browning the meat deeply and then maintaining a gentle, low-heat simmer, you allow the tough connective tissues to melt into gelatin. This process provides that luxurious mouthfeel that high-heat cooking simply cannot replicate. Let’s dive into how you can achieve this at home.
The Science of Succulent Braised Beef
To understand why we cook this dish for so long, we have to look at the biology of the meat. Beef chuck is loaded with collagen, a tough connective tissue that holds muscle fibers together. If you cook it quickly, those fibers tighten up and become like rubber bands, which is why a grilled chuck steak is almost impossible to chew.
However, when you maintain a temperature between 160°F and 180°F, a beautiful transformation occurs. The collagen slowly dissolves into gelatin, which coats the muscle fibers and keeps them moist. This is why “low and slow” isn’t just a catchy phrase; it’s a chemical necessity for tender beef.
You must avoid a rolling boil at all costs during the braising process. Boiling meat causes the muscle fibers to contract violently, squeezing out all their internal moisture. Even if the meat is submerged in liquid, it will end up tasting dry and “woody” if the heat is too high. A gentle simmer, where only a few bubbles break the surface, is your best friend.
Essential Components for Rich Braising Liquid
Success starts at the butcher counter, and for this dish, the beef chuck roast is the undisputed king. It has the perfect balance of lean meat and intramuscular fat, often called marbling. While leaner cuts might seem healthier, they lack the fat and connective tissue needed to survive a long braise without becoming parched.
The liquid isn’t just for cooking; it’s the foundation of your future gravy. We use beef broth as the base, but the real depth comes from umami boosters like Worcestershire sauce and tomato paste. These ingredients add a savory complexity that makes the sauce taste like it’s been simmering in a professional kitchen for days.
When it comes to the potatoes, Yukon Golds are the superior choice over Russets. Yukon Golds have a naturally buttery flavor and a medium starch content that creates a dense, creamy texture. Russets can sometimes become too grainy or “fluffy” for a heavy beef gravy, whereas the waxier Yukon Gold holds up beautifully to the richness of the meat.
Selecting the Right Cut of Beef
While chuck roast is the standard, you could also use brisket or short ribs for this recipe. However, stay far away from lean cuts like Top Round or Eye of Round. These cuts are too lean and will become incredibly dry and tough in a slow cooker or Dutch oven because they don’t have the fat to lubricate the fibers.
The Role of Aromatics and Acids
Garlic, thyme, and tomato paste aren’t just there for scent; they build the “base notes” of your flavor profile. The acidity in the tomato paste helps to balance the heavy fats, while the garlic and thyme infuse the meat with an earthy aroma that penetrates deep into the chunks during the long cook time.
Phase One: The Maillard Reaction and Fond
Before the liquid ever touches the pot, you need to sear the meat. This isn’t about “locking in juices,” which is a common myth, but about the Maillard reaction. This chemical reaction between amino acids and sugars creates hundreds of flavor compounds and gives the meat that dark, savory crust.
Heat your oil until it’s shimmering and almost smoking. If you crowd the pan with too much meat at once, the temperature will drop, and the beef will release moisture and steam instead of browning. Work in batches to ensure every side of every chunk has a deep, mahogany color.
After searing, you’ll notice brown bits stuck to the bottom of the pot. This is called the “fond,” and it is pure flavor gold. When you pour in the broth and scrape those bits up—a process called deglazing—you are incorporating all that concentrated beef flavor directly into your gravy. Without this step, your sauce will look pale and taste thin.
Phase Two: Low-Temperature Braising Techniques
You have three main paths for the braise: the stovetop, the oven, or a slow cooker. If you use a Dutch oven on the stove, keep the flame at the lowest possible setting. In the oven, 300°F is the sweet spot for a steady, even heat that surrounds the pot. For a slow cooker, the “Low” setting for 8 hours is almost always better than “High” for 4 hours.
Regardless of the method, a tight-fitting lid is mandatory. You want to create a closed environment where the moisture stays inside the pot. If the lid is loose, the liquid will evaporate, the top of the meat will dry out, and the sauce will become overly salty. If your lid isn’t perfectly tight, place a piece of parchment paper or foil over the pot before putting the lid on.
Check for doneness by pressing a fork into a piece of beef. It should slide in with zero resistance and the meat should start to pull apart with very little pressure. If it still feels bouncy or tough, it simply needs more time. You can’t rush the breakdown of collagen; it happens on its own schedule.
Phase Three: Achieving Velvet Mashed Potatoes
The biggest mistake people make with mashed potatoes is leaving them too wet. After draining your boiled potatoes, put them back in the hot pot for two minutes. This “steam dry” method allows excess water to evaporate, ensuring the potatoes can soak up the butter and cream instead of being diluted by water.
Temperature is also vital when adding your dairy. If you pour cold milk or cream into hot potatoes, it can shock the starches and lead to a gummy, gluey texture. Warm your butter and cream together in a small saucepan or the microwave before mixing them in. This keeps the potatoes hot and ensures a silky, emulsified finish.
Use a potato masher for a bit of texture or a ricer for a completely smooth, restaurant-style mash. Avoid using a food processor or blender at all costs. The high-speed blades tear the starch molecules apart, releasing too much amylose and turning your beautiful side dish into a sticky paste.
The Importance of Potato Surface Area
Try to cube your potatoes into uniform one-inch pieces. If some chunks are huge and others are small, the small ones will overcook and absorb too much water while the large ones stay hard in the middle. Uniformity ensures that every piece releases its starch at the same rate, leading to a consistent mash.
Phase Four: Reducing the Braising Liquor
Once the beef is tender, your braising liquid will likely be a bit thin. To turn it into a proper gravy, you need to reduce it. Remove the meat so it doesn’t overcook, then turn the heat up to medium-high. As the water evaporates, the flavors concentrate and the liquid begins to thicken naturally.
For that glossy, professional look, use a cornstarch slurry. Mix equal parts cornstarch and cold water, then whisk it into the simmering liquid. You’ll see it transform almost instantly from a dull broth to a shiny, thick gravy that coats the back of a spoon. This is known as “nappe” consistency, and it’s the gold standard for sauces.
Taste the gravy one last time before serving. Because the liquid has reduced, the saltiness will have increased. If it’s too intense, a tiny splash of water or a pinch of sugar can help balance it out. The final sauce should be rich, savory, and thick enough to cling to the beef and potatoes.
Troubleshooting Common Braising Obstacles
If your meat is still tough after the allotted time, don’t panic. It usually just means the collagen hasn’t finished melting. Give it another 30 to 60 minutes. On the flip side, if your gravy is too salty, you can add a peeled, halved potato to the liquid for 15 minutes to absorb some salt, or simply stir in a little more broth.
Gummy potatoes are usually the result of over-working the starch or using a hand mixer. If this happens, you can try to save them by spreading them in a baking dish, topping with cheese, and browning them in the oven to make a sort of potato gratin. If the sauce is too thin, just keep simmering; patience is the best thickener.
If your beef is falling apart but the sauce is greasy, you can skim the fat off the top with a wide spoon. Alternatively, if you have time, chill the sauce in the fridge; the fat will harden into a solid layer on top that you can easily lift off and discard before reheating.
Make-Ahead Strategies and Storage
This is one of those rare dishes that actually tastes better the next day. As the beef sits in the liquid, the flavors continue to meld and penetrate the meat. If you’re making this for a dinner party, feel free to cook it a day early. Just be sure to cool it quickly in the fridge to keep it safe.
When reheating, do it gently on the stovetop over low heat. If you microwave it on high, the beef can become rubbery. Keep the meat submerged in the gravy during the reheating process to ensure it stays moist. The potatoes can be reheated with an extra splash of milk to bring back their creamy texture.
Optimal Side Dish Pairings
Since the beef and potatoes are incredibly rich and heavy, you want side dishes that offer a “bright” contrast. A simple arugula salad with a sharp lemon vinaigrette works wonders to cleanse the palate between bites. The acidity cuts right through the butter and beef fat.
Roasted root vegetables like carrots or parsnips are also a classic choice, as their natural sweetness complements the savory gravy. If you want something green, try sautéed green beans with plenty of garlic and a squeeze of fresh lemon juice. The crunch of the beans provides a nice textural break from the soft beef and mash.
Expert Braising FAQ
Can I use a leaner cut like Top Round?
It is not recommended. Lean cuts like Top Round or Eye of Round lack the necessary connective tissue and fat to withstand long cooking times. They will become dry, crumbly, and tough rather than tender. Stick to chuck roast, brisket, or short ribs for the best results.
Why did my gravy turn out gray instead of dark brown?
A gray gravy usually means the meat wasn’t seared long enough or the pan was overcrowded. That deep brown color comes from the “fond” created during the initial searing process. To fix a pale gravy, you can add a teaspoon of Worcestershire sauce or a drop of browning seasoning, but the best flavor comes from a proper sear.
Is it possible to overcook beef in a slow cooker?
Yes, it is. While it’s hard to make it “tough” by overcooking, the meat can eventually lose all its structure and become mushy or disintegrate into the sauce. This usually happens after 10-12 hours on low. You want the meat to be fork-tender but still hold its shape in large chunks.
Can I substitute the heavy cream in the potatoes?
You can use whole milk for a lighter version, though the potatoes won’t be quite as silky. For a dairy-free option, use a high-quality chicken or vegetable broth and a bit of olive oil. This creates a “smashed” potato style that is flavorful but much less rich than the traditional version.
How long can I store leftovers in the fridge?
You can safely store the braised beef and mashed potatoes in airtight containers for up to 3 to 4 days. For the best quality, store the beef inside its gravy to prevent it from drying out. The potatoes may thicken as they cool, so add a splash of liquid when you reheat them.
Can I freeze this meal for later?
The braised beef freezes beautifully in its sauce for up to 3 months. However, mashed potatoes can sometimes change texture and become grainy after freezing and thawing. If you plan to freeze the potatoes, add a little extra fat (butter or cream) to help stabilize the starch before putting them in the freezer.

Slow Cooked Braised Beef and Mashed Potatoes
Course: Main CourseCuisine: AmericanDifficulty: easy6
servings20
minutes4
hours240
MinutesAmerican
Ingredients
3 pounds beef chuck roast, cut into 3-inch large chunks
2 tablespoons vegetable oil
1 quart beef broth
2 tablespoons tomato paste
1 tablespoon Worcestershire sauce
1 teaspoon dried thyme
2 cloves garlic, minced
1 tablespoon cornstarch mixed with 1 tablespoon cold water (optional, for thickness)
Salt and black pepper to taste
3 pounds Yukon Gold potatoes, peeled and cubed
1/2 cup unsalted butter
1/2 cup heavy cream or whole milk
Fresh flat-leaf parsley, roughly chopped for garnish
Directions
- To solve the tough meat problem, start by generously seasoning the beef chunks with salt and pepper. Heat oil in a large heavy-bottomed pot or Dutch oven over medium-high heat. Sear the beef in batches for 3 to 4 minutes per side until a deep, dark brown crust forms. This Maillard reaction is essential for the rich color seen in the gravy.
- Remove the beef and set aside. Reduce heat to medium and add the tomato paste and minced garlic to the pan drippings. Stir constantly for 1 minute until the paste turns a deep brick red.
- Slowly pour in the beef broth and Worcestershire sauce, scraping the bottom of the pan with a wooden spoon to release all the flavorful browned bits (fond).
- Return the beef and any accumulated juices to the pot along with the thyme. Ensure the liquid covers at least two-thirds of the meat. Cover with a tight-fitting lid.
- The Braise: For the stove, reduce heat to the lowest setting to maintain a very gentle simmer for 4 to 5 hours. Alternatively, place in a 300°F (150°C) oven for 4 hours, or a slow cooker on LOW for 8 hours. Do not boil aggressively, as high heat tightens the muscle fibers.
- While the beef finishes, boil the potatoes in salted water until fork-tender, about 15 to 20 minutes. Drain well and let steam dry for 2 minutes.
- Mash the potatoes with butter and cream until completely smooth and fluffy. Season with salt to taste.
- Once the beef shreds easily with a fork, remove it from the liquid and shred into large, succulent pieces.
- The Gravy: Increase the heat to medium-high to reduce the braising liquid by a third. For the glossy, thick consistency shown in the photo, whisk in the cornstarch slurry and simmer for 2 minutes until thickened and dark.
- Serve a generous portion of shredded beef over a large bed of mashed potatoes. Ladle the rich gravy over the top so it pools into the potatoes. Garnish heavily with fresh chopped parsley.
Notes
- To ensure the meat is not tough, avoid aggressive boiling; a gentle simmer is key to breaking down connective tissue. For the best gravy consistency, use the optional cornstarch slurry.


