Imagine pulling a fork through a thick slab of beef and watching it effortlessly glide apart into succulent, juice-soaked ribbons. There is a specific joy in a meal that requires nothing more than a dull utensil to eat, yet so many home cooks end up with a pot roast that feels like chewing through a rubber band. You’ve likely been there before, staring at a plate of stringy, dry meat and gray, mushy vegetables that have lost all their personality.
The secret to avoiding that culinary heartbreak lies in a two-phase cooking strategy that treats your protein and your produce with the individual respect they deserve. By separating the long, slow breakdown of the beef from the gentle steaming of the peppers, you ensure a plate that is both rich in deep, savory flavors and vibrant in texture. This isn’t just a “set it and forget it” dump meal; it’s a thoughtful approach to slow cooking that guarantees a professional result every single time.
Expertise in slow cooking starts with understanding that heat is a tool, not just a setting. To get that melt-in-your-mouth finish, you must commit to the “Low” setting on your appliance. While “High” might get dinner on the table faster, it causes the muscle fibers to seize and tighten, squeezing out the very moisture you’re trying to preserve. Patience is the primary ingredient that transforms a tough chuck roast into a masterpiece.
The Science of Breaking Down Tough Beef
To master this dish, you have to understand what’s happening inside the slow cooker. A chuck roast is packed with connective tissue, specifically collagen, which acts like a tough internal scaffolding for the muscle. If you cook this meat quickly over high heat, the muscle fibers shrink and become dry before that collagen has a chance to change. However, when you maintain a steady, low temperature, a beautiful chemical transformation occurs.
As the internal temperature of the beef hovers in the “magic zone” between 190°F and 200°F, the tough collagen begins to melt into gelatin. This gelatin coats the individual muscle fibers, providing that silky, rich mouthfeel that we associate with high-end braises. If you rush this process by using the “High” setting, the temperature rises too quickly, and the protein fibers contract violently, resulting in that dreaded “stringy” texture that no amount of gravy can fix.
Furthermore, the low and slow approach allows the fat within the marbling to render out slowly. This fat doesn’t just disappear; it bastes the meat from the inside out. By the time the eight-hour mark hits, the beef has essentially been confited in its own juices and the added bone broth. This creates a finished product that is structurally sound enough to hold its shape but soft enough to collapse at the mere suggestion of a fork.
Essential Components for Shredded Beef and Peppers
Success starts at the butcher counter. While you might be tempted to grab a leaner cut like a round roast to save on calories, you’ll regret it when the meat turns out dry and crumbly. Chuck roast is the undisputed king of shredded beef because it contains the perfect ratio of fat and connective tissue. Look for a piece that has plenty of white flecks of intramuscular fat, known as marbling, which will keep the meat lubricated during the long cook.
The liquid you choose is just as important as the meat. Using a high-quality beef bone broth rather than a standard thin stock adds a significant amount of natural gelatin to the au jus. This results in a sauce that has “body” and clings to the meat rather than just running off the plate. In addition, the choice of thick-cut peppers and onions is a strategic move. Thinly sliced vegetables would disintegrate into the sauce, but thick wedges can withstand the final hour of steaming while retaining a slight bite.
Selecting the Right Cut of Beef
When you’re at the grocery store, don’t just grab the first chuck roast you see. Look for a “Choice” or “Prime” grade if your budget allows, as these have superior marbling. You want to see a web of white fat running through the red meat. Before cooking, take a sharp knife and trim away any large, hard caps of exterior fat. Leaving too much exterior fat will result in a greasy au jus, whereas the interior marbling is what actually provides the moisture you need.
The Role of Aromatics and Acids
Flavor depth comes from the small details. Worcestershire sauce is a powerhouse in this recipe because it provides acidity and umami. The vinegar in the sauce helps to subtly tenderize the surface of the beef, while the fermented anchovies in the base amplify the “beefiness” of the roast. Similarly, using smashed garlic cloves instead of minced garlic is a deliberate choice. Smashed cloves release their aromatic oils slowly over eight hours, providing a mellow, sweet garlic undertone rather than a sharp, burnt flavor.
Phase One: The Maillard Reaction and Searing
The most common mistake people make with slow cookers is putting raw meat directly into the pot. To unlock the deepest flavor, you must first initiate the Maillard reaction. This is a chemical reaction between amino acids and reducing sugars that gives browned food its distinctive, savory crust. Without this step, your beef will taste “boiled” rather than “braised,” and your sauce will lack color and complexity.
Before the meat ever touches the pan, you must pat it completely dry with paper towels. If the surface of the beef is wet, it will steam in the pan instead of searing. Once dry, season it aggressively with salt and pepper. Heat your oil until it’s shimmering and just starting to wispy-smoke. When you lay the beef in the pan, leave it alone for at least four minutes. You are looking for a deep, mahogany-colored crust to form. This crust is where all the “umami” lives, and it will eventually dissolve into the cooking liquid to create a world-class au jus.
Phase Two: The Low and Slow Braise
Once the beef is seared and moved to the slow cooker, the environment changes from dry heat to moist heat. It’s vital to remember that you are braising, not boiling. You only need enough liquid to come about halfway up the side of the roast. If you submerge the meat entirely, you’ll end up with a bland, watery result. The top half of the roast should cook in the aromatic steam trapped under the lid, which concentrates the flavors.
Set your machine to “Low” and walk away. During these first seven hours, the beef is doing the heavy lifting. The oregano and garlic are infusing the broth, and the meat is slowly relaxing. Resist the urge to lift the lid to check on it. Every time you open the slow cooker, you release a significant amount of heat and steam, which can add twenty to thirty minutes to your total cook time. Trust the process and let the low heat do its job.
Phase Three: Timing the Peppers and Onions
The “mushy vegetable” syndrome is the primary reason people avoid slow cooker stews. Most recipes tell you to throw everything in at once, but peppers and onions only need about an hour to reach perfection. By waiting until the final hour of cooking to add your vegetables, you are essentially using the beef and its juices as a flavorful steaming rack. This keeps the yellow and orange peppers vibrant and prevents the onions from turning into a translucent paste.
When you open the lid at the seven-hour mark, quickly layer the thick strips of peppers and onion wedges directly on top of the beef. Don’t stir them into the liquid. They will soften in the rising steam, absorbing the essence of the beef while maintaining their structural integrity. When you finally serve the dish, those peppers will still have a beautiful “snap” to them, providing a necessary textural contrast to the soft, shredded beef.
Troubleshooting Tough or Stringy Shredded Beef
If you try to shred your beef and it feels tough or resists the fork, your first instinct might be that you’ve overcooked it. In reality, the opposite is usually true. If the meat is tough, the collagen hasn’t finished melting yet. The solution is simple: put the lid back on and give it another thirty to sixty minutes. You’ll know it’s done when the meat fibers separate with almost no pressure at all.
On the other hand, if the meat is dry but falls apart easily, it may have been cooked on a setting that was too high. To fix this, shred the meat and let it sit in the warm au jus for fifteen minutes before serving. The meat will act like a sponge and soak up the liquid, restoring some of that lost moisture. If your au jus feels too thin or weak, you can pour it into a small saucepan and simmer it on the stove for ten minutes to concentrate the flavors before pouring it back over the beef.
Optimal Side Dishes for Braised Beef
Because this dish produces a generous amount of savory au jus, you want to serve it with something that can act as a vessel for all that liquid. Creamy mashed potatoes or a buttery polenta are classic choices that soak up the sauce beautifully. If you want something a bit lighter, wide egg noodles or even a thick slice of toasted sourdough bread work wonders for capturing every drop of flavor.
To balance the richness of the beef fat and the sweetness of the cooked peppers, consider adding a bright, acidic element to the table. A simple arugula salad with a sharp lemon vinaigrette or some quick-pickled red onions can cut through the heaviness of the braise. This contrast refreshes your palate between bites, making the rich beef taste even better. Avoid heavy, cheesy sides that might compete with the deep savory notes of the roast.
Storage, Reheating, and Make-Ahead Strategies
This is one of those rare dishes that actually tastes better the next day. As the beef sits in the liquid in the refrigerator, the flavors continue to meld and penetrate deep into the fibers. When storing, always keep the beef submerged in its juices. This prevents the meat from oxidizing and turning gray or drying out. It will stay fresh in an airtight container for up to four days.
For long-term storage, this beef freezes exceptionally well. I recommend freezing the shredded beef and the liquid together in a freezer-safe bag, pressing out as much air as possible. You can freeze the peppers and onions as well, though they will be softer upon reheating. To reheat, do so gently on the stovetop over low heat. Avoid the microwave if possible, as it can toughen the beef fibers and make them feel rubbery.
Expert Tips for Shredded Beef Success
One of the most important rules for a perfect texture is to never use a knife to “cut” the beef once it’s cooked. Using a knife severs the fibers in a way that can make the meat feel dry on the tongue. Instead, use two large dinner forks to pull the meat apart along its natural grain. This preserves the long, juicy strands that hold onto the sauce much better than a clean cut ever could.
If you find the cooking liquid a bit too oily, use the “bread trick.” Take a slice of plain white bread and lightly skim it across the surface of the hot liquid. The bread will act like a magnet for the excess surface fat without removing the flavorful au jus underneath. Alternatively, you can pour the liquid into a fat separator if you have one, but the bread method is a quick and effective kitchen hack.
Finally, give the meat a “rest” before you start shredding. Once you remove the roast from the slow cooker, let it sit on a platter for about fifteen minutes. This allows the internal juices to redistribute. If you shred it the second it comes out of the pot, all that precious moisture will run out onto the board. A little patience here ensures that the juice stays inside the meat where it belongs.
How do I store leftovers so the beef doesn’t get dry?
The key to keeping leftover shredded beef moist is to store it completely submerged in its own cooking juices (the au jus). Use an airtight glass or plastic container and ensure the liquid covers the meat. It will stay delicious in the refrigerator for 3 to 4 days. When you reheat it, do so slowly in a covered pan on the stove to let the meat reabsorb the liquid.
Why is my beef still tough after 8 hours in the slow cooker?
If the beef is tough and won’t shred, it almost always means the connective tissue hasn’t finished breaking down into gelatin. This usually happens if the roast was particularly large or if the slow cooker’s “Low” setting is exceptionally cool. Simply cook it for another 45 to 60 minutes. It will eventually reach a point where the fibers give way and it falls apart easily.
Can I use a different cut of meat like London Broil or Round Roast?
It is not recommended to use lean cuts like London Broil, Eye of Round, or Bottom Round for this recipe. These cuts lack the internal fat and collagen necessary for a successful slow braise. If you use them, the meat will likely turn out very dry and crumbly rather than juicy and shredded. Stick with Chuck Roast for the best results.
What can I use if I don’t have Worcestershire sauce?
If you’re out of Worcestershire sauce, you can substitute it with an equal amount of soy sauce mixed with a teaspoon of lemon juice or balsamic vinegar. This provides the saltiness, acidity, and umami depth that the recipe requires. It won’t be an exact flavor match, but it will still result in a very savory and delicious au jus.
Can I freeze this dish for later?
Yes, this dish freezes beautifully. Place the shredded beef and the liquid into a heavy-duty freezer bag and squeeze out all the air. It will keep for up to 3 months. Note that the peppers and onions will become much softer after being frozen and thawed, so if you prefer them “tender-crisp,” you might want to add fresh ones when you reheat the beef.
Why should I sear the meat before putting it in the slow cooker?
Searing creates the Maillard reaction, which develops complex flavors and a deep color that a slow cooker cannot produce on its own. Without searing, your beef will have a “gray” appearance and a much flatter, less savory flavor profile. That brown crust on the outside of the meat eventually dissolves into the broth, creating a rich, dark, and flavorful sauce.
Slow Cooked Shredded Beef and Peppers
Course: Main CourseCuisine: AmericanDifficulty: easy6
servings15
minutes8
hours480
Minutes360
kcalAmerican
Ingredients
3 pounds beef chuck roast, trimmed of excess fat
1 large yellow bell pepper, sliced into thick strips
1 large orange bell pepper, sliced into thick strips
1 large white onion, cut into thick wedges
2 cups beef bone broth
1 tablespoon Worcestershire sauce
3 cloves garlic, smashed
1 tablespoon vegetable oil
1 teaspoon salt
1 teaspoon black pepper
1 teaspoon dried oregano
Fresh parsley, finely chopped for garnish
Directions
- The most important step to prevent tough meat is the sear. Pat the beef completely dry with paper towels. Season all sides generously with salt and pepper.
- Heat oil in a large skillet over medium-high heat. Sear the roast for 4 to 5 minutes per side until a deep mahogany crust forms. This Maillard reaction is essential for a rich, dark au jus.
- Place the seared roast into your slow cooker. Pour the beef broth and Worcestershire sauce over the meat, then add the smashed garlic and oregano.
- To solve the mushy vegetable problem, do not add the peppers and onions yet. Cover and cook the beef on LOW for 7 hours. Cooking on low heat prevents the protein fibers from tightening and becoming stringy.
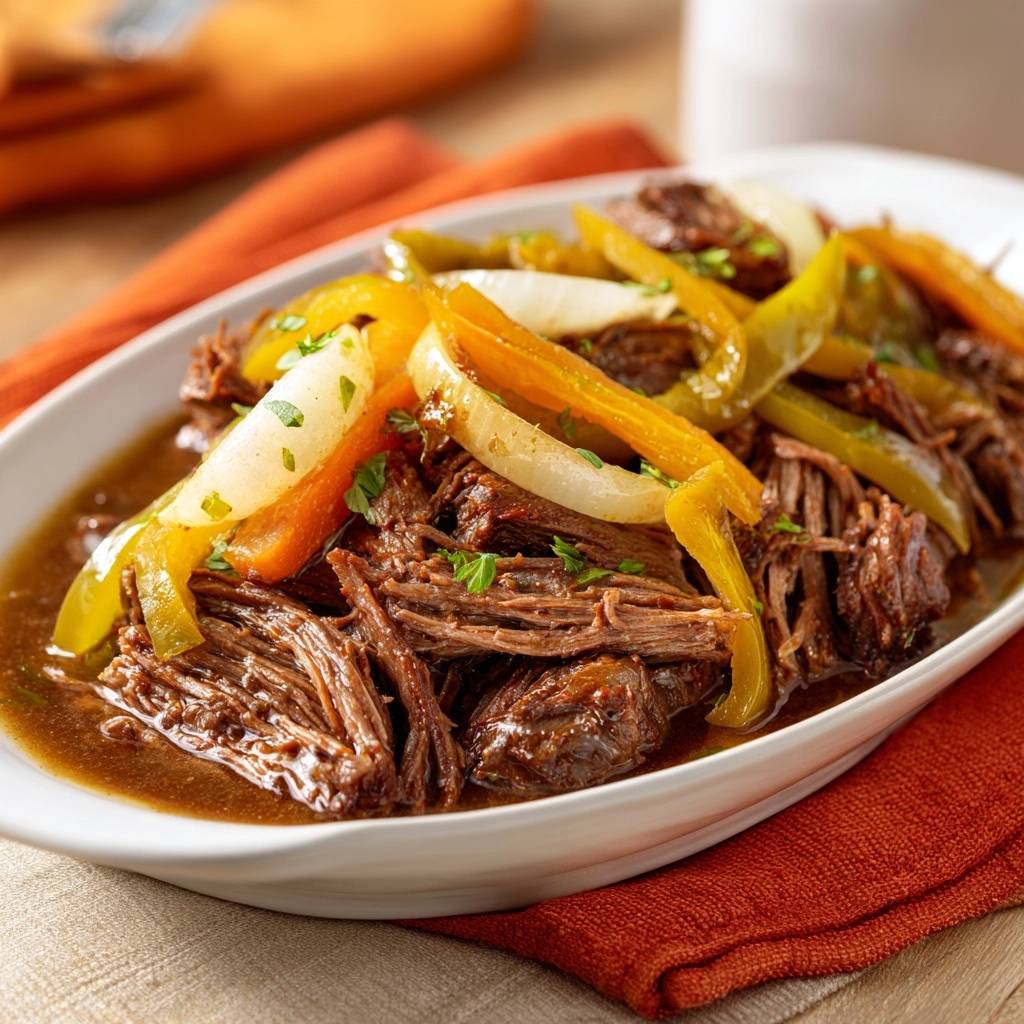
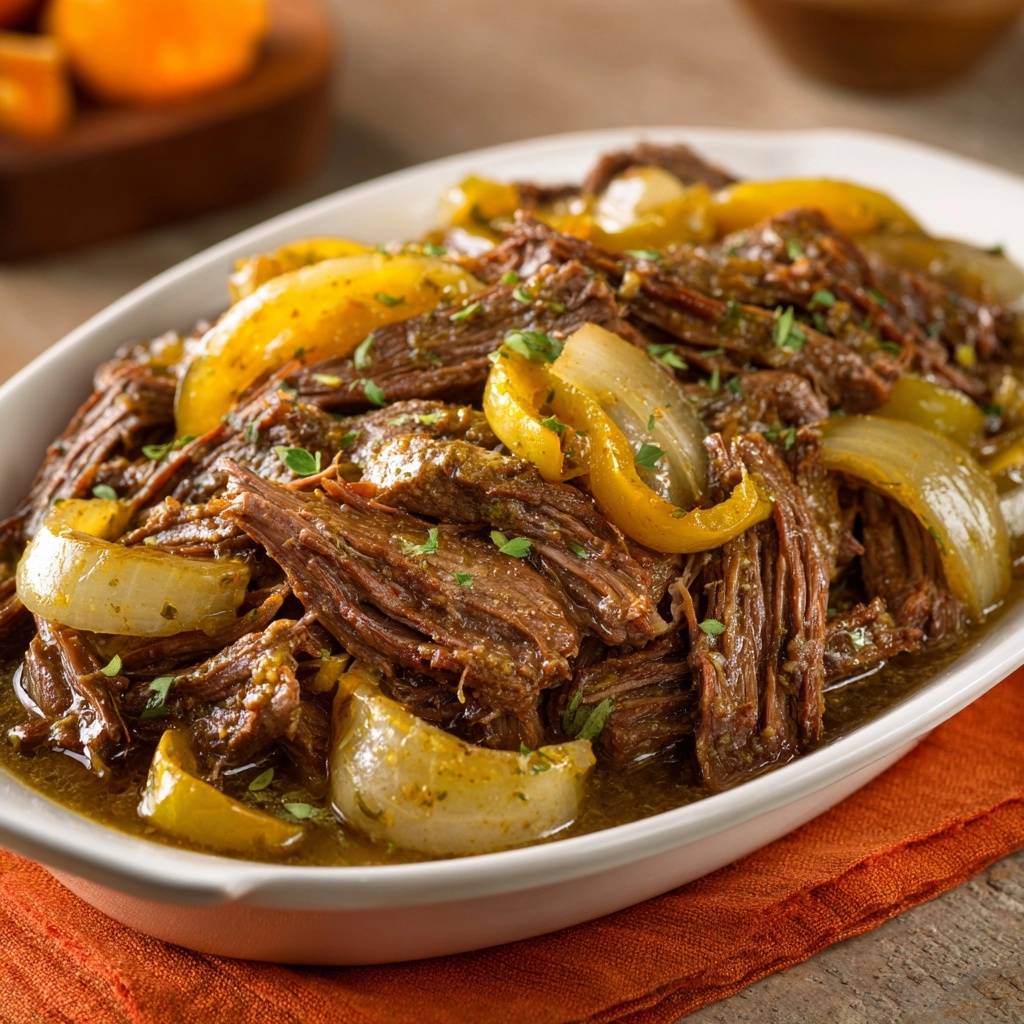
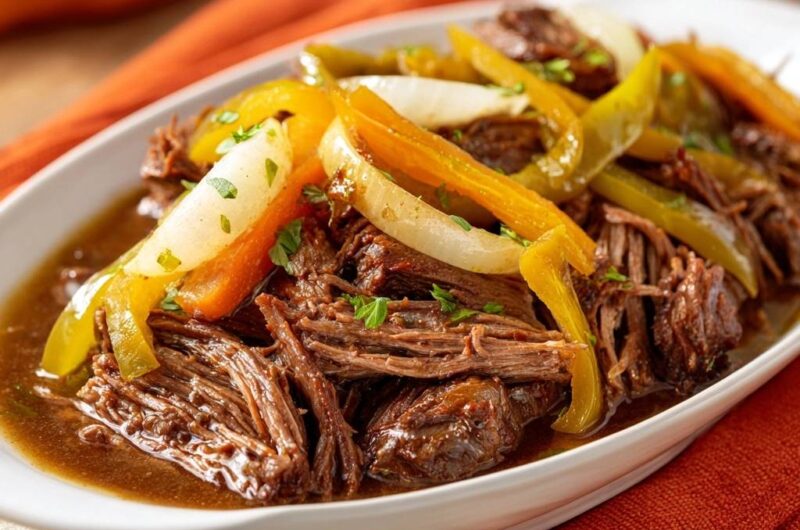
- After 7 hours, place the sliced peppers and onions on top of the beef. Cover and cook for the final 1 hour. This allows the vegetables to steam in the beef vapors so they stay tender-crisp and colorful, as seen in the image.
- Remove the beef to a platter. Use two forks to pull the meat into thick shreds. Because of the low and slow method, it should fall apart with zero resistance.
- Skim any excess fat from the cooking liquid. Arrange the shredded beef in a shallow serving dish, top with the steamed peppers and onions, and pour the savory au jus over the dish. Garnish with fresh parsley and serve immediately.
Notes
- To prevent tough meat, ensure you cook on the LOW setting. Adding the peppers and onions during the last hour of cooking keeps them vibrant and prevents them from turning into mush.