
Imagine biting into a taco where the beef is so tender it practically melts, yet the shell stays shatteringly crisp until the very last bite. Most of us have experienced the heartbreak of a structural failure where the bottom of the taco turns into a soggy, mushy mess before you even finish your first side dish. It’s a common frustration that usually stems from too much thin liquid escaping the meat and soaking into the corn.
The secret to a perfect taco isn’t just about how long you cook the beef; it’s about how you manage the moisture at the very end. We’re moving away from the “soup-style” shredded beef that plagues most slow cooker recipes. Instead, we focus on a specific reduction technique that transforms thin cooking juices into a concentrated, flavor-packed glaze.
I’ve found that the real trick to professional-grade tacos lies in the skillet finish. By reducing the braising liquid separately, you lock the moisture into the beef fibers rather than letting it run wild. This ensures your Slow Cooked Shredded Beef Tacos have all the succulence you crave without sacrificing the integrity of your hard shell.
The Anatomy of a Perfect Chuck Roast
When you’re making Slow Cooked Shredded Beef Tacos, the cut of meat you choose determines the final texture. You want a beef chuck roast because it’s packed with connective tissue known as collagen. Over an eight-hour simmer, that tough collagen transforms into silky gelatin, which provides that mouth-coating richness we love.
Leaner cuts like round roast or sirloin might seem healthier, but they lack the internal fat marbling required for a long braise. Without that fat, the meat will become stringy and dry rather than tender. The chuck roast acts as a self-basting sponge, soaking up the spices while the fat keeps every fiber moist during the long heat cycle.
Selecting and Trimming Your Beef
Look for a roast that has thick ribbons of white fat running through the center, often called marbling. You should avoid “select” grades if possible and aim for “choice” or “prime” to ensure better flavor. When you get it home, trim off any large, hard slabs of fat from the exterior, but leave the internal bits alone.
The goal is to have enough fat to flavor the sauce without leaving a greasy film on the roof of your mouth. A three-pound roast is the sweet spot for most slow cookers. It provides enough surface area for a good sear while fitting comfortably in the pot for even heat distribution.
Essential Components for the Braising Liquid
The liquid in your slow cooker does more than just keep the meat from burning; it builds the foundation of your taco’s soul. Using beef broth instead of water is a non-negotiable step because it adds a layer of savory depth. Tomato paste acts as an umami powerhouse, thickening the sauce and providing a subtle tang that cuts through the richness of the beef.
Aromatics like white onion and garlic are essential because they melt into the sauce over time. By the end of the eight hours, you won’t see chunks of onion, but you’ll definitely taste the sweetness they contribute. These ingredients work together to create a complex environment that seasons the beef from the inside out.
The Spice Profile: Beyond Basic Heat
We use a trio of cumin, smoked paprika, and chili powder to create a well-rounded flavor profile. Cumin brings an earthy, nutty aroma that is synonymous with great tacos, while smoked paprika adds a hint of “outdoor grill” flavor. The chili powder provides a mild heat that builds slowly without overwhelming the palate.
However, the real pro move is toasting these spices in the skillet with the tomato paste before they hit the slow cooker. This “blooming” process wakes up the essential oils in the spices. If you just dump raw spices into the slow cooker, they often taste dusty or flat; toasting them ensures the flavor is vibrant and bold.
The Maillard Reaction: Searing for Deep Flavor
The Maillard reaction is a chemical reaction between amino acids and reducing sugars that gives browned food its distinctive flavor. You cannot skip the searing step if you want high-quality Slow Cooked Shredded Beef Tacos. That dark brown crust on the outside of the roast translates into a deep, roasted flavor in the final shredded meat.
When you sear the meat, you’ll notice brown bits sticking to the bottom of your skillet. This is called “fond,” and it’s essentially concentrated flavor gold. By pouring your beef broth into the hot pan to deglaze it, you lift those bits and incorporate them into the braising liquid, ensuring no flavor is left behind.
Achieving the Perfect Crust
To get a proper sear, you must pat the beef completely dry with paper towels before it touches the oil. If the meat is wet, it will steam in the pan instead of browning, and you’ll lose that crucial crust. Use a high-smoke-point oil like vegetable or canola oil and wait until it’s shimmering hot.
Don’t rush this process by crowding the pan if you’re working in batches. Give the meat space so the moisture can evaporate quickly. You’re looking for a dark, mahogany color on all sides, which usually takes about three to four minutes per side. This step is the difference between “good” home cooking and “restaurant-quality” results.
The Low and Slow Transformation Phase
Patience is your best friend when it comes to shredded beef. You might be tempted to use the “High” setting on your slow cooker to save time, but I strongly advise against it. High heat can cause the muscle fibers to seize up and toughen before the collagen has a chance to melt, resulting in rubbery meat.
At the four-hour mark, the roast will still look solid and tough. By hour six, it will start to soften, but it won’t quite pull apart. It’s during those final two hours that the magic happens. The beef should eventually become so tender that you can shred it with the back of a wooden spoon with almost no resistance.
The Anti-Soggy Secret: The Reduction Technique
This is the most important part of the entire process. Standard slow cooker recipes leave the meat sitting in a pool of thin, watery juice. When you put that meat into a taco shell, the liquid immediately leaks out, ruining the crunch. Our “Anti-Soggy” method solves this by separating the meat from the bulk of the liquid.
Once the beef is shredded, you’ll move it to a clean skillet. Instead of dumping all the slow cooker liquid back in, you only add a small amount. This allows you to control exactly how much moisture goes into your taco. It’s a simple extra step that completely changes the structural integrity of your meal.
Concentrating the Jus into a Sticky Glaze
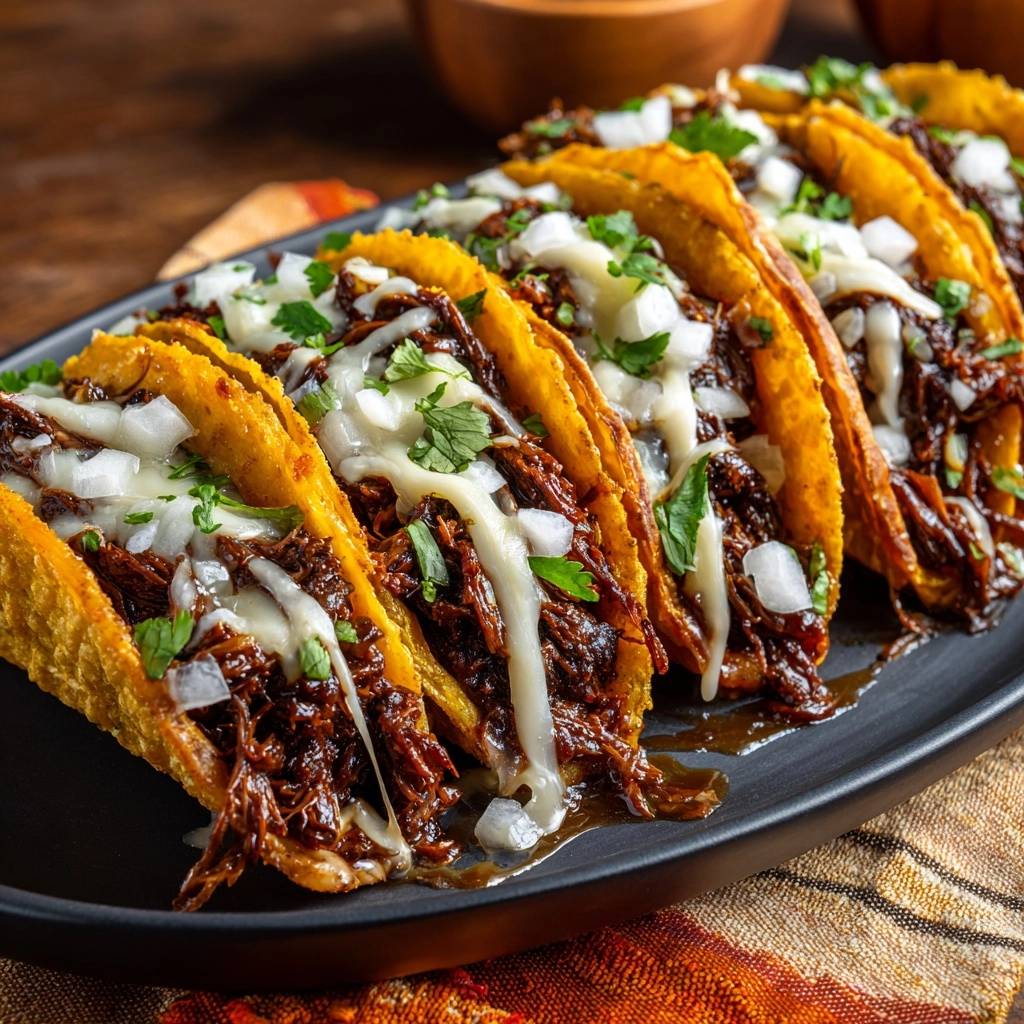
As you simmer the shredded beef with that half-cup of liquid, the water evaporates, leaving behind the fats, gelatin, and spices. You’ll see the liquid transform from a thin juice into a thick, glossy glaze that clings to every strand of beef. This glaze acts as a barrier, keeping the juices inside the meat fibers.
You’ll know it’s ready when you stir the beef and no liquid pools at the bottom of the pan. The meat should look shiny and moist, but not “wet.” This concentrated flavor is much more intense than the original braising liquid, meaning every bite of your taco is packed with a punch of seasoning.
Preparing the Hard Corn Shells for Maximum Crunch
Even with perfectly glazed beef, the shells need a little help to stay crispy. Taking them straight out of the box is a mistake because they can often be slightly stale or soft. Placing them in a 350-degree oven for just five minutes does two things: it crisps them up and releases the natural oils in the corn.
This “oven-first” method creates a toasted surface that is more resistant to moisture. It also makes the shells smell incredible, like fresh popcorn. Always warm your shells right before you’re ready to assemble so they are hot and rigid when the beef hits them.
Step-by-Step: Assembling Your Slow Cooked Shredded Beef Tacos
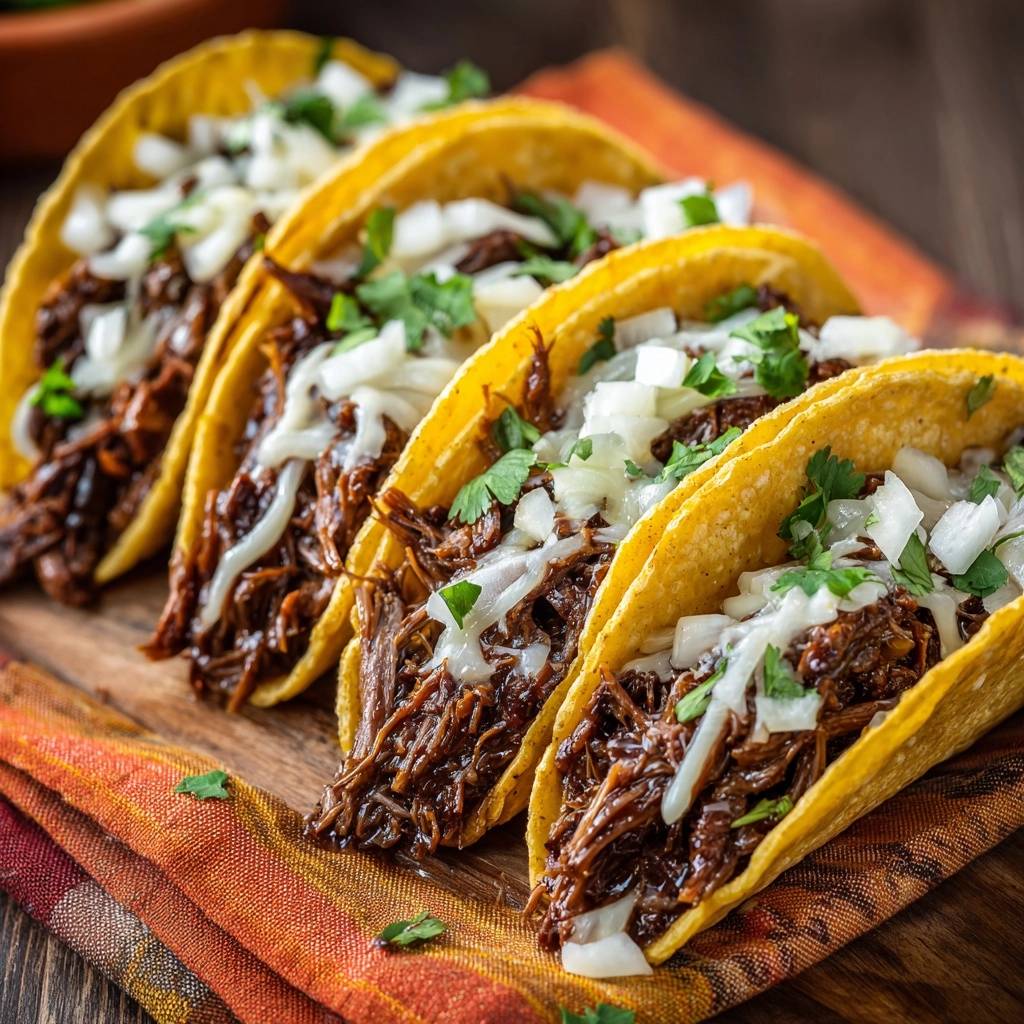
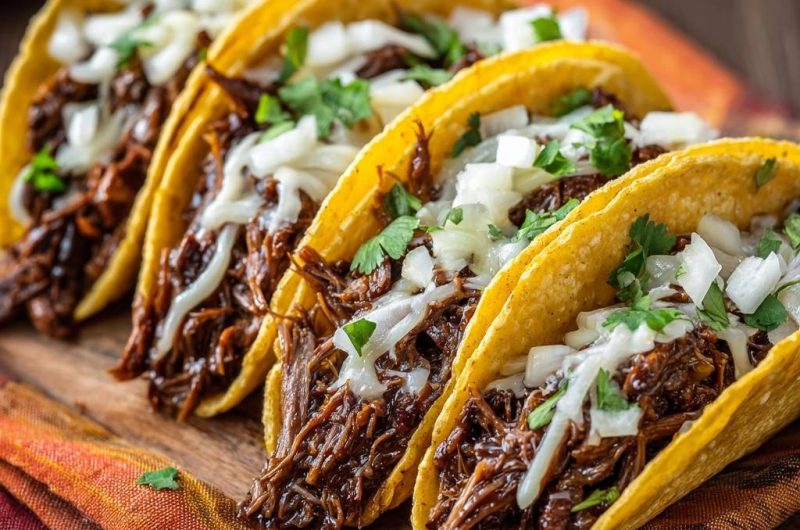
Assembly is all about timing. Start with your hot, toasted shell and immediately add a generous portion of the glazed beef. Because the beef is hot and the liquid is reduced, it won’t immediately soak the bottom. Follow this quickly with your shredded Monterey Jack cheese.
The residual heat from the beef will melt the cheese slightly, creating a delicious “glue” that helps hold the taco together. Don’t overfill the shells, or they will crack under the weight. A balanced taco is easier to eat and ensures you get a bit of every ingredient in every single bite.
The Role of Fresh Garnishes
Since the beef is very rich and savory, you need fresh toppings to provide contrast. Raw white onion offers a sharp, crisp bite that cuts through the fat of the chuck roast. Fresh cilantro adds a bright, citrusy note that lifts the entire flavor profile of the dish.
These aren’t just decorations; they are functional components that balance the palate. The crunch of the raw onion also complements the crunch of the taco shell, creating a multi-layered texture experience. Keep your garnishes simple to let the quality of the slow-cooked beef shine through.
Troubleshooting Common Shredded Beef Issues
If your beef is still tough after eight hours, it almost always means it needs more time. Every slow cooker runs at a slightly different temperature, and some roasts have more connective tissue than others. Simply put the lid back on and give it another 45 minutes; it will eventually give in and soften.
If you find the sauce is too salty after the reduction, don’t panic. You can balance it out with a tiny squeeze of lime juice or a pinch of sugar. The acidity or sweetness will distract the taste buds from the saltiness. If the beef feels dry, you likely over-trimmed the fat or reduced the liquid too far; just stir in a tablespoon of the remaining slow cooker liquid to loosen it up.
Make-Ahead Strategies and Storage Logistics
Slow Cooked Shredded Beef Tacos are actually better the next day. As the meat sits in the fridge, the spices continue to permeate the fibers, and the gelatin sets, making the flavor even more cohesive. This makes it a perfect meal-prep option for busy weeknights or hosting a party.
When reheating, avoid the microwave if you can. The microwave tends to steam the meat, which can make it rubbery. Instead, toss the beef back into a skillet over medium heat. Add a splash of water or leftover braising liquid to help it loosen up, and heat it until it’s sizzling and the glaze has reformed.
Freezing the Shredded Beef Base
This beef freezes beautifully, making it a great “emergency dinner” to have on hand. I recommend using the “flat-pack” method: put the shredded, glazed beef into a heavy-duty freezer bag and squeeze out all the air. Lay it flat on a baking sheet to freeze so it forms a thin “brick.”
This flat shape allows the meat to thaw much faster than a large frozen block. It also prevents freezer burn by minimizing the surface area exposed to air. It will stay fresh in the freezer for up to three months. When you’re ready to eat, thaw it in the fridge overnight and reheat in a skillet as usual.
Expert Tips for Flavor Variations
Once you’ve mastered the basic “Anti-Soggy” technique, you can start experimenting with the flavor profile. If you like heat, try adding a chopped chipotle pepper in adobo sauce to the slow cooker. The smoky, spicy liquid will infuse the beef with a deep heat that pairs perfectly with the reduction method.
Another great variation is adding a splash of apple cider vinegar or lime juice to the skillet during the final reduction phase. This hit of acidity brightens the heavy beef and makes the flavors pop. Just remember to always stick to the reduction rule—no matter what flavors you add, keep that liquid concentrated to protect your shells!
Frequently Asked Questions
Can I use a different cut of meat like Brisket?
Yes, you can use brisket, but keep in mind that it is a much more fibrous cut than chuck roast. Brisket requires a very long cook time to break down and can sometimes be a bit drier if it doesn’t have a significant fat cap. If you use brisket, ensure you don’t trim too much fat off before cooking, as you’ll need it to keep the meat succulent during the eight-hour braise.
Why is my slow cooker beef still tough after 8 hours?
This usually happens if the temperature didn’t stay consistent or if the specific roast had an unusually high amount of connective tissue. It’s often referred to as “the stall.” The best solution is simply more time. As long as there is liquid in the pot, the meat won’t burn. Give it another hour on low, and you’ll likely find it suddenly becomes tender enough to shred.
Can I make this in a pressure cooker?
You can certainly use a pressure cooker to speed up the initial cooking phase. Usually, 60 to 75 minutes on high pressure with a natural release will get the beef to a shreddable state. However, you must still perform the skillet reduction step. The pressure cooker creates even more liquid than a slow cooker, so the “Anti-Soggy” reduction is even more critical for success.
How do I keep the shells from breaking while eating?
Beyond the reduction technique, the way you fill the taco matters. Try to keep the heavy beef at the very bottom and don’t overstuff the top. If you tilt the taco at a slight angle while eating, the juices (what little are left) will stay trapped in the meat rather than pooling at the bottom curve of the shell. Also, ensuring the shells are properly toasted in the oven makes them much more durable.
How long can I store the leftovers in the fridge?
The shredded beef will stay fresh and delicious in an airtight container for up to four days. In fact, many people find the flavor improves after the first 24 hours. Just make sure to store it with a little bit of the extra cooking liquid to keep it from drying out during the reheating process. Do not store the assembled tacos; only store the components separately.
Can I use soft tortillas instead of hard shells?
Absolutely! While this recipe is designed to save hard shells from sogginess, the glazed beef is incredible on soft corn or flour tortillas. If using soft tortillas, I recommend charring them slightly over an open gas flame or in a dry skillet for 30 seconds per side. This adds a smoky flavor and a bit of structural strength to hold the heavy, glazed beef.
Slow Cooked Shredded Beef Tacos
Course: Main CourseCuisine: Mexican-AmericanDifficulty: easy6
servings15
minutes8
hours480
Minutes340
kcalMexican-American
Ingredients
3 pounds beef chuck roast, trimmed of excess fat
2 tablespoons vegetable oil
1 white onion, finely diced
3 cloves garlic, minced
1 cup beef broth
2 tablespoons tomato paste
1 tablespoon chili powder
1 teaspoon cumin
1 teaspoon smoked paprika
12 hard corn taco shells
1 cup shredded Monterey Jack cheese
Fresh cilantro for garnish
Directions
- Pat the beef roast completely dry with paper towels. This is the first step to deep flavor. Season generously with salt and pepper.
- Heat oil in a large skillet over medium-high heat. Sear the beef on all sides until a dark brown crust forms. Transfer the beef to a slow cooker.
- In the same skillet, sauté half of the diced onions until soft. Stir in the garlic, tomato paste, and spices for 1 minute. Pour in the beef broth to deglaze the pan, scraping up all the brown bits.
- Pour the liquid mixture over the beef in the slow cooker. Cover and cook on low for 8 hours until the meat shreds easily with a fork.
- Here is the secret to the Anti-Soggy Shell: Once shredded, remove the meat from the slow cooker and place it in a clean skillet. Ladle only half a cup of the cooking liquid over the meat. Simmer on medium heat for 5 to 8 minutes until the liquid reduces into a thick, sticky glaze that coats the beef. This locks the moisture into the meat instead of letting it run out into your shell.
- Warm the taco shells in a 350-degree oven for 5 minutes to ensure maximum crunch.
- Fill each shell with the glazed shredded beef. Top immediately with shredded cheese, the remaining raw white onions, and fresh cilantro. Serve right away.
Notes
- The secret to the Anti-Soggy Shell is simmering the shredded meat with a small amount of liquid until it forms a thick glaze before filling the shells.


