
Imagine pulling a heavy pot from the oven and watching the meat literally fall away from the bone with the slightest nudge of a fork. That deep, mahogany crust gives way to a center so tender it melts like butter on your tongue. This isn’t just a lucky outcome; it’s the result of understanding the science of a perfect Slow-Simmered Pot Roast and Mashed Potatoes.
Most home cooks struggle with beef that turns out stringy, dry, or tough despite hours of cooking. The frustration of spending your entire afternoon on a meal only to have it feel like chewing on a rubber band is real. However, the secret isn’t in a fancy gadget or an expensive cut of meat. It’s all about the transformation of collagen through a controlled, low-temperature braise.
I’ve found that the biggest mistake people make is letting the liquid boil, which actually tightens the muscle fibers and squeezes out all the moisture. By maintaining a gentle, lazy simmer, you allow the connective tissues to dissolve into rich gelatin. This guide will walk you through every sensory cue and technical detail to ensure your Sunday dinner is a triumph every single time.
The Science of Braising: Why Low Heat Wins
Braising is a dual-method cooking technique that uses both dry heat to sear and moist heat to tenderize. When you cook a tough cut like chuck roast, you’re dealing with a high concentration of collagen. This structural protein is what keeps the muscle attached to the bone, and it’s incredibly tough until it’s properly broken down.
If you subject the meat to a rolling boil at 212°F, the muscle fibers contract violently, pushing out the internal juices. Therefore, the meat becomes dry even though it’s submerged in liquid. However, if you keep the temperature between 180°F and 190°F, a magical transformation occurs. The collagen slowly melts into gelatin, which coats the fibers and creates that succulent, “melt-in-your-mouth” texture we crave.
This process takes time—usually around four hours for a three-pound roast. You cannot rush chemistry. In addition to the texture, this slow breakdown releases deep savory notes into the surrounding broth, creating a complex flavor profile that a quick-cooking method simply cannot replicate. Patience is your most valuable ingredient here.
Essential Components for Pot Roast and Mashed Potatoes
Success starts at the butcher counter. For this recipe, you need a three-pound beef chuck roast. This cut comes from the shoulder of the cow and is naturally marbled with fat and connective tissue. While a leaner cut like a round roast might look “healthier,” it will inevitably turn out dry and flavorless in a long braise.
For the mashed potatoes, I always reach for Yukon Gold potatoes. Unlike Russets, which are starchy and fluffy, Yukon Golds have a naturally buttery flavor and a dense, creamy texture. They hold up better to the weight of a heavy gravy. Furthermore, using low-sodium beef broth allows you to control the salt levels as the liquid reduces and intensifies over several hours.
Don’t overlook the tomato paste. It acts as an umami booster, providing a savory “backbone” to the gravy. When combined with the aromatics like sliced onions and minced garlic, it creates a base that tastes like it’s been simmering for days rather than hours. Fresh chives at the end provide a necessary pop of brightness to cut through the richness.
Selecting the Right Cut of Beef
While you might see brisket or bottom round labeled as “pot roast” in the grocery store, chuck roast is the undisputed king of the braise. The shoulder contains a complex network of muscles that work hard, meaning they are packed with flavor but also plenty of gristle. That gristle is exactly what turns into delicious gelatin during the cook.
Brisket is a fine alternative, but it tends to be more fibrous and can sometimes fall apart into shreds rather than succulent chunks. Round roasts are far too lean; without the internal fat marbling, the meat will feel “woody” and dry between your teeth. Stick with the chuck for the most consistent, juicy results.
The Role of Aromatics and Liquids
The onions and garlic aren’t just there for texture; they provide the aromatic foundation for the entire dish. As the onions sauté, their natural sugars caramelize, adding a subtle sweetness that balances the salty broth. I prefer using a large yellow onion for its high sugar content and robust flavor.
Using low-sodium broth is a professional tip that prevents your final gravy from becoming a salt bomb. As the liquid evaporates during the four-hour simmer, the salt concentration increases. By starting with a low-sodium base, you have the freedom to season with salt and pepper at the very end to suit your specific palate.
The Maillard Reaction: Searing for Deep Flavor
Before the meat ever touches the broth, you must sear it. This isn’t about “locking in juices”—that’s a common kitchen myth. Instead, searing triggers the Maillard reaction, a chemical reaction between amino acids and reducing sugars that creates hundreds of different flavor compounds and that beautiful brown crust.
To get a proper sear, you must pat the beef completely dry with paper towels. Moisture is the enemy of browning; if the meat is wet, it will steam rather than sear. Heat your oil until it’s shimmering and just starting to smoke. When you drop the meat in, you should hear a loud, aggressive sizzle. Don’t move it for at least five minutes.
Once you flip the meat, you’ll see a dark, mahogany crust. This crust eventually dissolves into the braising liquid, giving the gravy its characteristic dark color and roasted flavor. The brown bits stuck to the bottom of the pot are called “fond,” and they are essentially concentrated flavor gold. Do not wash the pot! We will use those bits in the next step.
Step-by-Step: Braising the Beef to Tenderness
After searing, remove the meat and lower the heat slightly. Add your onions and garlic to the pot, using the moisture they release to start loosening the fond. Once they are soft and fragrant, stir in the tomato paste. You want to cook the paste until it shifts from a bright red to a dark, brick-red color. This removes the raw metallic taste and deepens the flavor.
Now, pour in the beef broth. Use a wooden spoon to scrape every single brown bit off the bottom of the pan. This is called deglazing. Return the beef to the pot; the liquid should reach about halfway up the side of the roast. If it’s completely submerged, the meat will boil; if there’s too little liquid, it will dry out. Halfway is the “Goldilocks” zone.
Cover the pot with a very tight-fitting lid. If your lid is loose, place a piece of parchment paper or foil over the pot before putting the lid on to create a better seal. This keeps the moisture inside, creating a self-basting environment. Now, turn the heat to the lowest setting possible. You want to see only one or two bubbles breaking the surface every few seconds.
Deglazing the Pot and Building the Base
Deglazing is perhaps the most satisfying part of the process. As the cool broth hits the hot pan, the steam helps lift the caramelized beef drippings. These bits contain all the “roasted” notes that make a gravy taste professional. If you skip this or don’t scrape thoroughly, your gravy will taste thin and one-dimensional.
The addition of tomato paste at this stage is crucial. It acts as a thickener and a colorant. By “frying” the paste in the oil for a minute before adding the broth, you’re caramelizing the natural sugars in the tomatoes. This adds a layer of complexity that makes people ask, “What is that secret ingredient?”
Managing the Temperature Over Four Hours
The biggest challenge of a long braise is heat management. If you’re using a stovetop, check the pot every hour. If you see a “rolling boil” where the liquid is churning violently, your heat is too high. Move the pot to a smaller burner or use a heat diffuser if necessary.
The meat is done when a fork can be inserted and twisted with absolutely no resistance. If the meat “bounces” back or feels tough, it simply needs more time. Don’t be afraid to go an extra 30 minutes if the beef isn’t yielding yet. Every cow is different, and some cuts just take a little longer to surrender.
Achieving the Perfect Mashed Potato Texture
While the beef is finishing its long nap in the pot, it’s time to focus on the potatoes. A common mistake is dropping potato chunks into already boiling water. This causes the outside to overcook and turn mushy before the inside is even soft. Instead, start your peeled Yukon Golds in a pot of cold, heavily salted water.
Bring the water to a boil gradually. This ensures the potato cooks evenly from the center to the edge. You’ll know they are ready when a knife slides into a chunk with zero resistance. Once drained, I like to put the potatoes back in the hot pot for one minute over low heat. This “steam-dries” them, removing excess water so they can absorb more butter and cream.
For the smoothest texture, use a potato ricer or a food mill. If you’re using a traditional masher, be careful not to overwork them. Over-mashing breaks the starch granules, which turns the potatoes into a gluey, sticky paste. We want fluffy, cloud-like mounds that can hold a well of gravy.
The Butter and Heavy Cream Ratio
For two pounds of potatoes, I recommend at least four tablespoons of butter and a half-cup of heavy cream. The fat in the butter provides flavor, while the cream provides the silky mouthfeel. However, never add cold dairy directly to hot potatoes. This shocks the starches and can lead to a grainy texture.
Warm the cream and butter together in a small saucepan or the microwave until the butter is melted. Slowly fold this warm mixture into the mashed potatoes. You’ll notice they stay light and airy. Taste as you go; potatoes are salt-hungry, so you will likely need more salt than you think to make the flavor really pop.
Timing the Vegetables for Structural Integrity
Nobody likes a carrot that has turned into a flavorless mush. If you put the carrots in at the beginning of the four-hour braise, they will disintegrate into the sauce. While this adds flavor to the gravy, it leaves you with nothing to eat. The solution is to add your two-inch carrot chunks during the last 45 minutes of cooking.
This window of time is perfect. It’s long enough for the carrots to absorb the beefy braising liquid and become tender, but short enough that they maintain their structural integrity. They should be “fork-tender,” meaning a fork goes in easily, but the carrot doesn’t fall apart when you lift it. This provides a beautiful visual contrast on the plate.
If you prefer other vegetables like celery or parsnips, follow the same 45-minute rule. This ensures every component of the dish is cooked to its individual perfection. The carrots will come out glazed in the beef fat, tasting incredibly sweet and savory at the same time.
Transforming Braising Liquid into Glossy Gravy
Once the meat and carrots are tender, remove them from the pot and tent them with foil to keep them warm. You are left with a pot of incredibly flavorful, but thin, liquid. To turn this into a professional-grade gravy, we use a flour slurry. Whisk two tablespoons of all-purpose flour with a quarter-cup of cold water until perfectly smooth.
Slowly whisk this slurry into the simmering liquid. It’s vital that the water in the slurry is cold; if you use hot water, the flour will clump instantly. Bring the liquid to a boil for about one minute to “cook out” the raw flour taste, then drop it back to a simmer. The gravy will thicken and take on a beautiful, glossy sheen.
You are looking for “nappe” consistency. This is a fancy French term that simply means the gravy is thick enough to coat the back of a spoon. If you run your finger through the gravy on the spoon, the line should stay clear. If it’s too thin, simmer it for a few more minutes to reduce. If it’s too thick, add a splash of broth.
Troubleshooting Common Pot Roast Issues
If your meat is still tough after three hours, don’t panic. It simply hasn’t reached the temperature where the collagen melts. Put the lid back on and keep simmering. Some roasts are more stubborn than others, but they will all eventually yield if given enough time and gentle heat.
If your gravy tastes too salty, it’s likely because the broth reduced more than expected. You can fix this by adding a splash of water or a little more heavy cream to the mashed potatoes to balance the saltiness of the bite. Another trick is to add a teaspoon of sugar or honey; the sweetness can help mask an over-salted sauce.
If your potatoes are watery, it’s usually because they sat in the water too long after the heat was turned off. Always drain them immediately. If they still seem wet, use the “steam-dry” method mentioned earlier. Toss them in the hot, dry pot for a minute to let the residual heat evaporate that surface moisture before you add your butter and cream.
Make-Ahead Strategies and Storage Tips
Pot roast is one of those rare dishes that actually tastes better the next day. As the dish cools, the meat reabsorbs some of the gravy, and the flavors of the aromatics continue to meld. If you’re cooking for a dinner party, feel free to make the roast a day in advance. Store the meat submerged in the gravy in an airtight container.
To reheat, place the meat and gravy in a pot over low heat. Cover it so the steam keeps the beef moist. Avoid the microwave if possible, as it can make the beef rubbery. For the mashed potatoes, they are best made fresh. While you can reheat them with a little extra milk, they never quite regain that “cloud-like” texture after being refrigerated.
I do not recommend freezing the potatoes, as the cell structure breaks down and they become grainy and watery upon thawing. However, the beef and gravy freeze beautifully for up to three months. Just thaw them in the fridge overnight before reheating on the stove for a quick and comforting weeknight meal.
Expert Tips for Professional Presentation
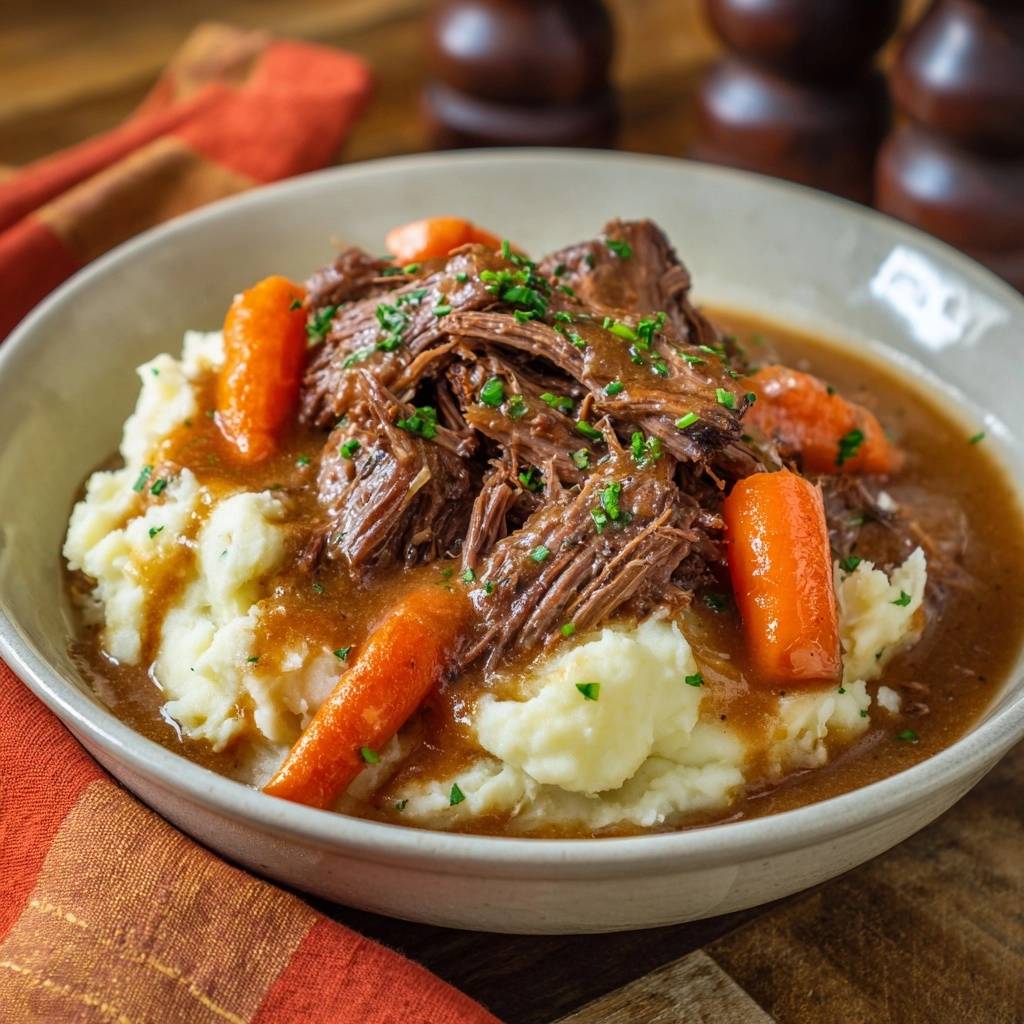
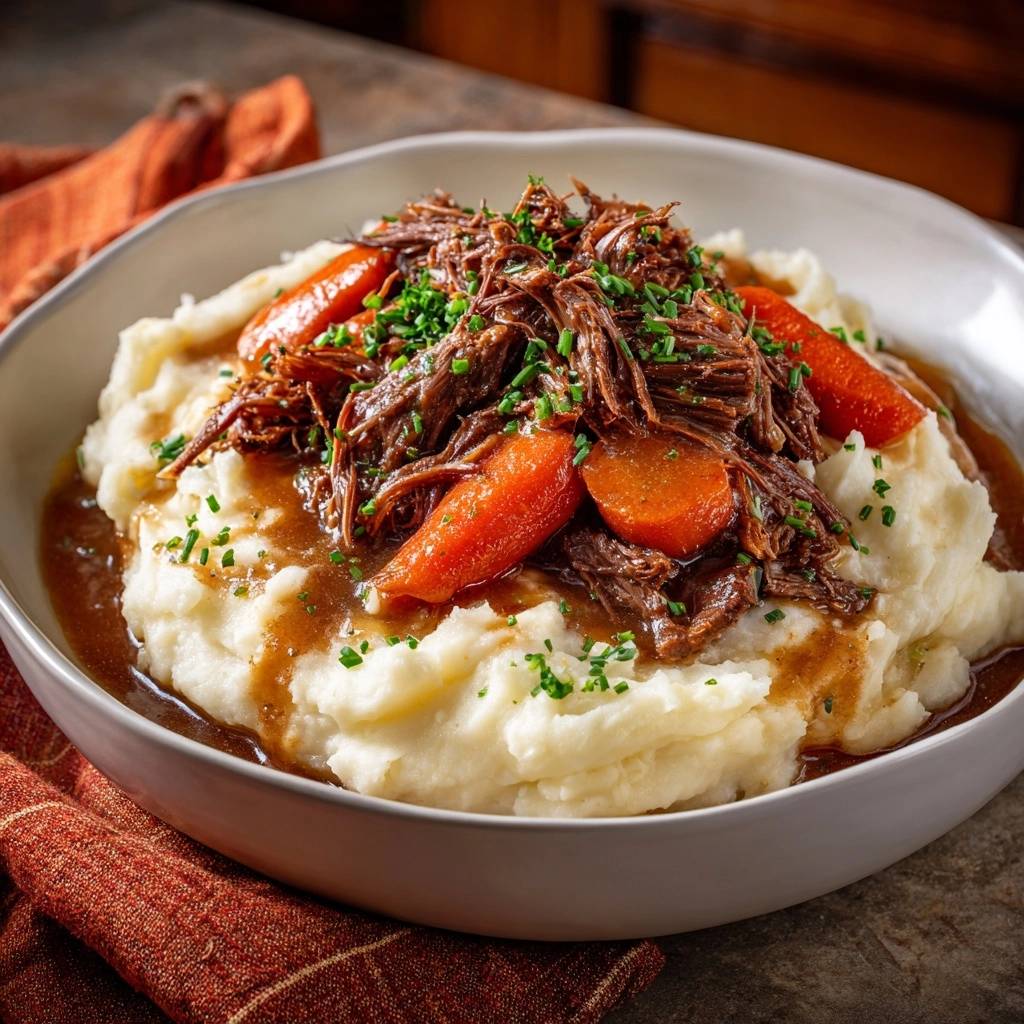
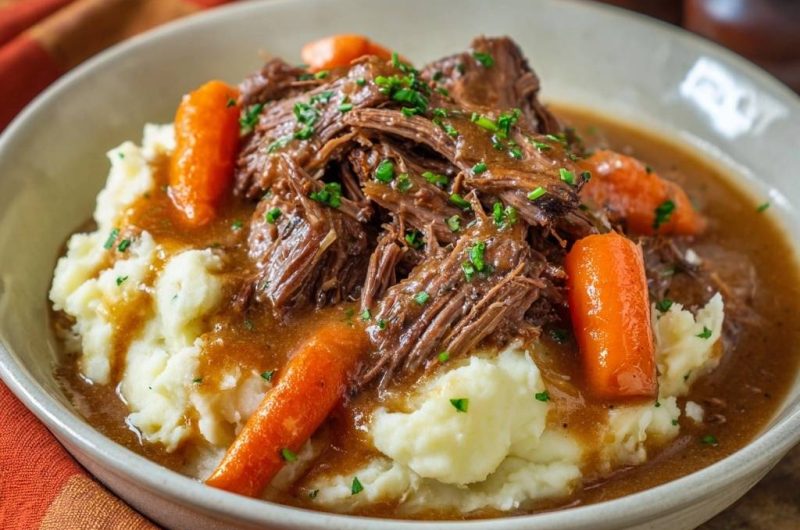
When it comes time to serve, don’t just shred the beef into tiny bits. Use two forks to pull it into large, succulent chunks. This keeps the meat looking substantial and prevents it from getting lost in the gravy. Place a massive mound of mashed potatoes in a shallow bowl and use the back of a spoon to create a “well” in the center.
Nestle the beef and carrots into that well, then ladle the glossy gravy over everything. The contrast between the white potatoes, the orange carrots, and the dark brown gravy is stunning. Finally, don’t be stingy with the chives. The bright green color and fresh oniony bite provide the perfect finish to a very rich meal.
Oh man, the way the gravy soaks into the potatoes while the beef just melts away… it’s the ultimate comfort food. This isn’t just a recipe; it’s a technique that you’ll use for the rest of your life. Once you master the low-and-slow braise, you’ll never settle for a tough pot roast again.
Frequently Asked Questions
Can I use a Slow Cooker or Instant Pot for this?
Yes, you can use both, but the results will vary slightly. In a slow cooker, use the “Low” setting for 8-10 hours. The slow cooker is excellent for tenderness but doesn’t allow for much liquid reduction, so your gravy might be thinner. In an Instant Pot, cook on high pressure for 60-80 minutes with a natural release. While the Instant Pot is fast, the high heat can sometimes make the meat fibers slightly tighter than a traditional stovetop braise. For the absolute best texture, the Dutch oven on the stove remains the gold standard.
Why is my roast dry even though it’s sitting in liquid?
This is the most common pot roast mystery! Dry meat in a liquid environment is almost always caused by overcooking or cooking at too high a temperature. If the liquid is boiling, the muscle fibers contract and squeeze out their internal moisture. Even though there is liquid outside the meat, there is no moisture inside the fibers. Additionally, if you use a cut that is too lean, like a eye of round, there isn’t enough internal fat to provide that “juicy” sensation. Always stick to chuck roast and keep that simmer very gentle.
Can I substitute the flour with cornstarch for a gluten-free gravy?
Absolutely. To use cornstarch, mix 1 tablespoon of cornstarch with 1 tablespoon of cold water to create a “slurry.” Whisk this into the simmering liquid at the very end. Cornstarch has more thickening power than flour, so start with less. It will also give the gravy a more translucent, shiny appearance compared to the matte, opaque look of a flour-thickened gravy. Be sure not to overcook the gravy once the cornstarch is added, as prolonged boiling can actually break down the cornstarch bonds and make the sauce thin again.
What is the best way to peel and prep 2 pounds of potatoes quickly?
To speed up the process, use a high-quality Y-peeler rather than a straight peeler; it offers better leverage and speed. Once peeled, cut the potatoes into uniform halves or quarters. The key is uniformity—if some pieces are small and others are large, they won’t cook at the same rate. If you are really in a rush, you can leave the skins on for a “rustic” mash, but for this specific recipe, the smooth texture of
Slow-Simmered Pot Roast and Mashed Potatoes
Course: Main CourseCuisine: AmericanDifficulty: easy6
servings20
minutes4
hours240
Minutes650
kcalAmerican
Ingredients
3 pound beef chuck roast, patted dry
1 pound large carrots, peeled and cut into 2-inch chunks
2 pounds Yukon Gold potatoes, peeled and halved
4 cups low-sodium beef broth
2 tablespoons tomato paste
3 cloves garlic, minced
1 large onion, sliced
2 tablespoons vegetable oil
4 tablespoons butter
1/2 cup heavy cream
2 tablespoons all-purpose flour (for the gravy slurry)
Salt and black pepper to taste
Fresh chives, finely chopped for garnish
Directions
- The secret to tender meat starts with the sear. Generously season the beef with salt and pepper. Heat oil in a large heavy-bottomed pot or Dutch oven over medium-high heat. Sear the meat for 5-7 minutes per side until a deep, dark brown crust forms. This provides the base flavor for the gravy.
- Remove the meat and set aside. In the same pot, add the onions and garlic, sautéing for 3 minutes until softened. Stir in the tomato paste and cook for 1-2 minutes until it turns a deep brick red.
- Pour in the beef broth, using a wooden spoon to scrape the bottom of the pan to release the flavorful browned bits (fond). Return the beef to the pot. The liquid should come about halfway up the side of the roast.
- To solve the toughness issue, lower the heat to a very gentle simmer. Cover with a tight-fitting lid. Do not let the liquid boil rapidly, as high heat toughens muscle fibers. Braise for 3 to 3.5 hours until the meat is tender enough to be easily shredded.
- Add the carrots during the last 45 minutes of cooking so they become tender but retain their shape.
- While the meat finishes, boil the potatoes in salted water until fork-tender (about 15-20 minutes). Drain and mash with butter and heavy cream until perfectly smooth and fluffy.
- Remove the meat and carrots from the pot. Shred the beef into large, succulent chunks.
- To achieve the thick, glossy gravy shown in the image, whisk the flour with 1/4 cup of cold water to create a slurry. Whisk this into the simmering braising liquid and cook for 5-10 minutes until thickened and rich.
- Serve a generous portion of shredded beef and carrots over a large bed of mashed potatoes. Ladle the thick gravy over the top and garnish heavily with fresh chopped chives.
Notes
- The secret to preventing tough meat is maintaining a gentle simmer rather than a rapid boil. Ensure the lid is tight-fitting to retain moisture throughout the 4-hour cook time.


