
We’ve all been there. You pull a beautiful tray of cheesecake bars out of the oven, let them cool, and go in for that first delicious square, only to find the bottom is a wet, mushy mess. It’s heartbreaking when the flavors are spot on but the texture fails you. A soggy crust happens because the moisture from the cheesecake batter seeps into the graham cracker crumbs before they have a chance to set.
These Chocolate Chip Cheesecake Bars are engineered to solve that exact problem. By using a specific double-bake method and a structural crumb topping, we create a dessert that is as sturdy as it is creamy. You get a distinct, buttery crunch in every bite that holds up perfectly, even when you’re eating it with your hands at a backyard party.
The secret to this “Anti-Soggy” success is the moisture barrier we build during the first ten minutes in the oven. Most recipes have you pour the wet batter directly onto raw crumbs, but we’re going to toast that base first. This simple step caramelizes the sugars and seals the crust, ensuring it stays crisp under that dense, velvety chocolate chip center. Trust me, once you try the double-bake, you’ll never go back to the old way.
The Anatomy of a Perfect Chocolate Chip Cheesecake Bar
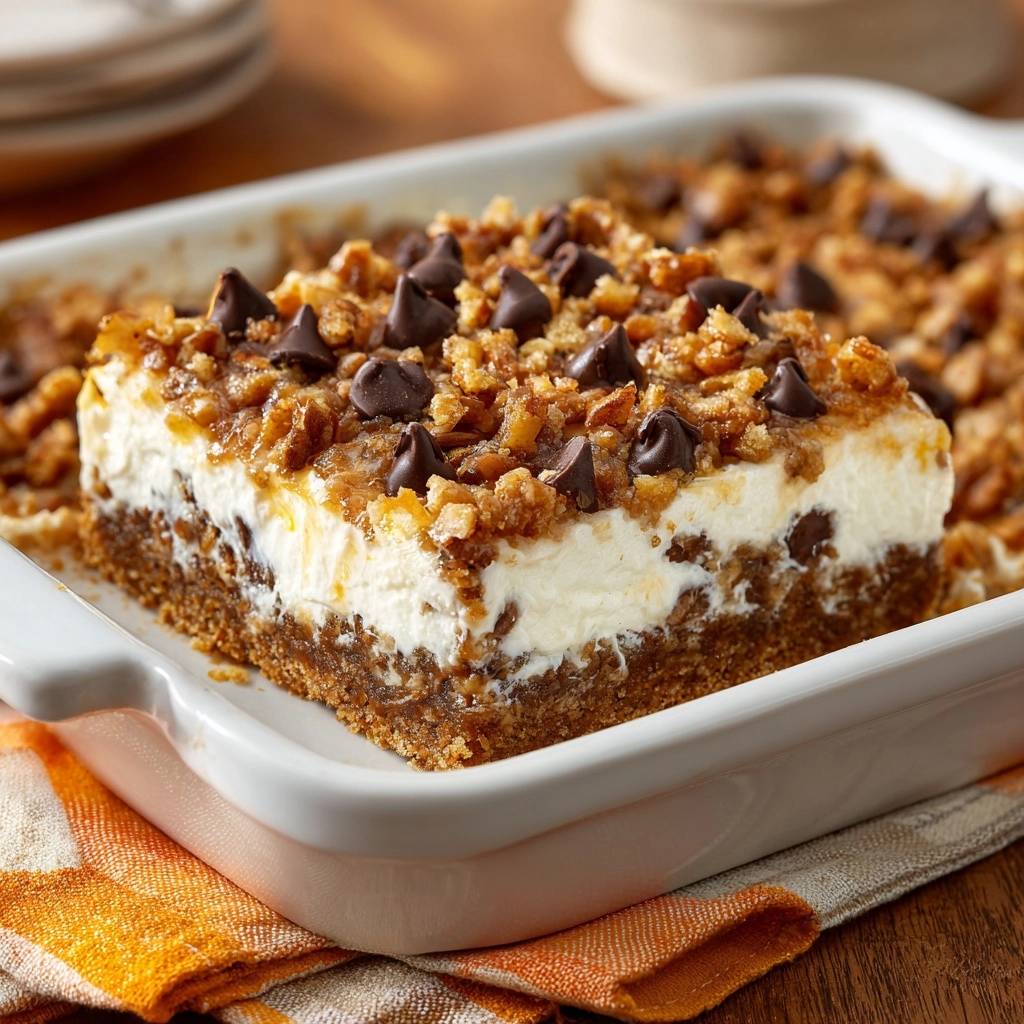
A truly great dessert bar relies on a balance of textures. This recipe features three distinct layers that work together to provide a satisfying mouthfeel. First, we have the reinforced graham base, which acts as the heavy-duty foundation for the entire treat.
Next comes the chocolate-studded cream cheese core. This layer is dense and silky, providing the rich tanginess you expect from a high-quality cheesecake. Finally, we add a structural crumble topping. This isn’t just for looks; it adds a necessary “snap” that contrasts with the soft filling below.
Why Texture Matters in Handheld Desserts
Unlike a traditional cheesecake slice that you eat with a fork on a plate, a bar needs to be portable. If the base is too soft, the bar will fold or crumble the moment you pick it up. The physics of a handheld dessert require a firmer foundation and a bit of resistance on the top.
The “crunch topping” we use here provides that resistance. By mixing flour, cold butter, and nuts, we create a pebbly surface that protects the creamy interior. This ensures that when you take a bite, the bar stays intact rather than squishing out the sides.
Essential Components for the Graham Cracker Base
To get that perfect base, you’ll need 2 cups of graham cracker crumbs, melted unsalted butter, and a bit of brown sugar. While some people use granulated sugar, brown sugar is the superior choice here. The molasses in the brown sugar helps the crumbs stick together more effectively.
As the crust bakes, the brown sugar caramelizes, acting like a delicious glue. This creates a moisture-proof seal that keeps the cheesecake filling from migrating downward. Make sure you press the mixture into the pan firmly using the bottom of a flat measuring cup to ensure a tight, even layer.
Selecting the Right Chocolate Chips
I always recommend semi-sweet chocolate chips for this recipe. Since we are using sweetened cream cheese and a caramel drizzle, milk chocolate can make the bars feel cloyingly sweet. Semi-sweet chips provide a deep cocoa flavor that cuts through the richness of the dairy.
If you prefer a more sophisticated, less sweet profile, dark chocolate chips (60% cacao or higher) work beautifully too. They offer a slight bitterness that pairs perfectly with the salty-sweet graham cracker crust. Avoid using “mini” chips inside the batter, as they tend to disappear; save those for the topping if you have them.
The Role of Room Temperature Ingredients
If you want a professional, lump-free cheesecake layer, you must use room-temperature ingredients. Cold cream cheese is stubborn and will leave tiny white dots in your batter no matter how long you beat it. Softened cream cheese, however, blends into a silky ribbon almost instantly.
The same goes for your eggs. Room-temperature eggs emulsify much better with the fats in the cream cheese. If you add cold eggs to a warm, creamed mixture, the fat can seize up, resulting in a grainy texture. Take your ingredients out of the fridge at least two hours before you plan to start baking.
The Double-Bake Technique for a Crisp Foundation
This is the “Skyscraper” technique that sets this recipe apart. After pressing your crumbs into the pan, you’ll bake the crust alone for 10 minutes. You’re looking for the edges to turn a shade darker and for your kitchen to smell like toasted honey and butter.
This initial bake dries out the crumbs and sets the structure. Once you pull it out, let it cool for about five minutes before adding the filling. This brief cooling period allows the butter to firm up slightly, creating a literal wall that the cheesecake batter cannot penetrate. It’s the ultimate insurance policy against a soggy bottom.
Step-by-Step: Mixing the Creamy Chocolate Chip Layer
When you start mixing your 16 ounces of cream cheese and sugar, keep the mixer on medium-low speed. You want to incorporate the sugar until the mixture is smooth, but you don’t want to whip in too much air. Over-aerating the batter is the number one cause of cheesecake cracking as it cools.
When it’s time for the eggs, add them one at a time. Mix just until the yellow streak disappears before adding the next one. This “slow and steady” approach maintains the structural integrity of the filling, ensuring it stays dense and creamy rather than light and foamy.
Folding vs. Stirring: Incorporating the Chips
Once your batter is smooth, put the electric mixer away. Use a rubber spatula to gently fold in the first half-cup of chocolate chips. Folding is a “cut and lift” motion that preserves the thickness of the batter.
If you stir too vigorously at this stage, you might thin out the batter, causing the chocolate chips to sink straight to the bottom during baking. By folding, you suspend the chips evenly throughout the cream cheese layer so every bite has a bit of chocolate.
Engineering the Structural Crunch Topping
The topping is where we add that final layer of “crunch.” In a small bowl, you’ll toss the remaining chocolate chips, nuts, and flour with cold, cubed butter. Use your fingertips to rub the butter into the dry ingredients until it looks like coarse sand with some pea-sized lumps.
Using cold butter is vital here. As the bars bake, the flour and cold butter create a pebbly barrier. This prevents the heavy chocolate chips and nuts from sinking into the cheesecake layer, keeping them right on top where they can get toasted and crisp.
Nut Selection: Walnuts vs. Pecans
Both walnuts and pecans work wonders in this recipe, but they offer different vibes. Walnuts have a slightly earthy, bitter skin that balances the sweet caramel perfectly. Pecans, on the other hand, are naturally sweeter and have a higher oil content, which makes the topping feel extra rich.
Whichever you choose, make sure they are chopped into small, uniform pieces. The oils in the nuts will release slightly during the second bake, contributing to a toasted aroma that makes these bars smell like a high-end bakery. If you have a nut allergy, you can swap these for crushed pretzels for a similar salty crunch.
The Second Bake: Timing and Visual Cues
Your bars will need about 30 to 35 minutes for the second bake. The biggest mistake people make is waiting for the center to look completely solid. If the center is firm while it’s still in the oven, you’ve overbaked it, and the texture will be rubbery once cooled.
Look for the edges to be slightly puffed and golden brown. The center should still have a “slight jiggle”—think of it like firm gelatin. The bars will continue to cook from the residual heat (carry-over cooking) once they are on the counter, reaching the perfect consistency as they cool.
The Caramel Drizzle and Thermal Shock
As soon as the bars come out of the oven, grab your caramel sauce. Drizzling the caramel while the bars are piping hot is a pro move. The heat thins the caramel, allowing it to seep into the nooks and crannies of the crumble topping.
This acts as a delicious “glue” that binds the nuts and chocolate chips to the cheesecake layer. As the bars cool, the caramel sets, creating a glossy, professional finish that looks incredible. If you wait until they are cold, the caramel will just sit on top and slide off when you try to eat them.
The Critical Chill: Why Patience Prevents Crumbling
I know it’s tempting to dive in while they’re warm, but you must refrigerate these bars for at least 4 hours—though overnight is even better. This isn’t just about temperature; it’s about chemistry. The fats in the cream cheese and butter need time to fully re-solidify.
This chilling period is what allows you to get those clean, sharp edges when you slice them. It also ensures the bottom crust stays crisp. If you cut them too early, the crust will crumble and the cheesecake will be “gooey” rather than “creamy.” Patience is the final ingredient for success.
Troubleshooting Common Cheesecake Bar Issues
If your crust crumbles when you lift a bar out, it usually means the crumbs weren’t pressed firmly enough into the pan. Next time, use more pressure! If you see cracks on the top, you likely over-mixed the eggs or baked them five minutes too long. Don’t worry, the caramel drizzle hides most “beauty marks.”
If your bars are sticking to the pan, you might have skipped the parchment paper. Always leave an “overhang” of parchment on two sides. This creates a sling that allows you to lift the entire block of chilled cheesecake out of the pan at once, making slicing a breeze.
Pro-Tips for Clean Slicing and Presentation
To get those perfect, Instagram-worthy squares, use the “hot knife” technique. Fill a tall glass with hot water and dip a sharp chef’s knife into it. Wipe the blade completely dry with a towel, make one long, clean cut, and then repeat the process for every single slice.
Wiping the blade between cuts prevents the cheesecake filling and chocolate from smearing across the layers. This keeps the contrast between the dark crust, white filling, and golden topping sharp and beautiful. It takes an extra minute, but the professional results are worth it.
Make-Ahead Strategies and Storage Logistics
These bars are the ultimate make-ahead dessert because they actually taste better on day two. You can store them in an airtight container in the refrigerator for up to 5 days. The crust stays remarkably crisp thanks to that initial pre-bake we did.
If you want to freeze them, wrap individual bars tightly in parchment paper and then a layer of aluminum foil. They will stay fresh in the freezer for up to 3 months. When you’re ready for a treat, thaw a bar in the fridge for a few hours. Avoid the microwave, as it will melt the cheesecake and turn the crust soggy.
Expert Tips for Recipe Success
For the best results, always use full-fat cream cheese sold in blocks. The spreadable variety in tubs contains more air and water, which will ruin the density of your bars. Also, if you have a few extra minutes, pulse whole graham crackers in a food processor yourself; the slightly irregular crumbs provide a better “crunch” than the store-bought fine dust.
If you only have salted butter on hand, just omit any extra salt the recipe might call for. The salt in the butter actually enhances the chocolate flavor beautifully. Finally, stick to the 8×8 inch pan size. Using a larger pan will make the layers too thin, and they will likely overbake and become dry before you notice.
Can I use a 9×9 pan instead?
You can use a 9×9 pan, but you need to be careful. Because the surface area is larger, the layers will be thinner. You should reduce the second baking time by about 5 to 7 minutes. Keep a close eye on the “jiggle” factor to ensure they don’t dry out.
How do I prevent the caramel from becoming too sticky?
If you find your caramel is too tacky, try adding a tiny pinch of sea salt to the sauce before drizzling. The salt helps the caramel “set” a bit firmer. Additionally, making sure the bars are fully chilled before serving helps the caramel maintain its shape rather than running.
What is the best way to soften cream cheese quickly?
The best way is the warm water bath. Keep the cream cheese in its foil wrapper and submerge it in a bowl of warm (not boiling) water for about 15 minutes. Avoid the microwave if possible; it often melts the edges while leaving the center frozen, which leads to a lumpy batter.
Can I substitute the graham crackers with other cookies?
Absolutely! Chocolate wafers or digestive biscuits make excellent crusts. If you use a cookie with a cream filling (like a chocolate sandwich cookie), you may need to reduce the melted butter by a tablespoon or two, as the filling adds extra moisture and fat to the base.
How do I store leftovers to keep the crust crisp?
Store the bars in a single layer in an airtight container. If you must stack them, place a piece of parchment paper between the layers so the caramel doesn’t stick to the bottom of the bar above it. Keep them in the fridge; the cold air helps maintain the structural integrity of the crust.
Why did my chocolate chips sink to the bottom of the cheesecake?
This usually happens if the cheesecake batter is too thin from over-mixing or if the cream cheese was too warm. To prevent this, ensure you are folding the chips in gently by hand. You can also toss the chocolate chips in a teaspoon of flour before adding them to the batter to help them “grip” the mixture.
Chocolate Chip Cheesecake Bars
Course: DessertCuisine: AmericanDifficulty: easy12
servings20
minutes40
minutes60
MinutesAmerican
Ingredients
2 cups graham cracker crumbs
1/2 cup unsalted butter, melted
1/4 cup brown sugar
16 ounces cream cheese, softened
1/2 cup granulated sugar
2 large eggs
1 teaspoon vanilla extract
1 1/2 cups semi-sweet chocolate chips (divided)
1/2 cup chopped walnuts or pecans
1/4 cup all-purpose flour (for the topping)
2 tablespoons cold butter, cubed (for the topping)
1/4 cup caramel sauce for drizzling
Directions
- Preheat your oven to 350 degrees F and grease an 8×8 inch baking pan. For easy removal, line with parchment paper leaving an overhang on the sides.
- Combine graham cracker crumbs, melted butter, and brown sugar in a bowl. Press the mixture firmly into the bottom of the pan.
- To solve the soggy bottom problem, bake the crust alone for 10 minutes until it is set and fragrant. This creates a moisture barrier that prevents the cheesecake filling from soaking into the crumbs. Let it cool for 5 minutes.
- In a large bowl, beat the softened cream cheese and granulated sugar until completely smooth. Add eggs one at a time, followed by the vanilla, mixing just until combined.
- Fold 1/2 cup of the chocolate chips directly into the cheesecake batter. Pour the mixture over the pre-baked crust.
- Prepare the “Crunch Topping”: In a small bowl, toss the remaining 1 cup of chocolate chips, chopped nuts, flour, and the 2 tablespoons of cold cubed butter. Rub with your fingers until a coarse, pebbly crumble forms.
- Sprinkle the crunch topping evenly over the cheesecake layer.
- Bake for 30 to 35 minutes. The edges should be golden and set, while the center should have a slight jiggle.
- Remove from the oven and immediately drizzle with the caramel sauce while the bars are hot.
- Allow the bars to cool to room temperature, then refrigerate for at least 4 hours (preferably overnight). This final chill is essential for the fats to solidify, ensuring the crust stays crisp and the layers remain distinct when sliced.
Notes
- The final refrigeration for at least 4 hours is essential for the fats to solidify, ensuring the crust stays crisp and the layers remain distinct when sliced.


