
Most of us have experienced the disappointment of a soggy, flavorless pasta casserole that feels more like a chore to eat than a treat. You know the one—where the noodles have turned into a gummy paste and the sauce has completely vanished into the starch. This Cheesy Chicken Spaghetti Bake changes that narrative by focusing on structural integrity and a sauce that actually stays creamy after it leaves the oven.
The secret to a truly great bake lies in the contrast between the tender, juicy chicken and the vibrant snap of fresh red bell peppers. However, the real victory is the sauce, which uses a blend of sharp cheddar and sour cream to create a rich coating that clings to every single strand of pasta. We aren’t just throwing ingredients into a pan; we’re building layers of flavor that stand up to the high heat of the oven.
I’ve found that the absolute key to success is the par-boiling stage. If you cook your spaghetti all the way through in the pot, it’s already “dead” before it hits the baking dish. By pulling the noodles out while they still have a firm, almost crunchy core, you allow them to finish their cooking process by drinking up the savory chicken broth and cream sauce. This results in a noodle that is perfectly seasoned from the inside out.
The Science of Al Dente Pasta Bakes
When you drop spaghetti into boiling water, the starch molecules on the surface begin to swell and gelatinize. If you follow the standard package directions, the water fully hydrates the center of the noodle, leaving no room for anything else. In a bake, this is a recipe for disaster because the pasta will continue to cook in the oven, leading to that dreaded mushy texture.
Therefore, you must pull the pasta exactly 3 minutes before the “al dente” timer hits. At this stage, the starch is only partially hydrated, creating a thirsty noodle. When you later toss this pasta with your cream of chicken and sour cream mixture, the spaghetti acts like a sponge. It pulls the fats and flavors of the sauce into its center, which reinforces the structure of the pasta rather than breaking it down.
In addition, you must never skip salting your pasta water heavily. Since the noodles spend such a short time in the pot, they need a high concentration of salt to penetrate the surface quickly. This is your only chance to season the pasta itself. Without this step, even the cheesiest sauce will taste flat because the base component—the spaghetti—is bland.
Why We Skip the Rinse
Many home cooks instinctively rinse their pasta under cold water to stop the cooking process, but you should avoid this at all costs for a bake. Rinsing washes away the precious surface starch that acts as a natural adhesive. You want that starch to stay put so the creamy sauce can “grip” the noodles instead of sliding off to the bottom of the dish.
Instead of rinsing, simply drain the pasta and immediately toss it with a small splash of olive oil. This creates a very thin barrier that prevents the strands from clumping into a giant ball while you prep the sauce. It keeps the noodles individual and distinct, ensuring that the cheese and chicken can distribute evenly throughout the entire dish.
Essential Components for the Creamy Base
The foundation of this bake relies on a balance of fat, salt, and acid. While it’s tempting to use a mild cheese, I strongly recommend a high-quality sharp cheddar. Sharp cheddar has a lower moisture content and a more aggressive flavor profile, which is necessary to cut through the heavy, velvety texture of the cream of chicken soup.
Sour cream is another non-negotiable ingredient here. While the soup provides the body, the sour cream introduces a necessary tanginess. This acidity brightens the overall flavor and prevents the dish from feeling too “heavy” on the palate. It also adds a silky mouthfeel that you just can’t get from milk or heavy cream alone.
Lastly, the chicken broth serves as our thinning agent. Condensed soups are incredibly thick, and if you don’t loosen them up, the sauce won’t be fluid enough to seep into the middle of the spaghetti nest. The broth ensures the moisture levels are high enough to hydrate those par-boiled noodles during their 25-minute stint in the oven.
Fresh vs. Canned: Optimizing the Flavor Profile
I always reach for a fresh red bell pepper for this recipe because it provides a much-needed textural contrast. While roasted jarred peppers are delicious, they are soft and tend to disappear into the sauce. A fresh diced pepper retains a slight “pop” even after baking, which breaks up the softness of the pasta and chicken.
When it comes to aromatics, dry spices like garlic powder and onion powder are actually superior to fresh in this specific application. Fresh minced garlic can sometimes develop a bitter edge or fail to mellow out in the relatively short baking time. Dry powders distribute instantly and evenly, ensuring every bite has a consistent, savory hum without any pungent “hot spots.”
Selecting the Right Chicken Texture
The way you prep your chicken significantly impacts the eating experience. I prefer shredded chicken breast over cubed pieces for this bake. Shredded meat has more surface area, which allows it to become fully entwined with the spaghetti strands. This means you get a bit of protein in every single forkful.
A rotisserie chicken is a fantastic shortcut here, as the meat is already seasoned and tender. However, if you are poaching your own chicken at home, make sure to shred it while it’s still slightly warm. Warm meat absorbs the sauce much better than cold, refrigerated chicken, leading to a more cohesive and juicy final result.
Step-by-Step: Constructing the Cheesy Chicken Spaghetti Bake
Once your pasta is ready and your sauce is whisked, the assembly process is all about gentle integration. You want to use a large mixing bowl to give yourself plenty of room to move. If the bowl is too small, you’ll end up breaking the spaghetti strands as you try to force the ingredients together.
Use a folding motion with a large spatula rather than a vigorous stir. Start from the bottom, lift up, and turn the mixture over. This technique ensures the heavy diced peppers and chicken chunks don’t just sink to the bottom of the bowl. You want a “suspension” of ingredients where everything is suspended in that creamy, golden sauce.
Emulsifying the Sauce and Broth
Before you add the solids, make sure your liquid base is perfectly smooth. When you whisk the soup, sour cream, and broth, look for a glossy, uniform appearance. There shouldn’t be any lumps of sour cream visible. It should look like a thick, pourable gravy that easily coats the back of a spoon.
If the sauce looks too thick—almost like a paste—add an extra tablespoon of chicken broth. Remember, the pasta is going to “drink” a significant portion of this liquid. A slightly looser sauce at the start guarantees a moist, decadent finish rather than a dry, sticky one.
The Layering Strategy for Maximum Melt
After transferring the mixture to your 9×13 dish, don’t just dump the cheese on top. Spread the pasta out so it’s an even thickness across the pan. Then, take your remaining two cups of cheddar and create a complete “blanket” from edge to edge. This isn’t just for flavor; it’s a functional shield.
The cheese layer acts as an insulator, trapping steam inside the pasta mixture which helps the noodles finish cooking. If any spaghetti strands are left poking out through the cheese, they will turn hard and brittle in the oven. A sprinkle of paprika over the cheese adds a beautiful smoky note and a pop of color that makes the dish look professional.
Avoiding Common Casserole Mistakes
The most common mistake is pulling the dish out of the oven too early. You aren’t just looking for the cheese to melt; you are looking for the sauce to bubble vigorously around the edges. Those bubbles indicate that the heat has reached the very center of the bake, ensuring the chicken is hot and the pasta is fully hydrated.
If you notice the cheese is browning too quickly but the center still feels cold, simply tent the dish loosely with a piece of aluminum foil. This allows the interior to continue heating without burning the top. However, if you followed the 375 degree F temperature, the timing should align perfectly for a golden crust and a bubbling center.
Preventing the “Dry Top” Syndrome
Nothing ruins a pasta bake like biting into a crunchy, dried-out noodle. To prevent this, make sure you use your spatula to press the pasta down firmly into the sauce before adding the cheese. Every single strand should be “wet” before it goes into the oven.
If you find that your oven runs particularly hot, you can also spray the underside of your foil with a bit of oil and cover the dish for the first 15 minutes of baking. Remove the foil for the final 10 minutes to get that beautiful cheese crust. This double-stage baking method is a foolproof way to lock in moisture.
Make-Ahead Strategies and Freezing Instructions
This is an incredible meal-prep dish because it actually holds up well to being made in advance. You can assemble the entire bake, cover it tightly with plastic wrap, and keep it in the fridge for up to 24 hours. Just be sure to let the dish sit on the counter for 20 minutes before baking so the glass dish doesn’t shatter in the hot oven.
For freezing, I recommend assembling the bake in a disposable aluminum pan. Wrap it twice in heavy-duty foil to prevent freezer burn. It will stay fresh for up to three months. When you’re ready to eat, you can bake it straight from frozen, but you’ll need to add about 20 to 30 minutes to the total cook time.
One pro tip for frozen bakes: add an extra quarter-cup of chicken broth to the mixture during assembly. Pasta tends to absorb even more moisture during the freezing and thawing process, so that extra liquid acts as insurance against a dry casserole later on.
Vegetable Additions and Protein Swaps
While the red pepper adds a nice crunch, you can easily boost the nutritional value of this dish. Steamed broccoli florets or sautéed mushrooms are fantastic additions that pair perfectly with the cheddar sauce. Just make sure to cook the vegetables slightly before adding them, as they won’t soften enough in the oven on their own.
If you want to swap the protein, ground turkey or even canned chickpeas work surprisingly well. If using ground meat, brown it completely in a skillet first and drain the excess fat. The creamy base is versatile enough to handle almost any mild protein, making this a great “clean out the fridge” recipe for busy weeknights.
Optimal Side Dish Pairings
Since this bake is very rich and creamy, you want to pair it with something that offers a sharp, acidic contrast. A simple arugula salad with a heavy squeeze of lemon juice and a splash of olive oil is my favorite choice. The peppery greens and citrus cut right through the density of the cheese.
Roasted balsamic Brussels sprouts or a vinegar-based coleslaw also work beautifully. I usually avoid serving garlic bread or heavy rolls with this meal. Since the spaghetti already provides plenty of carbohydrates, a light, crunchy vegetable side makes the whole dinner feel much more balanced and satisfying.
Expert Troubleshooting and FAQ
Can I use a different pasta shape?
Yes, you can certainly use penne, rigatoni, or rotini. However, keep in mind that these thicker shapes have more surface area and “hollow” centers that trap sauce. If you switch to a tubular pasta, I recommend adding an extra 1/4 cup of chicken broth to the sauce to ensure the dish doesn’t end up too dry.
How do I reheat leftovers without losing the creaminess?
The microwave tends to zap the moisture out of pasta. To keep it creamy, place your portion in a bowl and add a teaspoon of water or milk. Cover it with a damp paper towel and heat in 30-second intervals. This creates a mini-steam chamber that re-emulsifies the cheese sauce so it’s just as silky as day one.
Is there a substitute for cream of chicken soup?
If you don’t have canned soup, you can make a quick 5-minute roux. Melt 3 tablespoons of butter in a pan, whisk in 3 tablespoons of flour, and slowly add 1.5 cups of chicken broth while whisking constantly. Once it thickens, season it with salt and pepper, and use it exactly like you would the canned version.
Why is my cheese not browning?
Pre-shredded cheese is often coated in potato starch or cellulose to prevent clumping in the bag. This coating can sometimes inhibit melting and browning. For the best results, grate a block of sharp cheddar yourself. If it’s still not browning at the end of the bake, pop it under the broiler for 1 to 2 minutes, but watch it like a hawk!
Can I use Greek yogurt instead of sour cream?
You can, but there is a catch. Greek yogurt is much higher in protein and lower in fat, which makes it prone to curdling or “breaking” when exposed to high heat. If you use yogurt, stick to the full-fat version and be aware that the sauce might have a slightly grainier texture compared to the smooth finish of sour cream.
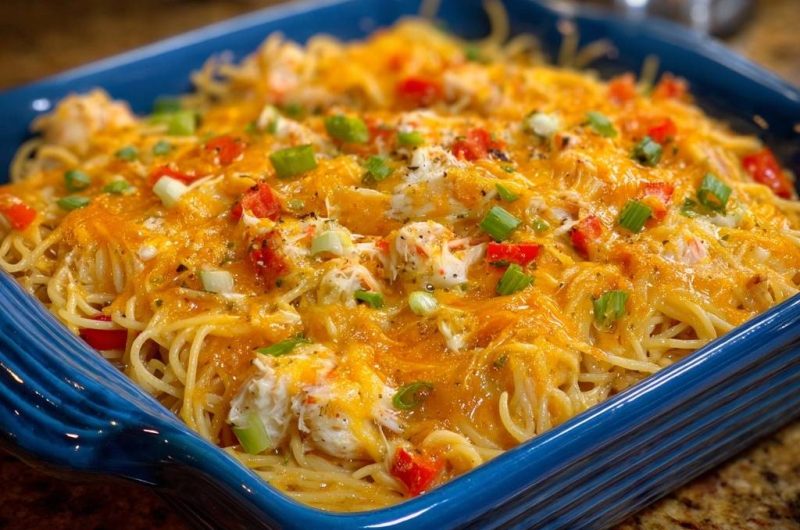
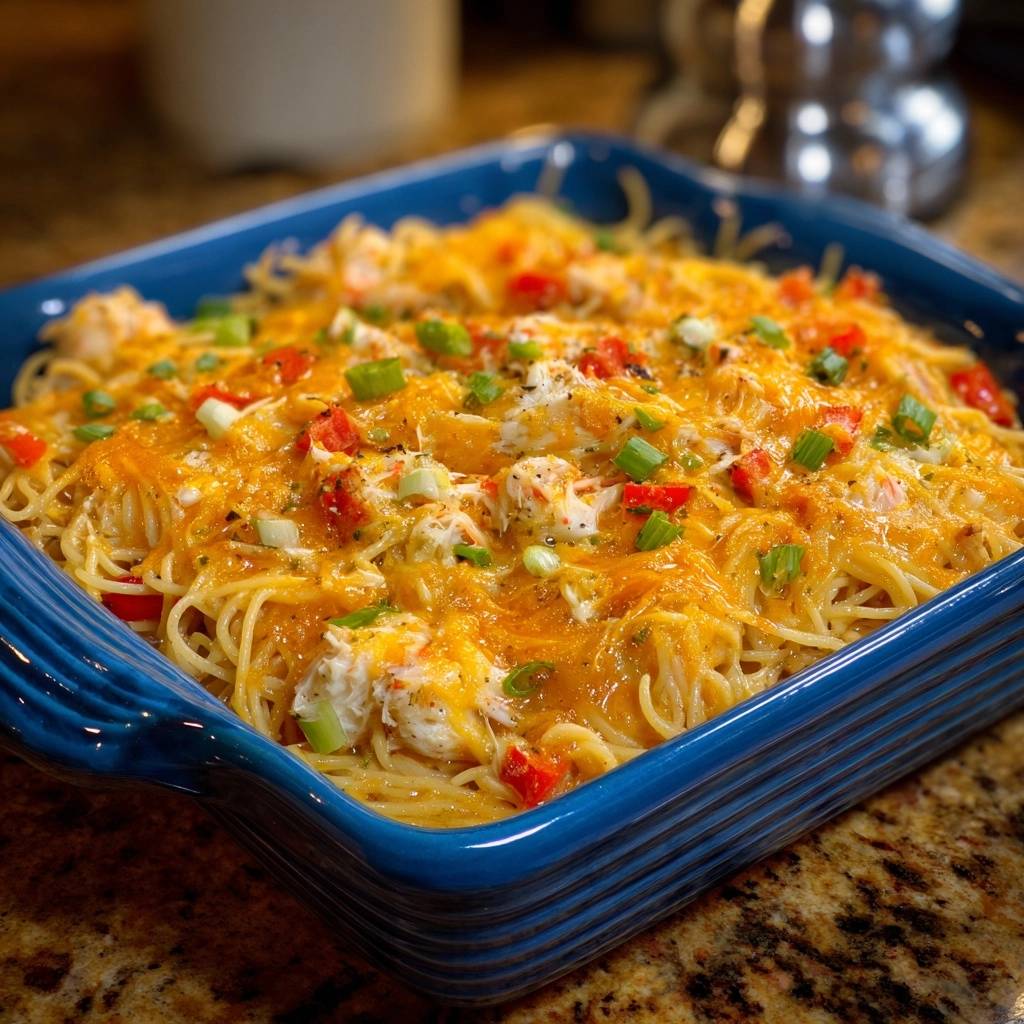
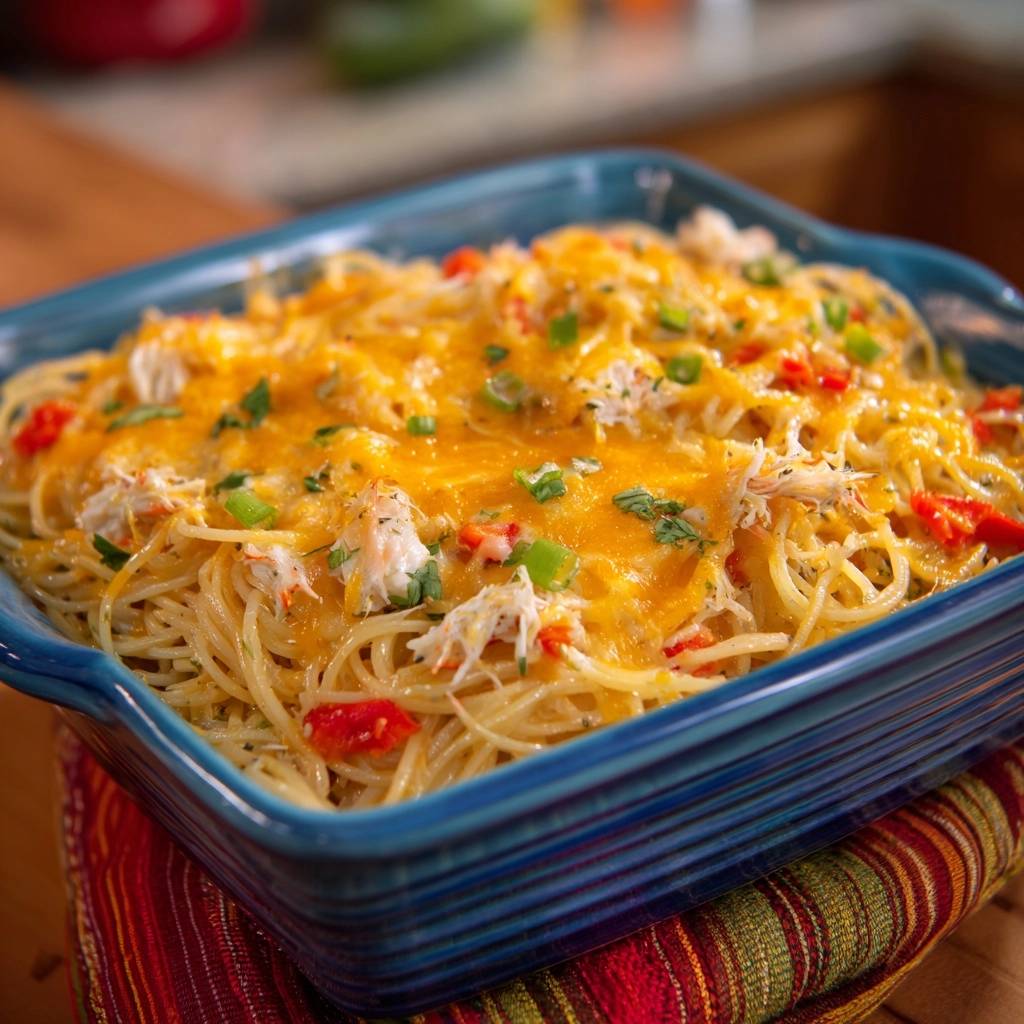
Cheesy Chicken Spaghetti Bake
Course: Main CourseCuisine: AmericanDifficulty: easy6
servings15
minutes25
minutes40
MinutesAmerican
Ingredients
1 pound spaghetti noodles
2 cups cooked shredded chicken breast
3 cups sharp cheddar cheese, shredded (divided)
1 large red bell pepper, diced
1/2 cup green onions, sliced (divided)
1 can (10.5 oz) cream of chicken soup
1/2 cup sour cream
1/2 cup chicken broth
1 teaspoon garlic powder
1/2 teaspoon onion powder
1/2 teaspoon black pepper
1/2 teaspoon salt
1/2 teaspoon paprika (for garnish)
Directions
- Preheat your oven to 375 degrees F and grease a 9×13 inch baking dish.
- To solve the mushy pasta problem, boil your spaghetti in heavily salted water for exactly 3 minutes less than the package directions for al dente. The pasta should still be quite firm in the center. It will finish softening perfectly by absorbing the moisture from the sauce in the oven.
- Drain the pasta and immediately toss it with a splash of olive oil to prevent sticking. Do not rinse.
- In a large mixing bowl, whisk together the cream of chicken soup, sour cream, chicken broth, garlic powder, onion powder, salt, and pepper until smooth and creamy.
- Fold in the shredded chicken, diced red bell peppers, and 1 cup of the shredded cheddar cheese.
- Add the par-boiled spaghetti to the bowl and toss thoroughly until every strand is evenly coated in the sauce.
- Transfer the mixture to your prepared baking dish and spread it out evenly.
- Top with the remaining 2 cups of shredded cheddar cheese, ensuring the pasta is well-covered to prevent the top strands from drying out.
- Sprinkle the top with paprika and half of the sliced green onions.
- Bake for 20 to 25 minutes until the sauce is bubbling and the cheese is completely melted and golden.
- Remove from the oven and garnish with the remaining fresh green onions before serving.
Notes
- To prevent mushy pasta, boil spaghetti for exactly 3 minutes less than the package directions for al dente. Ensure the top is well-covered with cheese to prevent the noodles from drying out.


