
We’ve all been there. You pull a beautiful, golden-brown loaf out of the oven, let it cool, and slice into it only to find a gummy, wet, or “soggy bottom” center. It’s a common heartbreak in the world of home baking. While banana bread is often treated as a simple “dump and stir” recipe, achieving that elusive airy crumb requires a bit more strategy than just mashing fruit and hoping for the best.
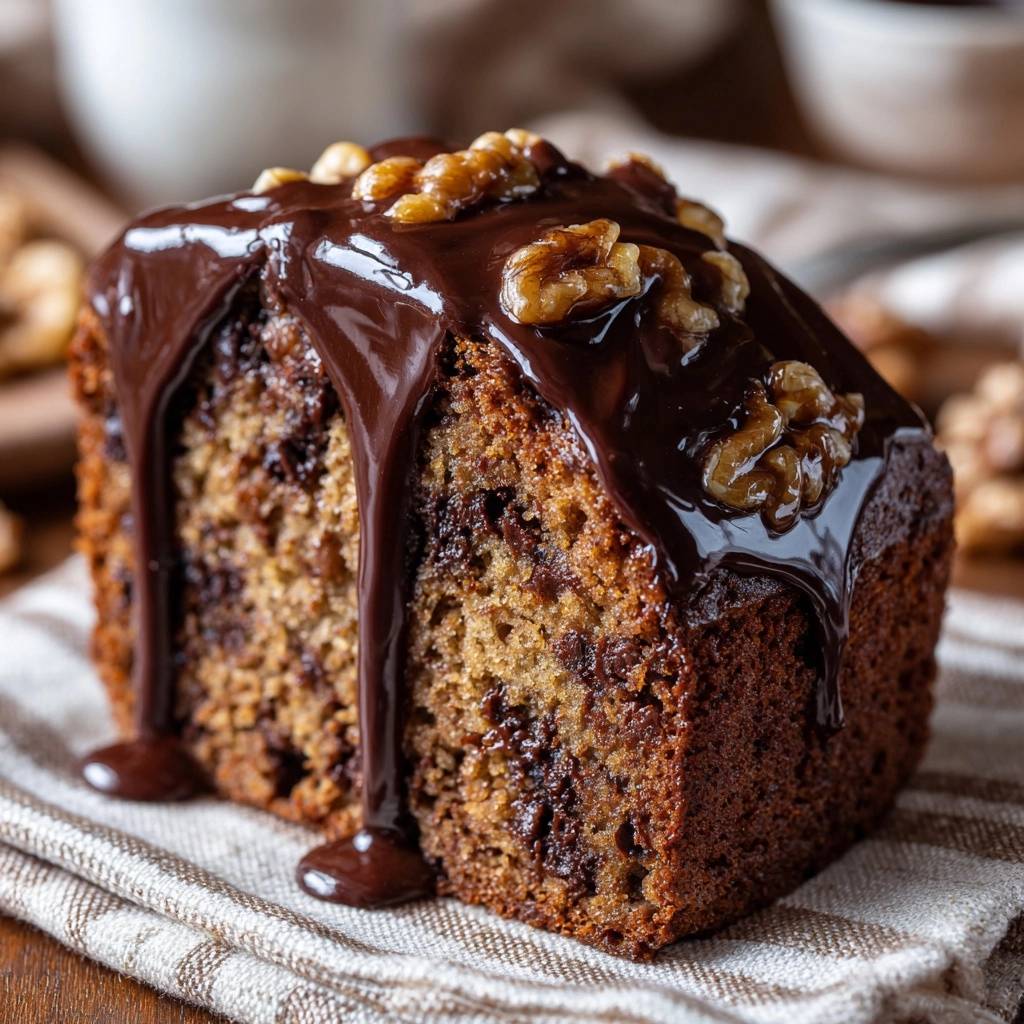
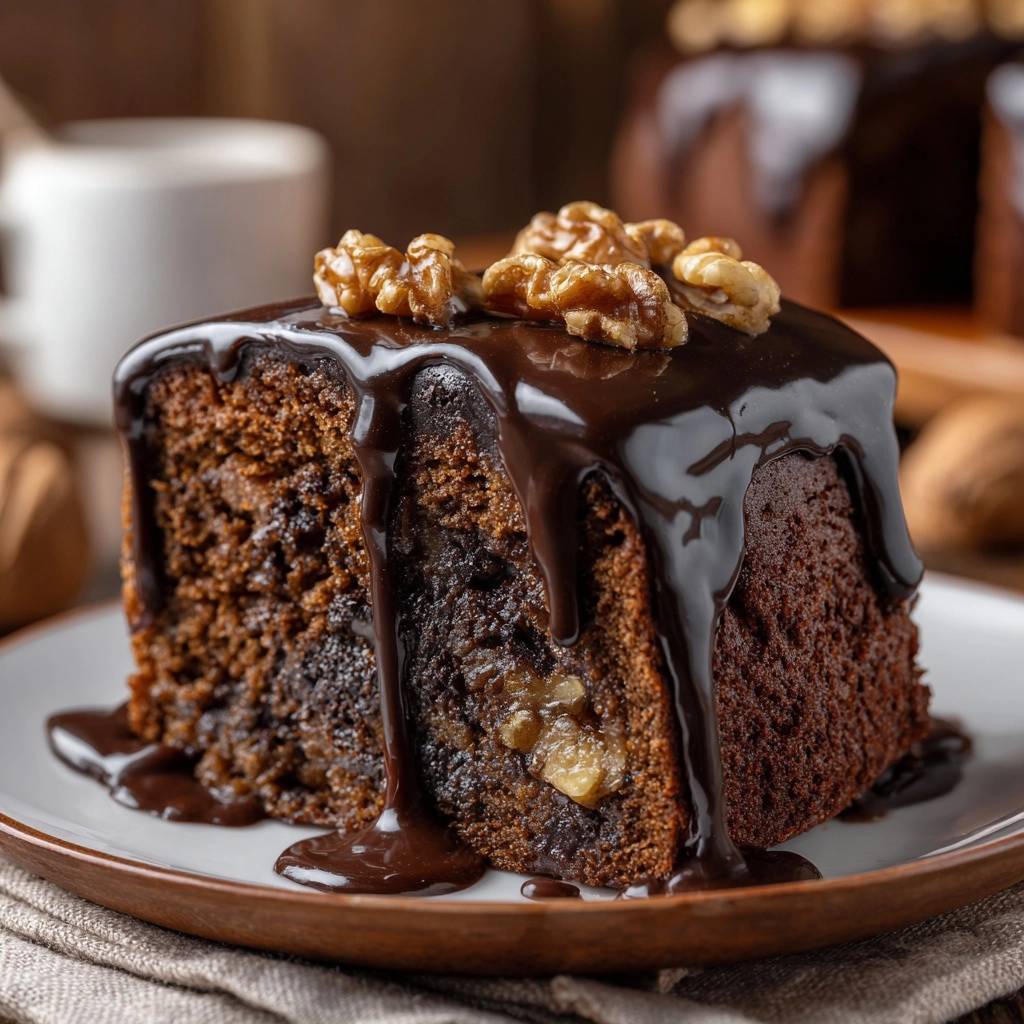
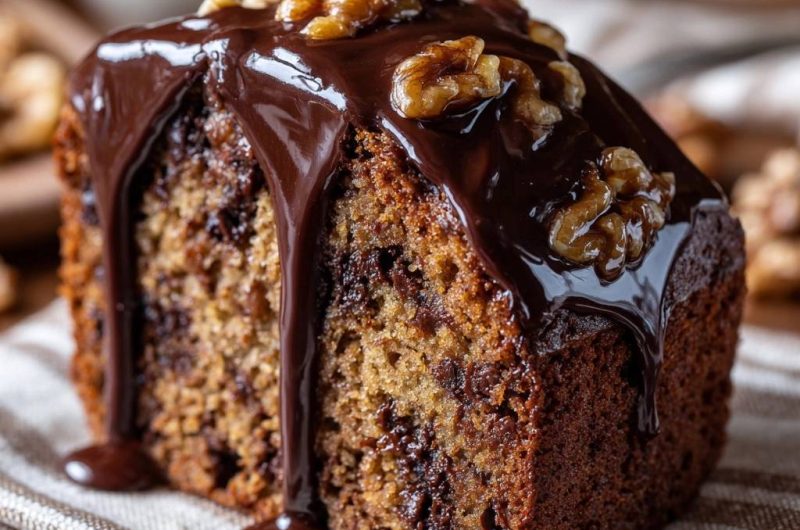
This Chocolate Chip Walnut Banana Bread is designed to solve those structural woes once and for all. You get the deep, caramelized sweetness of ripe fruit paired with the crunch of toasted walnuts and the richness of melting chocolate. However, unlike standard dense loaves, this version stands tall with a light, cake-like interior that holds its shape perfectly under a thick layer of dark chocolate ganache.
The secret to this success lies in the moisture-to-fat ratio and a specific temperature trick. By starting the oven at a higher heat, we set the structure of the bread immediately. This prevents the center from collapsing under the weight of the chocolate chips and walnuts. I’ve found that using room temperature eggs is also non-negotiable here, as they emulsify much better with the fats to create a stable batter.
The Chemistry of Non-Soggy Banana Bread
Banana bread is notoriously difficult because bananas are unpredictable. Depending on their size and ripeness, three bananas can vary significantly in water content. When you have too much moisture and not enough structure, the starch in the flour can’t absorb it all. This results in that dreaded “gummy” layer at the bottom of the pan where the fruit sugars and water have settled.
To combat this, we use a “high-heat start” method. By preheating the oven to 375°F, the exterior of the loaf begins to set and rise the moment it hits the rack. This initial blast of heat activates the baking soda quickly, pushing the batter upward before the heavy inclusions have a chance to sink. Once the loaf has its “lift,” we drop the temperature to 350°F to finish cooking the center without burning the crust.
Furthermore, the ratio of light brown sugar to flour is carefully balanced. Brown sugar is hygroscopic, meaning it pulls in moisture, but it also adds weight. By whisking the sugar with melted butter and eggs vigorously, we create a stable emulsion. This ensures the moisture is suspended throughout the batter rather than pooling at the base of the loaf pan during the long bake time.
Why Aeration Prevents a Dense Loaf
Most recipes tell you to just stir the ingredients together, but that’s a mistake if you want a fluffy crumb. When you whisk the egg, brown sugar, and melted butter for a full minute, you’re performing mechanical aeration. You’ll notice the mixture actually changes color, turning from a dark brown to a pale, tan foam.
This process creates thousands of tiny micro-bubbles. In the heat of the oven, these bubbles expand, providing the internal “skeleton” needed to support the heavy walnuts and chocolate chips. Without this step, the batter is too weak to hold those inclusions, leading to a flat, dense brick of bread rather than a tall, proud loaf.
Essential Components for Chocolate Chip Walnut Banana Bread
The ingredients you choose dictate the final texture. I prefer all-purpose flour for this recipe because it has enough protein to provide structural integrity. While cake flour might seem like it would make the bread lighter, it’s actually too weak to support the weight of the mashed bananas and chocolate. All-purpose flour gives us that sturdy yet tender bite we’re looking for.
Light brown sugar is another key player. It contains molasses, which adds a hint of caramel flavor that white sugar lacks. More importantly, it keeps the bread moist for days without making it feel greasy. If you only have dark brown sugar, that works too, though it will result in a slightly darker loaf with a more intense molasses kick.
Using unsalted butter allows you to control the salt content perfectly. Melted butter provides a much richer, more “bakery-style” flavor than vegetable oil. While oil can make a bread feel moister, butter provides a superior mouthfeel and helps the bread firm up slightly as it cools, making it easier to slice clean pieces.
Selecting and Prepping the Bananas
For the best flavor, you want bananas that look like they’ve seen better days. A few brown spots aren’t enough; you want the skins to be at least 50% black. At this stage, the starches have fully converted into sugar, and the fruit is soft enough to incorporate seamlessly into the batter without leaving chunky, wet pockets.
If you’re craving this bread but your bananas are still bright yellow, don’t worry. You can flash-ripen them by placing the unpeeled bananas on a baking sheet in a 300°F oven for about 15 to 20 minutes. They will turn completely black and soft. Just let them cool before peeling and mashing so you don’t scramble the egg in your batter.
The Role of Mini Chocolate Chips and Chopped Walnuts
Physics plays a bigger role in baking than you might think. Standard-sized chocolate chips are heavy and often dive straight to the bottom of the pan. I highly recommend using mini semi-sweet chips. Because they are smaller and lighter, they stay suspended in the batter much more easily, ensuring you get chocolate in every single bite.
The walnuts aren’t just for flavor; they provide a structural “skeleton” for the bread. Chopping them into medium-sized pieces creates more surface area for the batter to cling to. This adds a necessary crunch that contrasts beautifully with the soft, tender crumb of the banana bread.
Step-by-Step: Mixing for Maximum Loft
The most critical moment in this recipe is when the dry ingredients meet the wet. This is where many bakers go wrong by over-mixing. The second you add the flour to the banana mixture, gluten begins to develop. If you stir too much, those gluten strands become tough and elastic, resulting in a rubbery, bread-like texture instead of a tender crumb.
Use a large rubber spatula and a “folding” motion. Cut through the center of the bowl, scrape along the bottom, and fold the batter over the top. Rotate the bowl as you go. Stop the very instant you no longer see white streaks of flour. It’s perfectly fine if the batter looks a little lumpy; those lumps will disappear as the bread bakes.
You’ll notice the batter is quite thick. This is intentional. A thick batter has more “holding power” than a thin, runny one. It keeps the walnuts and chocolate chips from migrating, ensuring a perfectly even distribution from the top crust all the way down to the base.
The Flour-Toss Technique for Inclusions
Before you fold your chocolate chips and walnuts into the main batter, try this pro trick: toss them in a single tablespoon of your measured flour. This light coating of flour creates friction. It acts like a “grip” that allows the inclusions to hang onto the batter during the initial phase of baking when the heat makes everything more fluid.
Without this coating, the smooth surface of the chocolate chips acts like a slide, letting them slip through the batter to the bottom of the pan. This simple 10-second step is one of the best ways to ensure your bread looks as good on the inside as it does on the outside.
Managing the Temperature Shift
When you slide your loaf into the 375°F oven, you’re giving it the “kick” it needs to rise. However, if you left it at that temperature for the full hour, the outside would be burnt to a crisp before the middle even warmed up. That’s why we immediately turn the dial down to 350°F.
This transition mimics the falling-heat profile of professional stone ovens. It allows the heat to penetrate deep into the center of the loaf slowly. You’ll know it’s working when you see a beautiful, deep crack form down the center of the dome. That crack is a sign of a healthy, powerful rise.
Troubleshooting Common Banana Bread Failures
If you ever find a “gummy ring” near the top of your loaf, it’s usually a sign of underbaking or using too much banana. While it’s tempting to use four or five bananas to avoid waste, the extra moisture will overwhelm the flour. Stick to the 1.5-cup measurement for a consistent result every time.
A sunken center is another common frustration. This usually happens if you open the oven door too early to check on the bread. The sudden drop in temperature causes the fragile air bubbles to collapse before they’ve set. Wait until at least the 50-minute mark before opening the door to test with a toothpick.
If your bread is dry, you likely over-baked it or over-measured the flour. When measuring flour, always use the “spoon and level” method. Never scoop the measuring cup directly into the flour bag, as this packs the flour down and can result in up to 25% more than the recipe calls for. Instead, spoon the flour into the cup and level it off with a flat edge.
The Dark Chocolate Ganache Finishing Method
While this bread is delicious on its own, the dark chocolate ganache takes it to a whole new level. The key to a perfect ganache is the 1:1 ratio of fat to chocolate. By heating the heavy cream just until it simmers and pouring it over the dark chocolate chips, you create a gentle heat that melts the chocolate without scorching it.
Patience is vital here. Let the mixture sit for five minutes before you start whisking. This allows the chocolate to soften completely. When you do whisk, start in the center and work your way out until the glaze is glossy and smooth. It should be thick enough to coat a spoon but fluid enough to pour.
Crucially, you must wait until the banana bread is completely cool before adding the ganache. If the bread is even slightly warm, the ganache will thin out and soak into the crumb. This would ruin all the hard work we did to prevent a soggy texture! Once glazed, top it with whole walnut halves for a professional, bakery-style finish.
Storage and Preservation for Lasting Freshness
Banana bread actually tastes better the second day as the flavors have time to meld. However, how you store it matters. Never put your banana bread in the refrigerator. The cold environment of a fridge actually recrystallizes the starches in the bread, making it go stale and dry much faster than it would on the counter.
Instead, keep the loaf in an airtight container at room temperature. It will stay moist and delicious for up to four days. If you’ve already applied the ganache, the sugar and fat in the chocolate act as a bit of a seal, helping to keep the moisture locked inside the crumb.
Freezing Guide for Long-Term Storage
This bread freezes beautifully, making it a great option for meal prep. You can freeze the entire loaf or individual slices. If freezing slices, wrap each one tightly in plastic wrap and then place them all in a heavy-duty freezer bag. This double-layer protection prevents freezer burn and keeps the bread tasting fresh.
To thaw, simply leave a slice on the counter for about 30 minutes, or give it a quick 15-second zap in the microwave. If you’re freezing a loaf with the ganache already on it, be aware that the chocolate might lose a bit of its shine once thawed, but the flavor will remain perfectly intact. For the best results, consume frozen bread within three months.
Expert Baking FAQ
Can I use frozen bananas for this recipe?
Yes, you can! However, frozen bananas release a lot of extra liquid when they thaw. To prevent a soggy loaf, thaw them in a bowl and drain off about half of the watery liquid before mashing. This ensures you get the concentrated banana flavor without the excess moisture that ruins the crumb structure.
Why did my walnuts turn the bread purple or dark?
This is a natural chemical reaction! The skins of walnuts contain tannins that can react with the alkaline nature of baking soda. It’s completely harmless and doesn’t change the flavor, but if it bothers you, you can lightly toast the walnuts and rub them in a kitchen towel to remove some of the skins before adding them to the batter.
Can I substitute the heavy cream in the ganache?
If you don’t have heavy cream, you can use whole milk or even a bit of melted butter, but the ganache won’t be as thick or stable. Heavy cream has the high fat content necessary to create that velvety, fudge-like texture that sets up firmly on top of the bread without running off.
How do I know the bread is done without a toothpick?
You can use the “spring-back” test. Gently press the center of the loaf with your finger. If the bread feels firm and springs back immediately, it’s likely done. If your finger leaves an indentation, it needs more time. Also, look for the bread pulling away slightly from the sides of the parchment paper.
Why use unsalted butter instead of oil?
Butter provides a much more complex, toasted flavor that complements the walnuts and bananas. While oil creates a very soft texture, butter provides better structural support. This is especially important in a recipe with heavy inclusions like chocolate chips, as the butter helps the crumb “set” more firmly as it cools.
Chocolate Chip Walnut Banana Bread
Course: Dessert and BreadCuisine: AmericanDifficulty: easy8
servings15
minutes1
hour75
Minutes410
kcalAmerican
Ingredients
3 very ripe bananas, mashed (approx. 1 1/2 cups)
1/2 cup unsalted butter, melted and cooled
3/4 cup light brown sugar, packed
1 large egg, room temperature
1 teaspoon vanilla extract
1 1/2 cups all-purpose flour
1 teaspoon baking soda
1/2 teaspoon salt
1 teaspoon ground cinnamon
3/4 cup semi-sweet chocolate chips (mini chips recommended for even distribution)
1/2 cup chopped walnuts
1/2 cup heavy cream (for ganache topping)
2/3 cup dark chocolate chips (for ganache topping)
Whole walnut halves for garnish
Directions
- Preheat your oven to 375°F (190°C). This initial high heat activates the leavening quickly to prevent sagging. Grease a 9×5 inch loaf pan and line it with parchment paper, leaving an overhang on the sides.
- In a large bowl, whisk the melted butter and brown sugar until fully combined. Add the egg and vanilla, whisking vigorously for 1 full minute until the mixture lightens in color. This aeration is the first step in preventing a heavy, soggy loaf.
- Stir in the mashed bananas until just combined.
- In a separate bowl, whisk the flour, baking soda, salt, and cinnamon.
- To solve the soggy bottom issue, toss your chocolate chips and chopped walnuts in 1 tablespoon of the flour mixture before adding them to the batter. This prevents the heavy ingredients from sinking to the bottom and creating a dense, wet layer.
- Gently fold the dry ingredients into the wet ingredients using a spatula. Stop the moment you see no more streaks of flour. Over-mixing develops gluten, which leads to a rubbery, gummy texture.
- Pour the batter into the prepared pan. Place in the oven and immediately turn the heat down to 350°F (175°C). Bake for 55 to 65 minutes. The bread is done when a toothpick inserted into the center comes out with a few moist crumbs, but no wet batter.
- Let the bread cool in the pan for 10 minutes, then lift out using the parchment paper to cool completely on a wire rack.
- Prepare the ganache: Heat the heavy cream in a small saucepan until it just begins to simmer. Place the dark chocolate chips in a heat-proof bowl and pour the hot cream over them. Let sit for 5 minutes, then whisk until glossy and smooth.
- Pour the chocolate ganache generously over the cooled loaf, allowing it to drip down the sides as seen in the image. Top immediately with whole walnut halves. Slice only once the ganache has set to maintain the structural integrity of the crumb.
Notes
- To prevent heavy ingredients from sinking, toss chocolate chips and walnuts in a tablespoon of flour. Start the oven at 375 degrees Fahrenheit then immediately drop to 350 degrees Fahrenheit once the loaf is inside to ensure a better rise.


