
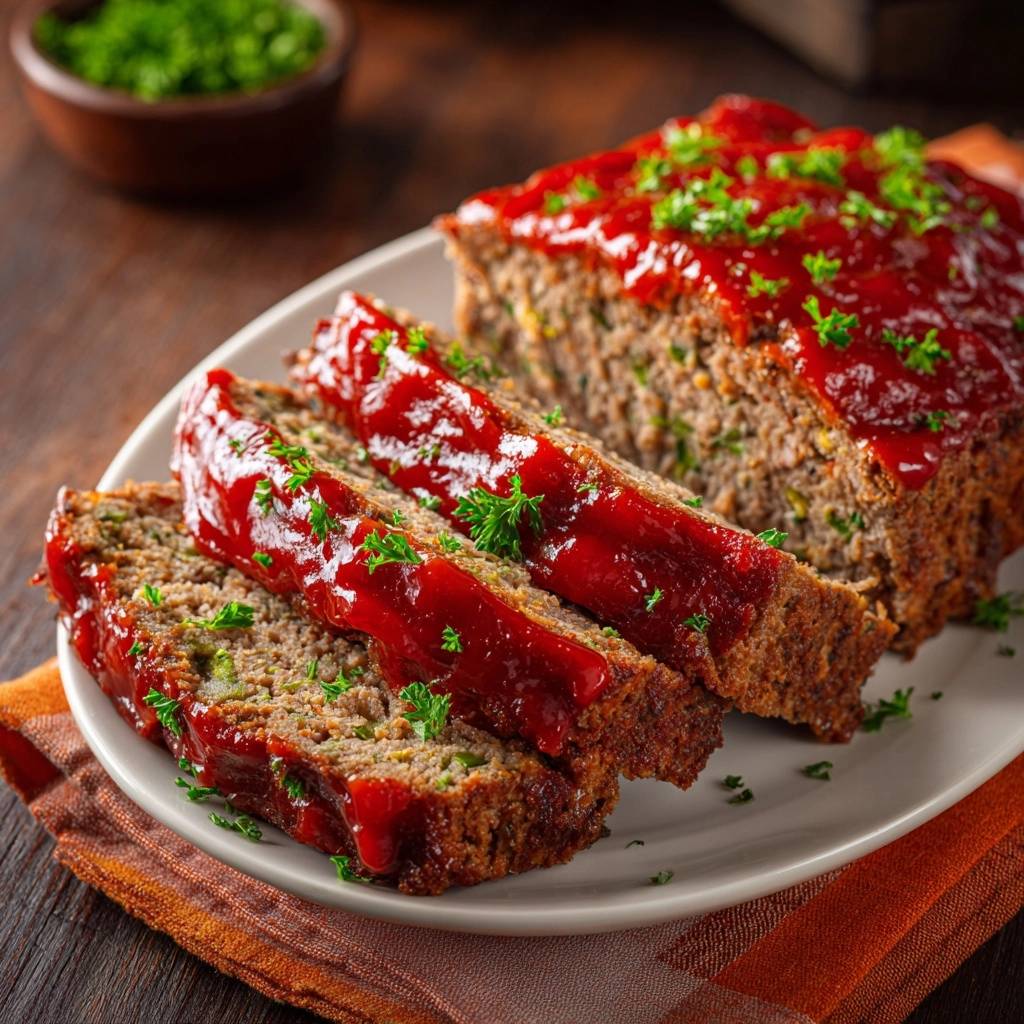
We’ve all been there: you pull a beautiful, steaming meatloaf out of the oven, let it sit for a second, and then watch in horror as it falls into a pile of crumbles the moment your knife hits the board. It’s frustrating because you want those thick, deli-style slices that hold their shape on a plate or a sandwich.
The secret to a meatloaf that stays together isn’t just “more eggs” or packing the meat down like a brick. In fact, the more you compress the meat, the tougher it gets. The real trick lies in a culinary technique called a panade, which creates a structural bond that locks in moisture while keeping the texture light and tender.
I’ve found that the most important tip for success is the “soak time.” You can’t just toss dry crumbs and milk into the bowl with the beef. You must let them mingle first until they form a thick, porridge-like paste. This paste coats the meat fibers, preventing them from knitting together into a rubbery mass while providing the “glue” needed for perfect slices.
The Structural Science of a Non-Crumbly Loaf
When you mix ground meat with salt and heat it, the proteins want to bond tightly together, squeezing out moisture like a wrung-out sponge. This is why some meatloaf ends up swimming in a pool of grease while the meat itself feels dry and grainy.
By using a panade—a mixture of starch and liquid—you introduce a barrier. The starch molecules in the breadcrumbs absorb the milk and expand, creating a gel-like matrix. This matrix physically stands between the meat proteins, so they can’t over-bond.
Unlike recipes that use dry breadcrumbs alone, which can actually suck moisture out of the meat, a hydrated panade acts as a reservoir. It keeps the loaf juicy from the inside out and provides the structural integrity needed to survive the carving knife.
Why 80/20 Ground Beef is Essential
Fat is flavor, but in meatloaf, fat is also the lubricant that prevents a “sawdust” mouthfeel. I always recommend an 80/20 or 85/15 blend of ground beef. If you go too lean, like a 90/10 blend, the loaf will likely turn out dense and crumbly because there isn’t enough fat to keep the protein strands supple.
While some fat will render out during the baking process, the portion that remains works with the panade to create a silky texture. Don’t worry about the excess grease; if you bake your loaf free-form on a sheet pan, that fat will drain away, leaving you with all the flavor and none of the oiliness.
The Role of Aromatics and Enzymes
Onions, garlic, and bell peppers do more than just add a savory punch. Onions contain sulfur compounds that help tenderize the meat as it cooks. However, the way you prep them is vital for the loaf’s structure.
If you leave the vegetables in large chunks, they create “fault lines” within the meat. When you go to slice the loaf, the knife will hit a large piece of pepper, causing the surrounding meat to break away. Finely mincing your aromatics ensures they distribute evenly, acting as flavor flecks rather than structural obstacles.
Essential Components for the Classic Glazed Meatloaf
Every ingredient in this recipe serves a specific purpose. The eggs act as a secondary binder, working alongside the panade to ensure the loaf doesn’t fall apart. Worcestershire sauce provides that deep, umami “meatiness” and acidity that balances the richness of the beef.
I also love using dried thyme because it offers an earthy backbone that doesn’t overpower the other flavors. It’s that “hidden” ingredient that makes people ask why your meatloaf tastes so much better than the standard version. Always use fresh garlic over the jarred stuff for a sharper, cleaner bite.
Selecting the Right Breadcrumbs: Panko vs. Fine
Panko breadcrumbs are the gold standard here because of their large, airy surface area. They are like little sponges that can hold significantly more milk than traditional fine, sandy breadcrumbs.
When panko hydrates, it creates a lighter, fluffier panade. This results in a meatloaf that feels substantial but never heavy or “bready.” If you only have fine crumbs, they will work, but the texture will be slightly more compact.
The Tangy Glaze: Balancing Acid and Sugar
A great glaze should be more than just heated ketchup. By adding apple cider vinegar, you introduce an essential acid that cuts through the sugar and the fat of the beef. It brightens the whole dish.
The brown sugar is there for more than sweetness; it aids in caramelization. As the loaf bakes, the sugar reacts with the heat to create a tacky, lacquered finish that clings to the meat rather than sliding off into the pan.
Step-by-Step: Preparing the Meat Mixture
Start by combining your breadcrumbs and milk in a small bowl. Give it a stir and then walk away for at least 10 minutes. You are looking for the crumbs to completely lose their crunch and turn into a thick, uniform paste.
While that soaks, prep your vegetables. Remember to keep that mince fine! Once the panade is ready, you’ll notice it looks almost like mashed potatoes. This is exactly what you want for a moist, sliceable result.
The “Gentle Fold” Mixing Technique
This is where most people go wrong. If you squeeze the meat through your fingers or mash it like dough, you’ll end up with a rubbery, tough loaf. I like to use my hands like a “claw” to gently toss the ingredients together.
Stop mixing the very second you don’t see any more streaks of plain meat or clumps of panade. It should look uniform but still have a loose, aerated texture. Over-mixing is the fastest way to ruin a good meatloaf.
Shaping for Even Heat Distribution
You have two choices: a loaf pan or a free-form loaf on a baking sheet. A loaf pan gives you those perfectly rectangular, uniform slices, which is great for sandwiches. However, the meat essentially boils in its own juices, which can lead to a mushier exterior.
I prefer the free-form method on a parchment-lined baking sheet. This allows the heat to hit all sides of the loaf, creating a better crust and allowing the glaze to wrap around the edges. Just pat it into a neat 9×5 inch rectangle with your hands.
The Two-Stage Glazing and Baking Process
Don’t put all the glaze on at once! If you do, the layer often becomes too thin or runs off before it has a chance to set. I apply half of the glaze at the beginning to let those flavors bake into the top layer of the meat.
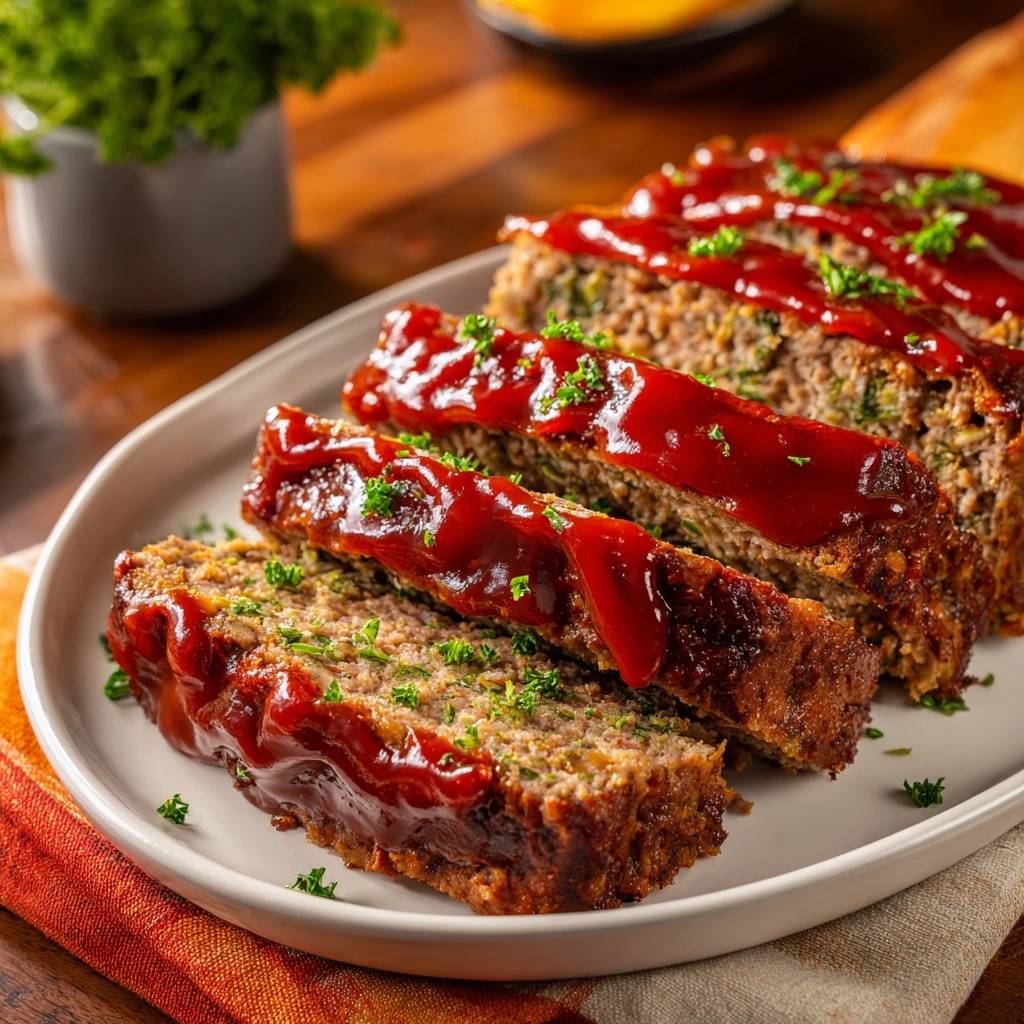
About 15 minutes before the loaf is finished, I pull it out and apply the remaining glaze. This second coat creates that thick, vibrant, “lacquered” look that makes the dish so visually appealing. It’s the difference between a dull brown loaf and a showstopper.
Monitoring Internal Temperature for Safety and Juice
The only way to truly know if your meatloaf is done is with an instant-read thermometer. You are aiming for an internal temperature of 160°F. If you go much higher, the proteins will tighten up and the loaf will start to dry out.
Keep in mind “carry-over cooking.” If you pull the loaf at 155°F and tent it with foil, the temperature will usually rise to 160°F as it rests. This is the pro move for the juiciest possible meat.
Avoiding Common Meatloaf Mistakes
If your meatloaf “weeps” a lot of clear liquid or grease, it usually means the panade wasn’t thick enough or the meat was overworked. If the glaze is burning, your oven rack might be too high; move it to the center position to ensure the sugar in the glaze caramelizes slowly.
Another common issue is a “mushy” center. This happens if the vegetables weren’t drained (if using frozen) or if too much milk was added. Stick to the measurements, and your loaf will have the perfect balance of moisture and firmness.
The 15-Minute Resting Rule
I cannot stress this enough: do not touch that meatloaf for at least 15 minutes after it leaves the oven. When meat cooks, the juices are pushed toward the center. If you cut it immediately, those juices will pour out onto the board, leaving the meat dry and the structure weak.
During the rest, the proteins relax and reabsorb those juices. More importantly, the panade sets up as it cools slightly, acting like a stabilizer. This is the final “secret” to getting those clean, non-crumbly slices you see in professional photos.
Side Dishes to Complement the Savory Glaze
Since meatloaf is rich and savory, you want sides that offer a bit of contrast. Creamy mashed potatoes are the classic choice because they soak up any extra glaze beautifully. I like to add a bit of roasted garlic to mine for extra depth.
For something lighter, try a crisp green salad with a sharp lemon vinaigrette. The acidity of the dressing cuts right through the fat of the beef, refreshing your palate between bites. Roasted carrots or green beans with a touch of balsamic also pair wonderfully with the tangy ketchup glaze.
Make-Ahead Strategies and Storage
Meatloaf is actually a fantastic make-ahead meal. You can mix and shape the loaf up to 24 hours in advance. Wrap it tightly in plastic wrap and keep it in the fridge; this actually helps the flavors meld and the structure firm up even more before baking.
Leftovers are arguably the best part. Store them in an airtight container in the fridge for up to 3 to 4 days. For the best texture, reheat slices in a skillet with a tiny bit of butter to get the edges crispy again.
Freezing Raw vs. Cooked Meatloaf
You can freeze meatloaf either raw or cooked. If freezing raw, shape the loaf and wrap it in a double layer of plastic wrap followed by aluminum foil to prevent freezer burn. Thaw it completely in the fridge before baking as directed.
If freezing cooked slices, wrap them individually. This makes it easy to grab a single serving for a quick lunch. To reheat without drying it out, place the slice in a baking dish with a tablespoon of water or beef broth, cover with foil, and warm at 300°F until heated through.
Expert Troubleshooting
Can I use ground turkey instead of beef?
Yes, but you need to be careful. Ground turkey is much leaner and has a finer texture, which can lead to a dry or “mushy” loaf. I recommend using ground turkey thigh (dark meat) rather than breast meat and adding an extra tablespoon of Worcestershire sauce or a splash of olive oil to compensate for the lower fat content.
Why did my glaze slide off the meat?
This usually happens if the surface of the meat is too wet or if there is too much steam. If you use a loaf pan, the steam can get trapped and loosen the glaze. To fix this, pat the top of the meat dry before applying the first layer of glaze, or switch to the free-form baking sheet method for better surface tension.
How do I fix a meatloaf that is too wet before baking?
If your mixture feels more like a thick batter than a moldable loaf, you likely had very “wet” vegetables or slightly too much milk. Don’t panic! Just add more breadcrumbs, one tablespoon at a time, until the mixture holds its shape when you form a ball. Let it sit for 5 minutes after adding extra crumbs so they can hydrate.
Can I make this without a loaf pan?
Absolutely! In fact, many chefs prefer it. Simply line a baking sheet with parchment paper and shape the meat mixture into a 9×5 inch rectangle with your hands. This “free-form” style allows for more caramelization on the sides and makes it much easier to drain away excess fat during cooking.
How do I get a darker, more caramelized crust?
If your glaze looks a bit pale at the end of the cooking time, turn on your broiler for the last 2 to 3 minutes of baking. Watch it very closely, as the sugar in the glaze can go from caramelized to burnt in seconds. This will give you that deep, dark, professional finish.
Classic Glazed Meatloaf
Course: Main CourseCuisine: AmericanDifficulty: easy6
servings15
minutes1
hour75
MinutesAmerican
Ingredients
2 lbs ground beef (80/20 or 85/15 blend for moisture)
1 cup plain panko or fine breadcrumbs
1/2 cup whole milk
2 large eggs, beaten
1/2 cup finely chopped yellow onion
1/2 cup finely chopped green bell pepper
2 cloves garlic, minced
1 tablespoon Worcestershire sauce
1 teaspoon salt
1/2 teaspoon black pepper
1/2 teaspoon dried thyme
Glaze:
3/4 cup ketchup
3 tablespoons brown sugar
1 tablespoon apple cider vinegar
1 teaspoon garlic powder
Garnish:
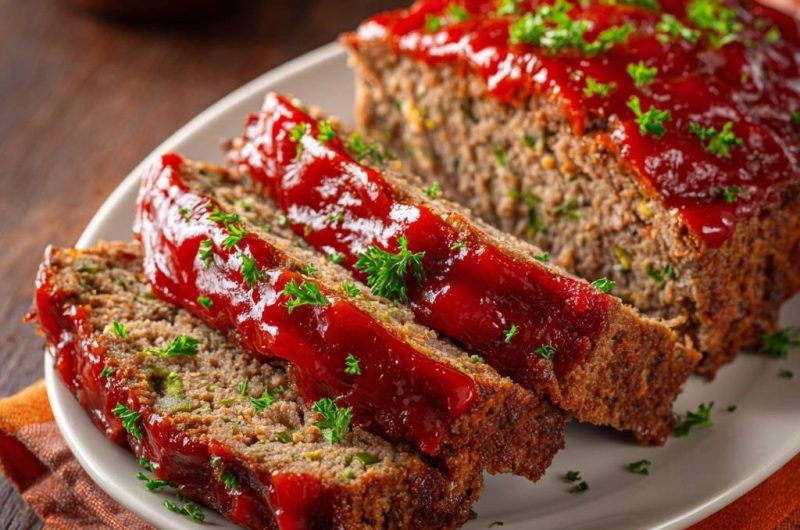
1/4 cup fresh parsley, finely chopped
Directions
- Preheat your oven to 350°F (175°C). Line a baking sheet with parchment paper or lightly grease a 9×5 inch loaf pan.
- In a small bowl, combine the breadcrumbs and milk. Let this sit for 5 to 10 minutes until it forms a thick paste (the panade). This is the key to preventing a crumbly texture.
- In a large mixing bowl, combine the ground beef, onion, bell pepper, garlic, salt, pepper, thyme, Worcestershire sauce, beaten eggs, and the milk-soaked breadcrumbs.
- Use your hands to mix the ingredients just until combined. Do not overwork the meat; over-mixing leads to a dense, rubbery loaf.
- Shape the mixture into a loaf on the prepared baking sheet or press gently into the loaf pan.
- In a small bowl, whisk together the ketchup, brown sugar, vinegar, and garlic powder. Spread half of this glaze evenly over the top of the meatloaf.
- Bake for 45 minutes. Remove from the oven and generously spread the remaining glaze over the top to create the thick, vibrant red layer seen in the photo.
- Bake for an additional 15-20 minutes or until the internal temperature reaches 160°F.
- Crucial Step: Let the meatloaf rest for at least 15 minutes before slicing. This allows the juices to redistribute and the panade to set, ensuring the clean, non-crumbly slices pictured.
- Garnish heavily with fresh chopped parsley and serve.
Notes
- The secret to clean slices is letting the meatloaf rest for 15 minutes after baking. Avoid over-mixing the meat to prevent a dense or rubbery texture.


