
Imagine pulling a bubbling, golden-brown tray from the oven, only to find a pool of green liquid swirling at the bottom. It’s a common heartbreak for home cooks, but it doesn’t have to be your reality. The secret to a thick, restaurant-quality dip lies entirely in moisture control and the perfect emulsion of fats.
You want a dip that clings to a chip rather than sliding off in a watery mess. By mastering a few simple prep techniques, you can ensure every bite is rich, velvety, and packed with flavor. This recipe focuses on a “bone-dry” vegetable prep that guarantees a scoopable masterpiece every single time.
The real trick to professional results is the temperature of your base ingredients. If you try to mix cold cream cheese, you’ll end up with tiny white lumps that never quite melt away. Always let your cream cheese sit on the counter for at least an hour until it’s completely soft to the touch.
The Science of Moisture Control in Vegetable Dips
Spinach and artichokes are naturally high in water, which is held within their cellular walls. When you heat these vegetables in a creamy base, those cells break down and release moisture. If that water has nowhere to go, it separates from the fats in the cheese and creates a soupy disaster.
Frozen spinach is particularly notorious because the freezing process creates ice crystals that puncture the cell walls. Therefore, once it thaws, the water is just waiting to escape. The “Squeeze and Dry” method isn’t just a suggestion; it’s a culinary necessity to keep the dip stable and thick.
Artichokes also carry surface brine from the canning process. If you don’t pat them dry, that acidic liquid can cause the dairy in your dip to curdle slightly. Taking two minutes to properly dehydrate your vegetables ensures the cream cheese and mozzarella can bond perfectly without interference.
Why Frozen Spinach Outperforms Fresh in This Recipe
While fresh spinach is great for salads, frozen spinach is actually the superior choice for a dense, flavorful dip. Frozen spinach is blanched before freezing, which collapses the bulky fibers and concentrates the earthy flavor. You would need to cook down several pounds of fresh leaves to get the same volume as one small frozen box.
Because it’s already cooked, frozen spinach has a much softer texture that blends seamlessly into the cheese. It provides a consistent green fleck throughout the dish without any tough stems or chewy bits. Just make sure it’s fully thawed before you start the squeezing process.
Essential Components for a Creamy Baked Spinach Artichoke Dip
The foundation of this dip relies on a trio of fats: cream cheese, sour cream, and mayonnaise. Full-fat cream cheese provides the structural integrity and thick “body” of the dip. However, using low-fat versions often results in a grainy texture because they contain more stabilizers and water.
Sour cream adds a necessary tang that cuts through the heavy fats, while mayonnaise provides a silky mouthfeel. In addition, fresh garlic is a non-negotiable for that punchy, aromatic finish. Jarred garlic often has a metallic aftertaste that can get lost or turn bitter when baked at high temperatures.
Selecting the Right Artichoke Hearts
When you’re at the grocery store, look for artichoke hearts packed in water or brine rather than oil. Marinated artichokes are delicious, but the oils and herbs they’re packed in can clash with the clean flavors of the mozzarella and garlic. Brine-packed hearts offer a bright, vinegary snap that balances the richness of the dairy.
The Three-Cheese Blend for Maximum Stretch
Mozzarella is the king of the “cheese pull” because of its high moisture content and excellent melting properties. However, it’s relatively mild in flavor, which is why we pair it with grated Parmesan. The Parmesan adds a salty, nutty depth that seasons the entire mixture from the inside out.
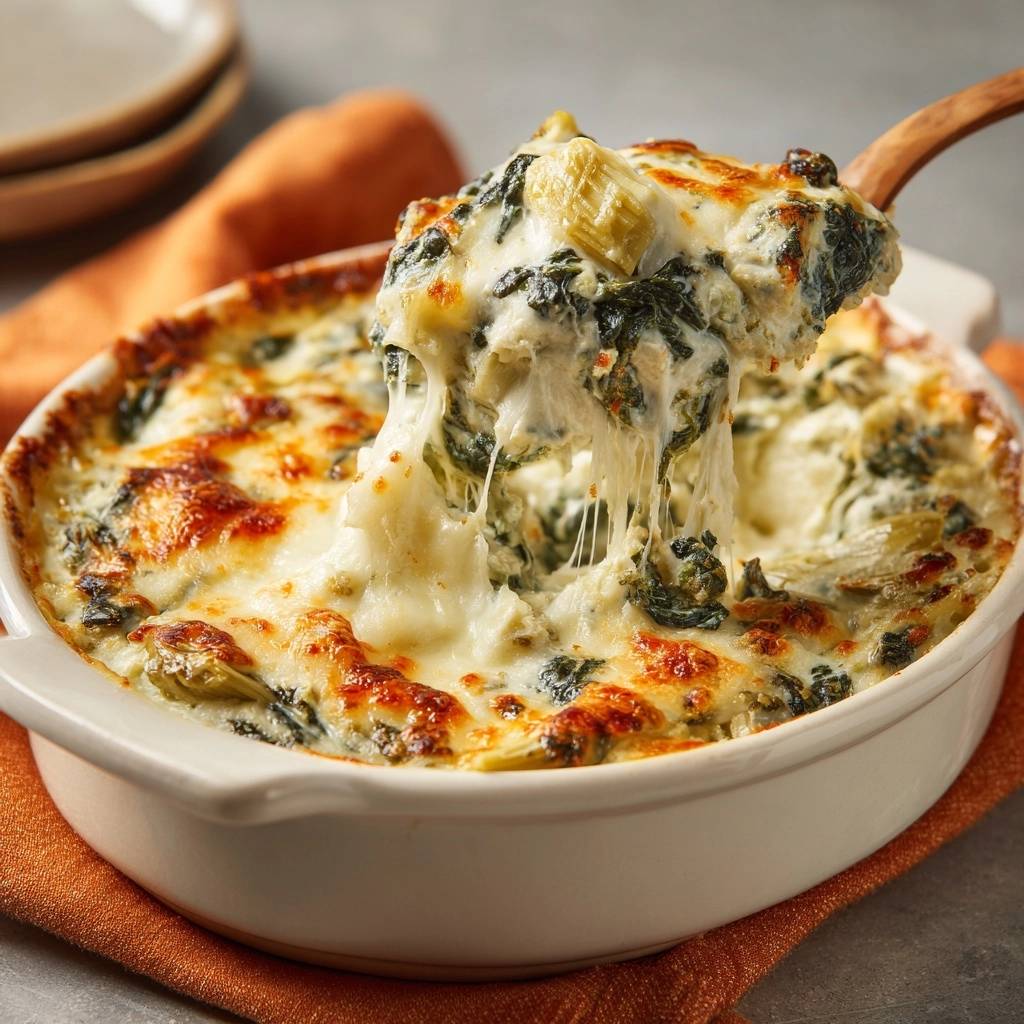
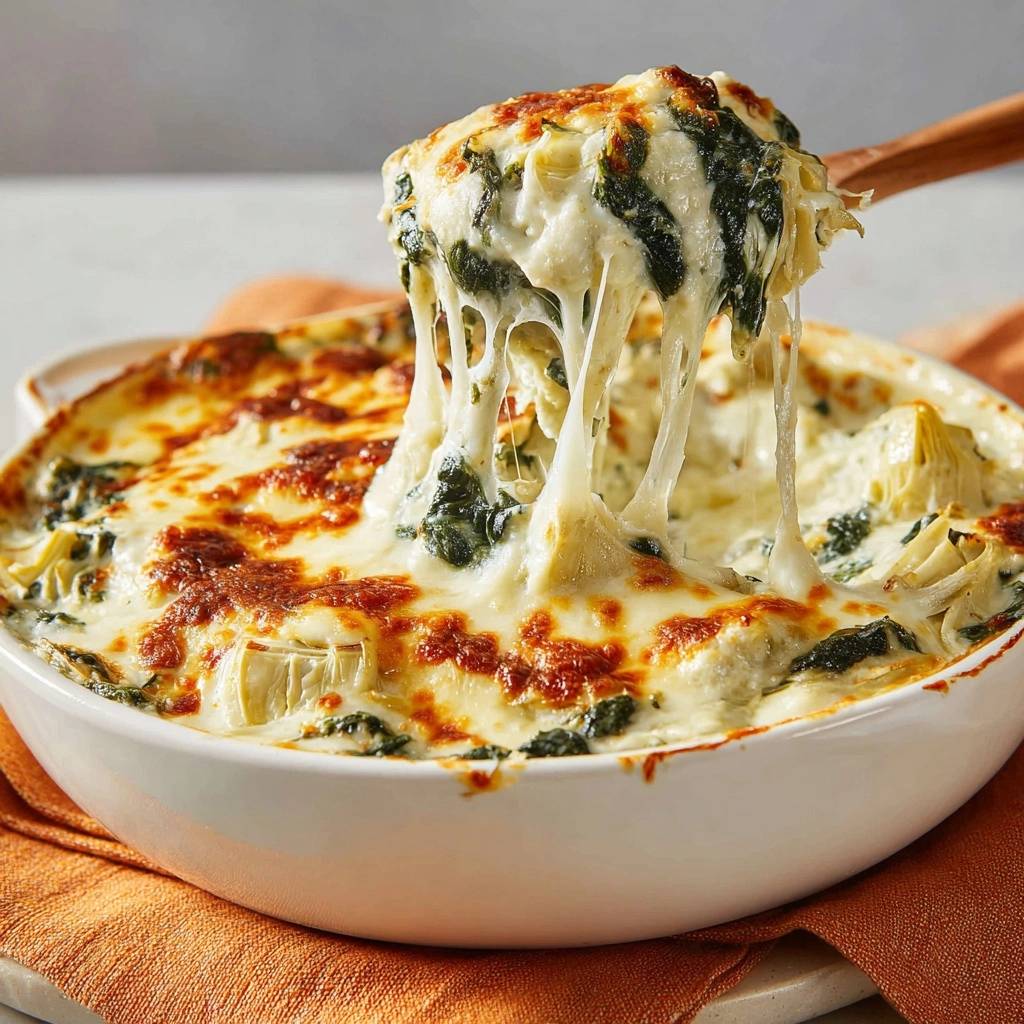
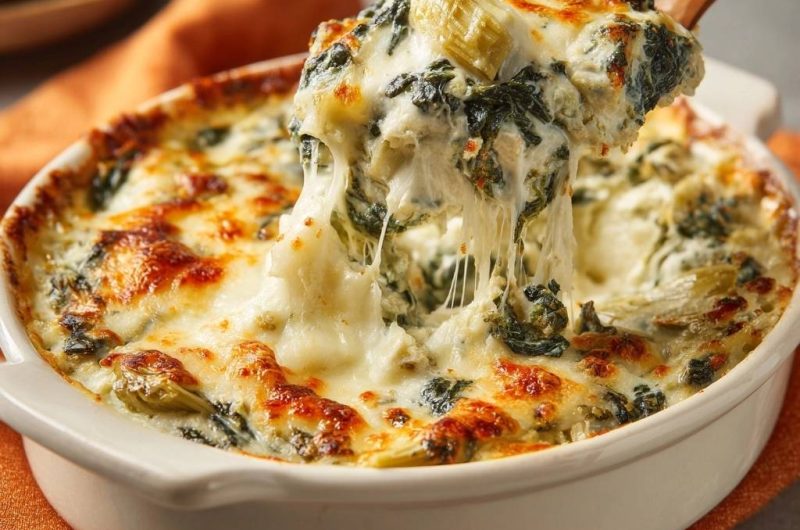
Dividing the mozzarella is a strategic move for the best texture. By mixing half into the dip, you create a stretchy interior. Placing the remaining cup on top creates a protective, cheesy crust that browns beautifully under the heat, trapping the steam inside to keep the dip moist.
Step-by-Step: Preparing the Creamy Baked Spinach Artichoke Dip
Preparing this dish is a three-phase process that moves from dehydration to emulsion. Firstly, you’ll handle the vegetables to remove every drop of excess liquid. Secondly, you’ll build a smooth flavor base before finally folding everything together for the bake.
Phase 1: Achieving Bone-Dry Spinach and Artichokes
Once your spinach is thawed, dump it into the center of a clean kitchen towel. Gather the corners and twist the towel tightly over the sink. You’ll be surprised how much green liquid comes out; keep squeezing until the spinach feels like a hard, dry ball of clay.
For the artichokes, give them a rough chop first. Spread the pieces out on a layer of paper towels and press down firmly with another towel on top. You want to remove the surface moisture so the creamy base can actually stick to the vegetables instead of sliding off.
Phase 2: Building the Creamy Base
In your mixing bowl, start with the softened cream cheese alone. Beat it with a spatula or hand mixer until it’s fluffy. Then, add the sour cream and mayonnaise, stirring until the mixture looks like a smooth, glossy frosting without a single lump in sight.
Next, stir in your aromatics: the minced garlic, onion powder, salt, and pepper. Adding the spices to the wet base before the vegetables ensures that the flavor is distributed evenly. You won’t have to worry about biting into a huge clump of salt or a dry pocket of onion powder.
Phase 3: Assembly and Even Distribution
Now, gently fold in your dry spinach, chopped artichokes, and the first half-cup of mozzarella. Use a folding motion rather than aggressive stirring so you don’t mash the artichokes into a paste. You want those distinct chunks of vegetable to provide texture in every bite.
Spread the mixture into your baking dish, smoothing the top with the back of a spoon. Finally, sprinkle that thick layer of mozzarella over the top. Make sure you cover the edges well, as the cheese at the perimeter will get the crispiest and most flavorful during the bake.
Thermal Execution: Baking and the Broiler Finish
Baking at 375°F is the “sweet spot” for this appetizer. It’s hot enough to get the dip bubbling and the garlic mellowed, but not so hot that the mayonnaise breaks down into oil. You’ll know it’s ready when the edges are vigorously bubbling and the center is hot to the touch.
To get that iconic restaurant look, don’t skip the broiler finish. Switch your oven to broil for the last two minutes of cooking. Stay right there and watch it; the cheese will go from pale to perfectly toasted with deep brown spots in a matter of seconds.
Troubleshooting Common Dip Textures
If you notice your dip looks a bit oily when it comes out, it usually means the cheese was overheated or the mayonnaise separated. A quick, gentle stir can often re-incorporate those fats. However, if the dip feels too thick or stiff, you can stir in a tablespoon of heavy cream before it goes into the oven.
Grainy textures are often caused by using pre-shredded cheese from a bag. Those products are coated in potato starch or cellulose to prevent clumping, which can interfere with a smooth melt. For the absolute best results, buy a block of mozzarella and grate it yourself at home.
Flavor Variations and Ingredient Swaps
This recipe is a fantastic canvas for your own personal touches. If you like a bit of heat, add a teaspoon of red pepper flakes or a dash of your favorite hot sauce to the creamy base. For a more sophisticated, nutty profile, try swapping the mozzarella for Gruyère or Fontina cheese.
You can also boost the umami by adding a tablespoon of finely chopped sun-dried tomatoes or a squeeze of lemon juice for extra brightness. If you want a bit of crunch, some people love topping the cheese layer with a handful of panko breadcrumbs tossed in melted butter before baking.
Optimal Pairings for a Rich Appetizer
While standard tortilla chips work, this dip is quite heavy and can snap thin chips easily. Sturdy options like pita chips or toasted baguette rounds are much better for heavy scooping. To toast a baguette, just slice it thin, brush with olive oil, and bake at 350°F for about 8 minutes.
If you want a lighter option, raw vegetables are a brilliant pairing. The snap of a cold radish, the crunch of a celery stick, or the bitter edge of an endive leaf cuts through the richness of the cheese beautifully. It makes the whole appetizer feel a bit more balanced and fresh.
Make-Ahead Strategies and Storage Logistics
You can easily assemble this dip up to 24 hours in advance. Just cover the unbaked dish tightly with plastic wrap and keep it in the fridge. When you’re ready to eat, let it sit on the counter for 20 minutes to take the chill off before popping it into the oven.
Leftovers should be stored in an airtight container in the refrigerator for up to three days. I don’t recommend freezing this dip, as the emulsion of sour cream and mayo will break upon thawing, leaving you with a grainy, oily mess. To reheat, use the oven or a toaster oven at 300°F until warmed through.
Expert Troubleshooting
Why is my dip oily on top?
Oiliness usually happens when the fats in the cheese or mayonnaise get too hot and separate. This can also occur if you use a lower-quality mayonnaise that contains a lot of fillers. To fix it, give the dip a gentle stir to re-emulsify the fats, or simply dab the top with a paper towel before serving.
Can I use Greek yogurt instead of sour cream?
Yes, you can substitute Greek yogurt for sour cream at a 1:1 ratio. However, keep in mind that Greek yogurt is more acidic and has less fat, so the dip will have a sharper tang and a slightly less creamy mouthfeel. Stick to full-fat Greek yogurt to maintain as much richness as possible.
How do I prevent the garlic from being too sharp?
If you find raw garlic too pungent, you can microplane the garlic cloves so they turn into a fine paste that melts into the sauce. Alternatively, briefly sauté the minced garlic in a teaspoon of olive oil for 60 seconds before adding it to the cream cheese. This mellows the bite and brings out a sweeter flavor.
What is the best dish for even baking?
A ceramic or glass baking dish is ideal for this recipe because they distribute heat evenly and hold onto it well. A small cast-iron skillet also works beautifully and creates extra-crispy edges. Avoid thin metal pans, as they can cause the bottom of the dip to scorch before the cheese on top has melted.
Creamy Baked Spinach Artichoke Dip
Course: AppetizerCuisine: AmericanDifficulty: easy8
servings15
minutes25
minutes40
Minutes285
kcalAmerican
Ingredients
10 ounces frozen chopped spinach, thawed
14 ounces canned artichoke hearts, drained and chopped
8 ounces cream cheese, softened to room temperature
1/2 cup sour cream
1/4 cup mayonnaise
2 cloves garlic, minced
1 teaspoon onion powder
1/2 teaspoon salt
1/4 teaspoon black pepper
1 1/2 cups shredded mozzarella cheese, divided (for that extra-cheesy pull)
1/2 cup grated parmesan cheese
Directions
- Preheat your oven to 375 degrees F (190 degrees C).
- The most critical step to prevent a watery dip: Place the thawed spinach in a clean kitchen towel or several layers of paper towels. Twist and squeeze with all your might until no more liquid comes out. The spinach should look like a dry, compact ball.
- Place the chopped artichokes on paper towels and pat them firmly to remove all surface brine and moisture.
- In a large mixing bowl, beat the softened cream cheese, sour cream, and mayonnaise until completely smooth and no lumps remain.
- Stir in the minced garlic, onion powder, salt, pepper, and parmesan cheese.
- Fold in the bone-dry spinach and the artichokes. Add 1/2 cup of the mozzarella cheese and mix until well combined.
- Spread the mixture evenly into a small oven-safe baking dish.
- Sprinkle the remaining 1 cup of mozzarella over the top in an even layer to ensure full coverage.
- Bake for 20 to 22 minutes until the dip is bubbly around the edges.
- For the Visual Finish: Turn the oven to Broil for the final 2-3 minutes. Watch closely until the cheese develops the deep golden-brown toasted spots shown in the photo.
- Remove from the oven and let sit for 5 minutes to set before serving with toasted baguette slices or sturdy chips.
Notes
- The secret to a thick dip is the squeeze and dry method for the spinach and artichokes to eliminate excess water.


