
You’ve likely experienced the disappointment of a store-bought dip that looks promising in the tub but turns into a watery, thin mess after sitting on the snack table for twenty minutes. Most people assume that runniness is just the nature of dairy-based appetizers, but it’s actually a failure of structure. A professional-grade dip should be thick, stable, and sturdy enough to stand up to the heaviest ridged potato chip without breaking.
The secret to achieving that elusive, fluffy consistency lies in the physics of aeration and temperature control. By understanding how to manipulate the proteins in cream cheese, you can create a dip that stays peaked and beautiful from the first scoop to the last. We’re going to dive deep into the mechanics of a perfect emulsion to ensure your next party platter is a total success.
The real trick to this recipe is the two-minute solo whip of the cream cheese. Most home cooks rush this step by adding all the ingredients at once, which leads to a heavy, dense base. When you whip the cream cheese alone first, you’re building a microscopic scaffolding of air that supports the heavier sour cream and aromatics later on.
The Physics of a Stable Creamy Dip
To understand why this Creamy Chive and Onion Dip works, we have to look at the molecular level of the dairy. Full-fat cream cheese is an emulsion of milk fat and water held together by a network of proteins. When this dip “weeps” or gets runny, it’s undergoing a process called syneresis, where the protein network collapses and squeezes out the liquid.
Therefore, we use mechanical aeration to prevent this collapse. By whipping the cream cheese at room temperature, you’re stretching those protein strands and trapping air bubbles. This creates a physical barrier that makes it much harder for the water to escape. In addition, the fat content acts as a stabilizer, which is why using high-quality, full-fat ingredients is essential for a dip that holds its shape.
Furthermore, the interaction between the chilled sour cream and the room-temperature cheese is a delicate dance. If you dump cold sour cream into the mix too fast, the fat in the cream cheese will seize up and create lumps. By adding it slowly, you maintain a smooth, stable emulsion that feels velvety on the tongue but remains firm on the chip.

Essential Components for Chive and Onion Dip
The foundation of this recipe relies on 16 ounces of full-fat cream cheese and 1/2 cup of chilled sour cream. You might be tempted to reach for the “light” versions, but I strongly advise against it. Low-fat dairy contains more water and fillers, which will almost certainly lead to a runny dip that lacks the structural integrity needed for dipping.
The sour cream provides more than just moisture; it brings a necessary lactic acid tang. This acidity is vital because it cuts through the heavy richness of the cream cheese, brightening the overall flavor profile. Without that sharp note, the dip can feel one-dimensional and overly coating on the palate.
In addition, the temperature of these ingredients is a key factor. Your cream cheese must be truly soft to the touch before you begin. If it’s even slightly cold in the center, it won’t aerate properly, and you’ll end up with a grainy texture rather than a cloud-like finish.
Fresh Chives vs. Dried Minced Onions
This recipe uses a two-pronged approach to onion flavor. Fresh chives are essential for their volatile oils, which provide a bright, grassy aroma and a beautiful green color. However, fresh chives alone don’t provide that deep, savory “onion” backbone we crave in a classic dip.
That’s where the dried minced onions come in. These little bits act as moisture sponges within the dip. As the mixture rests, the dried onions pull a tiny amount of moisture from the dairy, rehydrating themselves while simultaneously thickening the base. This results in a concentrated, savory bite that fresh onions simply can’t replicate without watering down the texture.
The Role of Granulated Garlic and Sea Salt
While I usually advocate for fresh garlic, this is one instance where the powdered version is superior. Fresh raw garlic can be incredibly harsh in a cold dairy dip, often becoming more pungent and bitter as it sits. Granulated garlic distributes evenly and provides a mellow, toasted flavor that complements the chives perfectly.
Sea salt is the final piece of the puzzle. It doesn’t just make the dip salty; it actually enhances the natural sweetness of the cream and the earthiness of the chives. I prefer sea salt over table salt because the larger grains provide a cleaner flavor without any metallic aftertaste.
Step-by-Step: Whipping the Perfect Base
Start by placing your softened cream cheese into a large bowl. You want to use a hand mixer on medium-high speed for a full two minutes. Don’t stop early! You’ll notice the cheese transform from a dense block into a pale, fluffy mass that almost looks like frosting.
During this time, you are performing mechanical aeration. You’re looking for the cheese to increase slightly in volume and develop a matte finish. If the cheese still looks shiny and yellow, keep whipping. This step is the insurance policy against a runny dip, as it builds the “peaks” that will hold your toppings later.
Once the cream cheese is sufficiently aerated, scrape down the sides of the bowl with a spatula. You want to ensure every bit of cheese is incorporated so you don’t find any dense lumps in your final product. The base should be so light that it feels effortless to move the mixer through it.
The Emulsion Phase: Integrating Sour Cream
Now comes the most critical part of the process. Turn your mixer down to the lowest setting. You’re going to add the chilled sour cream one tablespoon at a time. This might feel tedious, but it’s the only way to ensure a perfect emulsion between the warm cheese and the cold cream.
If you add the sour cream all at once, the temperature shock can cause the fat molecules to “crash,” leading to separation. By integrating it slowly, you’re allowing the temperatures to equalize gradually. This keeps the dip thick and prevents the “weeping” effect that often plagues homemade recipes.
As you mix, watch the texture closely. It should remain thick and scoopable. If at any point it starts to look like it’s thinning out too much, stop the mixer and finish the last few tablespoons by hand. You have total control over the final consistency here.
Folding Techniques for Maximum Aeration
After the base is smooth, put the electric mixer away. It’s time to switch to a silicone spatula for the “folding” phase. Add your dried onions, garlic powder, salt, pepper, and most of the fresh chives. Use a gentle over-and-under motion to incorporate these ingredients.
The goal here is to distribute the flavors without collapsing all those lovely air bubbles you just whipped into the cheese. If you continue to use the mixer, you’ll beat the air right back out, and the dip will lose its fluffy, professional texture. Think of it like folding egg whites into a cake batter.
Stop folding as soon as the spices are evenly distributed. You should still see those beautiful “peaks” and “valleys” in the mixture. This texture isn’t just for looks; it creates more surface area for the chips to grab onto, ensuring a perfect ratio of dip to chip in every bite.
Why Chilling Prevents a Runny Consistency
I know it’s tempting to dive in immediately, but this dip needs a 30-minute nap in the refrigerator. This rest period serves two vital purposes. First, it allows the dairy proteins to “set” and firm up after being agitated by the mixer. This ensures the dip is cold and crisp when served.
Secondly, the 30-minute window gives the dried minced onions time to rehydrate. As they soak up a tiny bit of the moisture from the sour cream, they soften into tender, flavorful bits. This process naturally thickens the dip even further, creating a consistency that won’t break even the thinnest chip.
If you skip the chilling step, the dip might feel a bit “loose” and the onion flavor won’t be as deep. Patience is the final ingredient here. Cover the bowl tightly with plastic wrap to prevent the dip from picking up any other odors from your fridge while it sets.
Troubleshooting Common Texture Issues
Sometimes, despite our best efforts, the texture isn’t quite right. If your dip feels way too stiff—perhaps because your cream cheese was exceptionally high in protein—don’t panic. You can fold in a single teaspoon of heavy cream or milk to loosen it up just enough to be scoopable.
On the flip side, if you accidentally over-mixed and the dip looks a bit flat, you can try to save it by chilling it for an extra hour. The cold will help the fats solidify, which can mimic some of that lost structure. However, the best fix for a flat dip is to serve it in a smaller, deeper bowl to give it the illusion of height.
Another common issue is graininess. This usually happens if the cream cheese wasn’t fully softened before whipping. If you see tiny white lumps, you can try to pass the mixture through a fine-mesh sieve, though this will deflate the air. It’s usually better to just embrace the “rustic” look and promise yourself to let the cheese sit out longer next time!
Flavor Variations and Herb Swaps
Once you’ve mastered the base, you can start playing with the flavors. If you want a bit more zing, try adding a teaspoon of fresh lemon zest. The citrus oils provide a bright, floral note that pairs beautifully with the chives. Just avoid using the juice, as the extra liquid can compromise the thickness.
For those who like a bit of hidden heat, swap the black pepper for white pepper. White pepper has a fermented, earthy funk that adds complexity without the visible black flecks. You could also add a pinch of smoked paprika if you want a subtle, woodsy undertone that mimics a charcoal grill.
If you can’t find chives, the very tops of thin green onions (scallions) make a great substitute. Make sure to use only the dark green parts and slice them as thinly as possible. They have a slightly more aggressive “bite” than chives, but they still provide that essential fresh crunch.
Optimal Pairings for Creamy Onion Dip
While the classic ridged potato chip is the gold standard, this dip is sturdy enough for a variety of vessels. Thick-cut chips are preferred because they have the structural strength to plow through the dense cream cheese base without snapping in half. Look for “kettle-cooked” varieties for the best experience.
If you want to go the vegetable route, choose high-crunch options. Snap peas, sliced radishes, and blanched asparagus spears are fantastic. The sweetness of the snap peas, in particular, plays very well against the salty, savory notes of the onion and garlic.
Artisanal crackers or toasted baguette rounds also work well. If you’re using bread, make sure it’s toasted until quite crisp. A soft piece of bread will simply tear when it hits this thick dip. You want something that provides a loud “crunch” to contrast with the velvety dairy.
Make-Ahead Strategies and Storage Safety
This is an excellent make-ahead appetizer. In fact, it often tastes better the next day because the flavors have had more time to meld. You can store it in an airtight container in the refrigerator for up to four days. Just give it a quick, gentle stir with a spoon before serving to refresh the texture.
However, do not freeze this dip. When dairy emulsions freeze and then thaw, the fat and water separate completely, leaving you with a grainy, watery mess that cannot be fixed. Always keep it in the coldest part of your fridge, away from the door, to maintain peak freshness.
If you’re serving this at a party, remember the two-hour rule. Dairy-based dips shouldn’t sit out at room temperature for more than two hours. If your party is going longer, keep the main bowl in the fridge and only put out small batches at a time to keep everything safe and chilled.
Expert Tips for Professional Presentation
Presentation is what separates a “bowl of dip” from a “centerpiece appetizer.” Once you’ve transferred the dip to your serving bowl, use the back of a small spoon to create a spiral pattern. Start in the center and work your way out, pushing down slightly to create “peaks and valleys.”
These grooves aren’t just decorative; they act as little reservoirs for the extra chives you’ll sprinkle on top. That “pop of color” from the fresh herbs makes the dish look vibrant and appetizing. It signals to your guests that the ingredients are fresh and high-quality.
Finally, choose your serving vessel wisely. A shallow, wide bowl is much better than a deep, narrow one. It allows multiple people to dip at once and ensures that the “swirls” you worked so hard on are visible to everyone. A white or light-colored bowl will make the green chives stand out even more.
Frequently Asked Questions
Can I use low-fat or fat-free cream cheese for this dip?
I strongly recommend against using low-fat or fat-free versions. These products contain higher water content and chemical stabilizers to mimic the texture of fat. When you try to whip them, they often break down and become runny. For the thick, scoopable consistency that holds up to a chip, full-fat cream cheese is a non-negotiable requirement.
How long can this dip safely stay out at room temperature?
For food safety, you should not leave this dip out for more than two hours. Because it is high in dairy, it can become a breeding ground for bacteria if it gets too warm. If you are hosting a long event, I suggest placing the serving bowl inside a larger bowl filled with ice to keep it chilled, or simply refreshing the bowl with a cold batch from the fridge every hour.
Can I use an immersion blender or food processor instead of a hand mixer?
It is best to stick with a hand mixer or a stand mixer. An immersion blender or food processor is too aggressive; the high-speed blades can shear the fat molecules too much, which actually turns the dip into a liquid. The beaters of a hand mixer are designed to incorporate air, which is exactly what you need for that fluffy, aerated texture.
Why are the dried onions in my dip still a little bit crunchy?
If the onions are still crunchy, it usually means the dip hasn’t rested long enough. The dried onions need at least 30 minutes to absorb moisture from the sour cream. If you find they are still too firm, let the dip sit for another 30 minutes. In the future, make sure your dried onions are fresh; very old dried spices can sometimes become “woody” and won’t rehydrate properly.
How do I double this recipe for a large crowd?
You can easily double the recipe by using 32 ounces of cream cheese and 1 cup of sour cream. However, make sure you use a very large mixing bowl to allow for proper aeration. When doubling, you may need to whip the cream cheese for an extra minute (3 minutes total) to ensure you’ve incorporated enough air for the larger volume of dairy. The “one tablespoon at a time” rule for the sour cream becomes even more important here to maintain the emulsion.
Creamy Chive and Onion Dip
Course: AppetizerCuisine: AmericanDifficulty: easy8
servings10
minutes10
MinutesAmerican
Ingredients
16 ounces full-fat cream cheese, softened to room temperature
1/2 cup sour cream, chilled
1/4 cup fresh chives, finely minced
1 tablespoon dried minced onions (for texture and deep onion flavor)
1 teaspoon garlic powder
1/2 teaspoon sea salt
1/4 teaspoon cracked black pepper
1 bag thick-cut ridged potato chips for serving
Directions
- To solve the runny dip problem, start by placing the softened cream cheese in a large mixing bowl. Use a hand mixer on medium-high speed to whip the cream cheese alone for 2 full minutes. This incorporates air and creates a sturdy, aerated structure that prevents the dip from weeping.
- Gradually add the chilled sour cream one tablespoon at a time while continuing to mix on low speed. Adding the cold sour cream slowly to the whipped cream cheese creates a stable emulsion that locks in moisture rather than letting it separate.
- Add the dried minced onions, garlic powder, salt, and pepper. Mix on low for 30 seconds until the spices are evenly distributed.
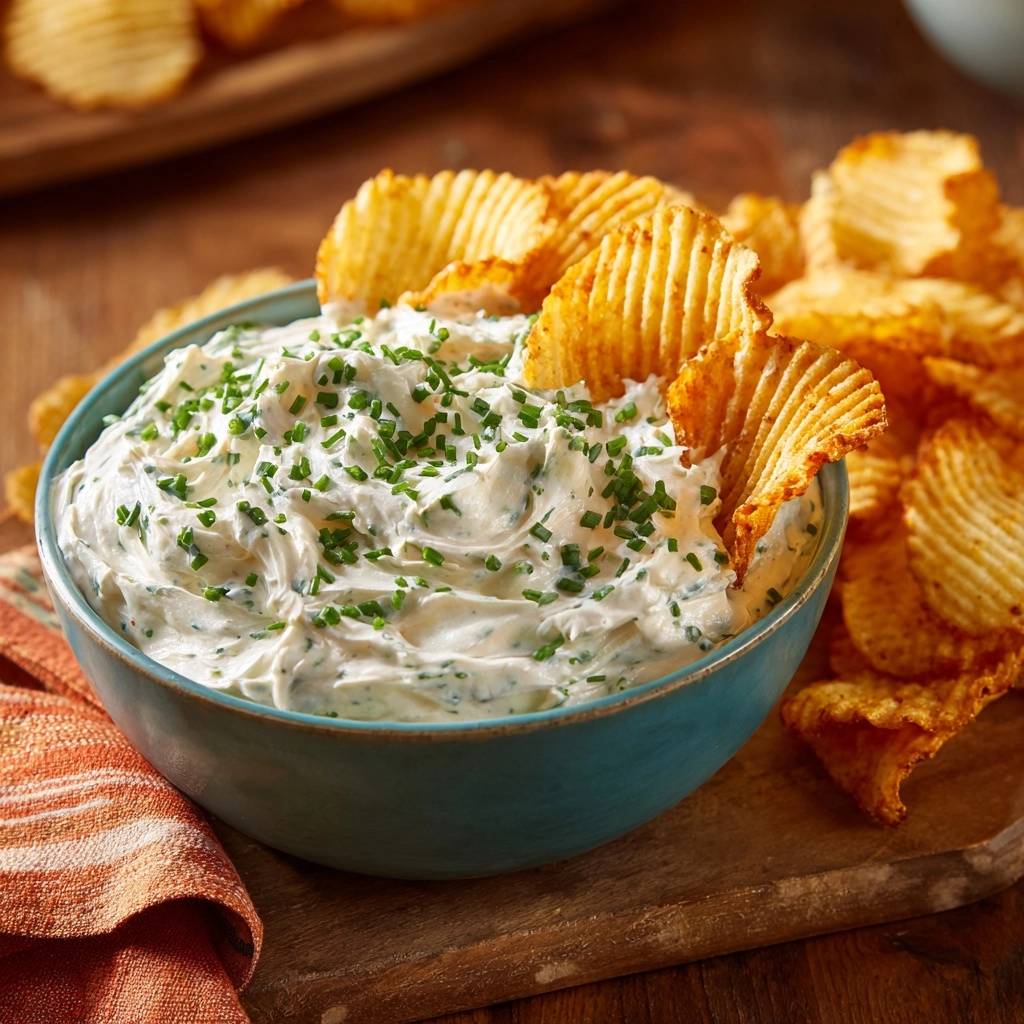
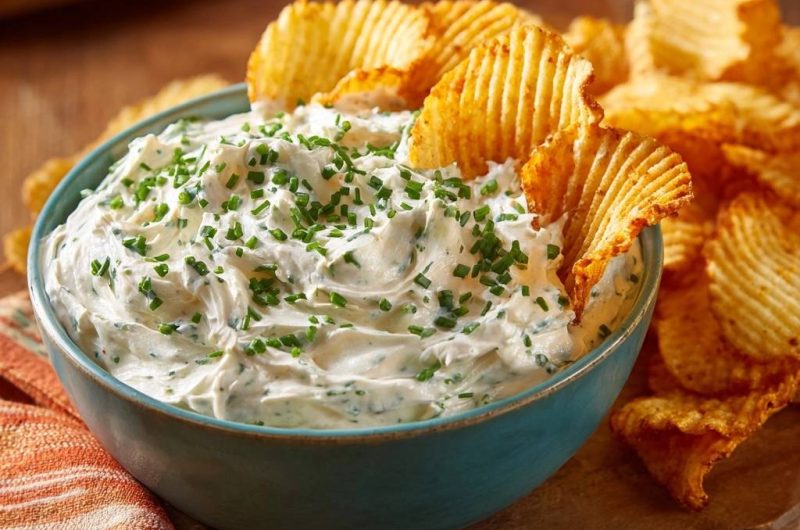
- Fold in 3/4 of the fresh minced chives using a spatula. Do not overmix at this stage to keep the air bubbles intact and maintain the “peaks” seen in the image.
- Transfer the mixture to a serving bowl. Use the back of a spoon to create decorative swirls and peaks in the dip.
- Top with the remaining fresh chives for a vibrant pop of color.
- For the best texture, let the dip sit in the refrigerator for at least 30 minutes before serving. This allows the dried onions to rehydrate slightly and the proteins to set, ensuring a thick, scoopable consistency that won’t break your chips.
- Serve with thick, ridged potato chips.
Notes
- Whip the cream cheese alone for 2 minutes to prevent weeping. Let the dip chill for 30 minutes before serving to allow dried onions to rehydrate and the structure to set.


