

Most homemade vegetable soups suffer from a disappointing, watery consistency that feels more like flavored tea than a hearty meal. You’ve likely experienced that thin, bland texture that happens when squash is simply boiled in a pot of water or broth. When you boil the vegetables, they soak up excess liquid, diluting their natural sugars and leaving the final dish tasting flat and uninspired.
This Creamy Roasted Butternut Squash Soup changes the game by focusing on moisture evaporation rather than hydration. By roasting the vegetables first, we draw out the water and concentrate the flavors, resulting in a puree so thick it can practically stand up on a spoon. The sensory experience is night and day; you get a velvety, tongue-coating richness that feels incredibly indulgent without needing a mountain of heavy thickeners.
The secret to this professional-grade texture lies in the gradual liquid integration. I’ve found that adding your broth in small increments while blending allows the vegetable fibers to emulsify perfectly with the fats. If you dump all the liquid in at once, you lose control over the viscosity, but by starting small, you ensure a dense, luxurious finish every single time.
The Science of Roasting vs. Boiling Squash
When you drop raw squash into boiling water, the temperature never exceeds 212°F, which is far too low to trigger the Maillard reaction. This chemical reaction is what creates those complex, savory-sweet flavors we love in browned foods. Boiling also forces water into the plant cells, which effectively “waters down” the soup before you even start blending.
Roasting at 400°F serves two critical purposes: it evaporates the squash’s internal moisture and caramelizes its natural sugars. As the edges of the squash cubes turn golden brown, the flavor profile shifts from simple and starchy to deep, nutty, and complex. This reduction of water content means that every spoonful of the final soup is packed with concentrated vegetable essence rather than diluted broth.
Furthermore, roasting allows you to achieve a thick consistency without relying on flour, cornstarch, or excessive amounts of cream. The roasted vegetable pulp itself becomes the thickening agent. Because the water has been driven out in the oven, the resulting puree is naturally dense, providing that signature “velvet” mouthfeel that defines a high-end bistro soup.
Essential Components for a Rich Flavor Base
Quality starts with the squash itself, and for this recipe, a 3lb butternut squash is the sweet spot for balancing yield and flavor. I always recommend using low-sodium vegetable broth because it gives you total authority over the salt levels. Since we are concentrating the flavors through roasting, a full-sodium broth can quickly become overwhelming as the liquid reduces.
Fresh thyme is non-negotiable here; the woody, earthy aroma of fresh leaves far surpasses the dusty, muted flavor of the dried variety. Additionally, using sea salt during the roasting phase is a strategic move. Sea salt helps draw moisture out of the vegetables more efficiently than standard table salt, aiding in that crucial caramelization process we’re looking for.
Selecting the Perfect Butternut Squash
When you’re at the market, look for a squash that feels surprisingly heavy for its size, which indicates a high moisture content that will concentrate well. Choose one with a matte skin rather than a shiny one, as a matte finish signifies the squash was harvested at peak maturity. I always look for a squash with a long, thick neck; this part is solid “meat” and contains no seeds, giving you more usable vegetable for your money.
Why Beef Bacon Provides the Ideal Salty Contrast
A soup this rich and sweet needs a sharp, salty counterpoint to keep your palate excited. Crispy beef bacon provides a smoky, savory crunch that cuts right through the creaminess of the roasted squash. When you render the beef bacon until it’s shattered-glass crisp, it adds a necessary textural layer that prevents the dish from feeling one-dimensional or overly soft.
Step-by-Step: Roasting for Maximum Caramelization
Preparation is key to a successful roast, so start by peeling and cubing your squash into uniform one-inch pieces. If the pieces vary too much in size, the small ones will burn before the large ones become tender. Toss them thoroughly in olive oil, salt, and pepper until every surface is glistening, which ensures even heat distribution and prevents sticking.
The most important rule is to spread your vegetables in a single, sparse layer on the baking sheet. If you crowd the pan, the vegetables will release steam and “sweat” rather than roast, ruining the caramelization. You want hot air to circulate around every single cube so the edges can crisp up and turn that beautiful deep amber color.
Don’t forget to nestle your garlic cloves among the vegetables with their skins still on. This “paper jacket” protects the delicate garlic sugars from the intense 400°F heat. Instead of becoming bitter and burnt, the garlic cloves will steam inside their skins, transforming into a mellow, buttery paste that blends seamlessly into the soup later on.
The Gradual Liquid Integration Technique
Most home cooks make the mistake of adding all their broth to the blender at once, which often results in a thin, runny mess. To maintain that “stand-up” thickness, start by adding only 1.5 cups of broth to your roasted vegetables. This creates a very thick, concentrated paste that the blender can easily whip into a perfectly smooth emulsion.
As you blend, watch the vortex in the center of the jar; if the motor is struggling or the mixture isn’t moving, add broth just a quarter-cup at a time. You are looking for a glossy, heavy ribbon of soup that holds its shape for a second when it falls back into the jar. This incremental approach gives you total control over the final viscosity of your Creamy Roasted Butternut Squash Soup.
Achieving the Signature Velvety Texture
Once your puree is smooth, transfer it to a heavy-bottomed pot over medium-low heat to finish the dish. This stovetop stage isn’t just about heating; it’s about flavor infusion. When you stir in the heavy cream and fresh thyme, the gentle heat allows the fats in the cream to pick up the herbal notes of the thyme, distributing them throughout the entire batch.
Simmer the soup for at least five minutes to allow the vegetable fibers to fully hydrate with the cream. You can perform the “spoon test” to check your progress: dip a metal spoon into the soup and pull it out. The soup should coat the back of the spoon thickly, and if you run your finger through it, the line should stay clean and sharp without any dripping.
Troubleshooting Common Soup Consistency Issues
If your soup still feels too thin after simmering, don’t panic; simply keep it on a low simmer without a lid for another 10 minutes. This allows more steam to escape, naturally thickening the base. However, if the texture feels grainy or “sandy,” it usually means the vegetables weren’t blended long enough or your blender lacks the power to break down the carrot fibers. A high-speed blender is truly the best tool for this job.
Sometimes the flavor can feel a bit “flat” even if the texture is perfect. This usually happens when there isn’t enough acidity to balance the sweetness of the roasted carrots. A tiny squeeze of fresh lemon juice or a teaspoon of apple cider vinegar can instantly brighten the roasted notes. Always taste and add a final pinch of salt after the cream is in, as dairy tends to mute seasonings.
Flavor Variations and Dietary Swaps
You can easily adapt this recipe to suit different dietary needs or flavor preferences. For a dairy-free version, coconut cream is a fantastic substitute for heavy cream, adding a subtle tropical undertone that pairs beautifully with squash. If you want a deeper, smokier profile, try adding a half-teaspoon of smoked paprika or a pinch of cumin to the vegetables before roasting.
Swapping the carrots for sweet potatoes is another great variation that results in an even denser, sweeter soup. Sweet potatoes have a higher starch content, which will make the soup feel even more filling. If you prefer a bit of heat, a dash of cayenne pepper or a swirl of chili oil on top provides a wonderful contrast to the naturally sweet base of the butternut squash.
Optimal Pairings for a Hearty Meal
To turn this soup into a full meal, serve it alongside a thick slice of toasted sourdough bread. The tanginess of the sourdough is the perfect foil for the sweet, creamy soup, and the crusty edges are ideal for mopping up every last drop. A bitter green salad, such as arugula with a light vinaigrette, also helps cleanse the palate between rich, velvety bites.
For extra texture, consider topping the bowls with roasted pumpkin seeds (pepitas) or toasted walnuts. These provide a different kind of crunch than the beef bacon and add a nice earthy flavor. If you’re feeling fancy, a few crumbles of a sharp, salty cheese like feta can add another layer of complexity that complements the roasted vegetables beautifully.
Make Ahead, Storage, and Reheating Instructions
This soup actually tastes better the next day because the flavors have more time to meld in the refrigerator. Store it in an airtight container for up to four days. Be aware that the soup will thicken significantly as it cools, often turning into a thick gel. When you reheat it, you’ll likely need to whisk in a splash of broth or water to return it to its original velvety consistency.
If you plan to freeze the soup, it’s best to do so before adding the heavy cream, as dairy can sometimes separate or become grainy when thawed. Freeze the concentrated vegetable puree in freezer-safe bags for up to three months. When you’re ready to eat, thaw it in the fridge overnight, bring it to a simmer on the stove, and then whisk in the fresh cream and thyme just before serving.
Expert Tips for Professional Presentation
To get that restaurant-quality look, use the “swirl” technique with your garnish. Pour a tablespoon of heavy cream into a small spoon and gently lay it onto the surface of the soup in a circular motion. Use a toothpick or the tip of a knife to drag through the cream, creating a marbled effect. This simple step makes the dish look incredibly sophisticated with very little effort.
Always serve this soup in warmed ceramic bowls. Because the soup is thick, it holds heat well, but a cold bowl will suck the temperature right out of it before it hits the table. Place your bowls in a low oven for a few minutes or rinse them with hot water before ladling in the soup. Top with a neat mound of the crispy beef bacon right in the center to keep it from sinking.
How to Store Leftover Fresh Thyme
Fresh thyme can dry out quickly in the fridge if left uncovered. To keep it fresh for your next batch, wrap the sprigs in a slightly damp paper towel and tuck them into a zip-top bag. This creates a humid environment that keeps the leaves hydrated and aromatic for up to two weeks, ensuring you always have vibrant herbs on hand.
Adjusting Seasoning at the Finish Line
Wait until the very end to do your final salt check. Heavy cream has a unique way of “absorbing” saltiness, so a soup that tasted perfectly seasoned before the cream might taste a bit dull afterward. Always take a final sip after the cream has simmered for a few minutes, and don’t be afraid to add one last pinch of sea salt to make the roasted flavors pop.
How long does this soup stay fresh in the refrigerator?
You can safely store this soup in an airtight container for 3 to 4 days. In fact, the flavor often improves after 24 hours as the roasted garlic and thyme fully permeate the squash puree. Just remember that it will thicken quite a bit when cold, so you may need to add a tablespoon or two of broth when reheating to loosen the texture back to its original silkiness.
Why is my butternut squash soup grainy instead of smooth?
Graininess usually stems from two things: undercooked vegetables or the type of blender used. If the carrots or squash weren’t fork-tender before blending, the fibers won’t break down completely. Additionally, a standard food processor or an older blender often lacks the RPMs to create a truly molecularly smooth puree. For the best results, use a high-speed blender and run it on the highest setting for at least 60 seconds.
Can I make this soup without a high-speed blender?
Yes, you can use an immersion blender (stick blender) directly in the pot, though the texture may be slightly more rustic. If you want that ultra-velvety finish without a high-speed blender, I recommend passing the blended soup through a fine-mesh sieve or chinois. This will catch any small fibers or bits of skin, leaving you with a perfectly smooth liquid that rivals any professional kitchen’s version.
What can I use if I don’t have heavy cream?
If you’re out of heavy cream, full-fat coconut milk is the best substitute for maintaining that rich mouthfeel. You could also use a dollop of plain Greek yogurt or sour cream stirred in at the very end, though these will add a tangy note to the soup. Avoid using skim or 1% milk, as they are too thin and may cause the soup to break or look watery rather than creamy.
Can I freeze this soup for later?
Yes, this soup freezes beautifully for up to 3 months. For the best texture, I recommend freezing the soup after blending but before adding the heavy cream. Dairy can sometimes take on a grainy texture after being frozen and thawed. When you are ready to eat, thaw the base in the refrigerator, bring it to a simmer on the stove, and then stir in the fresh cream and thyme to finish.
My soup is too sweet; how can I balance the flavor?
Butternut squash and carrots both have high natural sugar content, which intensifies during roasting. If the soup feels more like a dessert than a savory starter, add a teaspoon of an acidic ingredient like lemon juice or apple cider vinegar. The acid cuts through the sugar and fat, balancing the profile. You can also increase the amount of crispy beef bacon or add a pinch of red pepper flakes for a spicy contrast.

Creamy Roasted Butternut Squash Soup
Course: SoupCuisine: AmericanDifficulty: easy4
servings15
minutes45
minutes60
Minutes345
kcalAmerican
Ingredients
1 large butternut squash (about 3 lbs), peeled, seeded, and cubed
2 large carrots, peeled and chopped
1 yellow onion, quartered
4 cloves garlic, skin on
2 to 3 cups low-sodium vegetable broth (added incrementally)
1/2 cup heavy cream (plus extra for garnish)
6 slices crispy beef bacon, finely chopped
1 teaspoon fresh thyme leaves
1/2 teaspoon ground black pepper
1/2 teaspoon sea salt (plus more to taste)
3 tablespoons olive oil
Directions
- Preheat your oven to 400°F (200°C). This high heat is essential for the moisture-evaporation process that prevents a watery soup.
- Toss the squash, carrots, and onion in olive oil, salt, and pepper. Spread them in a single layer on a large baking sheet. Nestled the unpeeled garlic cloves among the vegetables.
- Roast for 35 to 40 minutes, tossing halfway through, until the edges are deeply browned and the squash is fork-tender. Roasting instead of boiling is the secret to the concentrated, thick texture.
- Squeeze the roasted garlic out of its skin and place all roasted vegetables into a high-speed blender.
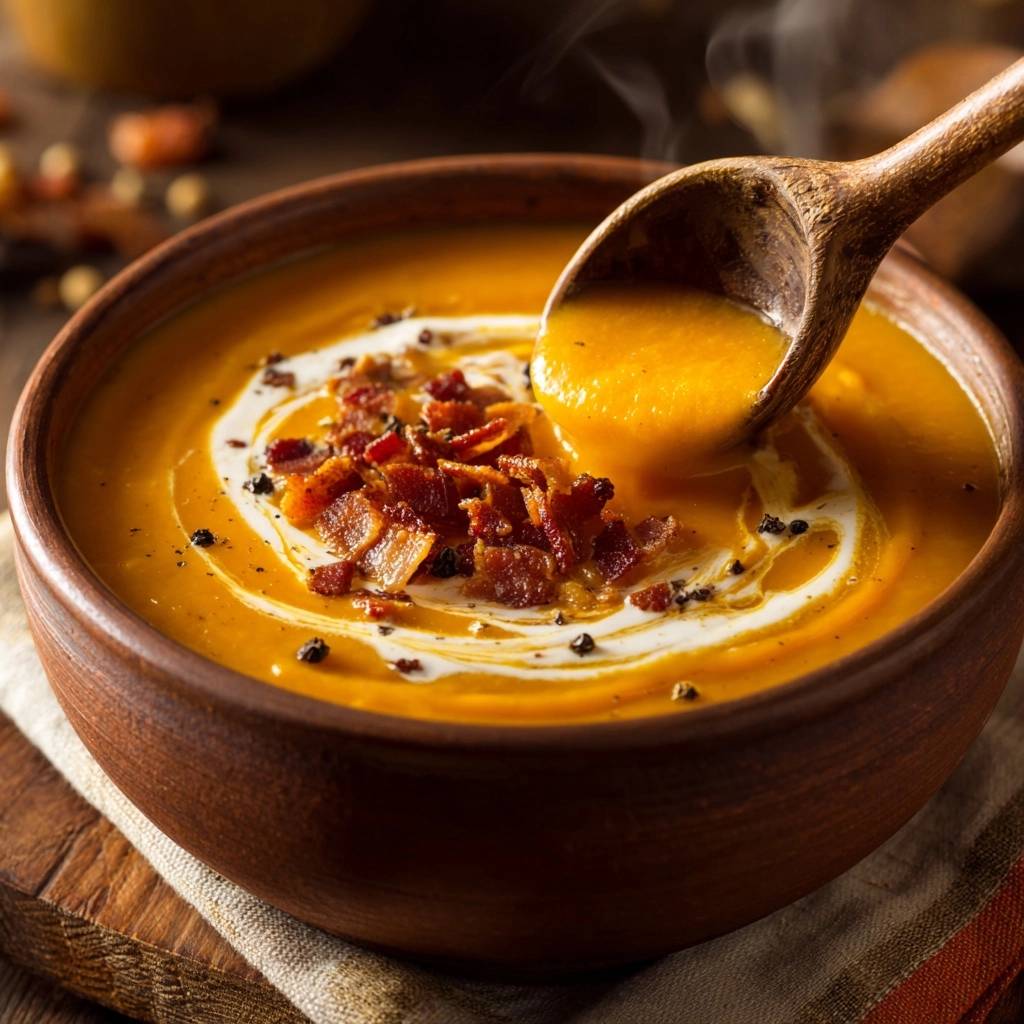
- Add only 1.5 cups of the vegetable broth to start. Blend on high until completely smooth. By adding the liquid gradually, you maintain the “stand-up” thickness seen on the spoon in the image.
- Pour the thick puree into a pot over medium-low heat. Stir in the heavy cream and fresh thyme.
- Assess the consistency: if the soup is too thick, whisk in the remaining broth 1/4 cup at a time until it reaches a velvety, pourable but heavy consistency. Simmer for 5 minutes to allow the flavors to meld.
- Ladle into deep ceramic bowls. Using a spoon, swirl a tablespoon of heavy cream into the center of each bowl. Top with a generous mound of crispy crumbled bacon, extra fresh thyme, and a crack of black pepper for the perfect salty crunch.
Notes
- To ensure the thickest consistency, add the vegetable broth incrementally during the blending process. Roasting the garlic in its skin prevents it from burning and creates a mellow, sweet flavor profile.


