
Most skillet meals promise a one-pan wonder but deliver rubbery, boiled chicken skin the moment the sauce hits the pan. You’ve likely experienced that disappointment where a beautiful sear turns into a soggy mess during the simmering process. This recipe changes that dynamic by using a specific architectural placement that protects your hard-earned crust.
The secret lies in the “Anti-Soggy” philosophy, which treats the chicken skin as a sacred barrier. By combining a high-heat sear with a controlled liquid level, you achieve a contrast between the shatteringly crisp exterior and the velvety, spice-laden sauce beneath it. It’s a balance of smoky cumin, earthy black beans, and a bright hit of lime that cuts right through the richness.
To make this work, you must pat the chicken dry with more intensity than you think is necessary. Moisture on the surface of the skin is the primary enemy of the Maillard reaction. If the skin isn’t bone-dry before it hits the oil, it will steam rather than fry, and you’ll lose that golden crunch before you even start the sauce.
The Physics of Shatteringly Crisp Chicken Skin
Achieving a professional-grade crunch on a chicken thigh isn’t about luck; it’s about heat management and fat rendering. When you place the bone-in thighs skin-side down in a hot skillet, the fat underneath the skin begins to render out. This liquid fat essentially fries the skin from the inside out, creating a rigid, golden structure.
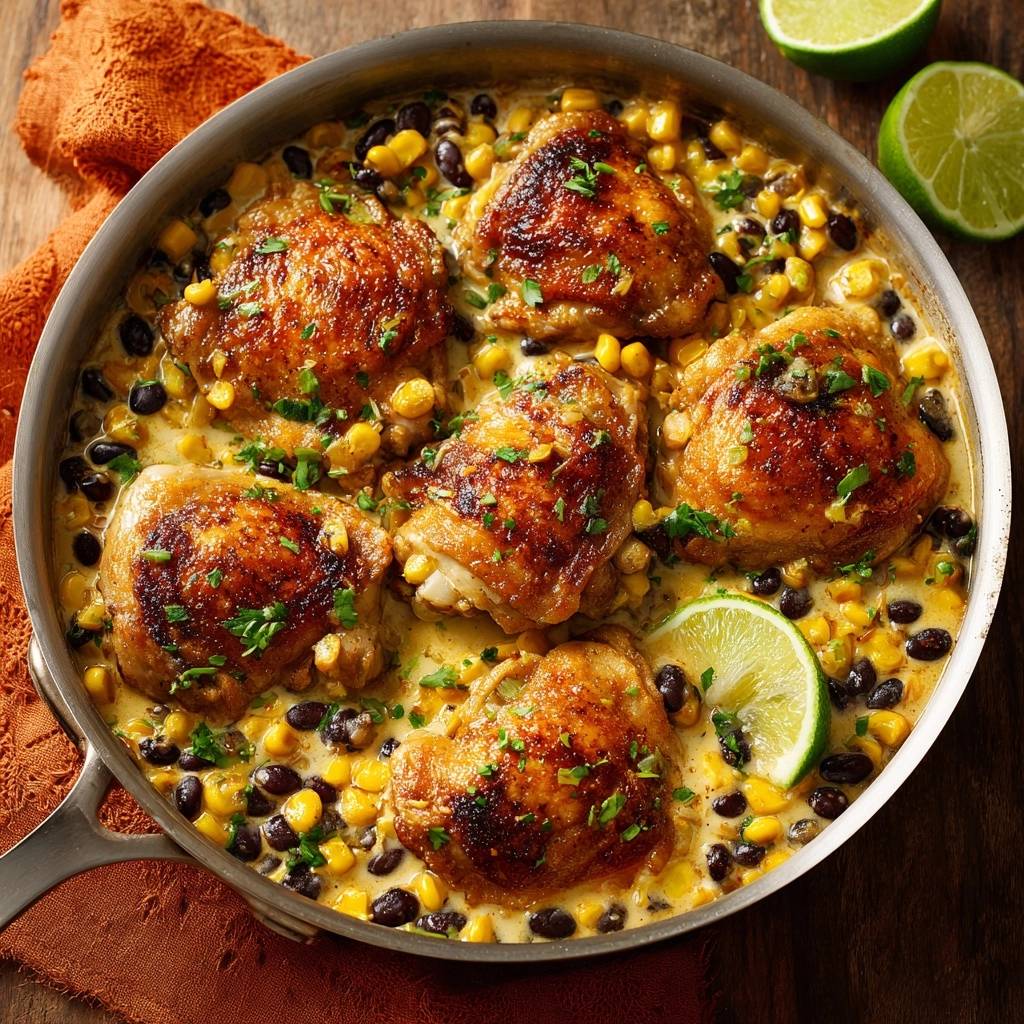
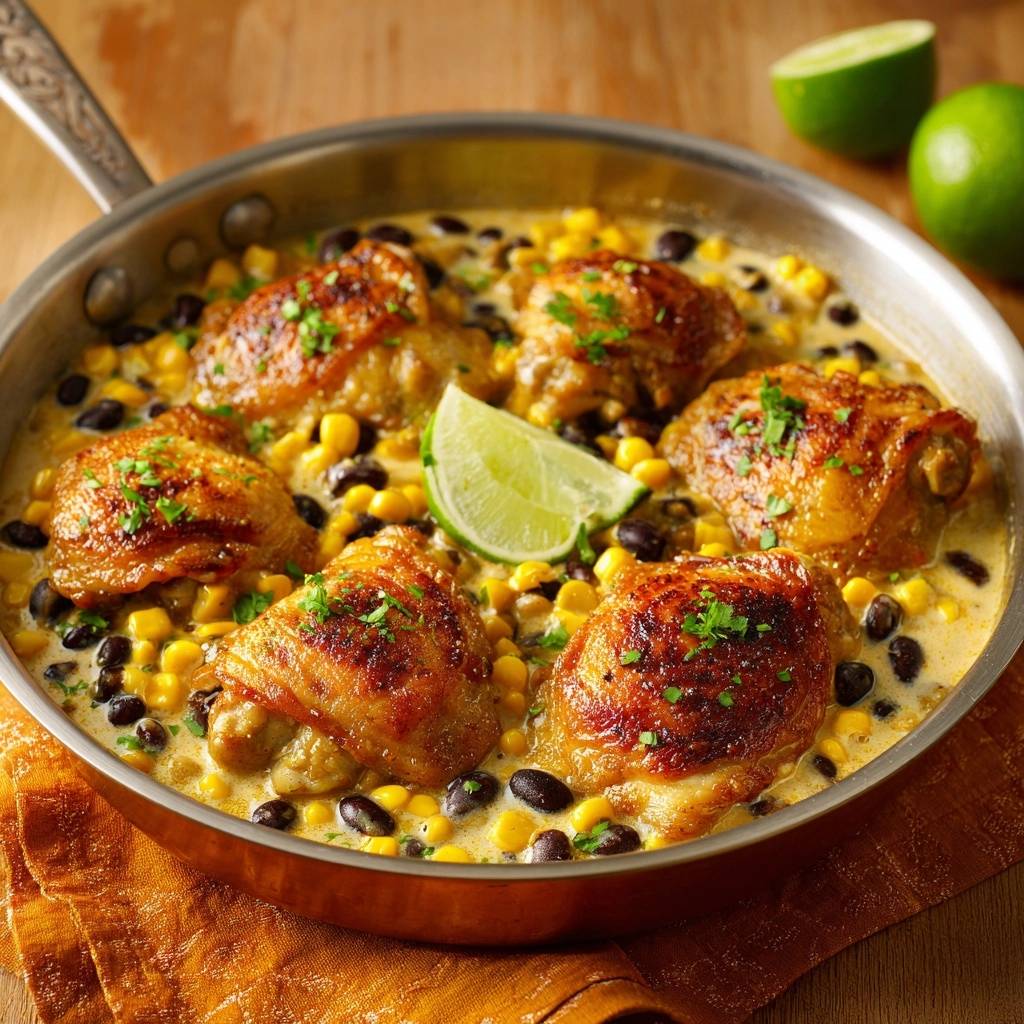
This crust acts as a moisture barrier during the second half of the cooking process. However, even the best sear can’t survive being submerged in liquid. Therefore, the physics of this dish rely on the “island method,” where the chicken sits atop the vegetables and sauce rather than drowning in them. This keeps the skin exposed to the dry heat of the air while the meat braises in the cream.
Essential Components for the Southwest Cream Sauce
The backbone of this sauce is heavy cream, and for good reason. Unlike milk or half-and-half, heavy cream has a high fat content that makes it stable when boiled or mixed with acidic lime juice. If you try to swap in a lower-fat dairy option, the sauce will likely break or curdle, leaving you with a grainy texture instead of a silky finish.
Black beans add a necessary heartiness, but they require a quick rinse before they enter the pan. The liquid inside the can is full of starches and dark pigments that will turn your vibrant orange-tinted sauce into a muddy, unappealing gray. Rinsing ensures the sauce stays bright and the flavors of the chili powder and garlic remain the stars of the show.
The dry rub is where the Southwest soul lives. Chili powder provides a mild heat and deep color, while cumin adds that signature smoky aroma. Garlic powder is preferred over fresh garlic in the rub because it won’t burn during the intense 8-minute sear, providing a consistent savory base that permeates the skin.
Selecting the Right Poultry Cut
You really need bone-in, skin-on thighs for this specific technique. Chicken breasts are too lean and will dry out long before the sauce has reduced to the proper consistency. The bone acts as a heat conductor, ensuring the meat cooks evenly from the inside while the skin protects it from the outside. Plus, the rendered fat from the thighs provides the flavorful base for sautéing your corn and beans.
Fresh vs. Frozen Corn: Texture Implications
Frozen corn is a fantastic pantry staple for this dish because it’s picked at peak ripeness and has a high sugar content. When those kernels hit the hot chicken fat in the skillet, they caramelize quickly, adding a sweet charred note to the sauce. If you have fresh summer corn, by all means, shear it off the cob. You’ll get a distinct “pop” and a milky sweetness that frozen corn can’t quite replicate.
The Foundation: Searing and Rendering Fat
Start with a heavy stainless steel or cast iron skillet. These materials hold heat much better than non-stick pans, which is vital for building “fond”—those little browned bits stuck to the bottom of the pan. Heat your olive oil until it shimmers, then lay the chicken in skin-side down. You’ll hear a loud sizzle; that’s the sound of success.
Now, the hardest part: don’t touch it. For at least 6 to 8 minutes, resist the urge to peek. Moving the chicken too early will tear the skin and prevent that deep golden crust from forming. You’ll know it’s ready when the chicken releases easily from the pan. If it’s sticking, it’s the pan’s way of telling you it needs another minute to finish rendering.
Building the Sauce Without Compromising Texture
Once you’ve seared the chicken and sautéed the vegetables, it’s time to deglaze. Pour in the chicken broth and use a wooden spoon to scrape up every bit of that fond from the bottom. Those bits are concentrated flavor. Add the cream and bring it to a simmer, watching as the liquid transforms into a rich, bubbling sauce.
When you return the chicken to the pan, follow the “Halfway Rule.” The liquid should only reach the middle of the chicken thighs. If you have too much liquid, remove some before adding the chicken. Carefully nestle the thighs back in, ensuring no sauce splashes onto the crispy tops. This allows the meat to finish cooking in the liquid while the skin stays dry and crunchy.
Troubleshooting Common Skillet Cooking Errors
If you find your sauce is thinning out too much, it likely hasn’t simmered long enough. Give it a few more minutes without a lid to allow the water to evaporate. Conversely, if the sauce reduces too quickly and looks oily, whisk in a tablespoon of water or broth to bring it back together. This “breaks” the emulsion and smooths it out.
In the event that your skin does soften—perhaps from a stray splash or steam—don’t panic. You can rescue the dish by popping the entire skillet under the broiler for 2 minutes. Just keep a close eye on it so the cream doesn’t burn. This quick blast of intense overhead heat will re-crisp the skin in seconds.
Flavor Variations and Dietary Adjustments
If you crave more heat, fold in a chopped chipotle pepper in adobo sauce when you add the beans. It adds a spicy, smoky punch that pairs beautifully with the cream. For those wanting to sneak in some greens, a few handfuls of fresh baby spinach can be folded into the sauce during the last 2 minutes of simmering. It will wilt perfectly without changing the cook time.
For a dairy-free version, full-fat canned coconut cream is your best friend. It provides the same thickness as heavy cream, though it will add a slight tropical undertone. To lean into that, you might add a pinch of extra lime and perhaps a dash of hot sauce to balance the natural sweetness of the coconut.
Optimal Side Dishes for Creamy Poultry
Because this dish is quite rich, you want sides that offer a sharp contrast. A simple cilantro lime rice is the classic choice, as it soaks up the extra sauce without competing for attention. The acidity in the rice helps cleanse the palate between bites of the creamy chicken.
A bitter radish salad or a slaw with a vinegar-based dressing also works wonders. The crunch of raw vegetables and the zing of vinegar cut right through the heavy cream. If you want something more traditional, warm corn tortillas are perfect for scooping up the beans and corn left in the skillet.
Storage and Reheating for Maximum Crunch
Store any leftovers in an airtight container in the fridge for up to 3 days. However, be aware that the skin will naturally soften as it sits in the refrigerator. To revive this dish, avoid the microwave at all costs. The microwave will turn the chicken rubbery and the sauce oily.
Instead, use an air fryer or a toaster oven. Place the chicken in at 375°F for about 5 to 7 minutes. This high-speed hot air will dry out the skin and bring back that initial crunch. Warm the sauce separately in a small saucepan over low heat, adding a splash of water if it has thickened too much overnight.
Expert Tips for Skillet Success
Can I use chicken breasts for this recipe?
You can, but you must adjust the timing. Breasts cook much faster and lack the fat content of thighs. Sear them for only 4 minutes per side, and reduce the final simmering time to about 5 or 7 minutes. Be extra careful not to overcook them, as white meat becomes stringy and dry very quickly in a cream sauce.
Why is my sauce too thin?
A thin sauce usually means the cream hasn’t had enough time to reduce. The simmering stage is where the water evaporates, leaving behind the fats and solids that create a thick consistency. If it’s still too thin after the chicken is done, remove the chicken and boil the sauce on high for 2 minutes before serving.
How do I prevent the lime juice from curdling the cream?
The trick is to add the lime juice at the very end, after you’ve turned off the heat. While heavy cream is more stable than milk, high heat combined with high acid can still cause separation. By squeezing the lime over the dish just before serving, you get the bright flavor without risking the texture of the sauce.
Can I use dried cilantro instead of fresh?
Fresh cilantro is highly recommended here. Dried cilantro loses almost all of its citrusy, peppery punch and can end up tasting like hay. If you absolutely hate cilantro, swap it for fresh flat-leaf parsley or sliced green onions to get that necessary pop of color and freshness at the end.
What is the best way to drain the black beans?
Don’t just drain them; rinse them thoroughly in a fine-mesh colander under cold running water. You want the water to run completely clear. This removes the metallic taste from the can and prevents the starchy liquid from thickening your sauce in an unpredictable or unappealing way.
How do I know when the chicken is fully cooked?
The most reliable way is to use an instant-read meat thermometer. You are looking for an internal temperature of 165°F. Insert the probe into the thickest part of the thigh, making sure not to hit the bone, which can give a false high reading. Because thighs have more connective tissue, they actually taste better and stay juicier when cooked to about 170°F or 175°F.

Creamy Southwest Chicken Skillet
Course: Main CourseCuisine: AmericanDifficulty: easy6
servings15
minutes25
minutes40
Minutes485
kcalAmerican
Ingredients
6 bone-in, skin-on chicken thighs
2 tablespoons olive oil
1 tablespoon chili powder
1 teaspoon cumin
1 teaspoon garlic powder
1 teaspoon salt
1/2 teaspoon black pepper
1 can (15 oz) black beans, drained and rinsed
2 cups frozen or fresh corn kernels
1 cup heavy cream
1/2 cup chicken broth
2 limes, sliced into wedges
1/4 cup fresh cilantro, chopped
Directions
- Pat the chicken thighs extremely dry with paper towels. This is the first step to preventing soggy skin. Rub the skin side with salt, pepper, chili powder, cumin, and garlic powder.
- Heat olive oil in a large stainless steel or cast iron skillet over medium-high heat. Place chicken skin-side down. Do not move them for 6 to 8 minutes. This creates a deep, golden crust that acts as a moisture barrier.
- Flip the chicken and cook for 2 minutes on the flesh side. Remove chicken from the pan and set aside on a plate.
- In the same skillet, add the corn and black beans. Sauté for 3 minutes in the rendered chicken fat to develop flavor.
- Pour in the chicken broth and heavy cream. Stir to scrape up any browned bits from the bottom of the pan. Bring the liquid to a gentle simmer.
- Carefully nestle the chicken thighs back into the skillet. Crucial Step: Ensure the liquid only reaches halfway up the sides of the chicken. The crispy skin must remain completely above the sauce line to stay crunchy.
- Simmer for 10 to 12 minutes until the sauce thickens and the chicken is cooked through.
- Squeeze fresh lime juice over the sauce (avoiding the skin) and garnish with cilantro. Serve immediately while the skin is at peak crispness.
Notes
- The secret to the anti-soggy skin is keeping the liquid level below the seared skin and avoiding pouring lime juice directly onto the crust.


