
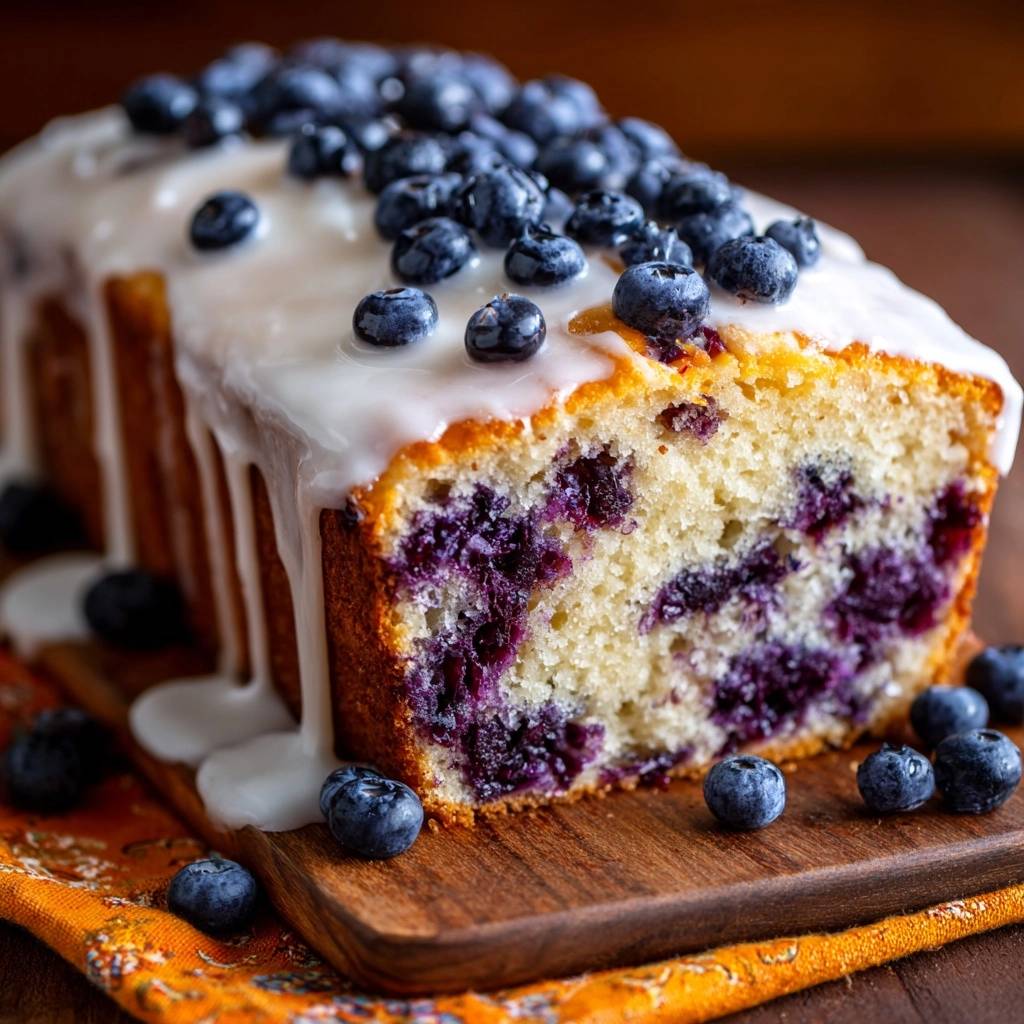
Imagine slicing into a golden, citrus-scented loaf only to find every single blueberry has plummeted to the bottom, creating a soggy, purple mess at the base. It’s a common kitchen heartbreak that ruins the balance of an otherwise beautiful bake. This Glazed Lemon Blueberry Loaf solves that problem entirely, offering a bright, zesty aroma that fills your home and a crumb so tender it practically melts.
The secret to this bakery-standard loaf lies in its structural integrity. We aren’t just making a simple cake; we’re engineering a high-stability batter that supports the weight of juicy, bursting fruit. Every bite delivers a perfect ratio of tart lemon glaze and sweet berries, ensuring you never end up with a “fruit-free” top half again.
To achieve this professional result, you must master the friction technique. By coating your berries in a light dusting of flour before they hit the bowl, you create a “velcro effect” that locks them into the batter. This small but mighty step, combined with a thick, yogurt-based base, ensures your fruit stays exactly where you put it.
The Physics of Fruit: Why Berries Sink
In the world of baking, we often deal with the challenge of specific gravity. Simply put, blueberries are denser than a standard thin cake batter. Therefore, as the heat of the oven thins the batter further during the first ten minutes of baking, gravity takes over and pulls the heavy fruit straight to the bottom of the pan.
However, we can fight physics with two specific culinary tools: viscosity and friction. Firstly, this recipe swaps out thin liquids like milk for thick Greek yogurt. This creates a high-viscosity batter that acts like a safety net, holding the berries in suspension while the heat sets the crumb. A thicker batter provides the physical resistance needed to keep the fruit from moving.
Secondly, we use the flour-toss method to increase surface friction. When you coat a smooth, waxy blueberry in dry flour, you change its surface texture. This allows the batter to “grip” the berry. Without this coating, the berry acts like a marble in a jar of syrup, sliding effortlessly to the floor of your loaf pan. By combining a sturdy batter with floured fruit, you guarantee a beautiful, even distribution.
Essential Components for a Stable Lemon Blueberry Loaf
Quality ingredients are the foundation of any great bake, but for this loaf, they also provide the necessary structure. I always recommend using all-purpose flour rather than cake flour. While cake flour makes things delicate, all-purpose flour has a slightly higher protein content, which provides the “bones” needed to support two full cups of blueberries.
Furthermore, your fats must be at the correct temperature to succeed. Softened butter and room-temperature eggs are non-negotiable because they create a stable emulsion. If you use cold eggs, they will cause the creamed butter to seize and clump, resulting in an uneven bake and a greasy mouthfeel. Therefore, take your ingredients out of the fridge at least an hour before you start.
Finally, don’t reach for the bottled lemon juice for the batter. Fresh lemon zest contains essential oils that provide a deep, floral citrus flavor that extracts simply cannot mimic. The zest provides the punch, while the juice provides the necessary acidity to react with your leavening agents.
The Role of Greek Yogurt vs. Milk
Greek yogurt is the MVP of this recipe because it offers more than just moisture. Its natural acidity reacts beautifully with the baking powder, creating a powerful initial lift in the oven. This quick “spring” helps set the structure of the loaf before the berries have a chance to migrate.
In addition, the thick consistency of yogurt ensures the batter remains heavy enough to support the fruit. If you were to use standard milk, the batter would be too runny, and your berries would likely end up in a heap at the bottom despite the flour coating. If you don’t have Greek yogurt, full-fat sour cream is an excellent substitute that offers the same structural benefits.
Selecting and Preparing Your Blueberries
When it comes to berries, size actually matters. Smaller, “wild-style” blueberries are ideal because they are lighter and less likely to sink. If you are using jumbo berries, they carry more water weight and might struggle to stay suspended. Always check your fruit for stems and soft spots before starting.
If you decide to use frozen berries, do not thaw them first! Thawing releases excess juice that will turn your entire loaf a muddy grey-purple color. Instead, rinse them quickly in cold water until the water runs clear, pat them very dry with a paper towel, and then proceed with the flour-toss step immediately before folding them into the batter.
Step-by-Step: Mixing the High-Stability Batter
The process begins with creaming your softened butter and sugar. You want to beat these together for at least 3 to 5 minutes until the mixture looks pale and fluffy. This isn’t just about mixing; you are actually beating tiny air bubbles into the fat, which helps the loaf rise and stay light.
Next, add your eggs one at a time, beating well after each addition. This ensures the water in the eggs and the fat in the butter play nicely together. If the mixture looks slightly curdled, don’t panic; it will smooth out once you add the dry ingredients. Just keep the mixer on a medium speed and stay patient.
When it’s time to combine the wet and dry ingredients, put the mixer away and use a spatula. You want to mix until “just combined,” meaning you stop the second you see no more streaks of white flour. Over-mixing develops gluten, which turns a tender loaf into something tough and bread-like. A few small lumps are perfectly fine!
The Flour-Toss Technique for Fruit Distribution
Before the berries ever touch the main batter, you must perform the flour-toss. Take one tablespoon of your pre-measured flour and toss it with the berries in a small bowl. You want every single berry to look dusty and white, with no shiny blue skin showing through.
This starch coating acts as a bridge between the fruit and the batter. As the loaf bakes, the flour on the berry absorbs a tiny bit of moisture from the surrounding batter, creating a bond. This prevents the berry from acting as an isolated weight and instead makes it part of the loaf’s overall structure.
Precision Baking: Temperature and Timing
A steady 350°F oven is crucial for this recipe. This temperature is the “sweet spot” that allows the edges to caramelize while the center cooks through without drying out. I highly recommend using a 9×5 inch loaf pan, as the depth is specifically designed to handle this volume of batter while allowing for a tall, proud rise.
You’ll know the loaf is done when the top is golden brown and a toothpick inserted into the center comes out clean or with just a few moist crumbs. Another great cue is the “spring-back” test. Gently press the center of the loaf with your finger; if it bounces back, it’s ready. If the indentation stays, it needs a few more minutes.
The Foil Tent Method for Even Browning
Because this loaf has a high sugar content and a long bake time, the top can sometimes get too dark before the middle is fully cooked. This is where the foil tent comes in. Around the 40-minute mark, take a quick peek through the oven window.
If the top looks perfectly bronzed but the center is still wobbly, loosely drape a piece of aluminum foil over the pan. Do not seal the edges; you want air to still circulate. This reflects the direct heat away from the surface, allowing the interior to finish baking without burning the crust.
Achieving the Professional Bakery Finish
Patience is the most important ingredient once the loaf leaves the oven. You must let the loaf cool in the pan for about 15 minutes to let the structure set. If you try to remove it too early, the weight of the berries might cause the warm loaf to crack or crumble.
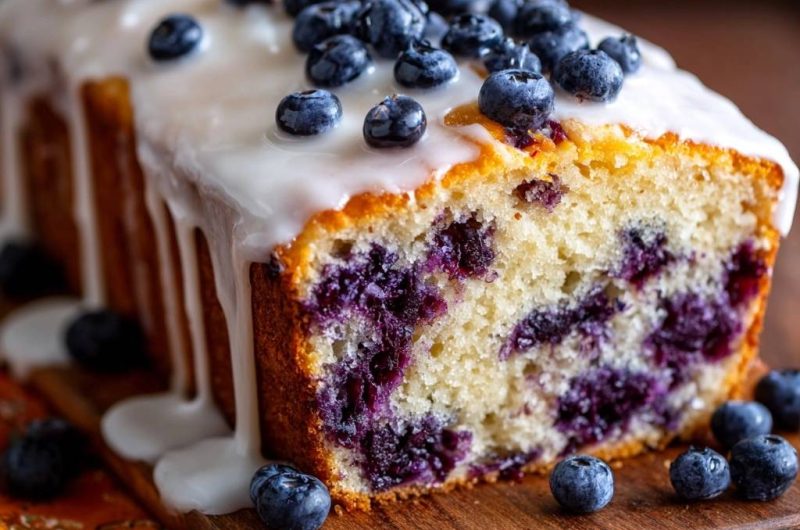
Furthermore, never glaze a warm loaf. If the cake is still radiating heat, the powdered sugar will melt and turn into a clear, sticky syrup that soaks into the bread. For that iconic, thick, opaque white drip, the loaf must be completely cool to the touch. This creates a beautiful contrast against the dark berries.
Crafting the Perfect Opaque Lemon Glaze
The perfect glaze should be thick, like Elmer’s glue, rather than runny like milk. Start with your powdered sugar and add the lemon juice one teaspoon at a time. Whisk vigorously until the mixture is smooth and falls off the spoon in a thick, slow ribbon.
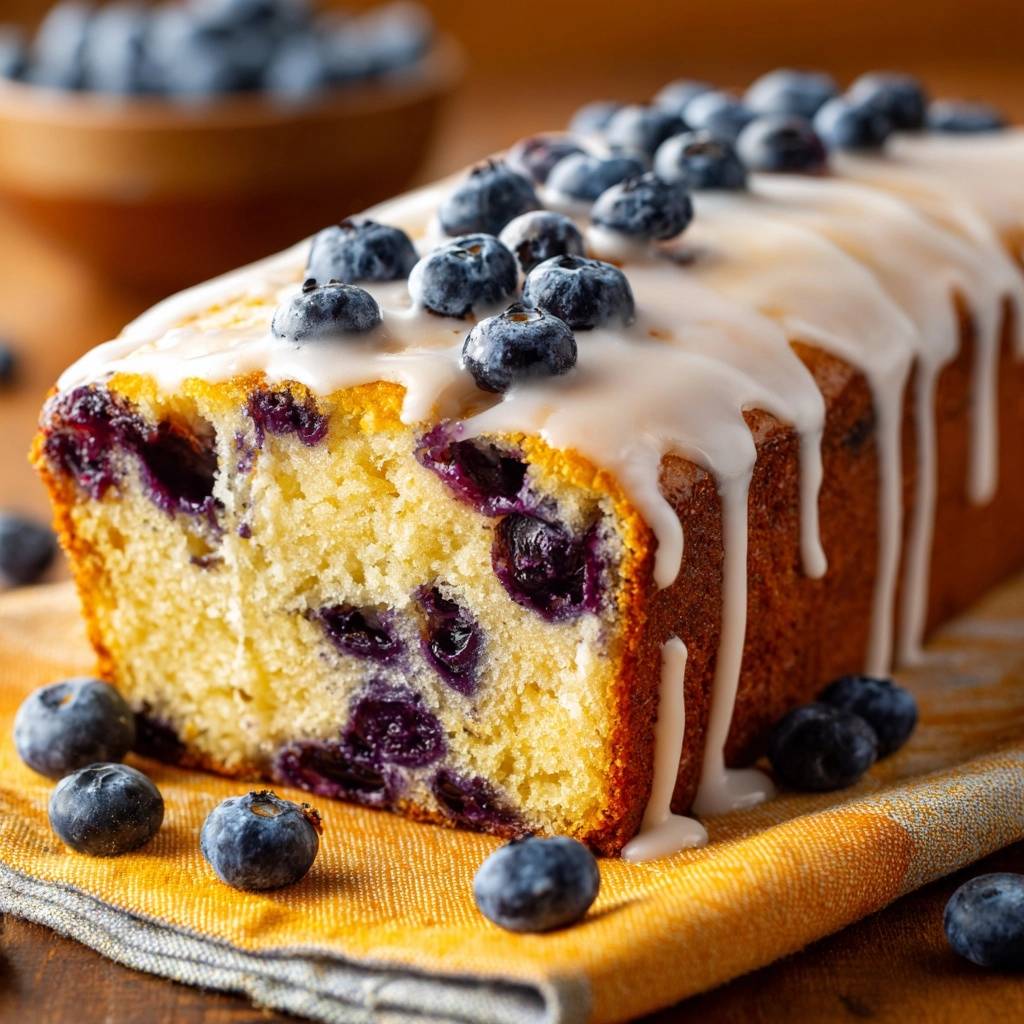
If it’s too thin, add another tablespoon of powdered sugar. If it’s too thick to pour, add a tiny drop of lemon juice. When you’re ready, pour it over the center of the loaf and let it naturally meander down the sides. This “controlled drip” is what gives it that high-end bakery aesthetic.
The Triple-Layer Blueberry Placement Strategy
To make this loaf look truly spectacular, we use a three-stage berry approach. The first batch is folded into the batter for that internal burst of flavor. The second batch is scattered on top of the raw batter right before it goes into the oven, which creates beautiful “craters” of fruit on the crust.
The final stage happens after you glaze. While the glaze is still wet, press a handful of fresh, plain blueberries into the white icing. This adds a pop of vibrant color and a fresh, tart crunch that contrasts with the baked fruit inside. It signals to everyone exactly what flavor is waiting for them inside.
Troubleshooting Your Blueberry Loaf
If your loaf sinks in the middle, it’s usually due to one of two things: under-baking or over-mixing. If you pull the loaf out before the internal structure has set, the air bubbles will collapse as they cool. Always use the toothpick test! If you over-mixed the batter, you likely incorporated too much air that the flour couldn’t support, leading to a “deflated” look.
A dry crumb is almost always the result of over-baking. Every oven is different, so start checking your loaf 5 minutes before the timer goes off. Remember that the loaf will continue to cook slightly from residual heat once it’s out of the oven. If the glaze disappeared, the loaf was simply too hot when you decorated it.
Lastly, if your berries turned a strange greenish color, don’t worry—it’s still safe to eat! This is a natural chemical reaction between the pigments in the blueberries and the pH level of the batter. Using Greek yogurt helps keep the batter acidic, which usually prevents this, but sometimes a little extra baking soda can trigger the color shift.
Storage and Make-Ahead Instructions
This loaf actually tastes even better on the second day as the lemon flavor has time to mellow and the moisture redistributes. Store it in an airtight container at room temperature for up to 3 days. I don’t recommend refrigerating it, as the cold air can dry out the crumb and make the glaze “sweat” and become sticky.
For long-term storage, this loaf freezes beautifully. I suggest slicing it first, then placing a small piece of parchment paper between each slice. Wrap the entire loaf (or individual slices) tightly in plastic wrap, then a layer of aluminum foil, and place it in a freezer bag. It will stay fresh for up to 3 months.
When you’re ready for a treat, just pull out a slice and let it thaw on the counter for about 30 minutes. You can even pop a slice in the toaster oven for a minute to get those edges crispy again, though the glaze will melt slightly. It’s the perfect way to have a “bakery-fresh” breakfast any day of the week.
Expert Baking FAQ
Can I use Meyer lemons for this recipe?
Yes, you certainly can! Meyer lemons are a cross between a lemon and a mandarin orange, so they are much sweeter and less acidic than standard Lisbon or Eureka lemons. If you use them, your loaf will have a more floral, subtle citrus note. You might want to reduce the sugar in the glaze by a tablespoon to balance the extra sweetness.
Can I substitute sour cream for the Greek yogurt?
Absolutely. Sour cream and Greek yogurt are virtually interchangeable in this recipe because they have similar fat content and acidity. Both provide the thickness needed to keep the blueberries from sinking. Avoid using “light” or fat-free versions, as the fat is necessary for a tender, moist crumb.
How do I prevent the loaf from sticking to the pan?
The best method is to grease the pan with butter and then line it with a “sling” of parchment paper. Cut the paper so it covers the bottom and the two long sides, leaving an inch of overhang. Once the loaf has cooled for 15 minutes, you can simply lift the paper handles to remove the loaf perfectly every time.
Can I make this recipe in a muffin tin instead?
Yes, this batter makes excellent muffins. Line a standard muffin tin with liners and fill them about 3/4 of the way full. Because muffins are smaller, they will bake much faster than a loaf. Start checking them at the 18-22 minute mark. You will still get that same great fruit distribution and moist texture.
Why did my blueberries turn green or grey?
Blueberries contain anthocyanins, which are pH-sensitive pigments. If the batter is too alkaline (often from too much baking soda or not enough acid), the blue will shift toward green. This recipe uses lemon juice and Greek yogurt to keep the batter acidic, which helps maintain that beautiful deep blue or purple hue.
Glazed Lemon Blueberry Loaf
Course: DessertCuisine: AmericanDifficulty: easy8
servings15
minutes55
minutes70
Minutes310
kcalAmerican
Ingredients
1 and 1/2 cups all-purpose flour
1 teaspoon baking powder
1/2 teaspoon salt
1 cup granulated sugar
1/2 cup unsalted butter, softened
2 large eggs
1/2 cup Greek yogurt or sour cream (provides better suspension than milk)
1 tablespoon lemon zest
1 tablespoon lemon juice
2 cups fresh blueberries, divided
1 and 1/4 cups powdered sugar
2 tablespoons lemon juice (for the glaze)
Directions
- Preheat your oven to 350 degrees F (175 degrees C). Grease and flour a 9×5 inch loaf pan, or line it with parchment paper.
- In a small bowl, take 1 tablespoon of your measured flour and toss it thoroughly with 1 cup of the blueberries. This flour coating creates friction, allowing the batter to grip the berries so they do not slide to the bottom during the bake.
- In a large bowl, cream together the softened butter and granulated sugar until light and fluffy. Beat in the eggs one at a time, then stir in the lemon zest and 1 tablespoon of lemon juice.
- In a separate bowl, whisk the remaining flour, baking powder, and salt.
- Gradually add the dry ingredients to the butter mixture, alternating with the Greek yogurt (or sour cream). Mix until just combined. The batter should be thick; this thickness is essential for holding the berries in place.
- Gently fold the flour-coated blueberries into the batter using a spatula.
- Pour the batter into the prepared pan. Smooth the top. Scatter 1/2 cup of the remaining plain blueberries over the top of the batter, pressing them in very slightly.
- Bake for 55 to 65 minutes, or until a toothpick inserted into the center comes out clean. If the top browns too quickly, tent it loosely with foil after 40 minutes.
- Let the loaf cool in the pan for 15 minutes before transferring to a wire rack to cool completely.
- Whisk together the powdered sugar and 2 tablespoons of lemon juice to create a thick, opaque white glaze. Drizzle generously over the cooled loaf, allowing it to drip down the sides.
- Immediately top the wet glaze with the final 1/2 cup of fresh blueberries so they stick to the top, matching the visual finish of a professional bakery loaf.
Notes
- The batter must be thick to hold the berries in place. If the top browns too quickly, tent it loosely with foil after 40 minutes of baking.


