
There is something undeniably sophisticated about a bright, citrus-forward loaf sitting on a cooling rack. However, many home bakers struggle with the heartbreaking reality of a lemon cake that looks beautiful on the outside but hides a dense, wet layer at the base. This “soggy bottom” often happens because the moisture from the lemon juice and fats settles during the bake, leaving you with a heavy texture instead of a light, airy crumb.
Therefore, achieving a professional bakery-style result requires more than just mixing ingredients in a bowl. You need a method that prioritizes structural integrity and proper aeration to ensure the cake stands tall and stays fluffy. This recipe focuses on a specific moisture-lock technique that prevents the middle from sinking while delivering that punchy, zesty flavor you crave.
The secret to this perfect loaf lies in the mechanical leavening of the eggs. By whisking them with sugar until they are thick and pale, you create a stable network of air bubbles. This structural foundation supports the weight of the flour and the thick glaze, ensuring every slice is as light as a cloud from the top crust to the very bottom.
Essential Components for a Vibrant Lemon Loaf
Every ingredient in this Glazed Lemon Loaf Cake serves a specific purpose in balancing flavor and physics. We use 1.5 teaspoons of baking powder, which is the absolute “sweet spot” for this batter. It provides enough lift to counteract the heavy citrus juice without leaving that unpleasant metallic aftertaste often found in over-leavened cakes.
The fat profile is equally important for a tender mouthfeel. By combining melted butter with sour cream or full-fat Greek yogurt, you get the best of both worlds. The butter provides a rich, classic flavor, while the acidity in the sour cream tenderizes the gluten and adds a subtle tang that complements the lemon. If you don’t have sour cream, full-fat Greek yogurt is an excellent substitute that maintains the same moisture levels.
Furthermore, always reach for fresh lemons rather than bottled extracts or juices. Fresh zest contains essential oils that provide a deep, floral aroma that bottled versions simply cannot replicate. When you use fresh juice, the natural acidity reacts perfectly with the baking powder to create a vibrant golden crumb that tastes like pure sunshine.
The Role of Room Temperature Ingredients
Science plays a massive role in the kitchen, especially when it comes to emulsification. If you use cold eggs, they will cause your melted butter to seize and clump up instantly. This creates an uneven batter that leads to a dense, oily layer at the bottom of your loaf pan. Therefore, ensure your eggs and sour cream are at true room temperature before you begin whisking. This allows the fats and liquids to bond into a smooth, stable emulsion for a uniform bake.
Selecting the Right Flour and Leavening
While many delicate cakes call for cake flour, this recipe specifically uses All-Purpose flour. You need the slightly higher protein content to support the weight of the thick, opaque glaze we add later. The chemical reaction between the baking powder and the lemon juice happens quickly, so getting your loaf into the oven promptly is key to capturing that initial burst of carbon dioxide for maximum height.
The Science of Aeration and Structural Integrity
The “Anti-Soggy” philosophy starts with how you handle your eggs and sugar. Instead of a quick stir, you must whisk them vigorously for at least 3 to 5 minutes. You are looking for the “ribbon stage,” where the mixture becomes pale and thick enough to hold a shape for a few seconds when the whisk is lifted. This isn’t just for show; those tiny trapped air bubbles are what keep the cake from collapsing under its own moisture.
Without this mechanical aeration, the heavy fats and liquids would simply compress the flour, leading to a rubbery texture. By building a strong foam at the start, you create a scaffold that holds the crumb open during the baking process. This ensures that even with the addition of fresh lemon juice, the cake remains light and porous rather than turning into a dense, wet brick.
Step-by-Step: Mixing the Perfect Citrus Batter
Once your egg foam is ready, the assembly must be gentle to preserve those precious air bubbles. Slowly stream in the melted butter while whisking constantly. This gradual addition prevents the fat from deflating the foam you just worked so hard to build. After the butter is in, whisk in the sour cream and lemon components until they are just combined.
When it’s time for the dry ingredients, sift them directly over the bowl. This removes any lumps and further aerates the flour. Use a spatula to fold the mixture together. You’ll know you’re done when the last streak of white flour disappears. The batter should look smooth and slightly thick, smelling intensely of fresh citrus. Stop immediately at this point to keep the texture tender.
Folding Techniques to Prevent Rubbery Texture
Folding is a specific motion where you cut through the center of the batter with a spatula, scrape the bottom, and lift it over the top. This is much gentler than stirring in circles. If you over-mix, you develop the gluten in the flour, which results in a tough, bread-like loaf. A few small lumps are perfectly fine; a smooth but overworked batter is the enemy of a soft cake.
Baking Parameters and the Critical Cooling Window
Preheat your oven to 350°F and place the rack in the center for even heat distribution. As the cake bakes, the aroma of toasted sugar and lemon will fill your kitchen. Use a toothpick to check for doneness around the 50-minute mark. It should come out clean or with just a few moist crumbs attached. If the top is browning too quickly, you can loosely tent it with foil for the last 10 minutes.
The most critical step for preventing a mushy base happens once the cake leaves the oven. You must let it rest in the pan for exactly 10 minutes. This allows the structure to set so it doesn’t break. However, you must move it to a wire rack immediately after those 10 minutes. If the cake stays in the metal pan, steam becomes trapped between the cake and the pan walls. This condensation migrates to the bottom crust, turning a perfect loaf into a soggy mess.
Achieving the Opaque Professional Glaze
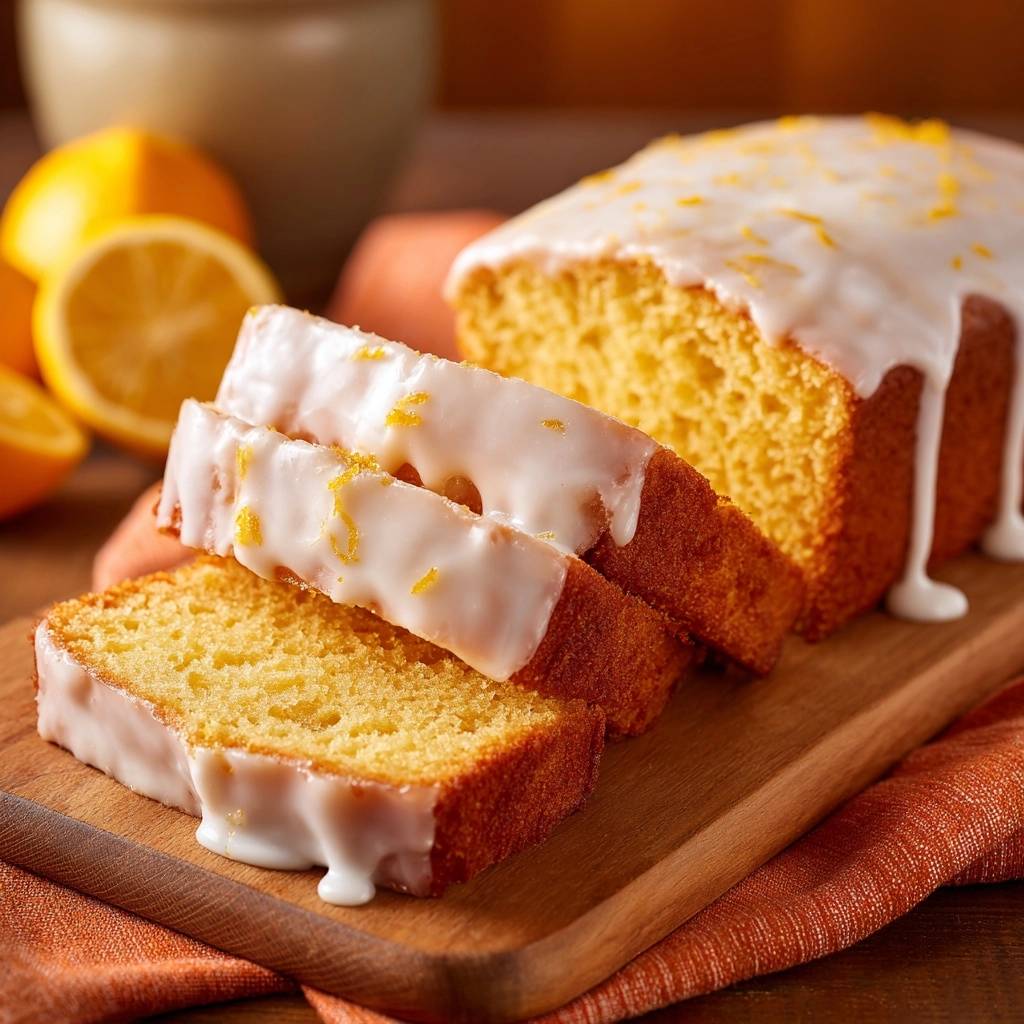
A common mistake is using a thin lemon syrup that simply soaks into the cake. While that adds flavor, it also makes the cake wet and sticky. For a professional look, we want a thick, opaque glaze that sits proudly on top. The consistency should mimic white school glue. It should be thick enough to stay put but fluid enough to slowly drip down the sides in beautiful, heavy ribbons.
Using heavy cream instead of just lemon juice in the glaze provides a much whiter, more stable finish. The fat in the cream prevents the sugar from becoming translucent as it dries. Pour the glaze over the cake while it is still slightly warm to the touch. This helps the glaze “grip” the surface without melting into the crumb. Top it with fresh zest immediately so the oils stick to the icing before it sets.
Troubleshooting Common Loaf Cake Failures
If your cake sinks in the middle, it usually means it was underbaked or the batter was over-beaten. Over-beating creates too many large air bubbles that expand and then pop in the oven, causing a collapse. Always trust the toothpick test and the “spring back” method. If you gently press the center of the cake and it leaves an indentation, it needs a few more minutes in the heat.
For a cake that cracks excessively on top, your oven might be running too hot. While a small central crack is traditional for loaf cakes, deep fissures usually indicate the outside set before the inside had a chance to rise. If your glaze ends up too thin, simply whisk in more powdered sugar one tablespoon at a time. It is much easier to thicken a glaze than it is to fix a cake that has already been soaked in a runny one.
Why Your Cake Might Have a Sticky Top
A sticky, tacky top is often the result of humidity or glazing the cake while it is still piping hot. If the cake is too hot, the sugar in the glaze melts and creates a sugary film rather than a crisp shell. Always wait until the cake is “touch-warm”—meaning you can comfortably hold your hand on it—before you pour that final layer of sweetness.
Storage Solutions and Make-Ahead Instructions
To keep the glaze’s slight crunch and the cake’s moisture, store the loaf in an airtight container at room temperature for up to three days. Avoid refrigerating the cake if possible, as the cold air can dry out the crumb and make the glaze weep. If you live in a very humid environment, you might notice the glaze softening after the first day; this is normal and won’t affect the flavor.
If you want to make this ahead of time, you can freeze the unglazed loaf. Wrap it tightly in plastic wrap and then a layer of foil. It will stay fresh for up to two months. When you are ready to serve, thaw it at room temperature and then apply the fresh glaze. This ensures the topping looks pristine and the citrus notes remain sharp and bright for your guests.
Expert Tips for Maximum Citrus Impact
For an even deeper lemon flavor, try “massaging” your lemon zest into the granulated sugar before you start the recipe. Use your fingertips to rub the zest and sugar together until the sugar looks like wet sand and smells incredibly fragrant. This process breaks down the zest’s cellular structure, releasing the essential oils directly into the sugar so the flavor permeates every single bite.
Additionally, timing your garnish is everything. If you wait too long to add the extra zest on top of the glaze, it won’t stick. If you add it while the glaze is too runny, it might sink. Aim for that sweet spot right after you’ve poured the glaze. The fresh green-yellow flecks against the stark white icing create a beautiful contrast that signals exactly what flavor profile to expect.
Frequently Asked Questions
Can I use bottled lemon juice instead of fresh?
It is highly recommended to use fresh lemons. Bottled lemon juice often contains preservatives and has a much higher, sharper acidity that can throw off the flavor balance. More importantly, you would miss out on the fresh zest, which provides the majority of the aromatic citrus oils that make this cake special.
Why did my glaze run completely off the sides of the cake?
This usually happens for two reasons: either the glaze was too thin or the cake was too hot. Ensure your glaze has the consistency of thick glue; it should be difficult to pour. Also, make sure the cake has cooled for at least 45 minutes. If the cake is too warm, it will melt the sugar in the glaze, causing it to turn into a liquid and run off.
Can I substitute the sour cream with something else?
Yes, you can use full-fat Greek yogurt or even crème fraîche as a direct 1:1 substitute. The goal is to use a thick, acidic dairy product that adds moisture and fat. Avoid using low-fat or fat-free versions, as they contain more water and less fat, which can lead to a tougher, less flavorful crumb.
How do I know the cake is done without using a toothpick?
You can use the “spring back” test. Gently press the center of the cake with your finger. If the cake is fully baked, it should feel firm and spring back to its original shape immediately. If your finger leaves a visible dent or the cake feels soft and squishy, it needs more time in the oven. The edges should also be slightly pulled away from the sides of the pan.
Why is my cake crumb rubbery or tough?
A rubbery texture is almost always a sign of over-mixing the batter once the flour was added. When you mix flour with liquids, gluten begins to develop. If you stir too much, the gluten becomes strong and elastic, like bread dough, rather than tender and crumbly like cake. Always fold the flour in gently and stop the moment you see no more white streaks.
Can I freeze this cake with the glaze on it?
While you can freeze a glazed cake, the texture of the glaze often changes during the thawing process. It can become sticky or translucent as it absorbs moisture. For the best results, freeze the loaf unglazed and add the fresh glaze once it has thawed to room temperature. This maintains the professional, opaque look and the slight crunch of the sugar.
Glazed Lemon Loaf Cake
Course: DessertCuisine: AmericanDifficulty: easy8
servings15
minutes50
minutes65
Minutes340
kcalAmerican
Ingredients
1.5 cups all-purpose flour
1.5 teaspoons baking powder (increased for better lift)
1/2 teaspoon salt
1 cup granulated sugar
3 large eggs, room temperature
1/2 cup unsalted butter, melted and cooled
1/4 cup sour cream or full-fat Greek yogurt
2 tablespoons fresh lemon zest (plus extra for garnish)
3 tablespoons fresh lemon juice
1.5 cups powdered sugar (for a thick, opaque glaze as pictured)
2-3 tablespoons heavy cream or lemon juice (for glaze consistency)
Directions
- Preheat your oven to 350°F (175°C). Grease a 9×5 inch loaf pan and line it with parchment paper, leaving an overhang on the long sides for easy removal.
- To prevent a soggy bottom, ensure all refrigerated ingredients are at true room temperature. In a large bowl, whisk the eggs and granulated sugar vigorously for at least 3-5 minutes until the mixture is pale, thick, and doubled in volume. This aeration is the secret to a lift that stays light and prevents the middle from sinking.
- Slowly stream in the melted butter while whisking constantly, followed by the sour cream, lemon juice, and lemon zest. Whisk until just combined.
- Sift the flour, baking powder, and salt directly over the wet ingredients. Gently fold the dry ingredients in using a spatula. Do not overmix; stop as soon as no flour streaks remain. Overmixing develops gluten which leads to a rubbery, dense base.
- Pour the batter into the prepared pan. Bake for 45 to 55 minutes, or until the top is golden brown and a toothpick inserted into the center comes out clean.
- The Anti-Soggy Secret: Once cooked, remove the cake from the oven and let it sit in the pan for exactly 10 minutes. Then, use the parchment paper to lift it onto a wire cooling rack immediately. Leaving it in the pan longer creates steam, which settles at the bottom and makes the cake mushy.
- While the cake is cooling, whisk the powdered sugar and heavy cream (or lemon juice) together to create a very thick, white glaze. It should be the consistency of white glue so it sits on top of the cake rather than soaking in.
- Once the cake is cool to the touch (but slightly warm), pour the glaze over the top, allowing it to drip naturally down the sides as seen in the image. Immediately top with fresh lemon zest. Let the glaze set for 20 minutes before slicing.
Notes
- To avoid a mushy base, remove the cake from the pan after exactly 10 minutes of cooling to prevent steam buildup. Ensure eggs are at room temperature for maximum volume during the whisking stage.


