
Most vegetable-based quick breads suffer from a frustrating flaw: the dreaded “soggy bottom.” You pull a beautiful loaf out of the oven, only to find a dense, gummy layer of moisture trapped at the base. This happens because pureed vegetables release too much water during the baking process, weighing down the crumb and preventing a clean rise. This Glazed Sweet Potato Quick Bread solves that problem entirely by ditching the mushy puree in favor of a specific grating and moisture-wicking technique.
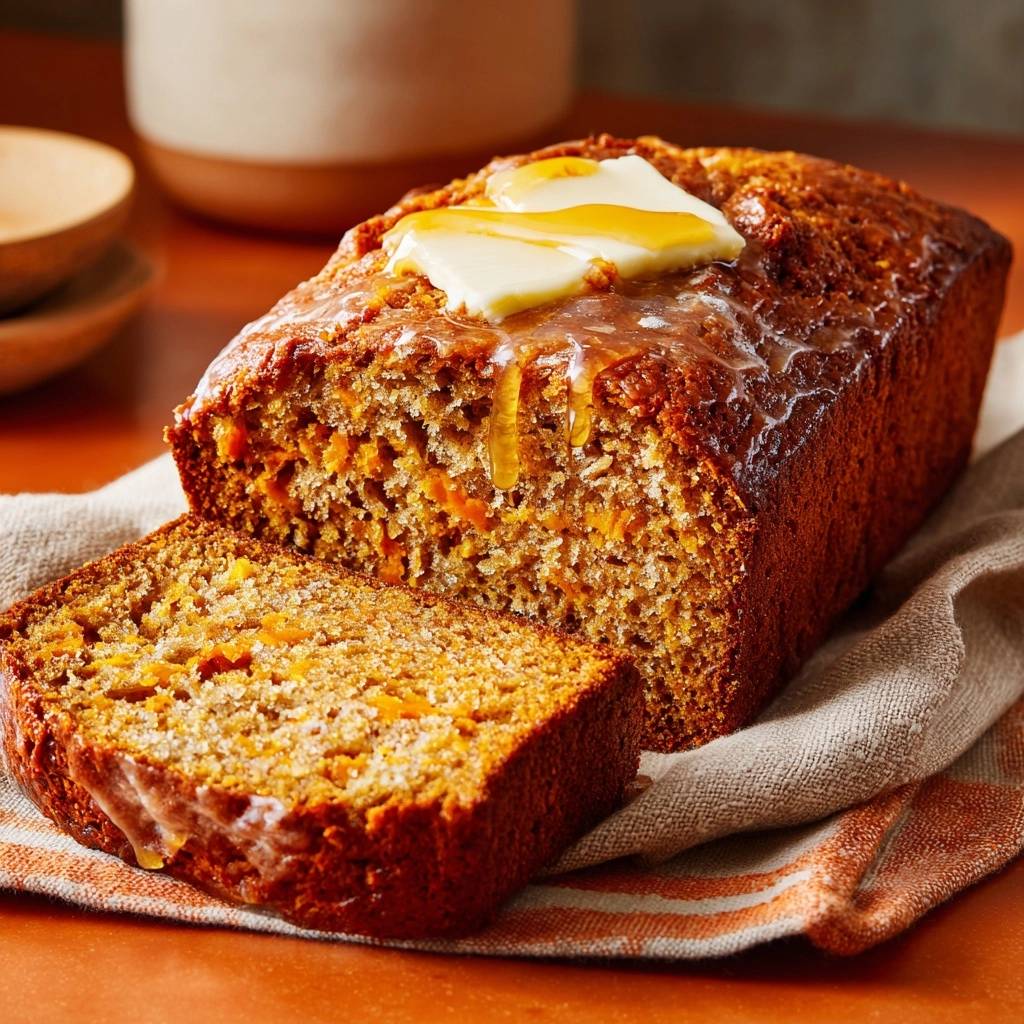
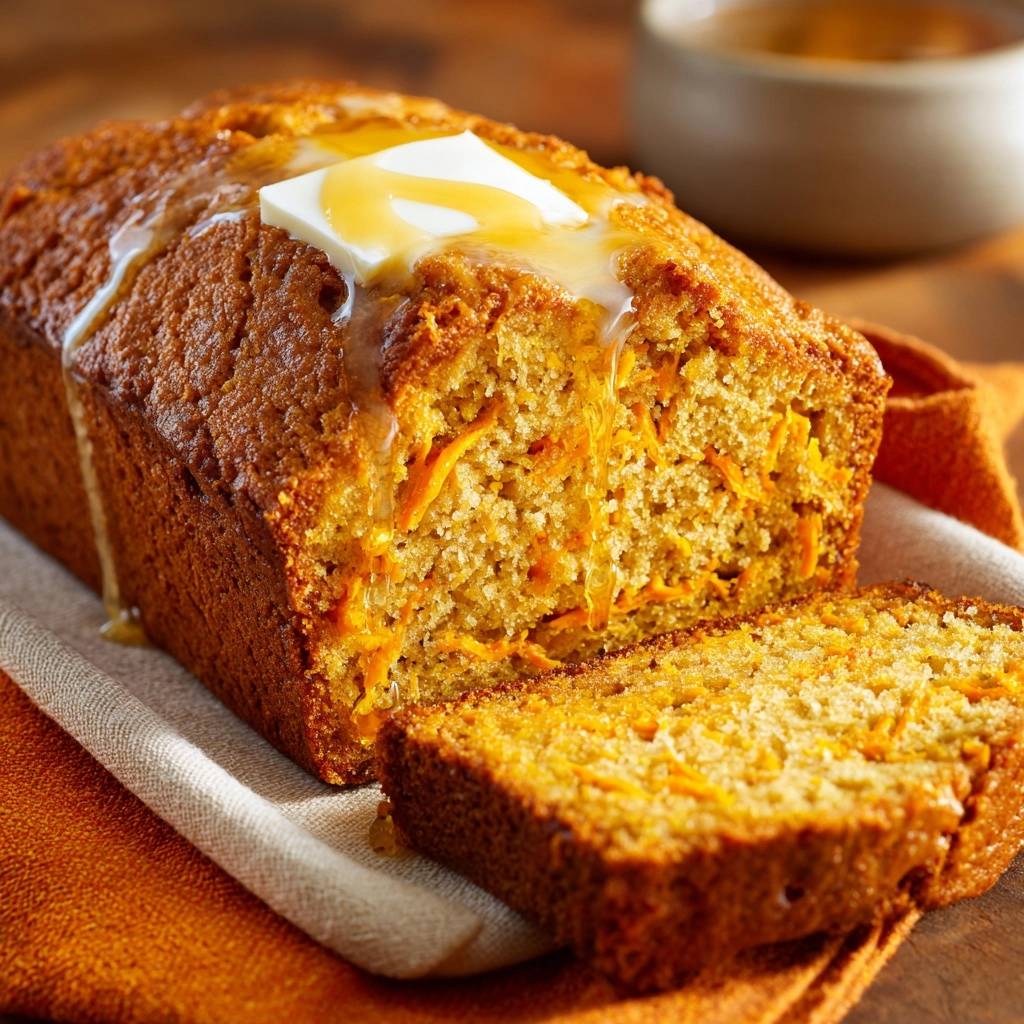
Instead of a uniform brown mass, you get a light, airy loaf studded with vibrant orange flecks that look stunning on a serving platter. The texture is remarkably tender, supported by a structural integrity that allows it to hold a rich, glossy honey-butter glaze. It’s the kind of bread that feels substantial enough for a morning snack but decadent enough to serve as a rustic dessert.
The secret to this success lies in the preparation of the sweet potato itself. By using raw, finely grated potato and squeezing out the excess juice, you control the hydration of the batter. This ensures the leavening agents can do their job without being smothered by vegetable “weeping.” You’ll notice the difference the moment you slice into it; the crumb is open, springy, and perfectly cooked from top to bottom.
The Science of Moisture Control in Root Vegetable Baking
Baking is essentially a series of chemical reactions, and sweet potatoes are notoriously unpredictable participants. When you use a puree, you’re introducing a high concentration of broken-down starches and trapped water into your flour mixture. As the bread heats up, that water turns to steam, but in a dense batter, it often gets trapped at the bottom of the pan. This creates that unappetizing, rubbery layer that ruins an otherwise perfect loaf.
By grating the sweet potato while it’s still raw, you keep the starch granules intact. However, even raw potatoes contain a surprising amount of liquid. If you skip the “towel squeeze” step, that juice will release into the batter as the cell walls break down in the oven. This extra liquid thins out the batter at the exact moment it needs to be setting, leading to a collapsed structure.
When you remove that excess moisture, you allow the baking soda and baking powder to work efficiently. These leaveners create tiny carbon dioxide bubbles that lift the flour proteins. Because the batter isn’t weighed down by heavy vegetable water, those bubbles stay trapped, resulting in a tall, proud loaf. This technique also preserves the bright color of the potato, as the strands don’t oxidize and turn gray as quickly as a puree would.
Essential Components for the Perfect Sweet Potato Loaf
Every ingredient in this recipe serves a specific structural or flavor-based purpose. We use a combination of granulated sugar and light brown sugar for a very specific reason. Granulated sugar helps with the “creaming” effect and provides a crispier edge, while brown sugar contains molasses, which adds a deep caramel note and keeps the center of the loaf soft. Together, they create a complex sweetness that complements the earthy potato.
The spice profile is intentionally bold. A full tablespoon of ground cinnamon and a half-teaspoon of nutmeg provide that classic warmth we crave in autumn baking. However, the real flavor bridge is the vanilla extract. Always use a high-quality, pure vanilla; it acts as a flavor enhancer that ties the spices and the natural sugars of the sweet potato together. Without it, the bread can taste a bit flat.
You might notice this recipe calls for vegetable oil instead of creamed butter in the batter. While butter tastes great, oil is a liquid at room temperature, which means your bread will stay incredibly moist even if you store it in the refrigerator. Butter-based breads tend to get firm and dry when chilled, but an oil-based crumb remains tender and “springy” to the touch for days.
Selecting and Preparing Fresh Sweet Potatoes
When you’re at the grocery store, look for sweet potatoes that feel heavy for their size with smooth, taut skin. Avoid any that have soft spots or sprouts, as these are signs the starch is beginning to turn to sugar, which can make the potato too watery. The skin should be a deep copper or rose color, indicating a high beta-carotene content for those beautiful orange flecks.
Use the fine side of a box grater rather than a food processor for this recipe. A food processor tends to “tear” the potato, which releases more juice and creates uneven chunks. Once you have your two cups of grated potato, pile them into a clean, thin kitchen towel. Twist the towel tightly and squeeze with all your might over the sink. You’ll be shocked at how much liquid comes out, but removing it is the only way to guarantee that “Anti-Soggy Bottom” result.
The Role of Chemical Leaveners and Flour Protein
This recipe utilizes both baking soda and baking powder to ensure a perfect rise. Baking soda reacts immediately with the acidic brown sugar, providing an initial boost of lift. Baking powder is “double-acting,” meaning it gives a second burst of rise once it hits the heat of the oven. This two-stage lift is vital for a bread filled with heavy grated vegetables.
All-purpose flour is the gold standard here because it has a moderate protein content. If you used bread flour, the loaf would become too chewy and tough, like a bagel. If you used cake flour, it wouldn’t have enough strength to support the weight of the sweet potatoes and the heavy honey glaze. All-purpose provides the perfect middle ground for a sturdy yet delicate crumb.
Step-by-Step: Mixing and Baking the Loaf
The process of making a quick bread is simple, but the order of operations matters immensely. You want to treat the batter with a gentle hand to ensure the final product isn’t tough. Think of yourself as a coach guiding the ingredients together rather than forcing them into a mixture.
Combining Dry Aromatics and Base Flour
Start by whisking your flour, sugars, leaveners, and spices in a large bowl. Don’t just give it a quick stir; really whisk it for about thirty seconds. This aerates the flour, making it lighter, and ensures the baking soda is perfectly distributed. There’s nothing worse than biting into a “hot spot” of bitter baking soda because it wasn’t mixed properly into the flour.
As you whisk, you’ll smell the cinnamon and nutmeg begin to bloom. This dry-mixing stage is also the best time to break up any stubborn clumps of brown sugar. You want the mixture to look like a uniform, sandy powder before any liquids are introduced. This prevents you from having to over-mix the batter later to get rid of lumps.
Emulsifying the Wet Ingredients and Grated Potato
In a separate bowl, beat your eggs with the oil, milk, and vanilla until the mixture is pale and slightly frothy. This creates a stable emulsion, which helps the fat distribute evenly throughout the bread. Once that’s smooth, stir in your squeezed sweet potato strands. You want to see the potato suspended in the liquid, not clumped together in one big ball.
By coating the potato strands in the oil and egg mixture first, you’re essentially “waterproofing” them. This further prevents them from releasing any remaining moisture into the flour once the two bowls are combined. It also ensures that every single bite of the finished bread has an even distribution of those beautiful orange flecks.
The Folding Technique to Prevent Gluten Over-Development
Now comes the most critical part: combining the two bowls. Pour the wet ingredients into the dry and use a large spatula to gently fold them together. Use a “cut and fold” motion—cut through the center, scrape the bottom, and fold the batter over the top. Stop the very second you no longer see white streaks of flour.
The batter should look thick and a little bit lumpy. If you keep stirring until it’s perfectly smooth, you’ll develop the gluten in the flour. Over-developed gluten creates a rubbery, bread-like texture rather than a tender, cake-like crumb. Trust the process; those small lumps will disappear in the heat of the oven as the bread expands.
Achieving the Signature Honey and Butter Glaze
The finishing touch is what takes this loaf from a simple snack to a showstopper. While the bread is still hot from the oven, place thin slices of cold butter right along the center crack. Because the butter is cold, it won’t just instantly turn to oil and run off the sides. Instead, it melts slowly, mingling with the honey or maple syrup you drizzle over the top.
This creates a controlled melt that seeps deep into the center of the loaf. As the bread cools, it “inhales” that honey-butter mixture, creating a moist, sweet core that contrasts beautifully with the slightly crusty exterior. The result is a glossy, soaked finish that looks like it came straight from a high-end bakery window.
Troubleshooting Common Quick Bread Obstacles
If you notice the top of your bread is getting very dark but the center still feels jiggly, don’t panic. Simply tent a piece of aluminum foil loosely over the top of the pan. This reflects the direct heat and allows the center to finish cooking without burning the crust. This usually happens in ovens that run a bit hot or if the rack is positioned too high.
To check for doneness, use a wooden toothpick or a thin skewer. Insert it into the thickest part of the loaf, usually right in the center crack. It should come out clean or with just a few moist crumbs attached. If you see wet batter, give it another five minutes. You can also use the “spring-back” test; gently press the top of the loaf with your finger. If it bounces back, it’s done; if it leaves an indentation, it needs more time.
Optimal Storage and Make-Ahead Strategies
Quick breads are famous for tasting even better on the second day. This is because the moisture in the bread redistributes and the spices have time to “bloom” and meld together. If you can resist eating it immediately, wrap the cooled loaf tightly in parchment paper and then a layer of foil. Store it at room temperature for up to three days.
For long-term storage, this bread freezes beautifully. I recommend slicing the loaf first and placing a small piece of parchment paper between each slice. Wrap the whole thing in plastic wrap and then put it in a freezer bag. This way, you can pull out a single slice and pop it in the toaster whenever the craving hits. It will stay fresh in the freezer for up to two months.
Expert Tips for Success
Can I use yams instead of sweet potatoes?
In US grocery stores, “yams” are usually just soft-fleshed sweet potatoes, so they work perfectly. However, true botanical yams are much starchier and drier, similar to a yucca root. If you find actual imported yams, they won’t provide the same sweetness or moisture, so stick to the orange-fleshed variety commonly found in the produce aisle.
Why did my bread sink in the middle?
A sunken center usually happens for two reasons: expired leaveners or opening the oven door too early. Check the date on your baking soda; if it’s older than six months, it might not have the strength to hold the bread up. Also, avoid peeking! Opening the door in the first 30 minutes causes a temperature drop that can make the fragile structure collapse before it sets.
Can I add nuts or dried fruit without changing the bake time?
Absolutely. You can add up to 1/2 cup of chopped pecans, walnuts, or golden raisins without significantly altering the bake time. Just fold them in at the very end of the mixing process. The nuts add a lovely crunch that contrasts with the soft, grated potato strands.
How do I get that perfect professional crack down the center?
While the bread will naturally crack as it rises, you can “force” a straight, professional-looking line. About 15 minutes into the bake, quickly pull the rack out and run a knife dipped in melted butter down the center of the loaf. This creates a weak point in the surface, encouraging the bread to expand right along that line.
Is there a dairy-free substitute for the whole milk?
Yes, you can easily swap the whole milk for oat milk or almond milk at a 1:1 ratio. Oat milk is particularly good here because it has a natural creaminess and a slight sweetness that pairs well with the sweet potato. Avoid using thin milks like rice milk, as they don’t provide enough fat for a rich crumb.
Suggested Pairings and Serving Occasions
This bread is incredibly versatile. For a sophisticated breakfast, serve a thick, toasted slice with a smear of salted cultured butter or even a piece of sharp cheddar cheese—the salty-sweet combo is addictive. It also pairs perfectly with a hot cup of black coffee or a spicy chai tea in the afternoon.
Because it’s so sturdy and travels well, it’s a fantastic option for potlucks or as a “thank you” gift for a neighbor. Whether you’re eating it warm from the oven or toasted with a little extra honey, this loaf is a masterclass in how proper technique can turn simple root vegetables into something truly extraordinary.
How should I store leftovers to keep them from getting dry?
To keep your bread moist, wrap it tightly in plastic wrap or parchment paper once it has cooled completely. Store it at room temperature for up to 3 days. If you live in a very humid environment, you can store it in the refrigerator for up to 5 days, but be sure to toast it before serving to soften the crumb back up. Avoid leaving it uncovered on the counter, as the air will quickly pull moisture from the exposed edges.
Why was my bread dense even though I squeezed the potatoes?
Density usually comes from over-mixing the batter. Once you add the dry ingredients to the wet, you must stop mixing as soon as the flour disappears. If you continue to stir, you develop gluten, which creates a tough, heavy texture. Another possibility is that your baking soda or powder has lost its potency. You can test your baking powder by putting a teaspoon in hot water; if it bubbles vigorously, it’s still good to use.
Can I substitute the vegetable oil with something else?
You can use melted coconut oil or even extra-virgin olive oil if you want a slightly different flavor profile. Coconut oil will add a very subtle tropical note, while olive oil adds a sophisticated, peppery finish that works surprisingly well with cinnamon. Just make sure the oil is in liquid form when you mix it into the eggs and milk to ensure a proper emulsion.
Can I freeze this bread for later?
Yes, this bread freezes exceptionally well. You can freeze the entire loaf by wrapping it in two layers of plastic wrap and one layer of aluminum foil. For convenience, I recommend freezing individual slices. Place parchment paper between the slices so they don’t stick together, then seal them in a heavy-duty freezer bag. They will stay fresh for up to 2 months. Thaw at room temperature or pop a frozen slice directly into the toaster.
What is the best way to reheat a slice?
The best way to reheat a slice is in a toaster oven or a conventional oven at 350°F for about 5 minutes. This restores the slightly crisp exterior while warming the center. If you’re in a hurry, you can microwave a slice for 15-20 seconds, but be careful not to overdo it, as the microwave can make the bread turn chewy or tough once it starts to cool down.
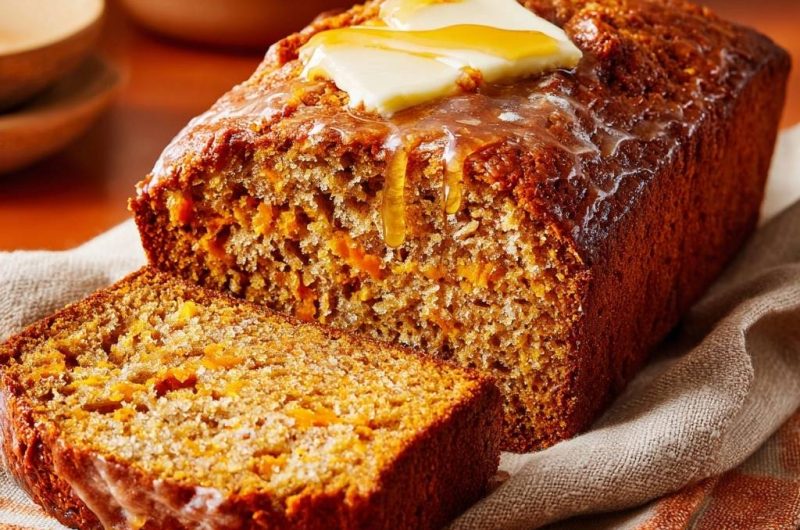
Glazed Sweet Potato Quick Bread
Course: Breads and DessertsCuisine: AmericanDifficulty: easy8
servings20
minutes1
hour80
Minutes340
kcalAmerican
Ingredients
2 cups all-purpose flour
1 cup granulated sugar
1/2 cup light brown sugar, packed
1 teaspoon baking soda
1 teaspoon baking powder
1/2 teaspoon salt
1 tablespoon ground cinnamon
1/2 teaspoon ground nutmeg
2 cups freshly grated sweet potato (peeled, raw)
1/2 cup vegetable oil
2 large eggs
1/4 cup whole milk
1 teaspoon vanilla extract
2 tablespoons unsalted butter, cold (for topping)
1/4 cup honey or maple syrup (for glaze)
Directions
- Preheat your oven to 350°F (175°C). Grease and flour a 9×5 inch loaf pan, or line it with parchment paper.
- To solve the soggy bottom issue and achieve the texture shown in the image, do not use puree. Peel fresh sweet potatoes and use the fine side of a box grater. Place the grated potato in a clean kitchen towel and squeeze firmly over the sink to remove excess moisture. This prevents the “weeping” that causes a gummy base.
- In a large bowl, whisk together the flour, granulated sugar, brown sugar, baking soda, baking powder, salt, cinnamon, and nutmeg.
- In a separate bowl, beat the eggs with the oil, milk, and vanilla. Stir in the squeezed, grated sweet potatoes until strands are evenly distributed.
- Gently fold the wet ingredients into the dry ingredients. Stop mixing the second you no longer see streaks of flour. Over-mixing creates a tough, rubbery texture.
- Pour the batter into the prepared pan. Bake for 55 to 65 minutes. A toothpick inserted into the center should come out clean, and the top should be a deep golden brown with a visible crack.
- Let the bread cool in the pan for 10 minutes before transferring to a wire rack.
- While the loaf is still warm, place thin slices of cold butter along the center ridge. Drizzle generously with honey or maple syrup, allowing it to melt with the butter and run down the sides to create the glossy, soaked glaze seen in the photo. Serve warm.
Notes
- To prevent a gummy base, ensure you squeeze the grated sweet potatoes firmly in a kitchen towel to remove all excess moisture before adding to the batter.


