
Nothing ruins a beautiful apple pie faster than a mushy, wet bottom crust. We’ve all been there, pulling a gorgeous-looking dessert out of the oven only to find the base has turned into a soggy, doughy mess under the weight of the fruit. This Golden Apple Slab Pie is the ultimate solution to that heartbreak. By using a wide, shallow format and a specific high-heat technique, we ensure every single bite is shatteringly crisp.
Slab pies are the unsung heroes of the baking world because they feed a crowd without the fuss of multiple round tins. You get a much higher crust-to-filling ratio, which is exactly what you want when working with buttery puff pastry. This recipe isn’t just about convenience, though; it’s about achieving a “Golden” standard of quality where the pastry stays flaky and the apples remain tender but distinct.
The secret to this success lies in thermal shock. Most bakers put cold dough into a cold pan and then into the oven, giving the fruit juices plenty of time to soak into the crust before it sets. I’m going to show you how to sear your pastry just like you’d sear a steak. This immediate blast of heat creates a moisture barrier that keeps your pie bottom crisp for hours, even after it cools.
The Physics of a Crisp Puff Pastry Base
Puff pastry is a marvel of culinary engineering, relying on hundreds of thin layers of chilled fat sandwiched between layers of dough. When that cold fat hits a hot oven, the water in the butter evaporates instantly, creating steam. This steam force-lifts the dough layers apart, resulting in that iconic, airy crunch we crave. However, if the oven isn’t hot enough or the pan is cold, the fat simply melts and soaks into the flour, leaving you with a flat, greasy heavy crust.
The “Soggy Bottom” phenomenon happens when the sugar in the apple filling draws out the fruit’s natural juices through osmosis. In a traditional deep-dish pie, these juices pool at the bottom and boil the raw dough instead of baking it. By using a flat slab format, we increase the surface area, allowing moisture to evaporate more quickly through the top lattice.
To combat the remaining moisture, we use the thermal shock method. By preheating the baking sheet to 425°F before the dough ever touches it, we initiate an immediate “set” on the bottom layer of the pastry. This creates a toasted, sealed surface that acts as a shield against the apple juices. It’s the difference between a soggy sandwich and a perfectly toasted panini.
Essential Components for Golden Apple Slab Pie
When it comes to the filling, Granny Smith apples are the industry standard for a reason. Their high acidity balances the heavy sugars, and their firm cell structure prevents them from turning into applesauce during the 45-minute bake. They contain a good amount of natural pectin, which helps the juices thicken into a jam-like consistency rather than a watery syrup.
Cornstarch acts as our primary stabilizer in this recipe. While flour can sometimes leave a cloudy or pasty aftertaste, cornstarch creates a clear, glossy filling that holds its shape when sliced. It’s vital to mix it thoroughly with the sugars so it distributes evenly across every apple slice. This ensures that every pocket of the pie has that perfect, gooey bind.
Don’t overlook the importance of the finishing sugar. Using coarse sparkling sugar or turbinado sugar isn’t just for looks. These large crystals don’t melt in the oven heat, providing a delightful crunch that contrasts with the soft apples. Always use unsalted butter for the “dots” on top of the filling; this allows you to control the saltiness of the dessert while adding a rich, velvety mouthfeel to the sauce.
Selecting and Preparing the Fruit Filling
Consistency is your best friend when prepping the apples. I recommend slicing them to a precise 1/4-inch thickness. If the slices are too thin, they’ll disappear into the syrup; if they’re too thick, they won’t soften in time, leaving you with crunchy bits in your pie. A uniform slice ensures that every piece of fruit reaches the same level of tenderness at the exact same moment.
Once you’ve tossed the apples with the spices and sugars, let them sit for at least 15 minutes. This maceration period is crucial. You’ll notice a thick, fragrant syrup forming at the bottom of the bowl. This process allows the cornstarch to begin hydrating in the fruit juices before it hits the heat, which prevents any dry clumps of starch from ruining the texture of your filling.
Working with Chilled Puff Pastry Sheets
Store-bought puff pastry is a fantastic time-saver, but it’s temperamental. You want the dough to be “thawed but cold.” If it’s too frozen, it will crack when you try to unroll it; if it’s too warm, the butter layers will bleed together, and you’ll lose your puff. If you feel the dough getting sticky or limp at any point, pop it back in the fridge for ten minutes.
When joining the sheets to fit your 15×10-inch pan, overlap the edges by about half an inch. Use a rolling pin to gently press the seam together. Be careful not to overwork the dough or roll it too thin. You want to maintain those delicate layers of gluten and fat. A light touch ensures the pastry remains tender and shatters easily when you bite into it.
Thermal Shock: The Preheated Pan Technique
This is the most important step in the entire process. While your oven preheats to 425°F, your empty rimmed baking sheet should be inside getting scorching hot. This mimics the intense floor heat of a professional stone pizza oven. When you finally place your cold, prepared pastry onto that hot metal, you should hear a distinct sizzle. That sound is the bottom of your pie instantly searing.
This immediate heat transfer does two things. First, it begins cooking the bottom crust before the heavy, wet apple filling can weigh it down. Second, it forces the butter in the puff pastry to expand upward instantly, creating a sturdier base. You’re essentially creating a waterproofed layer of toasted pastry that can withstand the bubbling juices of the apples.
Working quickly is essential here. You don’t want the pan to lose too much heat while it’s out of the oven. Have your parchment paper and rolled-out dough ready to go. Once that pan comes out, it’s a race to get the pastry down, the apples spread, and the pie back into the heat. This efficiency is what separates a good home cook from a great one.
Step-by-Step: Constructing the Slab Pie
Phase one begins with the “Sizzle.” Carefully drape your bottom pastry over the parchment-lined, hot pan. Don’t worry if it isn’t perfectly centered at first; you have a few seconds to adjust before the heat sets the dough. You’ll see the edges start to puff almost immediately. This is exactly what we want to see for a crisp result.
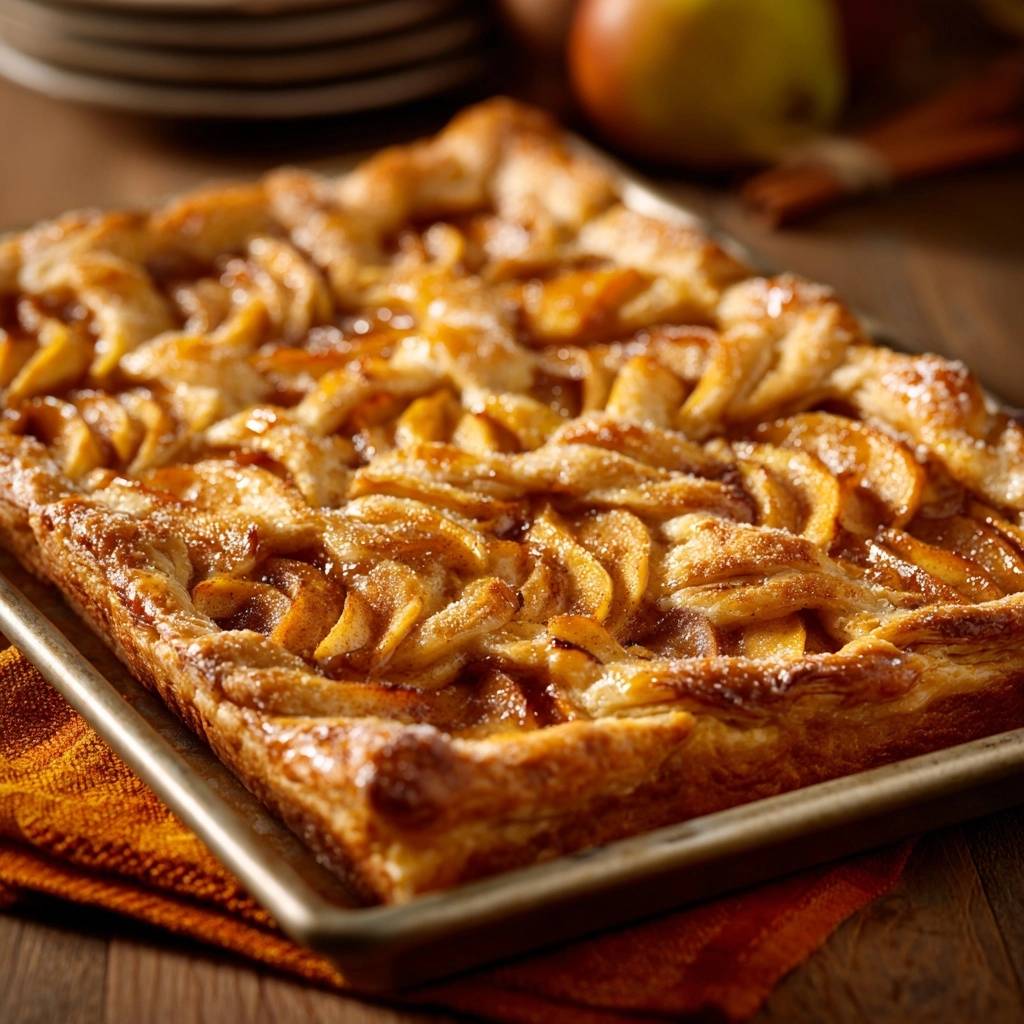
Phase two involves the filling. Spread the apple mixture in an even layer, making sure you don’t pile them too high in the center. You want a flat, even surface so the top crust sits level. Dot the surface with your small bits of unsalted butter. As these melt, they’ll mingle with the cinnamon and sugar to create a butterscotch-like sauce that coats the fruit.
Phase three is the assembly of the top. By using a lattice instead of a solid sheet of dough, you’re creating built-in chimneys for steam to escape. If you used a solid sheet, the steam from the apples would get trapped, making the top crust soggy and the filling watery. The lattice ensures the interior stays jammy while the pastry stays dry.
Creating a Structural Lattice Top
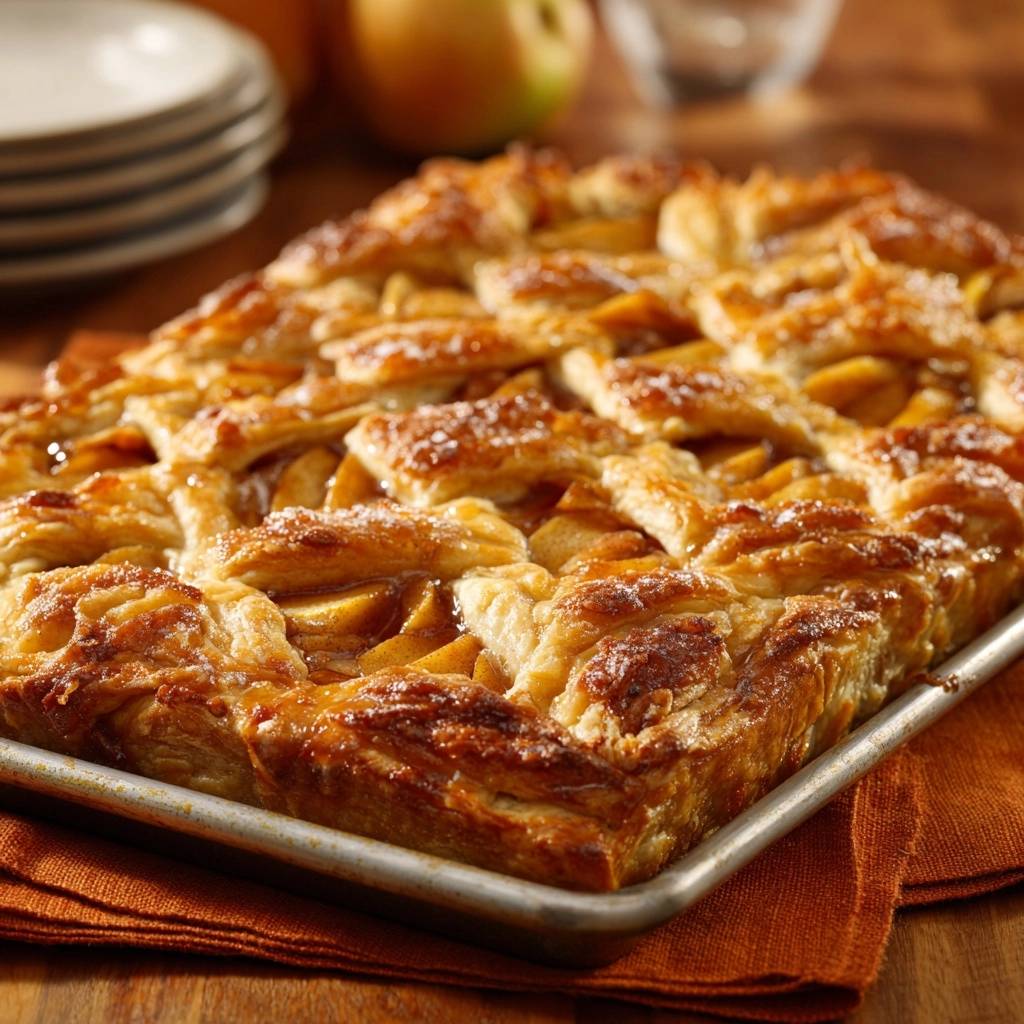
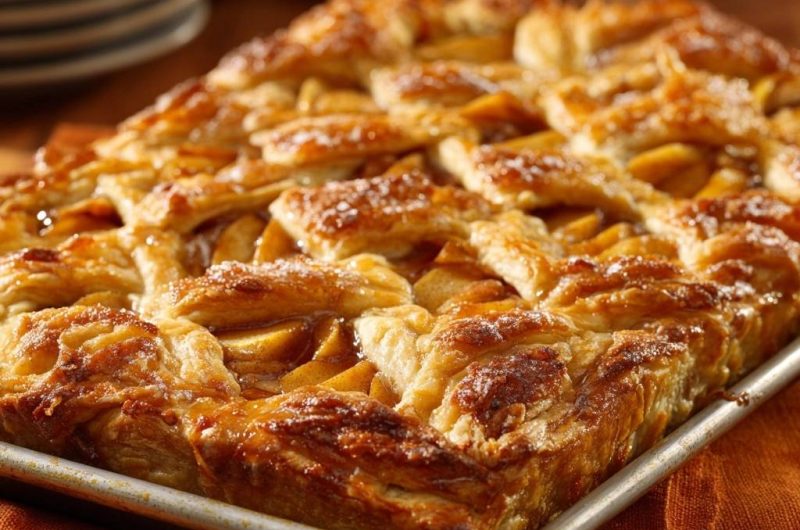
Use a pizza cutter to slice your second sheet of pastry into 1.5-inch wide strips. A wider strip is easier to handle and provides more structural integrity for a slab pie. You don’t need a complex weave; a simple over-under pattern works beautifully. This open design allows you to see the bubbling fruit underneath, which is a great visual cue for doneness.
Once your strips are laid out, fold the overhanging bottom crust up and over the ends of the strips. Use a fork to crimp the edges firmly. This creates a decorative border and, more importantly, a leak-proof seal. You want to keep all those delicious juices inside the pie rather than running all over your baking sheet.
The Egg Wash and Finishing Touches
The egg wash is your ticket to that professional, deep mahogany color. The proteins in the egg white encourage browning, while the fat in the yolk provides a stunning shine. Whisk the egg with a tablespoon of water until it’s completely smooth with no globs of white remaining. This ensures an even coat across the entire surface.
Use a pastry brush to apply a thin, even layer over the lattice and the crimped edges. Be careful not to let the egg wash drip down the sides of the pastry layers. If the egg “glues” the cut edges of the puff pastry together, it will prevent the layers from expanding upward. Finish with a heavy sprinkle of sparkling sugar for that signature glisten and crunch.
Baking for Maximum Color and Crunch
Don’t be afraid of a dark crust. A pale pie is an undercooked pie. You are looking for a “deeply bronzed” finish. This color indicates that the Maillard reaction has occurred, which brings out complex, toasted flavors in the flour and butter. If the pastry looks light tan, it likely hasn’t developed the structural strength to stay crisp once it cools.
Keep an eye on the filling in the center of the pie. You want to see the juices bubbling vigorously. This is the signal that the internal temperature has reached the point where the cornstarch can fully activate and thicken. If the juices are just simmering at the edges but still look thin in the middle, give it another five minutes. The total bake time is usually between 40 and 45 minutes.
The Critical Cooling and Setting Phase
I know it’s tempting to slice into a warm pie the second it leaves the oven, but patience is a technical requirement here. When the pie is piping hot, the filling is still essentially a liquid. If you cut it now, the juices will run everywhere, and the bottom crust will lose its crispness as it sits in the puddle. You’ll end up with a mess instead of a slice.
As the pie cools for at least 45 minutes, the starches undergo a process called retrogradation. The filling firms up, turning into a sliceable, jam-like consistency that stays put. The pastry also needs this time to fully set its structure. Cooling the pie in the pan allows the bottom crust to finish “curing” against the residual heat of the metal, ensuring it stays dry and firm.
Troubleshooting Common Slab Pie Issues
If your pastry didn’t puff as much as you hoped, the dough likely got too warm during the assembly process. Next time, try chilling the assembled pie in the fridge for 15 minutes before putting it onto the hot baking sheet. This ensures the butter is cold enough to create steam. If the top is browning too quickly but the apples aren’t tender, simply lay a piece of foil loosely over the top to protect it.
Sometimes apples can be extra tart depending on the season. If you find the filling too sharp, you can increase the brown sugar by a few tablespoons in your next batch. Conversely, if the bottom is still a bit soft, try moving your oven rack to the lowest position for the last ten minutes of baking. This puts the pan closer to the heating element, giving the base an extra boost of crisping power.
Storage and Reheating for Lasting Crispness
To keep your leftovers crisp, avoid airtight containers or plastic wrap, which trap moisture and turn puff pastry soft. Instead, leave the pie in the pan and cover it loosely with a clean kitchen towel or foil. It will stay fresh at room temperature for up to two days. If you need to store it longer, keep it in the fridge, but be aware the crust will soften slightly.
Never use a microwave to reheat puff pastry; it will turn the dough rubbery and tough. The only way to restore that “just-baked” crunch is in a 350°F oven for about 8 to 10 minutes. This dries out any absorbed moisture and recrisps the butter layers. You can also freeze the unbaked slab pie for up to a month; just bake it directly from frozen, adding about 15 minutes to the total time.
Serving Suggestions for Large Gatherings
This slab pie is a showstopper at potlucks and holiday dinners. For a classic experience, serve it slightly warm with a big scoop of cold vanilla bean ice cream. The contrast between the hot, spiced apples and the melting cream is unbeatable. If you want something a bit more sophisticated, a dollop of unsweetened whipped cream or a drizzle of salted caramel sauce works beautifully.
The 15×10-inch size is incredibly versatile for portioning. You can cut 12 large, generous squares for a sit-down dessert, or slice it into 24 smaller rectangles for a buffet-style event. Because the crust is so sturdy, these smaller pieces can even be eaten as “hand pies” without the need for forks and plates, making it the perfect low-maintenance treat for busy gatherings.
How do I prevent the bottom of my slab pie from getting soggy?
The most effective way to prevent a soggy bottom is using the preheated pan technique. By placing your cold pastry onto a scorching hot baking sheet, you sear the bottom of the dough instantly. Additionally, using cornstarch in the filling binds the juices so they don’t soak into the crust, and the lattice top allows steam to escape rather than turning into moisture inside the pie.
Can I use a different type of apple for this recipe?
While Granny Smith is the best for its tartness and firm texture, you can use Honeycrisp, Braeburn, or Jonagold apples. Avoid soft apples like Red Delicious or McIntosh, as they tend to break down and become grainy or mushy when baked for 45 minutes. If you use a sweeter apple, you may want to reduce the granulated sugar by a tablespoon or two.
What if I don’t have a 15×10-inch pan?
You can use a standard 18×13-inch half-sheet pan, but you will need to roll your puff pastry slightly thinner to cover the larger surface area. If you do this, keep a close eye on the bake time, as a thinner pie will cook faster. Alternatively, you can use a 9×13-inch baking dish, but you won’t get the same level of crispness on the bottom because the high sides of the dish trap more steam.
How do I store leftovers so they stay crunchy?
Store leftovers at room temperature for up to two days, covered loosely with foil or a kitchen towel. Avoid airtight plastic containers, as they trap humidity and make the puff pastry soggy. To reheat, place the slices on a baking sheet in a 350°F oven for 10 minutes. This will reactivate the fats in the pastry and bring back that shatteringly crisp texture.
Can I make this slab pie ahead of time?
Yes, you can assemble the entire pie, wrap it tightly in plastic wrap, and keep it in the refrigerator for up to 24 hours before baking. However, do not apply the egg wash until right before you are ready to put it in the oven. For the best results, you can also freeze the unbaked pie for up to a month. Bake it straight from the freezer, adding an extra 10-15 minutes to the baking time.
Why didn’t my puff pastry rise or “puff” on the edges?
This usually happens if the dough becomes too warm before it hits the oven. If the butter layers melt into the flour while you are assembling the lattice, they won’t create the steam necessary for lift. Another common culprit is the egg wash; if it drips down the cut edges of the pastry, it can act as a glue that prevents the layers from separating. Always keep your dough as cold as possible until the moment it enters the oven.
Golden Apple Slab Pie
Course: DessertCuisine: AmericanDifficulty: easy12
servings30
minutes45
minutes75
MinutesAmerican
Ingredients
2 packages (17.25 oz each) frozen puff pastry, thawed but cold
6 large Granny Smith apples, peeled and thinly sliced (1/4 inch thick)
1/2 cup granulated sugar
1/2 cup packed light brown sugar
2 tablespoons ground cinnamon
1/4 teaspoon ground nutmeg
3 tablespoons cornstarch
1/4 teaspoon salt
2 tablespoons unsalted butter, cut into small bits
1 egg, beaten with 1 tablespoon water (egg wash)
2 tablespoons coarse sparkling sugar or turbinado sugar
Directions
- Preheat your oven to 425°F (220°C). Place a large, rimmed 15×10-inch baking sheet inside the oven while it preheats. This hot pan is the secret to immediately searing the bottom pastry to prevent sogginess.
- In a large bowl, toss the sliced apples with granulated sugar, brown sugar, cinnamon, nutmeg, cornstarch, and salt. Let them sit for 15 minutes. The cornstarch and sugars will create a thick, jammy syrup that won’t soak into the dough.
- On a lightly floured surface, roll out one package of puff pastry (two sheets) and join them by overlapping the edges slightly, rolling them into a rectangle large enough to cover the 15×10-inch pan. Repeat with the second package of puff pastry for the top.
- Cut the second sheet of rolled pastry into 1.5-inch wide strips using a pizza cutter or knife.
- Carefully remove the scorching hot baking sheet from the oven. Quickly line it with a piece of parchment paper and drape the bottom pastry sheet over it. You should hear a slight sizzle as the bottom begins to set.
- Immediately spread the apple mixture over the crust, leaving a 1/2-inch border. Dot the apples with the small bits of butter.
- Weave the pastry strips over the apples in a loose lattice pattern. Fold the bottom crust edges over the lattice ends and press firmly with a fork to seal.
- Brush the lattice top and edges thoroughly with the egg wash. Sprinkle generously with the coarse sparkling sugar.
- Place the pan back into the oven. Bake for 40 to 45 minutes, or until the puff pastry is deeply bronzed and the apple filling is bubbling vigorously in the center.
- Allow the pie to cool in the pan for at least 45 minutes before slicing. This cooling period is essential for the starches to set, ensuring a clean slice and a crisp, dry bottom crust.
Notes
- The secret to the crisp bottom is preheating the baking sheet to 425°F. Ensure the apples sit for 15 minutes with cornstarch to create a thick syrup that won’t soak into the dough.


