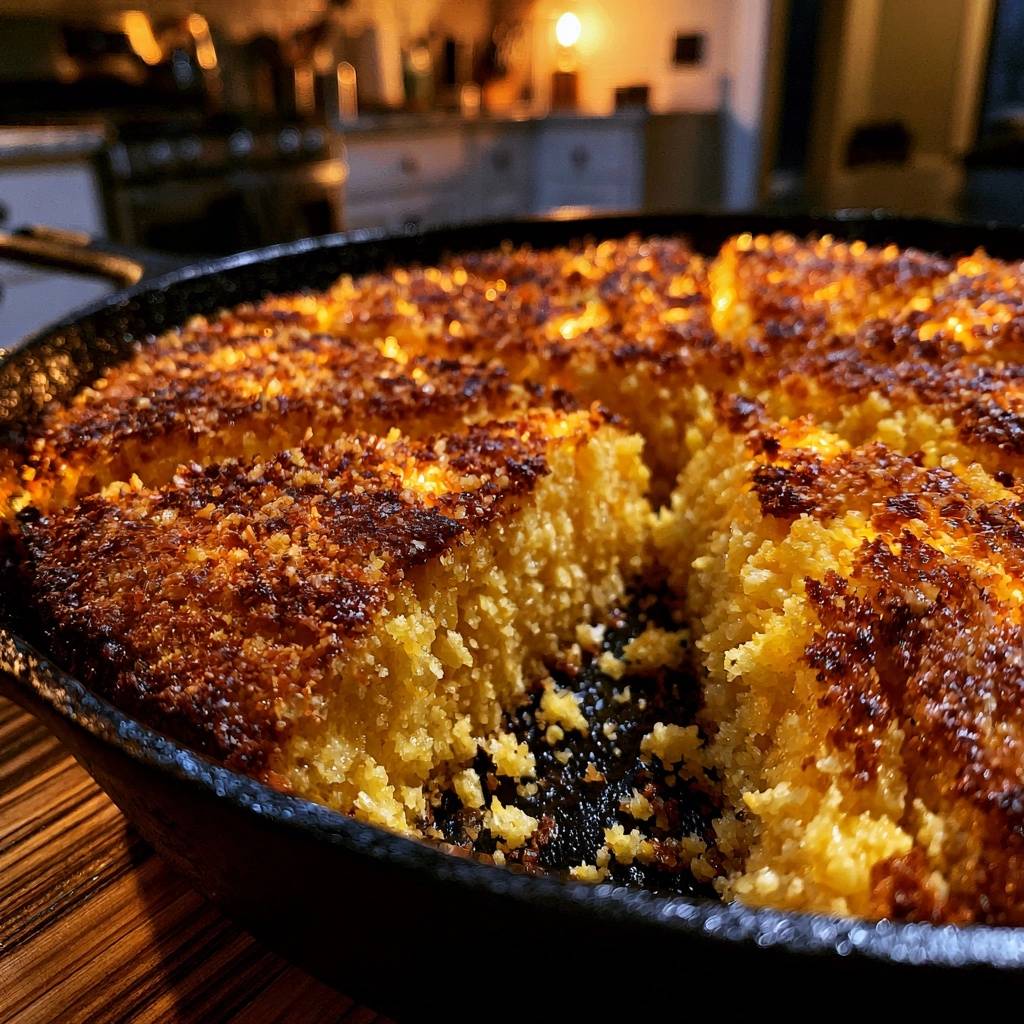
Imagine the sound of a loud, aggressive sizzle the moment your batter hits the pan. That instant searing of the cornmeal creates a crust so crisp it practically shatters when you bite into it, revealing a center that stays light, fluffy, and steaming hot. This isn’t just another side dish; it’s a masterclass in texture that turns a humble staple into the star of the table.
Most home cooks struggle with cornbread that turns out pale, greasy, or tragically stuck to the bottom of the pan. We’ve all been there, scraping away at a beautiful loaf that just won’t release. The secret to avoiding a soggy bottom lies entirely in the temperature of your skillet before the batter even touches it. By preheating your cast iron until it’s screaming hot, you create a natural non-stick barrier that fries the exterior to a deep, caramelized gold.
The real trick to professional-grade cornbread is the “thermal shock” method. You aren’t just baking the bread; you’re essentially shallow-frying the outer layer while the inside bakes. This requires a heavy cast iron skillet because it holds onto heat better than any other material. When that shimmering fat meets the cold batter, it locks in moisture immediately, ensuring your bread never tastes like dry sawdust.
The Physics of the Preheated Cast Iron Skillet
Cast iron is the undisputed king of the kitchen for this recipe because of its incredible thermal mass. Unlike stainless steel or glass, which lose heat the moment you open the oven door, cast iron acts like a heat battery. It radiates intense, even energy into the batter from the second it lands. This constant, high-level heat is what produces that iconic, thick crust that can support a heavy smear of butter without crumbling apart.
When you preheat the skillet with the fat inside, the oil reaches a shimmering, slightly smoking state. This creates a “Leidenfrost effect” of sorts, where the steam escaping from the batter prevents it from actually bonding to the metal. Instead of sticking, the batter floats on a thin layer of hot fat, searing the edges instantly. This process is what gives you that beautiful, dark ring around the edge of the loaf that everyone fights over at dinner.
Essential Components for Golden Skillet Cornbread
Every ingredient in this recipe serves a specific structural or chemical purpose. We use a combination of cornmeal and all-purpose flour to strike the perfect balance between a rustic “crunch” and a cake-like crumb. While some purists use only cornmeal, the addition of flour provides the gluten needed to hold the bread together, preventing it from falling into a pile of crumbs the moment you slice it.
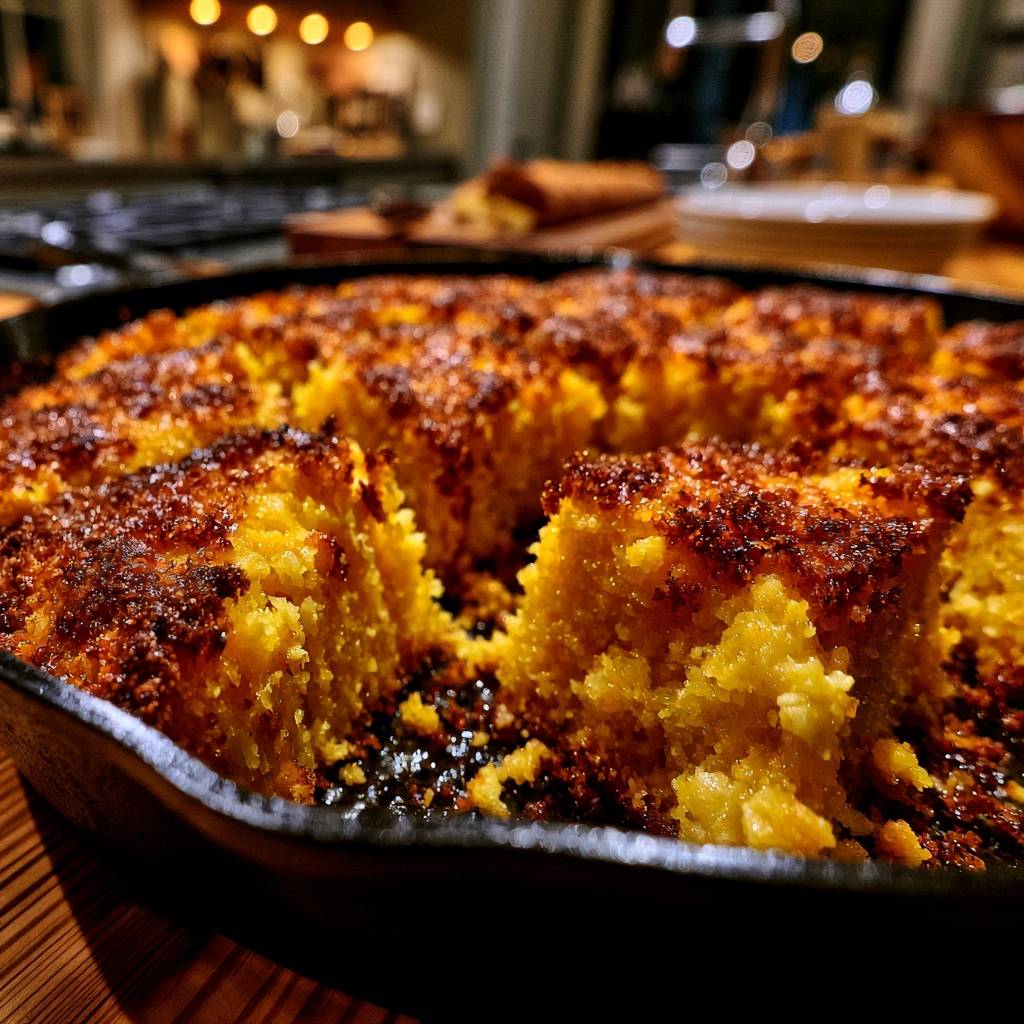
The leavening agents are equally vital. We use both baking powder and baking soda to ensure a high, airy rise. The baking soda specifically reacts with the lactic acid in the buttermilk, creating tiny carbon dioxide bubbles that lift the heavy cornmeal. If you want that deep bronze color, don’t skip the small amount of honey or sugar. Even if you prefer savory bread, that touch of sugar aids the Maillard reaction, which is the chemical process that browns the crust and develops complex flavors.
Choosing the Right Cornmeal Grind
For the best results, look for stone-ground yellow cornmeal. Unlike highly processed, finely bolted meal, stone-ground varieties retain the germ and the hull, providing a toothsome, “corn-forward” texture. Fine meal can often result in a texture that feels too much like a standard yellow cake, whereas a medium or stone-ground grit gives you that authentic, rustic mouthfeel that defines a great skillet loaf.
The Role of Full-Fat Buttermilk
Full-fat buttermilk is non-negotiable here. The thick consistency and high fat content provide a richness that standard milk simply cannot replicate. More importantly, the acidity in buttermilk acts as a tenderizer. It breaks down the tough outer hulls of the cornmeal during the short baking time, ensuring that while the bread is crunchy on the outside, it remains tender and moist on the inside.
Phase One: Preparing the High-Heat Environment
Success starts long before you crack an egg. You must place your 10-inch cast iron skillet into the oven while it preheats to 425°F. This ensures the metal is saturated with heat all the way through. If you wait until the oven is hot to put the pan in, the surface might be warm, but the core will be too cool to create that necessary sizzle.
Safety is paramount during this phase. A 400-degree cast iron handle looks exactly like a cold one, so always keep a heavy-duty oven mitt or a silicone handle cover nearby. When you add your fat—whether it’s vegetable oil or beef tallow—it should shimmer and move like water. If it doesn’t smoke just a tiny bit, the pan isn’t hot enough yet. Give it another few minutes to reach that critical temperature.
Phase Two: Mixing for a Light and Airy Crumb
When it comes time to combine your wet and dry ingredients, the golden rule is “less is more.” You want to stir just until you no longer see streaks of dry flour. The batter should look a bit lumpy and thick. If you whisk it until it’s perfectly smooth, you’ll overwork the gluten in the flour, resulting in a tough, rubbery texture that feels more like a hockey puck than a piece of bread.
The consistency should be thick but still pourable. If the batter feels too stiff, add a tablespoon more of buttermilk. Remember, the cornmeal will begin absorbing moisture the second it hits the liquid, so you need to work quickly. Have your hot skillet ready and waiting so the batter doesn’t sit on the counter losing its leavening power.
Phase Three: The Sizzle and the Sear
This is the moment of truth. Carefully pull the hot skillet out and swirl the oil so it coats the bottom and at least halfway up the sides. Immediately pour the batter into the center of the pan. You should hear a loud, aggressive hiss. This is the sound of the bottom of your cornbread being “fried” in the skillet, which creates that legendary non-stick crust.
Don’t linger once the batter is in the pan. Use a spatula to quickly smooth the top and get it back into the oven. You want to maintain as much of that residual heat as possible. This immediate transfer ensures the “sear” continues as the bread begins to rise, locking in the shape and preventing the oil from soaking into the center of the bread and making it greasy.
Achieving the Deep Bronze Textured Top
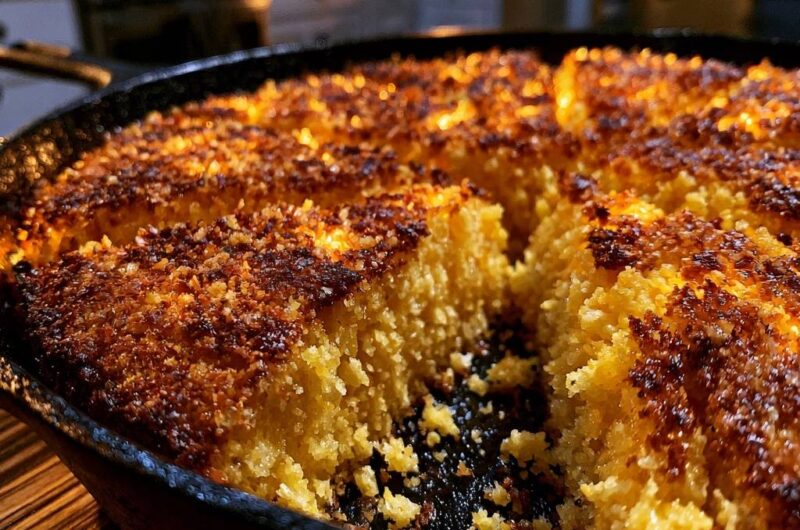
While the bottom gets its color from the skillet, the top needs a little extra help. For that professional, textured look, move the skillet to the top rack of the oven for the final three minutes of baking. The radiant heat from the top heating element will caramelize the natural sugars on the surface. You’re looking for a deep, golden-brown hue with slightly darker, craggy peaks across the top.
Troubleshooting Common Cornbread Failures
If your cornbread comes out with a soggy bottom, it almost always means the skillet or the oil wasn’t hot enough when the batter was added. Next time, let the pan sit in the oven for at least 10 minutes after the oven hits the target temperature. If the bread is too crumbly to slice, you likely overbaked it or didn’t use enough fat. Check your oven temperature with a thermometer to ensure it isn’t running too hot.
A pale loaf is usually the result of low oven temperatures or skipping the honey/sugar. The sugar isn’t just for sweetness; it’s a functional ingredient for browning. If you find the texture too gritty, try letting your cornmeal and buttermilk mixture sit for 10 minutes before adding the other ingredients. This “soaking” period softens the grains for a smoother finish.
Optimal Pairings for Savory Cornbread
This cornbread is sturdy enough to stand up to the heaviest stews and chilis. It’s the perfect vessel for soaking up the broth from a slow-cooked pot of pinto beans or a hearty beef stew. The savory, salty crust provides a brilliant contrast to the richness of roasted meats like brisket or smoked chicken.
For a simple treat, serve it warm with a generous dollop of whipped honey butter. The heat from the bread will melt the butter into the nooks and crannies, creating a sweet and salty explosion. If you have leftovers, try splitting a piece down the middle and searing it in a dry pan for a breakfast treat topped with a drizzle of maple syrup.
Storage and Reheating for Maximum Crunch
Never put your crispy cornbread in the microwave! The microwave is the enemy of texture and will turn that beautiful crust into a soft, spongy mess. Instead, store leftovers in an airtight container at room temperature for up to two days. To reheat, place a slice in a toaster oven or a dry skillet over medium heat for a few minutes. This revives the fried edges and keeps the center moist.
If you want to freeze it, wrap individual slices tightly in plastic wrap and then foil. They will stay fresh for up to three months. When you’re ready to eat, let them thaw at room temperature and then give them a quick toast in the oven to bring back that signature skillet crunch.
Expert Tips for Skillet Success
How do I prevent the center from dipping?
A sunken center usually means your leavening agents—the baking powder or soda—are expired. These lose their potency over time, especially in humid kitchens. Always test your baking powder by dropping a pinch into hot water; if it doesn’t fizz vigorously, it’s time to buy a fresh tin. Also, avoid opening the oven door frequently during the first 15 minutes of baking.
Can I use a cake pan if I don’t have cast iron?
You can use a standard metal cake pan or a glass baking dish, but you will lose the signature “fried” crust. These materials don’t hold enough heat to sear the batter. If you must use them, increase the butter in the batter by a tablespoon to compensate for the lack of exterior fat, and expect a much softer, paler result.
Why is my cornbread gritty?
Grittiness is often a result of the cornmeal grind or the hydration time. If you prefer a softer texture, whisk the cornmeal and buttermilk together and let them rest for 10 to 15 minutes before adding the eggs and dry ingredients. This allows the cornmeal to hydrate and soften, resulting in a much smoother crumb after baking.
Is the sugar necessary?
In many Southern traditions, sugar is considered a sin in cornbread. However, from a culinary science perspective, a small amount of sugar or honey significantly improves the Maillard reaction. This helps the bread achieve that deep bronze color and complex, toasted aroma. If you want a strictly savory bread, you can omit it, but your crust will be noticeably lighter.
How do I clean the skillet after this recipe?
Because of the high heat and the oil used in this recipe, the cornbread should slide right out. While the pan is still warm, wipe it down with a paper towel. If there are stuck-on bits, use a stiff brush and hot water—no soap! Dry it immediately on the stovetop over low heat and rub in a tiny drop of oil to maintain the seasoning for your next bake.
Golden Skillet Cornbread
Course: Side DishCuisine: AmericanDifficulty: easy8
servings10
minutes25
minutes35
Minutes295
kcalAmerican
Ingredients
2 cups yellow cornmeal (stone-ground preferred for texture)
1/2 cup all-purpose flour
1 teaspoon salt
1 tablespoon baking powder
1/2 teaspoon baking soda
1.5 cups full-fat buttermilk
2 large eggs
4 tablespoons unsalted butter, melted
3 tablespoons bacon drippings or vegetable oil (for the skillet)
1 tablespoon honey or sugar (optional)
Directions
- Place a 10-inch cast iron skillet into the oven and preheat to 425°F (218°C). This is the most critical step to ensure your cornbread does not stick and develops the deep, dark crust shown in the image.
- In a large bowl, whisk together the cornmeal, flour, salt, baking powder, and baking soda until well combined.
- In a separate bowl, beat the eggs into the buttermilk. Stir in the melted butter and honey if using.
- Carefully remove the hot skillet from the oven using a heavy-duty oven mitt. Add the 3 tablespoons of bacon drippings or oil to the hot pan. Swirl to coat the bottom and sides completely; the fat should be shimmering and slightly smoking.
- Quickly pour the wet ingredients into the dry ingredients and stir just until moistened. Do not overmix, as this leads to a tough, dense texture.
- Immediately pour the batter into the sizzling hot skillet. You should hear a loud, aggressive sizzle as the batter hits the oil-this “fries” the bottom and sides instantly, creating the non-stick barrier and the crunchy, caramelized exterior.
- Return the skillet to the oven and bake for 20 to 25 minutes. For the specific dark, textured top seen in the image, you may move the skillet to the top rack for the final 3 minutes of baking.
- Let the cornbread rest in the skillet for 5 minutes before slicing. The residual heat will finish setting the crust for a perfect release. Serve warm directly from the iron.
Notes
- The aggressive sizzle when pouring the batter is essential for creating the non-stick barrier and crunchy exterior.