
We have all been there. You pull a tray of chicken out of the oven, hoping for a juicy centerpiece, only to find a plate of rubbery, flavorless meat that requires a gallon of water just to swallow. It is the ultimate kitchen heartbreak. Most home cooks struggle with chicken breasts because the lean meat has almost zero margin for error. One minute too long in the heat and the moisture vanishes, leaving you with something that resembles a pencil eraser more than a meal.
The secret to restaurant-quality Lemon Herb Roasted Chicken is a technique I call the “Moisture Seal.” Instead of letting the oven slowly bake the life out of the poultry, we use a two-stage approach that bridges the gap between a home kitchen and a professional bistro. By combining a high-heat sear with a shallow herb butter bath, we create a protective barrier. This method ensures the exterior is savory and golden while the interior remains incredibly succulent.
The real magic happens when the fats and acids work together. You aren’t just cooking the meat; you are poaching it in a concentrated sauce that infuses every fiber with garlic and citrus. This isn’t just another recipe; it is a foolproof system for perfect poultry. Once you master the jumpstart sear, you will never go back to the “toss it in and hope” method again.
The Physics of the Perfect Sear
When the chicken hits that hot oil, a complex chemical reaction called the Maillard reaction begins. This isn’t just about getting a pretty brown color. This process creates hundreds of different flavor compounds that give the meat its savory, “meaty” depth. Without this step, your chicken will always taste flat and one-dimensional.
Furthermore, the sear acts as a structural barrier. By tightening the outer proteins quickly, you help trap the internal juices before the chicken even enters the oven. Think of it as a protective shield. When you transition the meat from the stovetop to the oven, that crust holds firm, ensuring the high heat of the oven cooks the center without evaporating the moisture from the surface.
Why Surface Moisture is the Enemy
If you want a perfect sear, your chicken must be bone-dry. If there is even a thin film of water on the surface of the meat, the heat of the pan will turn that water into steam instantly. Instead of searing, your chicken will essentially boil in its own juices, resulting in a grey, limp texture that lacks flavor.
I always tell people to use more paper towels than they think they need. Press down firmly on both sides of the breast until the paper no longer feels damp. This allows the olive oil to make direct contact with the protein, creating that signature golden-brown crust that makes this dish so visually appealing and delicious.
Essential Components for Lemon Herb Roasted Chicken
Quality ingredients are the backbone of this dish. Since the ingredient list is short, each item has a big job to do. I recommend using a high-quality olive oil for the sear because it handles the heat well, but the real flavor comes from the unsalted butter. Using unsalted butter allows you to control the seasoning perfectly without the dish becoming a salt bomb.
The chicken broth is another heavy hitter. It provides the volume for the “bath” that keeps the meat tender. If you use a low-sodium version, you can be more aggressive with your sea salt seasoning. Freshly cracked black pepper is also a must; the pre-ground stuff in the tin lacks the floral, spicy punch that cuts through the richness of the butter.
Selecting the Right Poultry Cuts
When shopping, look for chicken breasts that are roughly the same thickness. If one is massive and the other is thin, they will never finish at the same time. If you have uneven pieces, you can gently pound the thicker end with a meat mallet to ensure a uniform shape. This leads to even heat distribution and prevents the dreaded “dry edges.”
I prefer air-chilled chicken whenever possible. Most standard chicken is chilled in a water bath, which means the meat absorbs extra liquid that leaks out during cooking. Air-chilled poultry has a more concentrated flavor and shrinks significantly less in the oven, giving you more meat for your money and a better texture.
The Role of Fresh Aromatics and Acids
Lemon juice is more than just a flavor; it is a natural tenderizer. The acid helps break down the tough protein fibers on the surface, allowing the butter and herbs to penetrate deeper. However, balance is key. We use the juice for the sauce and the slices for the roast to provide a double hit of citrus aroma without making the dish too sour.
Fresh thyme is non-negotiable here. While dried oregano provides a great earthy base, fresh thyme adds a bright, lemony pepperiness that dried herbs just can’t replicate. Also, please skip the jarred minced garlic. It often has a bitter, metallic aftertaste. Freshly minced cloves will melt into the butter sauce, creating a sweet, mellow garlic flavor that complements the lemon perfectly.
Step-by-Step: Executing the Moisture Seal Method
Success in the kitchen is all about timing and observation. You aren’t just following a clock; you are watching for specific visual and sensory cues. This method moves quickly, so have all your ingredients measured and ready before the chicken ever touches the pan.
Phase 1: The High-Heat Stovetop Jumpstart
Start by heating your olive oil until it is shimmering. You should see tiny ripples on the surface. If the oil starts to smoke, it is too hot; pull it off the heat for a second. Carefully lay the chicken away from you to avoid splashes. Now, here is the hardest part: do not touch it.
Let the chicken sit undisturbed for a full 3 minutes. If you try to flip it and it sticks, it isn’t ready. The meat will naturally release from the pan once that golden crust has formed. Flip it once, sear the other side, and get ready for the next phase. You are looking for a deep gold color, not a charred black.
Phase 2: Constructing the Herb Butter Bath
While the chicken is finishing its sear, whisk your melted butter, broth, lemon juice, garlic, and thyme. This mixture is the lifeblood of the recipe. When you transfer the chicken to the baking dish, you want to pour this liquid around and over the meat. This creates a humid environment in the oven.
The broth dilutes the lemon juice just enough so it doesn’t “cook” the meat like a ceviche, which can lead to a chalky texture. Instead, it creates a silky pan sauce. Placing the lemon slices directly on top of the chicken protects the meat from the direct dry heat of the oven, acting as a little flavor-infused heat shield.
Phase 3: The Oven Finish and Temperature Control
Slide the dish into your preheated 400-degree oven. This high temperature is vital. We want to finish the cooking process quickly so the juices don’t have time to migrate out of the meat. A ceramic dish is excellent here because it holds heat evenly, preventing the bottom of the chicken from getting tough or leathery.
The only way to be 100% sure your chicken is done is with an instant-read thermometer. Pull the chicken out the second it hits 165 degrees F. If you wait until it “looks” done, it is probably already overcooked. The shallow liquid bath will be bubbling and fragrant, indicating that the sauce has thickened slightly and the garlic has softened.
The Science of the Five-Minute Rest
I know you are hungry, but do not cut into that chicken immediately! When meat cooks, the muscle fibers contract and push all the juices toward the center. If you slice it right away, those juices will pour out onto the plate, leaving the meat dry. It is a waste of all that hard work.
By letting the chicken rest for 5 minutes, you allow the protein fibers to relax. As they relax, they reabsorb the herb butter and broth from the dish. This results in a piece of meat that is succulent from the first bite to the last. Use a spoon to baste the chicken with the hot pan juices one last time while it rests to keep the surface glistening.
Troubleshooting Common Texture Issues
If your chicken still feels tough, the most likely culprit is overcooking. Even five extra minutes in a 400-degree oven can turn a juicy breast into a dry one. Always trust your thermometer over the timer. If your sauce feels too thin, you can pour the juices into a small saucepan after the chicken is done and simmer it for 2 minutes to reduce it.
If your garlic tastes bitter, it likely burned during the searing phase or the oven was too hot. Make sure the garlic is mixed into the liquid bath rather than sitting dry on the pan. If the lemon flavor is too sharp, a tiny pinch of sugar added to the butter mixture can help neutralize the acidity without making the dish sweet.
Optimizing Your Kitchen Equipment
For the initial sear, a heavy stainless steel or cast iron skillet is your best friend. These materials hold heat much better than thin non-stick pans, which often drop in temperature the moment the cold meat hits the surface. A good sear requires consistent, high heat that only heavy-duty metal can provide.
As mentioned before, an instant-read thermometer is the most important tool in your drawer. It takes the guesswork out of the equation. Also, using a ceramic or glass baking dish for the oven phase helps maintain a gentle, steady heat that prevents the delicate lemon butter sauce from breaking or scorching on the edges.
Flavor Variations and Herb Substitutions
Once you have the technique down, you can swap the flavors easily. For a warmer, winter-inspired profile, replace the thyme with fresh rosemary and use orange juice instead of lemon. The orange provides a floral sweetness that pairs beautifully with the earthy rosemary. It is a fantastic variation for a cozy Sunday dinner.
If you want something brighter and a bit sharper, try using lime juice and fresh cilantro. This version works great if you want to serve the chicken alongside some charred corn or a fresh bean salad. Just remember to keep the ratios the same: one part acid, one part fat, and two parts broth to maintain that perfect moisture seal.
Side Dish Pairings for Roasted Poultry
Since this chicken creates its own incredible pan sauce, you want sides that can soak up every drop. A creamy garlic mash is a classic choice; the potatoes act like a sponge for the lemon butter. If you want something lighter, try a pile of roasted asparagus or sautéed green beans. The snap of the vegetables provides a nice contrast to the tender meat.
A simple arugula salad with a light vinaigrette is another great option. The peppery greens cut through the richness of the butter sauce perfectly. You could also serve this over a bed of fluffy quinoa or couscous. Whatever you choose, make sure it is something that benefits from a drizzle of that golden, garlicky liquid left in the baking dish.
Expert Tips for Meal Prep and Storage
This chicken stays fresh in the refrigerator for up to 3 days in an airtight container. If you are meal prepping, I recommend storing the chicken whole rather than slicing it. Slicing it exposes more surface area to the air, which can lead to drying. Keep a little bit of the pan sauce in the container with the meat to keep it hydrated.
When it comes to reheating, avoid the microwave if you can. It vibrates water molecules so fast that it toughens the protein. Instead, place the chicken in a covered skillet with a splash of broth over low heat. This gently steams the meat back to temperature without ruining the texture. It will taste almost as good as the day you made it.
Expert Tips: Frequently Asked Questions
Can I use bone-in chicken breasts for this recipe?
Yes, you can use bone-in breasts, but you will need to adjust the cooking time. Bone-in meat takes longer to reach the safe internal temperature of 165 degrees F. Increase the oven time to about 25 to 30 minutes. The bone actually helps keep the meat even juicier, so it is a great option if you aren’t in a rush.
What if I do not have an oven-safe skillet?
No problem at all! Simply sear the chicken in whatever frying pan you have. Once the sear is complete, move the chicken to a standard glass or ceramic baking dish. Then, pour your herb butter mixture over it and proceed with the oven steps. The results will be exactly the same as long as you get that initial golden crust.
How do I prevent the garlic from burning?
Garlic burns very quickly in a hot skillet, which creates a bitter taste. To avoid this, do not add the minced garlic to the pan during the searing phase. Instead, whisk it into the butter and broth mixture. This way, the garlic is protected by the liquid and cooks gently in the oven, becoming sweet and fragrant rather than charred.
Can I use dried herbs only?
You can use dried herbs if you are in a pinch, but use less of them. Dried herbs are much more concentrated than fresh ones. Use about one-third of the amount called for in the recipe. However, keep in mind that fresh thyme provides a specific aromatic quality that dried thyme lacks. If using dried, add a little extra lemon zest to brighten the flavor.
Why is my lemon sauce too tart?
The acidity of lemons can vary wildly. If your sauce is too sharp, it usually means the lemon was particularly acidic or the broth was too weak. You can fix this by whisking in an extra tablespoon of melted butter at the end. The fat coats the tongue and mellows out the perception of acid, creating a much smoother and more balanced flavor profile.
Lemon Herb Roasted Chicken
Course: Main CourseCuisine: AmericanDifficulty: easy4
servings10
minutes25
minutes35
Minutes345
kcalAmerican
Ingredients
4 boneless skinless chicken breasts
2 tablespoons olive oil
4 tablespoons unsalted butter, melted
1/2 cup chicken broth
2 lemons (one juiced, one sliced into rounds)
4 cloves garlic, minced
2 tablespoons fresh thyme, chopped
1 teaspoon dried oregano
1 teaspoon cracked black pepper
1 teaspoon sea salt
Directions
- Preheat your oven to 400 degrees F. High heat is essential for a quick cook that doesn’t leach moisture.
- Pat the chicken breasts completely dry with paper towels. This is the most important step for the moisture seal; if the surface is wet, the meat will steam instead of sear.
- Season both sides of the chicken generously with salt, pepper, and the dried oregano.
- Heat olive oil in a large oven-safe skillet over medium-high heat. Once the oil is shimmering, sear the chicken for 3 minutes per side until a deep golden-brown crust forms.
- While the chicken sears, whisk together the melted butter, chicken broth, lemon juice, minced garlic, and fresh thyme in a small bowl.
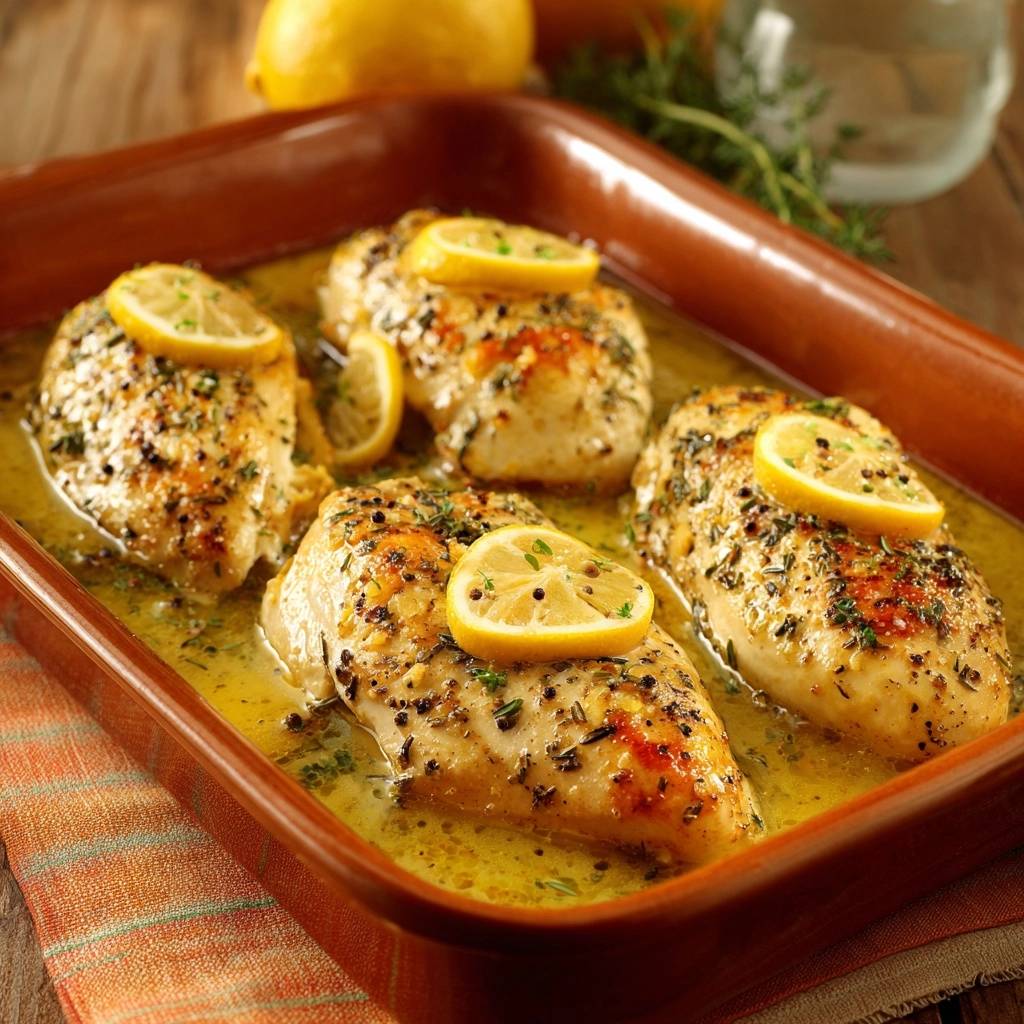
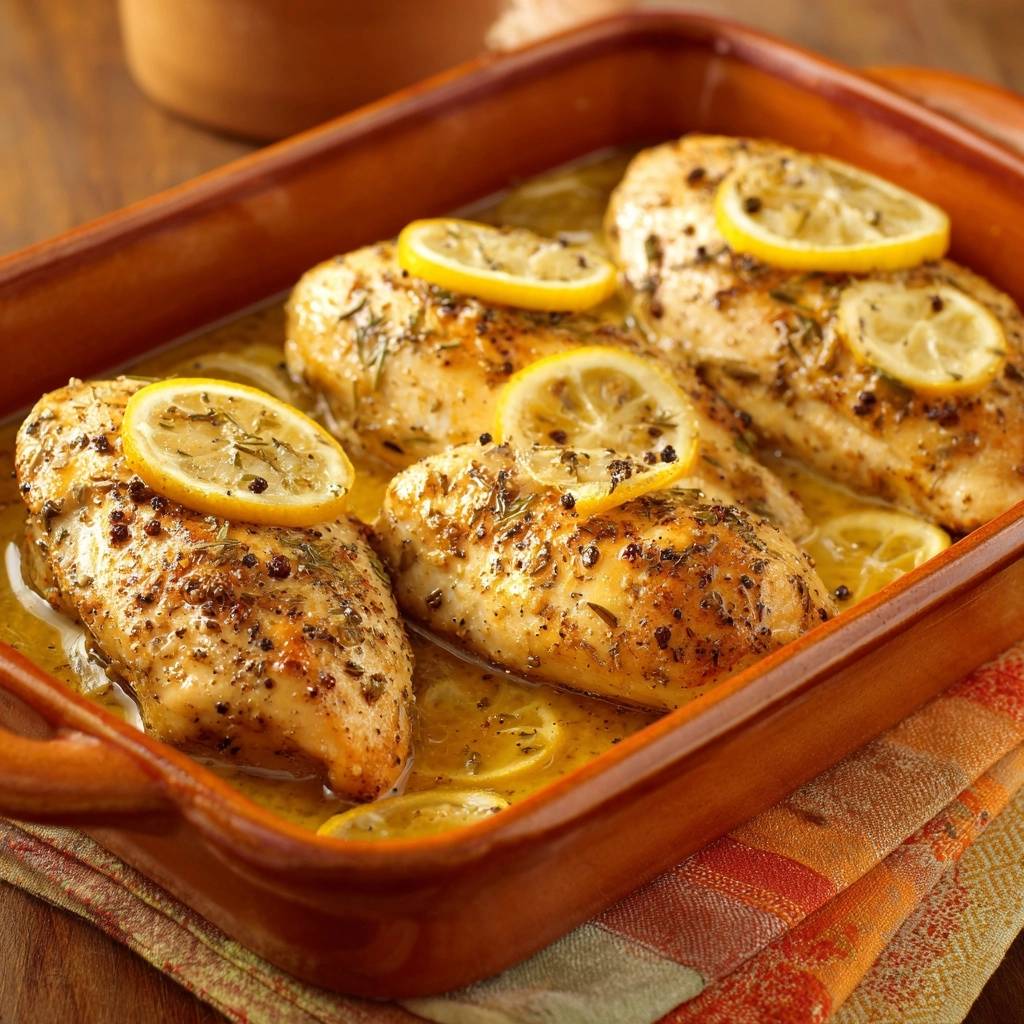
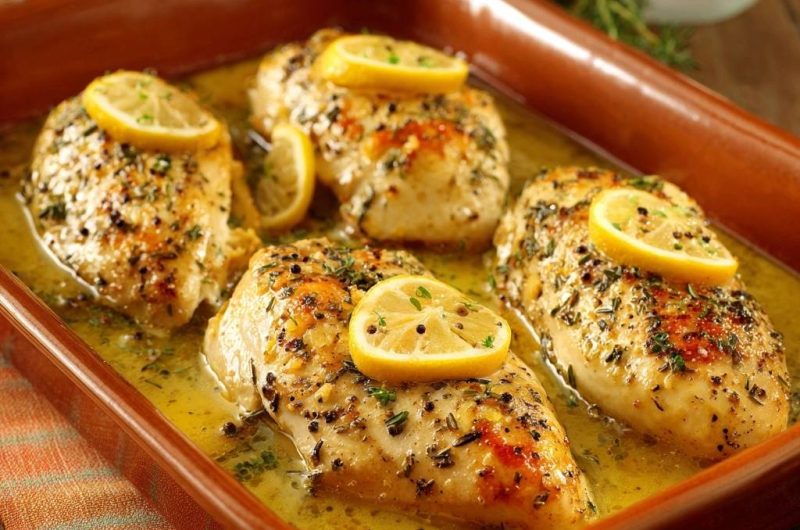
- Transfer the seared chicken to a ceramic baking dish. Pour the herb butter mixture over the chicken, ensuring the herbs coat the top of the meat as seen in the image. Top each breast with a fresh lemon slice.
- Bake for 12 to 15 minutes, or until the internal temperature reaches 165 degrees F. The shallow liquid bath prevents the bottom of the chicken from toughening and creates a rich pan sauce.
- Remove from the oven and use a spoon to baste the chicken with the hot pan juices. Let the meat rest in the dish for 5 minutes before serving. Resting allows the fibers to reabsorb the liquid, ensuring your first bite is perfectly succulent.
Notes
- Patting the meat dry is the most important step for the moisture seal; if the surface is wet, the meat will steam instead of sear.


