
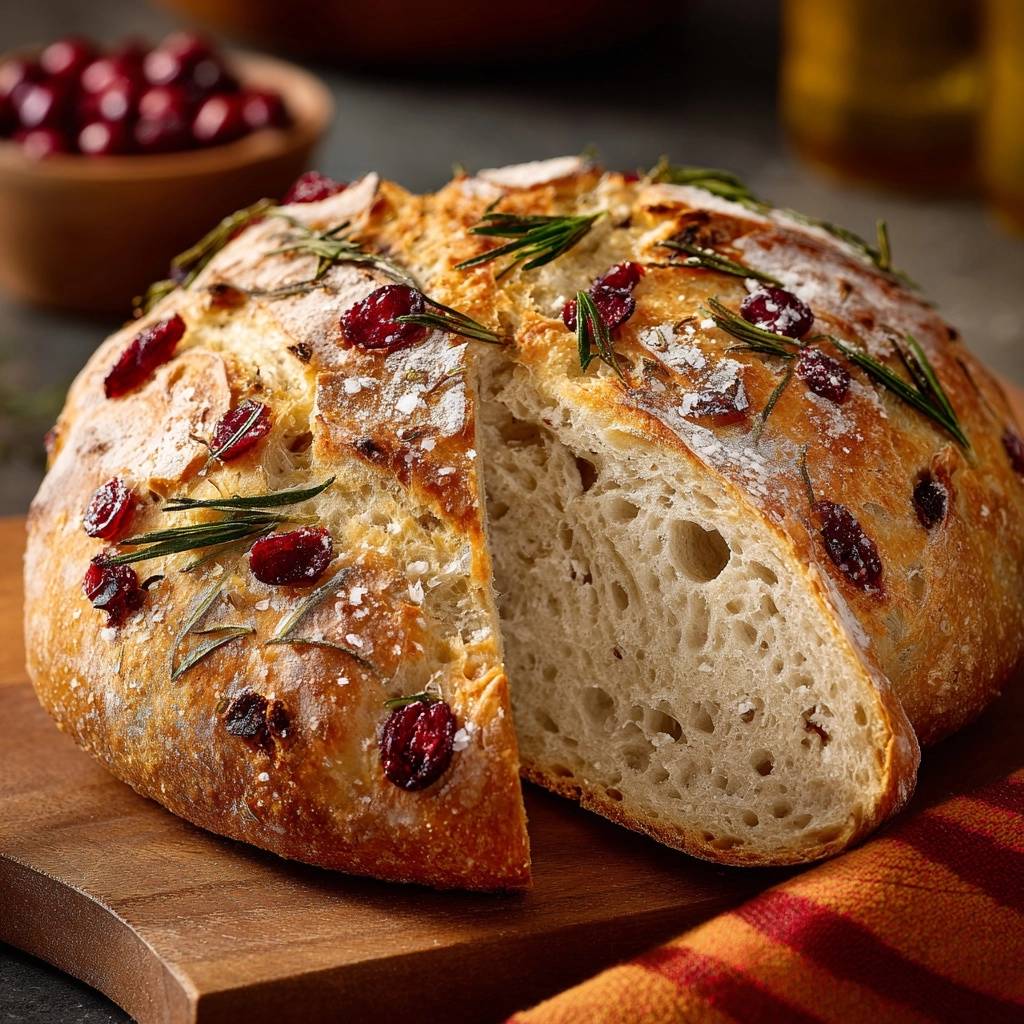
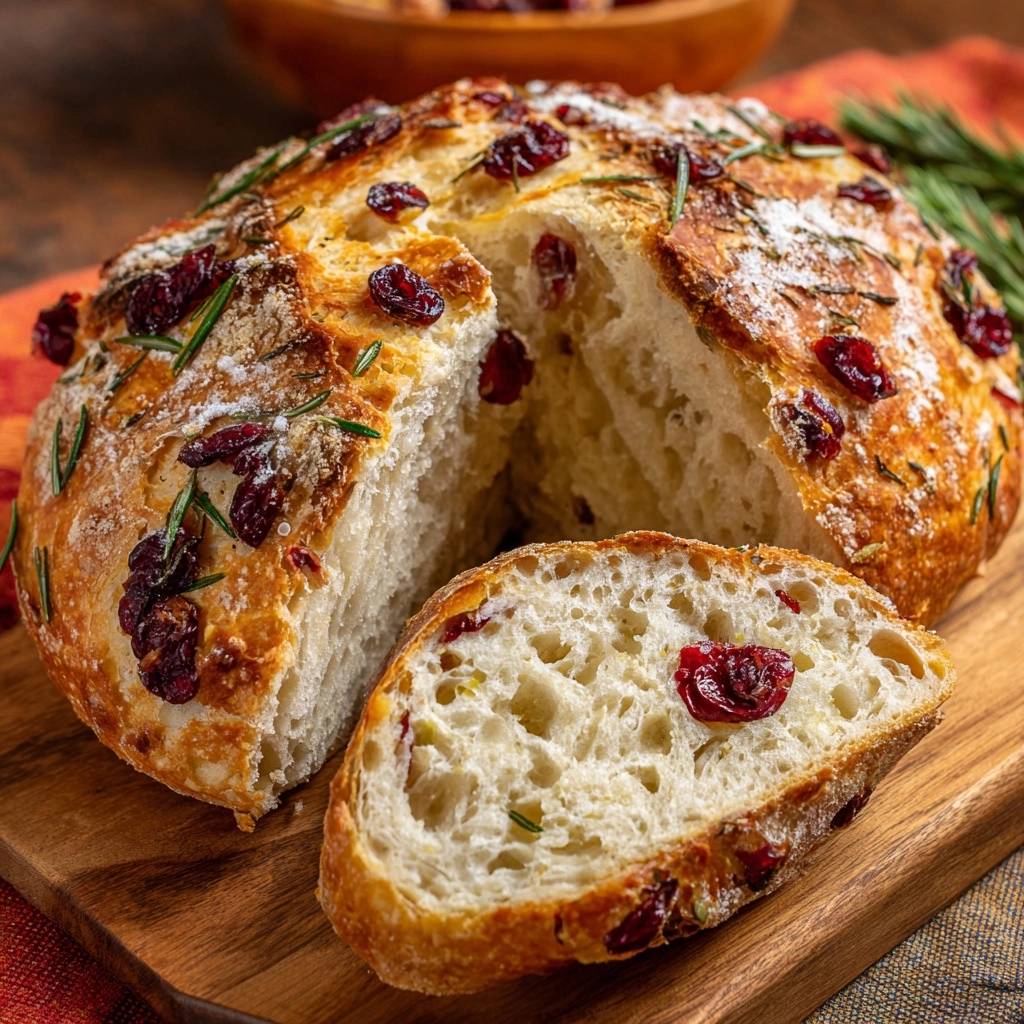
The moment you slice into this Rosemary Cranberry Artisan Loaf, the sound says it all. A sharp, glass-like crackle gives way to a cloud of steam carrying the scent of piney rosemary and tart, jammy fruit. It is a sensory contrast that defines great bread: the rugged, flinty exterior against a crumb so soft it practically melts. However, many home bakers struggle with the dreaded soggy bottom, where the base of the loaf turns out pale and spongy instead of crisp and caramelized.
This recipe solves that frustration by focusing on heat management and moisture control. You don’t need a professional bakery oven to get these results. By using a specific pre-heating method, you create an environment where the dough is shocked by heat the second it hits the pan. This immediate sear locks in the structure of the base, ensuring your loaf is just as crunchy on the bottom as it is on the top.
The secret to that professional finish lies in the water temperature. I always use a digital thermometer to ensure the water is exactly 105°F. If it’s too cold, the yeast won’t wake up; if it’s too hot, you’ll kill the leavening power before the bread even hits the bowl. Precision at the start guarantees that airy, bubbly interior every single time.
The Science of the Perfect Crust
Achieving a bakery-quality crust is a matter of thermodynamics rather than luck. When you place dough into a scorching 450°F environment, the exterior undergoes the Maillard reaction. This chemical process between amino acids and reducing sugars creates that deep mahogany color and complex, toasted flavor profile. Without enough heat, the bread simply dries out without browning, resulting in a tough, leathery skin rather than a crisp crust.
A preheated heavy vessel, like a Dutch oven, acts as a heat battery. It holds a massive amount of thermal energy that doesn’t drop when you open the oven door. This intense, consistent heat transfer is non-negotiable for the “Anti-Soggy Bottom” hack. It forces the moisture in the dough to turn into steam rapidly, pushing the bread upward and setting the bottom crust instantly so it cannot absorb moisture from the dough above it.
Why Steam is Your Best Friend
During the first 30 minutes of baking, steam is your most valuable tool. By keeping the lid on your pot, you trap the moisture evaporating from the dough itself. This creates a humid micro-climate that keeps the “skin” of the loaf supple and stretchy. Because the surface stays soft longer, the gases inside can expand fully, a phenomenon known as oven spring, before the crust finally hardens and browns.
The Physics of the Cooling Rack
The cooking process doesn’t end when the loaf leaves the oven. As the bread cools, moisture continues to migrate from the center of the loaf toward the exterior. If you leave the bread in the pot or place it on a flat cutting board, that steam gets trapped against the bottom of the loaf. This creates a “steam trap” that will turn your shatteringly crisp crust into a damp, gummy mess within minutes. Always move the loaf to a wire rack immediately to allow air to circulate 360 degrees around the bread.
Essential Components for the Rosemary Cranberry Loaf
Quality ingredients are the foundation of this artisan loaf. I recommend using bread flour because its higher protein content (usually 12-14%) creates a stronger gluten network. This strength is what allows the dough to hold onto the heavy dried cranberries without collapsing. If you only have all-purpose flour, the bread will still be delicious, but it may have a slightly tighter, less chewy crumb.
The yeast is the engine of your bread. Active dry yeast is reliable, but it is sensitive to temperature. Aim for 105°F for your water; it should feel like warm bath water on your wrist. If the water is too hot, you risk killing the yeast, which leads to a dense, brick-like loaf. Additionally, using high-quality sea salt instead of table salt provides a cleaner flavor that doesn’t interfere with the fermentation process.
Selecting the Best Dried Cranberries
When shopping for dried cranberries, look for bags where the fruit appears plump rather than shriveled and dry. Some brands coat their fruit in excess vegetable oil to prevent sticking, but too much oil can interfere with the dough’s ability to form strong bonds. If your cranberries feel very oily, give them a quick rinse and pat them dry before folding them into the flour. This ensures the fruit integrates perfectly into the crumb.
Fresh Rosemary vs. Dried Alternatives
Fresh rosemary is a requirement for the best flavor profile. The volatile oils in fresh sprigs are much more potent and aromatic than the dried, woody needles found in spice jars. These oils permeate the dough as it rises, giving the entire loaf a subtle herbal backbone. If you absolutely must use dried rosemary, use only one-third of the amount called for, as the flavor is more concentrated but lacks the bright, citrusy notes of the fresh herb.
Preparing the Shaggy Dough Base
This is a high-hydration dough, meaning it has a water-to-flour ratio of about 70-75%. When you first mix the ingredients, it will not look like a smooth ball of pizza dough. Instead, it will be “shaggy”—a bit lumpy, very sticky, and somewhat messy. Resist the urge to add more flour! That stickiness is exactly what creates the large, airy holes in the finished bread. Use a sturdy wooden spoon or your hands to ensure no dry pockets of flour remain at the bottom of the bowl.
The Bulk Fermentation Phase
Once mixed, the dough needs a long, undisturbed rest. This 2-3 hour window is when the yeast does the heavy lifting. You are looking for the dough to double in size and develop a surface covered in tiny bubbles. Find a warm, draft-free spot in your kitchen, such as the inside of an oven that is turned off. If your house is cold, the rise might take an extra hour. Patience here is key; the longer the rise, the better the flavor development.
Techniques for Shaping and Scoring
Shaping the dough is about creating surface tension. When you turn the dough onto a floured surface, gently fold the edges toward the center like you are folding an envelope. This creates a “skin” on the outside of the loaf that will hold its shape in the oven. Using a piece of parchment paper as a sling is a pro move. It allows you to drop the dough into a 450°F pot without burning your fingers or deflating the delicate air bubbles you worked so hard to create.
Artistic Scoring for Maximum Expansion
Scoring the top of the bread with a sharp knife or a razor blade is more than just decoration. It acts as a pressure release valve. Without a score, the bread will burst at its weakest point, usually the side or the bottom. By cutting a deep “X” into the top, you direct the expansion upward. This results in a beautiful “ear” or ridge of crust that becomes extra crunchy and dark in the oven.
The High-Heat Baking Protocol
The “Anti-Soggy Bottom” method requires a 30-minute preheat of your Dutch oven. This ensures the ceramic or cast iron is radiating heat from every angle. Be extremely careful when handling the pot; at 450°F, it will cause instant burns. Use heavy-duty suede or silicone oven mitts. When you drop the dough into the pot, you should hear a faint sizzle. That is the sound of the bottom crust sealing and the moisture beginning to evaporate.
The Lid-Off Moisture Venting Phase
After 30 minutes of baking with the lid on, the internal structure of the bread is set. Now, you must remove the lid to finish the crust. This phase allows the trapped steam to escape, which is vital for hardening the exterior. Watch the color closely during these final 15 minutes. You want to move past “golden” and aim for a deep, burnished mahogany. This color indicates that the sugars have fully caramelized, providing the best flavor and a crust that stays crunchy for hours.
Troubleshooting Common Artisan Bread Issues
If your loaf didn’t rise, the most likely culprit is the yeast. Always check the expiration date, and ensure your water wasn’t hot enough to scald the organisms. Another common issue is burnt fruit on the surface. To prevent this, try to tuck most of the cranberries just under the surface of the dough during the shaping phase. Only leave a few on top for aesthetics, as the high heat can turn dried fruit bitter if it’s exposed for too long.
A gummy interior is usually caused by one of two things: underbaking or slicing too soon. Even if the crust looks perfect, the center needs to reach an internal temperature of about 205°F. Most importantly, you must wait at least 30 minutes before slicing. The bread is still technically cooking as it cools. If you cut it open while it’s steaming hot, that moisture will turn the starch into a sticky, gummy paste that ruins the texture of the entire loaf.
Optimal Equipment for Bread Success
For this recipe, a 6-quart enameled cast iron Dutch oven is the gold standard. This size provides enough room for the loaf to expand without touching the sides, which helps with even browning. Enameled cast iron is preferred over raw cast iron because it doesn’t require seasoning and provides a very clean, consistent heat. If you find yourself baking bread often, investing in a bread lame—a small handle that holds a razor blade—will give you much cleaner, more professional scores than a standard kitchen knife.
Pairing and Serving Suggestions
This loaf is a powerhouse of flavor on its own, but it shines when paired with savory accompaniments. The tartness of the cranberries and the earthiness of the rosemary make it a perfect partner for a bowl of thick lentil soup or a hearty vegetable stew. For a simple snack, try dipping slices into a bowl of high-quality extra virgin olive oil mixed with cracked black pepper and a pinch of sea salt. It also pairs beautifully with sharp, aged cheeses like a vintage white cheddar or a creamy goat cheese spread.
Storage and Reviving the Crust
To keep your bread fresh, avoid plastic bags at all costs. Plastic traps moisture and will turn your crispy crust soft and rubbery within hours. Instead, wrap the loaf in a clean kitchen towel or store it in a paper bag. This allows the bread to breathe while still protecting it from drying out. If the bread does get a bit stale after a day or two, you can easily revive it. Simply pop a slice into the toaster or put the whole loaf back into a 350°F oven for five minutes to restore that signature crunch.
How should I store the leftovers?
Store the bread at room temperature in a paper bag or a dedicated bread box for up to two days. For longer storage, slice the loaf and freeze the slices in a freezer-safe bag for up to three months. Do not store this bread in the refrigerator, as the cold environment actually accelerates the staling process by crystallizing the starches.
Why is my bread crust soft instead of crunchy?
A soft crust usually happens because the bread wasn’t allowed to vent properly. Ensure you remove the lid for the final 15 minutes of baking to let the steam escape. Additionally, you must move the loaf to a wire cooling rack immediately after it comes out of the pot. If it cools on a solid surface, the bottom will trap steam and turn soggy.
Can I use all-purpose flour instead of bread flour?
Yes, you can use all-purpose flour. However, because all-purpose flour has less protein, the dough might feel a bit stickier and the finished loaf may not rise quite as high. The flavor will still be excellent, but the texture will be slightly softer and less chewy than a loaf made with bread flour.
What if I don’t have a Dutch oven?
If you don’t have a Dutch oven, you can use a heavy oven-safe pot with a tight-fitting lid. If you have no lidded pot at all, you can bake the loaf on a preheated baking stone or heavy baking sheet. To mimic the steam effect, place a shallow pan of hot water on the bottom rack of the oven during the first 20 minutes of baking.
Why did my cranberries burn on the top?
Dried fruit has a high sugar content, which causes it to char quickly at 450°F. When shaping your loaf, try to push the cranberries into the dough so they are covered by a thin layer of flour. If you want fruit on top for looks, press them deep into the score marks after you cut the “X” so they are somewhat shielded from the direct heat.
Is the olive oil necessary in the dough?
The tablespoon of olive oil isn’t strictly required for the bread to rise, but it serves a vital purpose. It adds a hint of richness to the crumb and helps keep the interior moist for a longer period. It also contributes to the golden color of the crust. If you leave it out, the bread will be slightly crustier and leaner, similar to a traditional French baguette.
Rosemary Cranberry Artisan Loaf
Course: BreadCuisine: AmericanDifficulty: easy8
servings15
minutes45
minutes180
Minutes195
kcalAmerican
Ingredients
3 cups bread flour (or all-purpose)
1.5 cups warm water (approx. 105°F)
1 teaspoon active dry yeast
1.5 teaspoons sea salt
1/2 cup dried cranberries
3 sprigs fresh rosemary (leaves stripped and divided)
1 tablespoon extra virgin olive oil
Flour for dusting
Flaky sea salt for topping
Directions
- In a large bowl, whisk together the flour, yeast, and salt. Stir in the warm water and olive oil until a shaggy dough forms. Fold in the dried cranberries and half of the fresh rosemary leaves.
- Cover the bowl with a damp cloth or plastic wrap and let it rise in a warm, draft-free spot for 2 to 3 hours until doubled in size and bubbly.
- To solve the soggy bottom issue, place a heavy 6-quart Dutch oven (with its lid) inside your oven and preheat it to 450°F (230°C) for at least 30 minutes. This intense heat transfer is what locks in the bottom crust immediately upon contact.
- While the oven preheats, turn the dough onto a well-floured surface. Gently fold the edges toward the center to shape into a round loaf. Place the dough onto a piece of parchment paper.
- Carefully remove the scorching hot pot from the oven. Lift the parchment paper to drop the dough (and paper) inside.
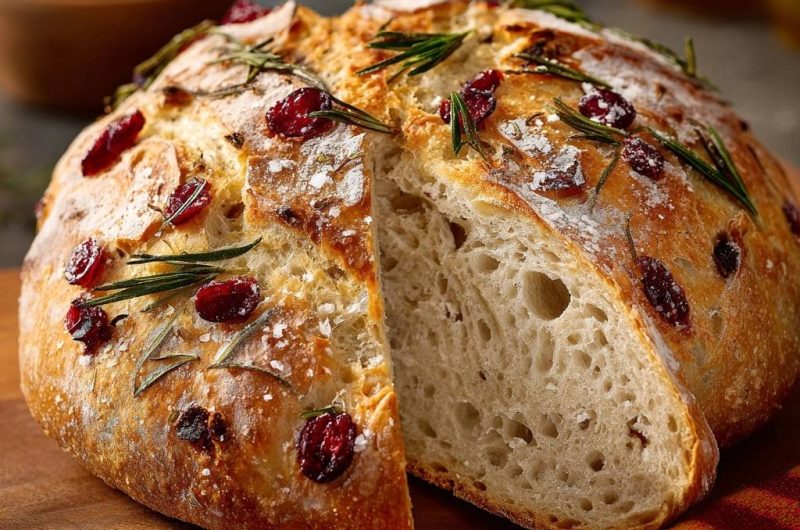
- Using a sharp knife or lame, score a deep “X” or cross into the top of the dough. Press the remaining fresh rosemary sprigs and a few extra cranberries into the surface. Sprinkle generously with flaky sea salt and a dusting of flour to match the visual finish.
- Cover with the lid and bake for 30 minutes. The lid traps the dough’s natural moisture, creating steam that allows for maximum expansion and a thin, crispy crust.
- Remove the lid for the final 15 minutes of baking. This is the crucial step to vent moisture, develop the deep golden-brown color seen in the image, and ensure the crust hardens perfectly.
- Remove the bread from the pot immediately and place it on a wire cooling rack. Never let it cool inside the pot or on a flat board, as trapped steam will migrate back into the crust and ruin the crunch. Let cool for at least 30 minutes before slicing to allow the internal structure to set.
Notes
- Never let the bread cool inside the pot or on a flat board, as trapped steam will migrate back into the crust and ruin the crunch.


