
Few things in the kitchen sting as much as watching a gorgeous cake deflate the moment it hits the cooling rack. You spend an hour measuring and mixing, only to have the center of your masterpiece cave in like a fallen soufflé. It’s a common heartbreak, but it’s also entirely preventable with the right structural science.
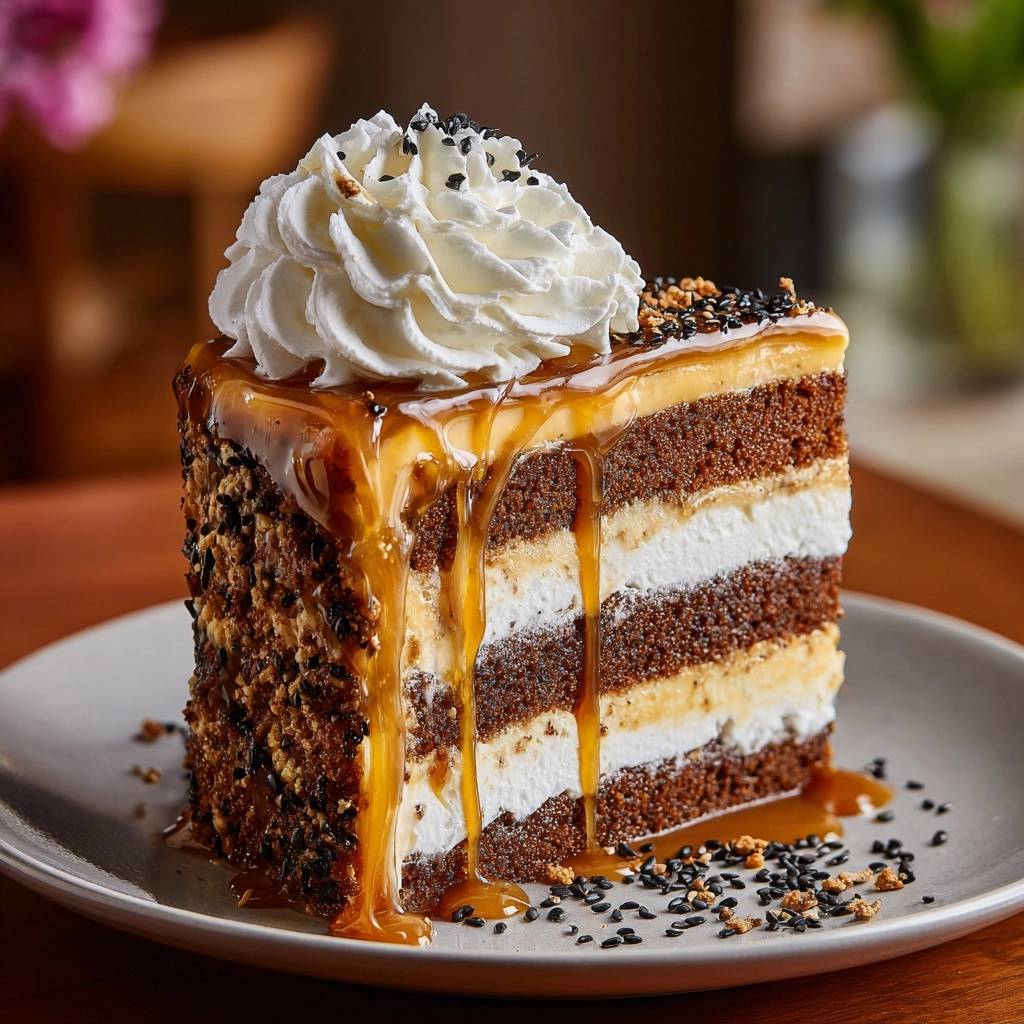
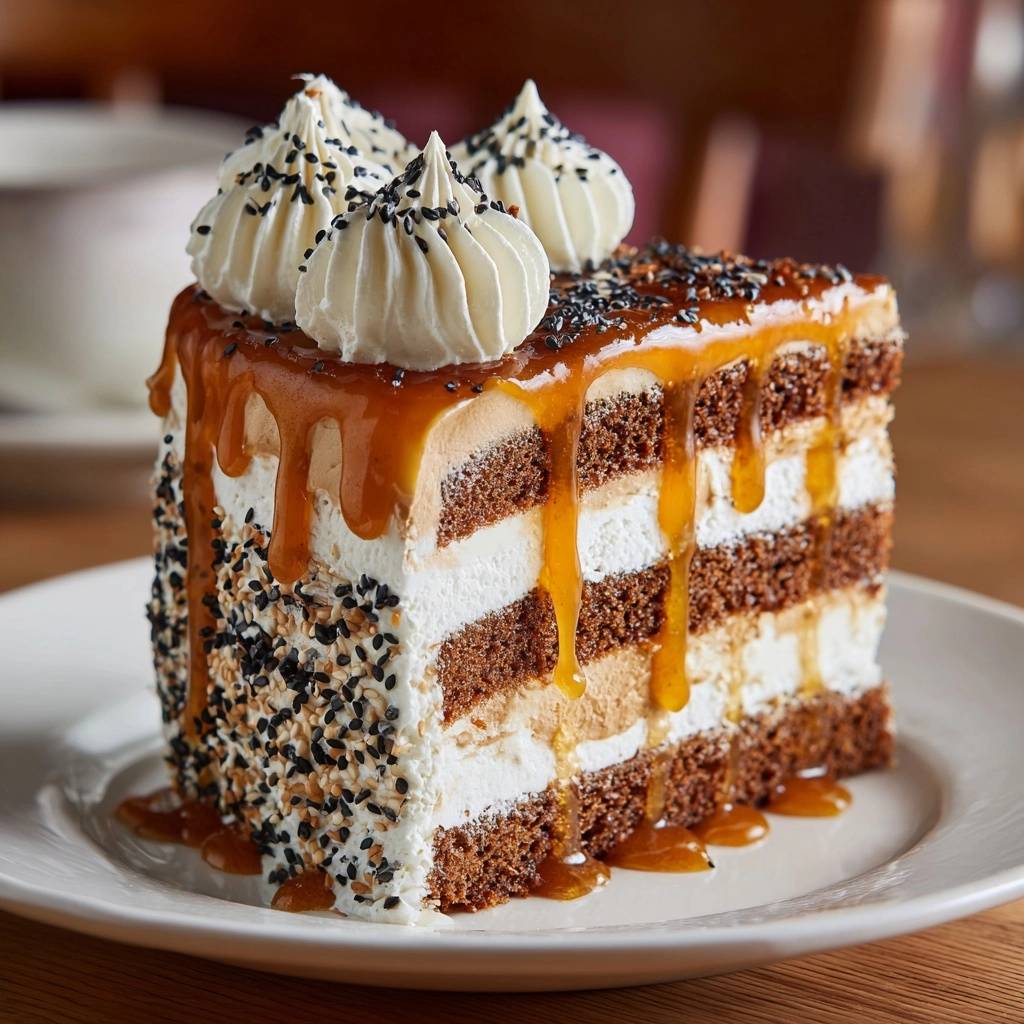
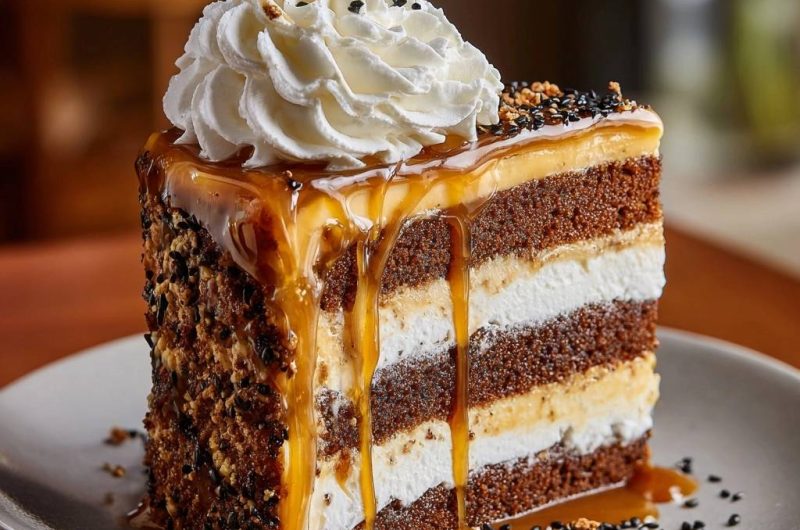
This Salted Caramel & Black Sesame Layer Cake isn’t just about the sophisticated, nutty contrast of toasted seeds against deep, buttery caramel. It’s a masterclass in architectural baking. By using a specific “Temperature Staggering” method, we ensure your layers stay tall, level, and airy enough to support those thick ribbons of gold.
The secret to this high-rise crumb lies in the final addition of boiling water. While it makes the batter look alarmingly thin, it actually blooms the cocoa and creates a delicate internal structure. To keep that structure from collapsing, you must let the cake acclimate to the kitchen air slowly rather than shocking it with a sudden temperature drop.
The Structural Science of High-Rise Sponge
Baking is chemistry, and this recipe relies on a dual-leavening system of baking soda and baking powder. The baking soda reacts immediately with the acidic cocoa powder, while the baking powder provides a second lift once the pans hit the heat. This creates a sturdy network of air bubbles that can hold up under the weight of heavy cream and caramel.
When you pour in the boiling water, you’re performing a technique called “blooming.” The heat dissolves any cocoa clumps and releases the full depth of the chocolate flavor, resulting in a beautiful mocha-bronze crumb. This hot liquid also thins the batter, which allows the air bubbles to expand rapidly and evenly during the first ten minutes of baking.
However, a thin batter can be prone to sinking if the protein structure doesn’t set quickly enough. That’s why we use a precise ratio of all-purpose flour to liquid. The gluten develops just enough during the mixing process to form “walls” around those air bubbles, ensuring the cake stays upright even as it cools.
Why Cakes Sink: The Thermal Shock Factor
Physics tells us that hot air occupies more space than cold air. Inside your 350°F oven, the steam and gases are holding the cake’s shape like a million tiny balloons. If you move that cake directly to a 70-degree countertop, those gas cells contract instantly before the cake’s “skeleton” has fully hardened.
This rapid contraction is what causes the dreaded center dip. By leaving the oven door cracked for ten minutes after the heat is off, you allow the internal steam to dissipate slowly. This gradual decline gives the starches and proteins time to solidify, locking that height in place permanently.
Essential Components for the Black Sesame Layer Cake
Quality ingredients are the foundation of any professional-grade dessert. You must use room temperature eggs and milk to ensure a perfect emulsion. Cold ingredients won’t bond properly with the fats, which can lead to a greasy or dense texture rather than the light, velvety crumb we’re after.
The choice of cocoa powder also dictates the final look of your cake. I recommend a standard unsweetened cocoa powder for this recipe. It provides a lighter, bronze-toned crumb that offers a stunning visual contrast against the jet-black sesame seeds and the pale tan caramel mousse.
Vegetable oil is our fat of choice here because it stays liquid at room temperature. While butter tastes great, oil-based cakes are significantly moister and have a more reliable “spring” when touched. This moisture is vital when you’re slicing the cake into four thin, delicate layers.
Selecting the Right Salted Caramel
For the filling and the iconic drip, the viscosity of your caramel is everything. If you use a thin, syrupy sauce, your cake layers will slide around like they’re on ice. You need a “thick” caramel—one that holds its shape on a spoon but still flows slowly when poured.
Salt plays a massive role here, too. It isn’t just a background note; it’s the bridge between the earthy sesame and the sugary cream. If your store-bought caramel isn’t salty enough, don’t be afraid to whisk in a pinch of flaky sea salt to sharpen the flavor profile.
Black Sesame: Toasted vs. Raw Seeds
Black sesame seeds bring a complex, slightly bitter, and intensely nutty flavor that cuts through the richness of the caramel. Raw seeds are fine, but toasting them for three minutes in a dry pan truly unlocks their aromatic oils. You’ll know they’re ready when they start to smell like roasted peanuts.
Be careful not to over-toast them, though. Because they are black, you can’t see them browning, so you have to rely entirely on your nose. Once they become fragrant, pull them off the heat immediately. This toasted element provides the “crunch” that makes the side coating so addictive.
Required Tools for Professional Cake Assembly
To get that “skyscraper” look, 8-inch round pans are much better than 9-inch pans. The smaller diameter forces the batter upward, giving you more height to work with when it’s time to slice the layers. Make sure your pans are at least two inches deep to prevent any overflow.
A wire cooling rack is non-negotiable because it allows air to circulate under the bottom of the pan. If you leave the cake on a flat surface, the bottom will steam and become soggy. Additionally, a long serrated knife—like a bread knife—is the best tool for “torting” or slicing your layers horizontally with precision.
Step-by-Step: Mixing the Moisture-Rich Batter
When you start mixing the dry and wet ingredients, pay close attention to the clock. You want to beat the mixture on medium speed for exactly two minutes. This specific timing is the “sweet spot” for gluten development; it creates enough strength to hold the cake together without making it tough or bready.
As you beat the batter, you’ll notice it turning from a dusty brown to a smooth, glossy tan. The eggs will fully incorporate, creating a stable base. Don’t skip this timed step, as it’s the primary way we build the structural integrity needed for a four-layer assembly.
The Boiling Water Technique
Once those two minutes are up, it’s time to stir in the boiling water by hand. Do not use the electric mixer for this part, or you’ll splash hot liquid everywhere. As you stir, the batter will become very thin—almost like a heavy soup. Don’t panic!
Many bakers see this thin consistency and assume they’ve made a mistake, leading them to add extra flour. Resist that urge. This high liquid content is exactly what creates the airy, melt-in-your-mouth texture. Just pour it into your prepared pans and trust the process.
The Critical Fix: Preventing the Center Collapse
This is the most important part of the entire recipe. Once your toothpick comes out clean, turn the oven off. Open the door about two or three inches—you can use a wooden spoon to prop it open if needed—and set a timer for ten minutes. This is the “Skyscraper” secret.
During these ten minutes, the temperature inside the oven drops slowly. The cake’s internal structure, which is still somewhat soft, begins to firm up without the shock of cold kitchen air. You’ll notice the cake might pull away from the sides of the pan slightly, which is a great sign that it’s setting perfectly.
After the ten minutes are up, move the pans to a wire rack. Let them cool completely in the pans for another fifteen minutes before flipping them out. If you try to remove them while they’re still hot, the delicate crumb might tear. Patience here ensures a flawless, professional finish.
Precision Slicing for Four-Layer Symmetry
Once your cakes are stone-cold, it’s time to turn two layers into four. The easiest way to do this is the “hand-flat” method. Place one hand flat on top of the cake to steady it. Hold your serrated knife horizontally and slowly saw through the middle, rotating the cake as you go.
If you’re nervous about getting a straight line, you can use the toothpick trick. Insert toothpicks halfway up the side of the cake every few inches to act as a guide rail for your knife. Take your time; even layers are the key to a cake that doesn’t lean or wobble once it’s stacked.
Crafting the Salted Caramel Mousse Filling
The filling is a hybrid between a stabilized whipped cream and a mousse. Start with very cold heavy cream and a chilled bowl. Whip the cream and powdered sugar until you reach “stiff peaks”—this means when you lift the whisk, the cream stands straight up without drooping.
Now, gently fold in two tablespoons of your salted caramel. Use a spatula to cut through the center and turn the mixture over. Do not use the mixer for this, or you’ll deflate all the air you just worked so hard to incorporate. The result should be a light, tan cream that tastes like a cloud of caramel.
Architectural Assembly and Side Texturing
When stacking, place your first layer on the plate “bottom-side down.” For the very top layer, however, flip it so the “bottom-side is up.” This gives you a perfectly flat, factory-smooth surface for your final caramel pour. Spread the caramel-cream generously between each layer, leaving a small margin at the edges.
After stacking, apply a very thin “crumb coat” of cream to the sides. While the cream is still tacky, take your crushed biscuits and black sesame seeds and press them into the sides of the cake. This creates a beautiful, rustic texture that hints at the flavors hidden inside.
Achieving the Perfect Caramel Drip
The “drip” is the most visual part of this cake, and temperature is your best friend here. Your caramel should be around 100°F—warm to the touch but not hot. If it’s too hot, it will melt your whipped cream and run straight off the plate. If it’s too cold, it will clump up and look messy.
Use a small spoon to test a single drip on the back of the cake first. If it crawls down slowly and stops halfway, it’s perfect. Pour the rest over the top and use a spatula to gently nudge it toward the edges. Finish with a big swirl of cream and a final sprinkle of sesame seeds for that high-contrast look.
Troubleshooting Common Baking Obstacles
If your caramel is too runny and won’t stay on the cake, try whisking in a tablespoon of powdered sugar to thicken it up. If your whipped cream breaks and looks grainy, you’ve over-beaten it. You can often fix this by stirring in a few tablespoons of fresh, liquid heavy cream by hand until it smooths out.
For cakes that stick to the pan, try wrapping a warm, damp towel around the bottom of the pan for a few minutes. The heat will help release the fats from the metal. Next time, ensure you’re using both grease and a dusting of flour (or parchment paper) to guarantee a clean release.
Make-Ahead Strategies and Storage Logistics
You can bake the sponge layers up to two days in advance. Wrap them tightly in plastic wrap and keep them at room temperature. In fact, the flavor often deepens after a day. However, once the cake is assembled with the cream, it must be stored in the refrigerator.
To keep the black sesame seeds and biscuits crunchy, it’s best to serve the cake within 24 hours of assembly. If you have leftovers, store them in an airtight container for up to three days. For the best texture, take the cake out of the fridge about 20 minutes before eating so the caramel can soften slightly.
Expert Tips for a Professional Finish
1. Always sift your cocoa powder and flour together. Cocoa is notorious for having small, stubborn clumps that won’t disappear during mixing, and sifting ensures a perfectly uniform crumb.
2. Use a turntable if you have one. Being able to spin the cake while you apply the side coating of sesame seeds makes the process much faster and more even.
3. Chill your mixing bowl and whisk attachment in the freezer for 10 minutes before whipping the cream. This helps the fat globules in the cream stay cold, resulting in a much more stable mousse.
4. Don’t forget the final garnish of flaky salt. A tiny sprinkle on top of the caramel drip makes the flavors pop and prevents the cake from being “one-note” sweet.
How do I prevent the sesame seeds from falling off the sides?
The trick is to apply them while the cream is still “wet” or tacky. Take a handful of the seed and biscuit mixture and gently press it into the side of the cake using the palm of your hand or a flat bench scraper. If the cream has already crusted over in the fridge, you can’t get them to stick, so do this step immediately after frosting.
Can I substitute the black sesame with white sesame?
You can, but the flavor profile will change. White sesame seeds are much milder and sweeter, whereas black sesame has a deep, smoky earthiness that balances the caramel. Visually, you’ll also lose that striking black-on-gold contrast. If you must use white seeds, I recommend adding a teaspoon of tahini to the batter to boost the nutty flavor.
Why is my caramel bleeding into the whipped cream?
This usually happens for two reasons: either the cake layers weren’t completely cold, or the caramel was too warm when applied. Make sure your cake has spent at least an hour in the fridge before you do the final assembly. Also, ensure you’ve whipped your cream to very stiff peaks, as soft cream lacks the structure to hold back the heavy caramel.
What can I use instead of graham crackers for the crust?
If you want to change up the flavor, Biscoff cookies are a fantastic alternative; their cinnamon and ginger notes pair beautifully with salted caramel. For a saltier “sweet and salty” vibe, try using finely crushed pretzels. Just make sure whatever you use is ground into small crumbs so it adheres easily to the sides of the cake.
Salted Caramel & Black Sesame Layer Cake
Course: DessertCuisine: FusionDifficulty: easy12
servings45
minutes35
minutes60
MinutesFusion
Ingredients
2 cups all-purpose flour
1.5 cups granulated sugar
1/2 cup unsweetened cocoa powder (for a light mocha-bronze crumb)
1.5 teaspoons baking powder
1.5 teaspoons baking soda
1 teaspoon salt
2 large eggs, room temperature
1 cup whole milk, room temperature
1/2 cup vegetable oil
2 teaspoons vanilla extract
1 cup boiling water
2 cups heavy whipping cream, chilled
1/4 cup powdered sugar
3/4 cup thick salted caramel sauce (divided)
1/2 cup crushed graham crackers or digestive biscuits (for side coating)
3 tablespoons black sesame seeds
Directions
- Preheat your oven to 350°F (175°C). Grease and flour two 8-inch round cake pans.
- In a large bowl, whisk together flour, sugar, cocoa, baking powder, baking soda, and salt.
- Add eggs, milk, oil, and vanilla. Beat on medium speed for 2 minutes. Stir in the boiling water by hand. The batter will be thin; this is essential for the airy texture shown.
- Pour batter into pans. To solve the sinking problem, bake for 30 to 35 minutes until a toothpick comes out clean.
- The Critical Fix: Once the timer goes off, turn the oven off but leave the door cracked open 2-3 inches for 10 minutes before removing the cakes. This gradual temperature decline prevents the structural shock and “sinking” caused by rapid cooling.
- Cool completely on a wire rack. Once cold, slice each cake horizontally to create four thin, even layers.
- In a chilled bowl, whip the heavy cream and powdered sugar until very stiff peaks form. Fold in 2 tablespoons of the salted caramel to create the light tan mousse layer seen in the image.
- Assembly: Place the first cake layer down. Spread a thick layer of the caramel-cream. Repeat until you reach the top layer.
- Coat the sides of the cake with a thin layer of cream, then press the crushed biscuits and 1 tablespoon of black sesame seeds into the sides to create the textured “crust” look.
- Pour the remaining salted caramel over the top, allowing it to drip down the sides in thick ribbons.
- Finish with a large, stabilized swirl of whipped cream on top. Garnish the top and the plate with the remaining black sesame seeds for a professional, high-contrast finish.
Notes
- To prevent the cake from sinking, leave the oven door cracked for 10 minutes after turning off the heat to allow for a gradual temperature decline. Ensure eggs and milk are at room temperature for the best emulsion.


