
Most home cooks have experienced the disappointment of a mushy, water-logged pasta casserole. You spend an hour prepping, only to pull a dish out of the oven where the noodles have lost all texture and the sauce has turned into a thin soup. It’s a common epidemic in kitchens across the country, but it’s entirely avoidable with the right technique.
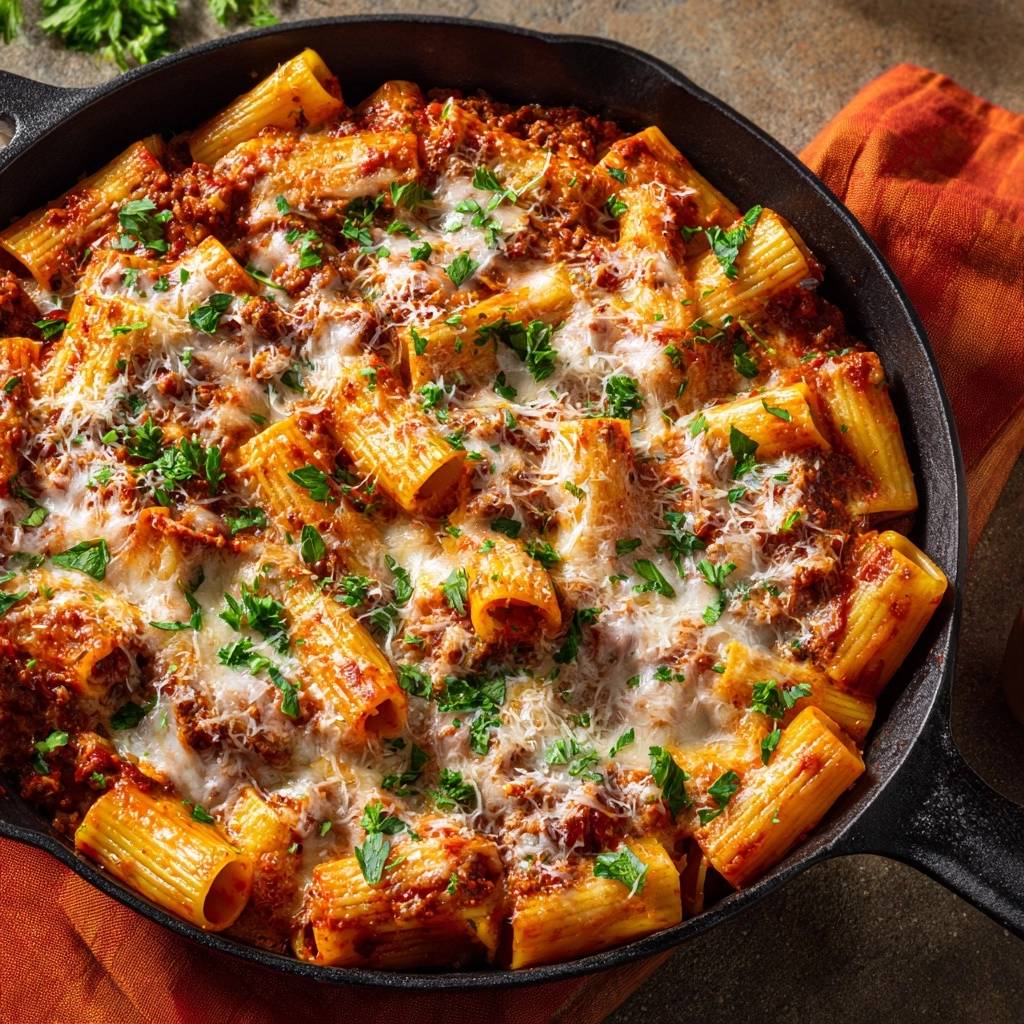
The secret to a restaurant-quality Skillet Rigatoni Bolognese Bake lies in moving away from deep ceramic dishes and embracing the “Starch Lock” method. By using a wide skillet, you create more surface area for browning and cheese-to-pasta contact. This isn’t just a quick dinner; it’s a strategic approach to ensuring every bite is rich, velvety, and perfectly al dente.
I’ve found that the real magic happens when you stop treating the pasta and sauce as separate entities. When you finish the rigatoni directly in the skillet with the beef and cream, the undercooked wheat starch acts as a natural binder. This creates a superior mouthfeel that clings to the ridges of the pasta rather than sliding off to the bottom of the pan.
The Science of the Starch Lock Method
To achieve that perfect bite, you have to rethink how you boil your water. Most people follow the box instructions, but for a baked dish, those instructions are a recipe for disaster. Cooking the rigatoni for exactly four minutes less than the package suggests is your insurance policy against the heat of the oven.
This par-boiling technique leaves the center of the pasta with a firm “snap.” While it might taste too hard at that moment, it’s actually a thirsty vessel ready to soak up flavor. As the pasta sits in the simmering Bolognese sauce, it absorbs the savory beef juices and heavy cream instead of plain water.
The interaction between the raw starch on the surface of the undercooked noodles and the fats in the heavy cream creates a powerful emulsion. This chemical bond prevents the sauce from breaking or becoming watery during the baking process. Instead of a pool of liquid at the bottom of your skillet, you get a thick, cohesive sauce that stays exactly where it belongs.
Essential Components for a Rich Meat Sauce
Quality ingredients are the backbone of this dish. Using 1.5 pounds of lean ground beef for every pound of pasta ensures a high protein-to-carb ratio, making the meal feel substantial and luxurious. Lean beef is preferable here because it provides plenty of flavor without leaving the final dish feeling greasy or heavy.
Aromatics like yellow onion and garlic provide the foundational depth that makes a Bolognese sing. You should always use fresh-minced garlic rather than the jarred variety; the pre-minced stuff often has a metallic, bitter aftertaste that can ruin a delicate cream sauce. Fresh garlic offers a sweet, pungent aroma that develops beautifully as it toasts in the beef fat.
While we love a good slow-simmered sauce, using a high-quality store-bought marinara as a base is a brilliant time-saver. It provides a consistent level of acidity and sweetness, allowing you to focus your energy on the browning and the finishing touches that elevate the dish to a professional level.
Choosing the Right Rigatoni
Rigatoni is the undisputed king of baked pasta. Its large, hollow center is designed to trap chunks of beef, while the exterior ridges—known as “rigate”—act as structural channels for the sauce. Unlike penne or ziti, rigatoni is sturdy enough to withstand the double-cooking process without collapsing or becoming gummy.
The Role of Heavy Cream and Fats
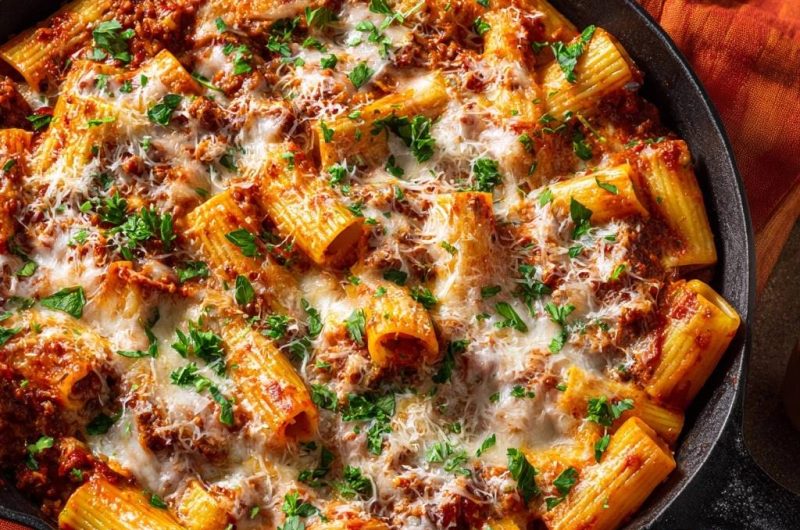
Adding a half-cup of heavy cream is the transformative step that turns a standard red sauce into a velvety, orange-hued Bolognese. The cream mellows the acidity of the tomatoes and creates a silky texture that coats the tongue. Just remember to drain the excess beef fat before adding the cream to keep the flavor profile clean and bright.
Step-by-Step: Building the Skillet Rigatoni Bolognese Bake
Building this dish is a three-phase process that focuses on layering flavors and textures. If you follow these steps, you’ll avoid the common pitfalls of home-baked pasta and achieve a result that looks as good as it tastes.
Phase 1: Preparing the Pasta Foundation
Start by bringing a large pot of water to a rolling boil. You want to salt the water heavily; it should literally taste like the sea. This is your only chance to season the pasta itself from the inside out. Drop the rigatoni and set a timer for four minutes less than the “al dente” mark.
Before you drain the pasta, dip a measuring cup into the pot and reserve at least a half-cup of that cloudy, salty water. This liquid gold is packed with starch and is essential for thinning or thickening your sauce later. Once drained, the pasta should look slightly pale and feel very firm to the touch.
Phase 2: Developing Deep Umami in the Skillet
Heat your olive oil in a 12-inch cast iron skillet until it shimmers. When you add the beef and onions, don’t rush the process. You’re looking for a deep, dark brown crust on the meat—this is the Maillard reaction in action, and it’s where the “umami” or savory depth comes from.
Once the beef is browned and the onions are translucent, stir in your garlic and dried spices. Let them toast in the residual fat for about 60 seconds. You’ll know it’s ready when the kitchen starts to smell like an Italian trattoria. This brief toasting wakes up the oils in the dried oregano and red pepper flakes.
Phase 3: Emulsifying the Sauce and Folding
Pour in the marinara, the reserved pasta water, and the heavy cream. Stir it all together until it turns that beautiful, creamy sunset color. Bring it to a gentle simmer, then fold in your undercooked rigatoni. Toss the pasta continuously for two to three minutes over medium heat.
Watch closely as the sauce begins to change. It will start to look glossy and thick, physically “locking” onto the noodles. This is the moment the starch from the pasta bonds with the cream. If the sauce looks too thick, add a splash more pasta water. It should be saucy but not runny.
Achieving the Perfect Toasted Cheese Crust
A high-heat blast at 425°F is far superior to a long, slow bake. Since the pasta and sauce are already hot from the skillet, the oven’s job is simply to melt the cheese and finish the pasta’s internal cook. A lower temperature would just dry out the sauce and overcook the noodles.
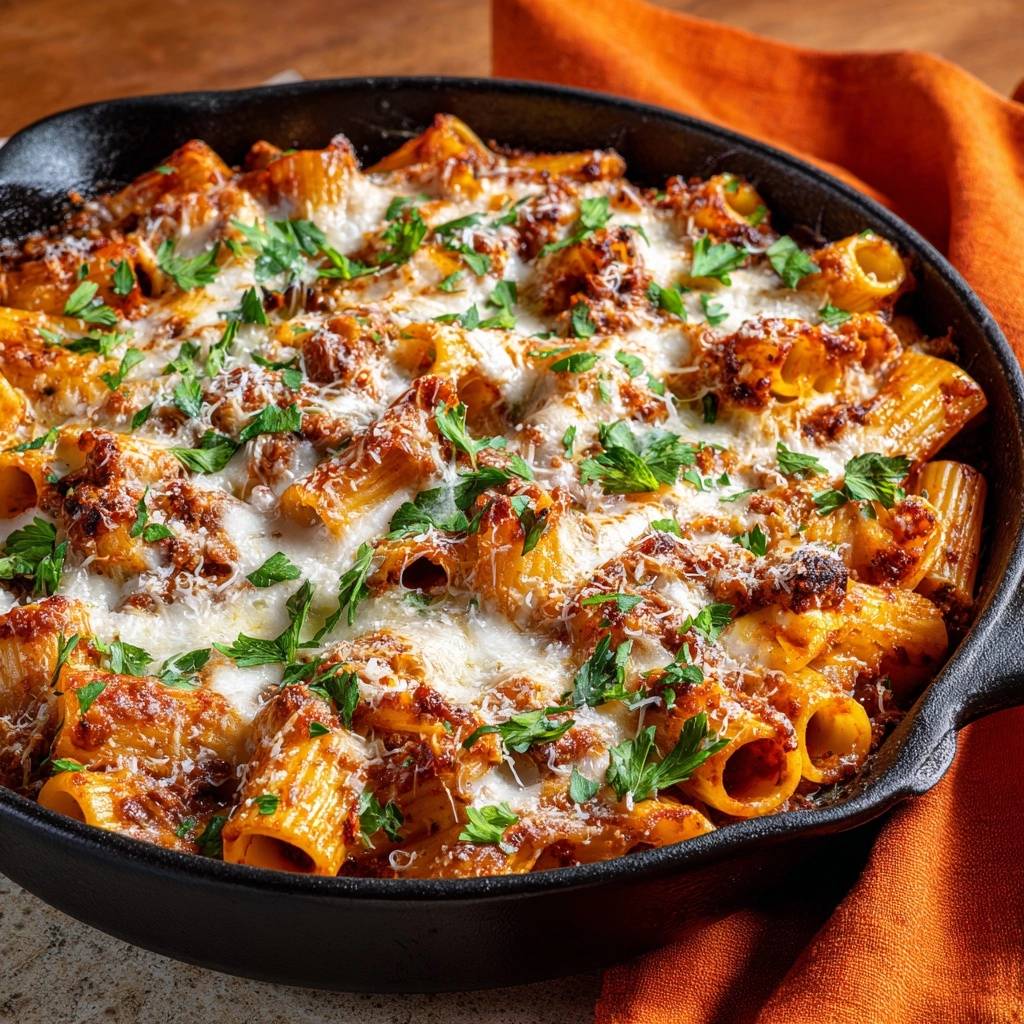
After about eight minutes, the mozzarella should be bubbly. This is when you switch the oven to the broil setting. Stay right there and watch it! There is a very narrow 30-second window between perfectly toasted golden-brown spots and a burnt mess. You want those dark, crispy cheese “freckles” that provide a salty crunch against the soft pasta.
Why Cast Iron is the Superior Vessel
If you have a 12-inch cast iron skillet, use it. Cast iron has incredible heat retention properties that glass or ceramic dishes simply can’t match. The metal bottom continues to sear the bottom layer of pasta even after it’s in the oven, creating little crispy bits that are often the best part of the meal.
Furthermore, the skillet allows you to move seamlessly from the stovetop to the oven. This one-pan approach keeps all the browned bits of beef (the fond) in the dish rather than leaving them behind in a separate frying pan. It also means fewer dishes to wash, which is always a win.
Troubleshooting Common Texture Issues
If you find your sauce is looking a bit dry before it even hits the oven, don’t panic. Stir in a little more of that reserved pasta water or an extra splash of cream. The pasta will continue to absorb liquid as it bakes, so it’s better to start with a sauce that looks slightly “too wet” than one that is already tight.
If your cheese isn’t browning evenly, your oven might have hot spots. Rotate the skillet halfway through the broiling process. Most importantly, let the dish rest for five minutes after you pull it out of the oven. This allows the sauce to settle and thicken, ensuring the dish holds its shape when you scoop it out.
Flavor Variations and Ingredient Swaps
This recipe is incredibly versatile. If you want a lighter version, ground turkey works beautifully, though you may want to add a touch more olive oil since turkey is leaner than beef. For a deeper, more earthy flavor, try replacing half the beef with finely chopped mushrooms.
You can also boost the nutrient profile by folding in a few handfuls of fresh baby spinach right before you add the cheese. The residual heat will wilt the spinach perfectly without making it slimy. If you like heat, double the red pepper flakes or stir in a spoonful of Calabrian chili paste for a spicy kick.
Make-Ahead Strategies and Storage
For busy weeknights, you can prepare the meat sauce up to two days in advance and store it in the fridge. When you’re ready to eat, just boil the pasta, combine it with the warmed sauce in the skillet, and bake as directed. This cuts your active kitchen time down to about 15 minutes.
Leftovers store wonderfully in an airtight container for up to three days. When reheating, the cream sauce can sometimes tighten up. I recommend adding a tiny splash of water or milk before microwaving to loosen the sauce and restore that velvety texture. Avoid freezing this dish if possible, as the cream can separate and the pasta may become soft upon thawing.
Optimal Side Dish Pairings
Because this bake is so rich and savory, you want side dishes that offer high acidity to cleanse the palate. A simple arugula salad with a sharp lemon vinaigrette is the perfect companion. The peppery greens and citrus cut right through the heavy cream and beef.
If you’re looking for something heartier, roasted broccolini with a squeeze of lemon and extra red pepper flakes provides a nice charred crunch. And of course, you can never go wrong with a loaf of crusty garlic bread to mop up every last drop of that Bolognese sauce from the bottom of the skillet.
Expert Tips for Success
To take this dish to the next level, buy a block of mozzarella and grate it yourself. Pre-shredded cheese is coated in potato starch or cellulose to prevent clumping in the bag, which also prevents it from melting into that perfect, stretchy blanket we want. Freshly grated cheese melts much more smoothly.
Check your spice cabinet, too. If your dried oregano has been sitting there for over six months, it’s likely lost its punch. Rub the dried herbs between your palms before adding them to the skillet to release their remaining oils. Finally, don’t skip the fresh parsley garnish; that hit of fresh chlorophyll balances the heavy, savory notes of the meat.
How to Scale for Large Crowds
If you’re feeding a crowd, you can easily double this recipe. However, don’t try to cram it all into one skillet. Use two separate skillets or transfer the combined pasta and sauce into a large roasting pan before topping with cheese. Maintaining the right ratio of surface area to volume is key to preventing the pasta from steaming and becoming mushy.
The Importance of Fresh Parsley Garnish
It might seem like a decorative afterthought, but fresh parsley is functional. The slight bitterness and bright flavor of the herb act as a foil to the richness of the heavy cream and the saltiness of the parmesan. It wakes up the dish and makes the flavors pop just before you take that first bite.
Frequently Asked Questions
How do I store leftovers and will they freeze well?
Store any leftovers in an airtight container in the refrigerator for up to 3 days. While you can freeze it, I don’t recommend it. The heavy cream in the sauce can separate when thawed, and the rigatoni often loses its al dente texture, becoming grainy or mushy. For the best experience, enjoy it fresh or within a few days of cooking.
Why did my pasta turn out mushy even though I followed the directions?
The most common culprit is the boiling time. Ensure you are timing the pasta from the moment the water returns to a boil after adding the noodles. If your oven runs cool, the pasta might sit in the liquid too long before the cheese browns. Also, make sure you aren’t skipping the “Starch Lock” step on the stovetop; that 2-3 minutes of tossing is vital for setting the texture.
Can I use a different type of pasta if I don’t have rigatoni?
Yes, you can substitute with other sturdy, tubular shapes like penne rigate or large shells. Avoid thin or delicate pastas like spaghetti or fusilli, as they lack the structural integrity to hold up under the weight of the heavy meat sauce and the high heat of the oven. Always look for a pasta with ridges to ensure the sauce clings properly.
What can I use instead of heavy cream?
If you don’t have heavy cream, you can use half-and-half, though the sauce will be slightly less rich. I don’t recommend using regular milk, as it lacks the fat content necessary to create a stable emulsion with the pasta starch and may result in a watery sauce. For a dairy-free alternative, a thick cashew cream works surprisingly well to maintain that velvety texture.
My cheese didn’t get those brown spots, what happened?
This usually happens if the skillet is placed too low in the oven. For the broiling phase, move your oven rack to the top position, about 4-6 inches away from the heating element. Also, ensure you are using a full-fat mozzarella; low-fat or “part-skim” cheeses don’t always brown and bubble as beautifully as the whole-milk varieties.
Is the reserved pasta water really necessary?
Absolutely. That water is full of starch that acts as a bridge between the pasta and the sauce. If your sauce looks a bit broken or oily, a splash of that starchy water will help pull everything back together into a smooth, cohesive glaze. It’s the secret weapon of professional Italian chefs for a reason!
Skillet Rigatoni Bolognese Bake
Course: Main CourseCuisine: Italian-AmericanDifficulty: easy6
servings15
minutes30
minutes45
Minutes510
kcalItalian-American
Ingredients
1 pound rigatoni pasta
1.5 pounds lean ground beef
1 jar (24 ounces) high-quality marinara sauce
1/2 cup heavy cream (to achieve the velvety orange-red sauce texture)
1 tablespoon olive oil
1 small yellow onion, finely diced
3 cloves garlic, minced
1 teaspoon dried oregano
1/2 teaspoon red pepper flakes
1.5 cups shredded mozzarella cheese
1/2 cup finely grated parmesan cheese
1/4 cup fresh parsley, finely chopped
Salt and black pepper to taste
Directions
- Preheat your oven to 425°F (220°C). Bring a large pot of heavily salted water to a boil.
- Add the rigatoni to the water and cook for exactly 4 minutes less than the package directions for al dente. The pasta should still have a firm “snap” in the center. Drain, reserving 1/2 cup of pasta water, and set aside.
- In a large (12-inch) oven-safe cast iron skillet, heat the olive oil over medium-high heat. Add the ground beef and diced onion. Cook until the beef is deeply browned and the onions are translucent. Drain any excess fat.
- Stir in the minced garlic, oregano, and red pepper flakes. Cook for 1 minute until fragrant.
- Pour in the marinara sauce and the reserved pasta water. Bring to a simmer. Stir in the heavy cream to create a thick, emulsified meat sauce that will cling to the large pasta tubes.
- Add the undercooked rigatoni directly into the skillet. Toss well for 2-3 minutes over medium heat. This allows the pasta to release starch, thickening the sauce and “locking” it onto the noodles.
- Turn off the heat. Ensure the pasta is leveled in the skillet. Sprinkle the shredded mozzarella and half of the parmesan cheese evenly over the top.
- Place the skillet in the oven and bake for 8-10 minutes. Switch the oven to Broil for the final 2 minutes to achieve the toasted cheese spots shown in the image.
- Remove from the oven and let it rest for 5 minutes. This rest period is essential for the sauce to set so it doesn’t run. Garnish generously with fresh parsley and the remaining parmesan cheese before serving.
Notes
- The secret to this dish is undercooking the pasta by 4 minutes and finishing it in the sauce to allow the starch to thicken the mixture. Always let the dish rest for 5 minutes after baking to allow the sauce to set.


