
Imagine walking into a kitchen where the air is thick with the scent of toasted thyme, savory beef, and earthy mushrooms. There is a specific kind of magic in a pot that has been simmering on the stove for hours, promising a meal that feels like a warm hug. This isn’t just a meal; it’s the ultimate solution to the heartbreak of chewy, disappointing stew meat.
Most home cooks struggle with beef that turns out rubbery or dry, even after hours of cooking. However, the secret to success isn’t just time; it’s the specific way you treat the proteins and the temperature of your liquid. We are going to transform a humble chuck roast into something so tender you could eat it with a spoon.
The real trick to this recipe lies in the “lazy bubble” simmer. If you let your stew reach a rolling boil, the muscle fibers in the beef will seize up and stay tough forever. By keeping the heat at the lowest possible setting, we allow the connective tissue to melt into silk without drying out the meat. Oh man, the first bite of this velvety gravy will change your Sunday dinner game forever!
The Science of Tenderness: Why Braising Works
Braising is a dual-method cooking technique that uses both dry heat to sear and moist heat to finish. When you work with a cut like chuck roast, you are dealing with a lot of collagen and connective tissue. Therefore, you cannot rush the process by turning up the heat, as high temperatures cause muscle fibers to contract and squeeze out their moisture.
Instead, we aim for the “magic zone” between 160°F and 180°F. In this temperature range, collagen slowly dissolves into gelatin. This gelatin coats the meat fibers, providing that rich, lip-smacking mouthfeel we all crave. If you boil the meat, you end up with gray, stringy clumps; if you braise it, you get succulent morsels that fall apart at the touch of a fork.
Furthermore, this long cooking time allows the flavors of the mushrooms and aromatics to penetrate deep into the beef. The liquid doesn’t just cook the meat; it seasons it from the inside out. This transformation is why a braise is fundamentally different from a quick-seared steak or a boiled soup.
Essential Components for Slow-Braised Beef and Mushroom Stew
Success starts with your shopping list, and the beef is the star of the show. You want a cut with plenty of internal fat and connective tissue. In addition to the meat, the mushrooms play a vital role in building a savory foundation that tastes like it came from a professional kitchen.
Using low-sodium beef broth is a pro move here. As the stew simmers for three hours, the liquid reduces and the flavors concentrate. If you start with a full-sodium broth, the final gravy might end up way too salty. This way, you maintain total control over the seasoning until the very end.
Selecting the Right Cut of Beef
Always reach for the chuck roast for this dish. While brisket or round might look tempting, they often lack the specific marbling needed for a three-hour braise. Look for a piece of meat with white flecks of fat running through the muscle, rather than just a thick cap of fat on the outside.
The Role of Mushrooms in Umami Development
Button mushrooms are the classic choice because they are incredible flavor sponges. They soak up the beef juices and the wine, becoming little savory bombs in every bite. If you want a deeper flavor, you can use Cremini, but the humble white button mushroom works perfectly to provide that essential umami depth.
The Maillard Reaction: Building a Flavor Foundation
Before any liquid hits the pot, we have to talk about the Maillard reaction. This is the chemical reaction between amino acids and sugars that creates that beautiful brown crust on the meat. Without this step, your stew will look gray and taste flat. We want deep, mahogany colors to ensure a complex flavor profile.
The Importance of Searing in Batches
The biggest mistake people make is dumping all the meat into the pot at once. When you do this, the temperature of the oil drops instantly, and the meat releases moisture. Instead of searing, the beef ends up steaming in its own juices. Work in small batches so each cube has enough space to develop a dark, crispy crust.
Deglazing and the Power of Fond
After you sear the meat and vegetables, you’ll notice brown bits stuck to the bottom of the Dutch oven. This is called “fond,” and it is pure gold. When you pour in your liquid, use a wooden spoon to scrape those bits up. They will dissolve into the sauce, providing a richness that you simply cannot get from a carton of broth alone.
Step-by-Step: Executing the Perfect Braise
Start by patting your beef cubes bone-dry with paper towels. If the meat is wet, it won’t sear properly. Once seared and removed, toss in your mushrooms. Let them sit undisturbed for a few minutes; you want them to get golden and slightly crispy before they start releasing their liquid.
Next, add your onions and garlic. You aren’t looking to brown them heavily, just to make them soft and translucent. This creates a sweet, aromatic base for the heavier flavors to follow. Once the vegetables are ready, it is time to build the body of your sauce.
Preparing the Aromatics and Thickening Agent
Stir in the tomato paste and flour, making sure every piece of vegetable is coated. Cook this for about two minutes. This “toasts” the flour, which removes the raw taste and ensures your gravy is smooth and dark rather than pale and pasty. It’s a small step that makes a massive difference in the final result.
Managing the Simmer: The “Lazy Bubble” Technique
Once the liquid is in and the beef is back in the pot, bring it to a simmer. Now, look closely at the surface. You want to see a “lazy bubble”—maybe one or two bubbles breaking the surface every few seconds. If the pot is boiling vigorously, turn the heat down immediately. This gentle heat is what guarantees that melt-in-your-mouth texture.
Troubleshooting Common Braising Obstacles
If your meat is still tough after three hours, don’t panic! It simply means the collagen hasn’t finished breaking down yet. Every cow is different, and some cuts just need an extra thirty minutes. Just keep the lid on and keep that simmer low; it will eventually give in and become tender.
If your gravy feels too thin at the end, you can simmer it with the lid off for the last fifteen minutes. Conversely, if it’s too thick or salty, stir in a splash of water or extra broth. Always taste your sauce before serving to ensure the salt and pepper levels are exactly where you want them.
Equipment Essentials: The Dutch Oven Advantage
A heavy-bottomed Dutch oven is the best tool for this job. The thick cast iron walls hold heat steadily, which prevents the temperature fluctuations that can toughen the meat. Additionally, a tight-fitting lid is crucial. It keeps the moisture inside the pot, creating a self-basting environment that keeps the beef moist during the long cook.
Flavor Variations and Ingredient Substitutions
If you prefer not to use the optional red wine, you can easily swap it for an equal amount of beef broth mixed with a teaspoon of balsamic vinegar. The vinegar provides the acidity needed to cut through the richness of the beef. You can also add root vegetables like carrots or parsnips during the last hour of cooking for a heartier meal.
Optimal Pairings for Rich Beef Gravy
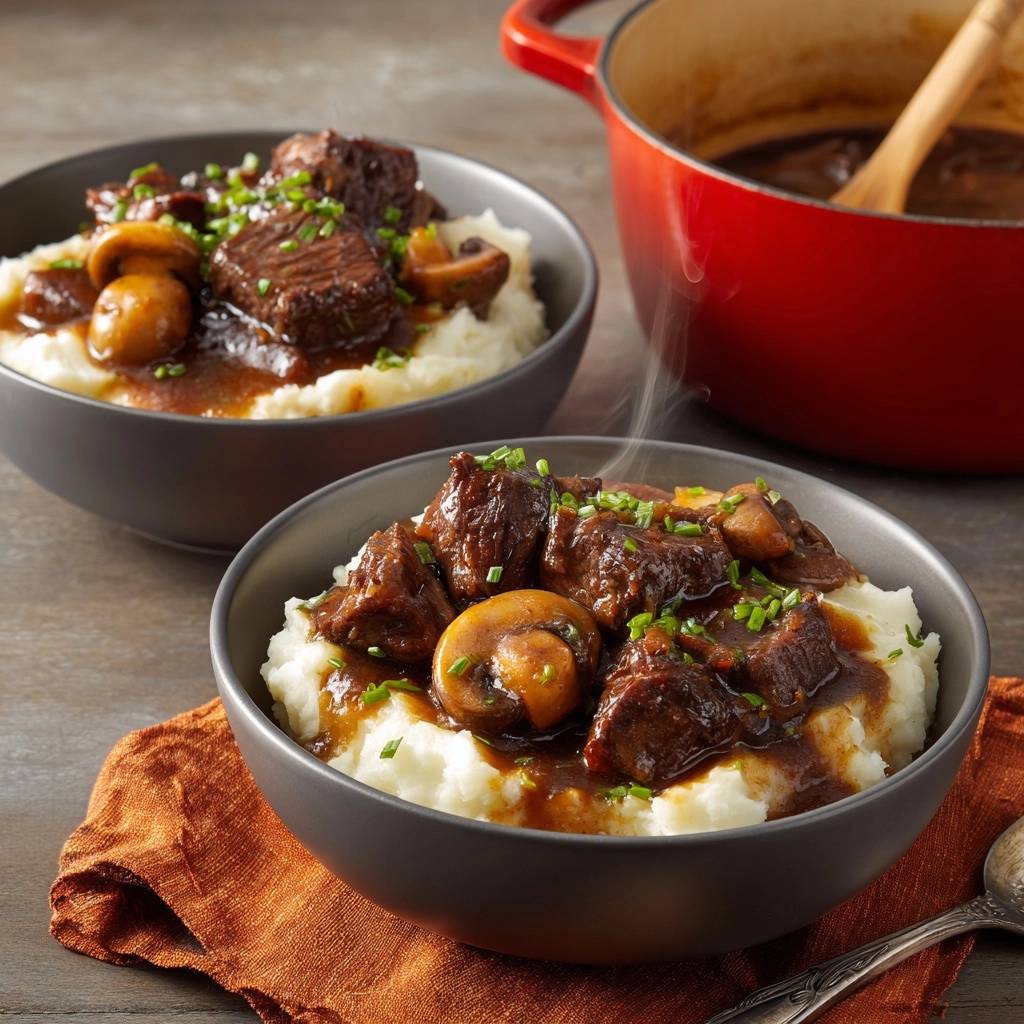
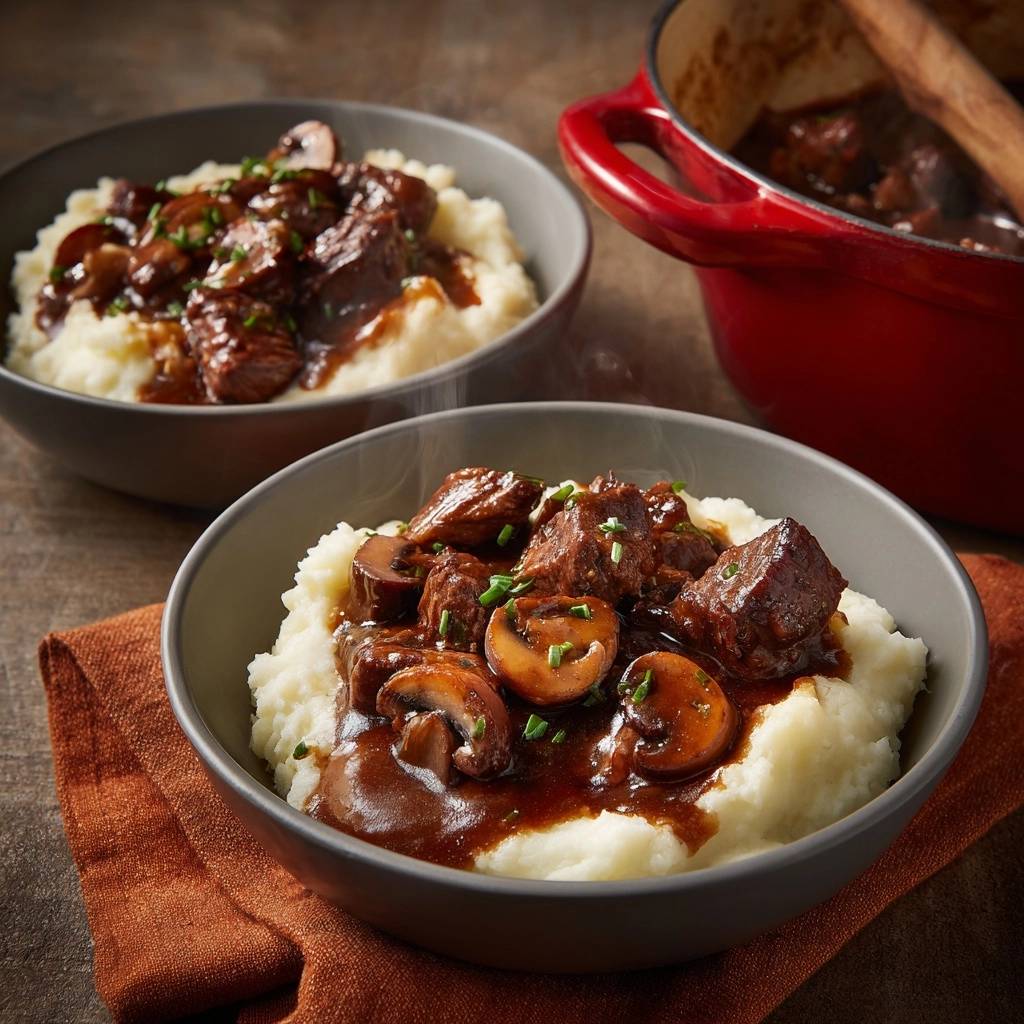
This stew is designed to be served over a mountain of creamy mashed potatoes. The potatoes act as a canvas for the dark, glossy gravy. However, if you want to switch things up, wide egg noodles or a thick bed of polenta also work beautifully. You want something that can soak up every last drop of that sauce.
Make-Ahead Strategy and Storage Logistics
Believe it or not, this stew actually tastes better the next day. As it sits in the fridge, the flavors continue to meld and deepen. If you are making this for a dinner party, feel free to cook it a day in advance. Just reheat it gently on the stove over low heat so you don’t overcook the beef.
To store leftovers, let the stew cool to room temperature before transferring it to an airtight container. It will stay fresh in the refrigerator for up to four days. You can also freeze this stew for up to three months, though the mushrooms may become slightly softer upon thawing.
Expert Tips for Professional Presentation
Before serving, take a large spoon and skim any excess fat that has risen to the top. This gives the gravy a clean, professional look. Finally, don’t be shy with the chives! The bright green color and fresh onion bite provide a necessary contrast to the deep, earthy tones of the slow-cooked beef.
Frequently Asked Questions
Can I make this in a Slow Cooker or Instant Pot?
Yes, you can! For a slow cooker, sear the meat and aromatics in a pan first, then transfer everything to the crockpot with only 3 cups of broth (liquids don’t evaporate in a slow cooker). Cook on low for 7-8 hours. For an Instant Pot, use the sauté function for searing, then cook on high pressure for 45 minutes with a natural release.
Why is my beef still tough after the recommended time?
Tough beef usually means one of two things: either the heat was too high and the fibers seized, or it simply hasn’t cooked long enough. If you kept the heat low, just give it more time. Connective tissue breaks down on its own schedule, and sometimes an extra 30 minutes is all it takes to reach that perfect texture.
Can I use dried mushrooms instead of fresh?
You can use dried mushrooms to add an extra punch of flavor, but don’t use them as a total replacement for the texture of fresh button mushrooms. Rehydrate dried porcini in warm water, then add both the chopped mushrooms and the strained soaking liquid to the pot for an incredibly deep, forest-like aroma.
What is the best substitute for red wine in this stew?
The best substitute is a combination of extra beef broth and a splash of acidity. Use one cup of broth mixed with a tablespoon of balsamic vinegar or Worcestershire sauce. This mimics the complexity and brightness that wine usually provides without changing the fundamental soul of the dish.
How do I thicken the gravy at the very end if it’s too watery?
If the gravy is too thin after 3 hours, make a “beurre manié” by mixing one tablespoon of softened butter with one tablespoon of flour. Whisk this paste into the simmering stew. It will thicken the sauce almost instantly without creating lumps, leaving you with a glossy, restaurant-quality finish.

Slow-Braised Beef and Mushroom Stew
Course: Main CourseCuisine: AmericanDifficulty: easy4
servings20
minutes3
hours180
Minutes540
kcalAmerican
Ingredients
2 pounds beef chuck roast, cut into 1.5 inch cubes
1 pound whole button mushrooms
4 cups low-sodium beef broth
1 cup dry red wine (optional, or substitute with more broth)
2 tablespoons tomato paste
3 cloves garlic, minced
1 large onion, diced
2 tablespoons vegetable oil
1/4 cup all-purpose flour
1 teaspoon dried thyme
1 bay leaf
Salt and black pepper to taste
Fresh chives, chopped for garnish
4 cups prepared creamy mashed potatoes for serving
Directions
- Pat the beef cubes completely dry with paper towels. This is the first secret to flavor; moisture on the surface prevents the Maillard reaction. Season generously with salt and pepper.
- Heat oil in a heavy Dutch oven over medium-high heat. Sear the beef in small batches until a deep brown crust forms on all sides. Do not crowd the pan or the meat will steam instead of brown. Remove beef and set aside.
- In the same pot, add the mushrooms. Cook undisturbed for 3-4 minutes to develop a golden sear, then stir until their moisture has evaporated. Add the onions and garlic, cooking until softened and translucent.
- Stir in the tomato paste and flour, coating the vegetables. Cook for 2 minutes, stirring constantly, to toast the flour and deepen the color of the paste.
- Deglaze the pot by pouring in the red wine (if using) or 1 cup of the broth. Use a wooden spoon to scrape the bottom of the pot to release all the browned bits (the fond), which contains the deep flavor.
- Slowly pour in the remaining beef broth. Return the beef and any accumulated juices to the pot along with the thyme and bay leaf.
- Bring to a very gentle simmer, then immediately reduce heat to the lowest setting. Cover with a tight-fitting lid. The key to ending tough meat is maintaining a “lazy bubble” simmer. If the liquid boils vigorously, the muscle fibers will seize and become tough.
- Braise for 2.5 to 3 hours until the beef is fork-tender and the sauce has thickened into a rich, dark gravy. Remove the bay leaf.
- Serve the stew over a generous bed of creamy mashed potatoes, ensuring the dark gravy pools around the sides as shown in the image. Garnish heavily with fresh chopped chives.
Notes
- The secret to tender meat is maintaining a lazy bubble simmer; boiling the liquid will cause the muscle fibers to seize and become tough. Always pat the beef dry before searing to ensure a proper crust.


