
Nothing ruins a cozy autumn afternoon faster than a pumpkin dessert with a wet, mushy base. We’ve all been there: you pull a beautiful-looking cake out of the oven, only to find the center feels underbaked and the bottom is unpleasantly damp. This “soggy bottom” syndrome is the nemesis of pumpkin bakers everywhere, but it doesn’t have to be your reality.
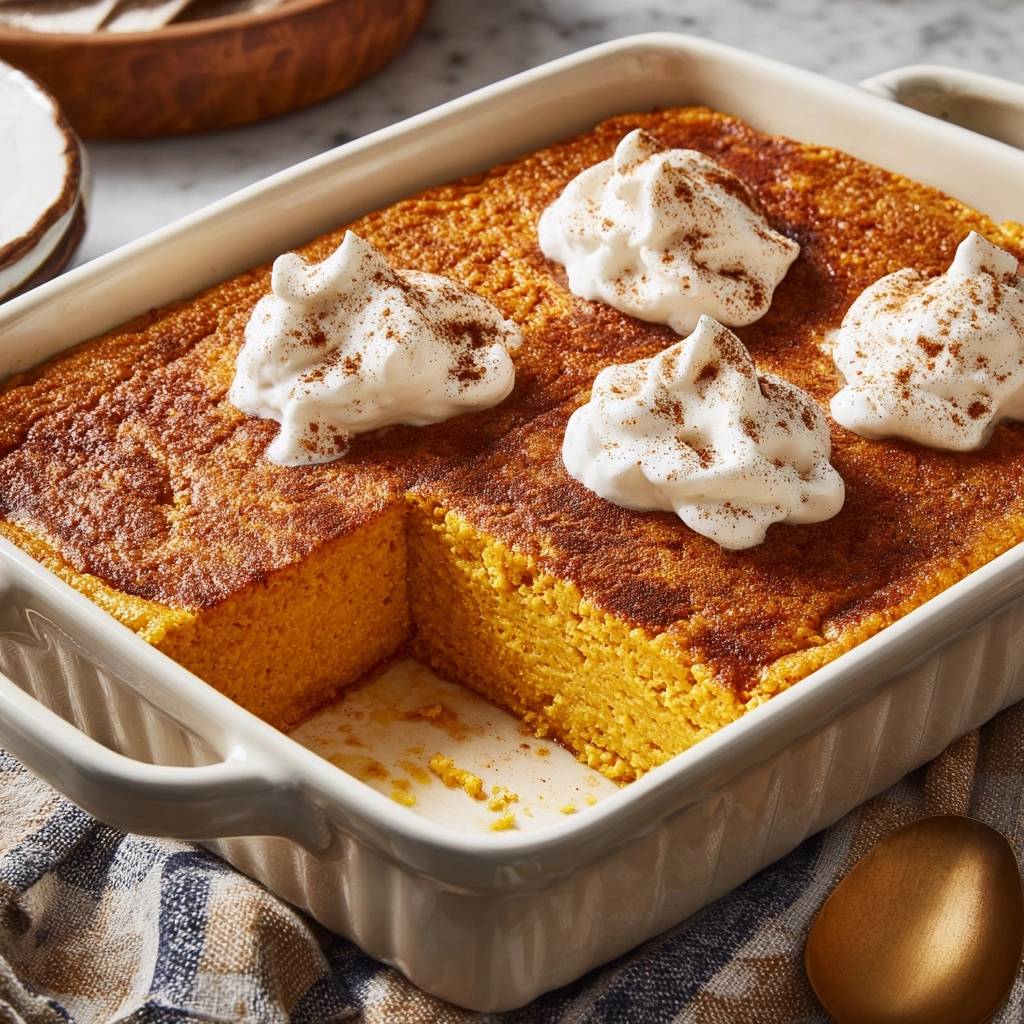
This Spiced Pumpkin Custard Cake is specifically engineered to solve that problem. It sits in that glorious sweet spot between a dense, spiced snack cake and a silky, elegant custard. By focusing on aeration and temperature control, we create a dessert that holds its structural integrity while maintaining a melt-in-your-mouth texture.
The secret to this “Anti-Soggy” method lies in the emulsion of fats and proteins. When you use room temperature ingredients and follow a precise cooling period, you allow the starches to lock in moisture rather than letting it pool at the bottom. It’s a game-changer for anyone who loves the flavor of pumpkin but hates the “weeping” texture of traditional bakes.
The Anatomy of a Perfect Pumpkin Custard
Achieving the perfect pumpkin custard requires a delicate balance of moisture and protein. Pumpkin puree is naturally heavy and wet, which can easily weigh down a standard cake batter. However, when we introduce three large eggs, we provide the protein structure needed to lift that weight and create a stable crumb.
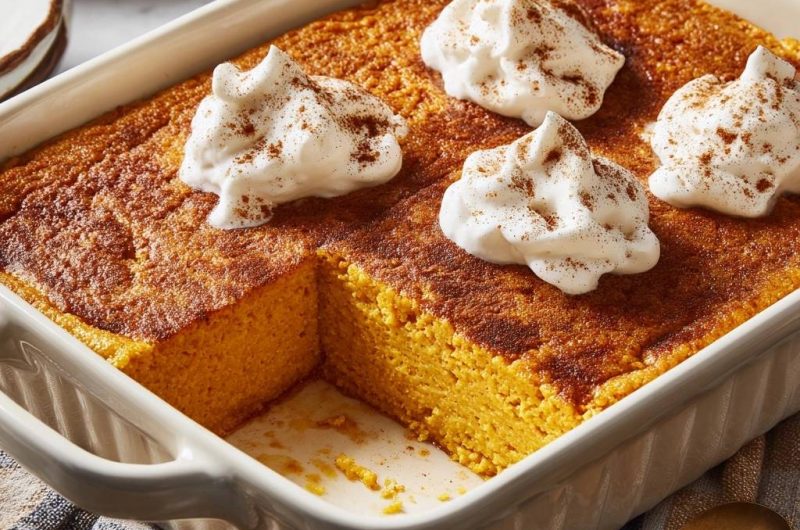
The goal here is a texture that is structurally sound enough to slice into clean, sharp squares but soft enough to dissolve on your tongue. Unlike a traditional pumpkin pie, which lacks flour, or a standard sponge cake, which lacks the dense moisture of puree, this dish bridges the gap. It feels substantial yet incredibly refined.
Because we use a specific ratio of all-purpose flour to pumpkin, the cake develops a tight, velvety crumb. This isn’t a light, airy chiffon; it’s a rich, decadent experience. The contrast between the golden, slightly firm edges and the tender, custard-like center is what makes every bite so addictive.
Essential Components for the Spiced Pumpkin Custard Cake
Using exactly 15 ounces of pumpkin puree is the golden ratio for this recipe. It provides enough vegetable density to flavor the cake deeply without overwhelming the leavening agents. Make sure you’re using pure pumpkin, not the pre-sweetened pie filling, so you can control the spice and sugar levels yourself.
The sugar blend is equally vital for the final result. We use granulated sugar to provide the necessary structure and “crunch” to the crumb, while light brown sugar brings in molasses notes. That brown sugar also adds a humectant quality, ensuring the cake stays moist for days without becoming greasy.
Don’t skimp on the salt or the pumpkin pie spice. Salt acts as a flavor amplifier, cutting through the richness of the butter and eggs to make the pumpkin taste more like itself. A full tablespoon of spice ensures the warmth of cinnamon, ginger, and cloves permeates every single crumb.
Temperature Control: Why Room Temperature Eggs Matter
If you take one thing away from this recipe, let it be this: use room temperature eggs. When you drop cold eggs into melted butter and pumpkin, the fat immediately seizes up. This creates a “broken” batter that looks curdled and results in a heavy, greasy cake with a rubbery bottom.
Room temperature proteins bond much more effectively with fats. This creates a stable emulsion that traps tiny air bubbles during the whisking process. These bubbles are your insurance policy against the “weeping” effect, as they help the cake rise evenly and stay set once it cools.
If you forgot to take your eggs out of the fridge, don’t worry. Simply place them in a bowl of warm (not hot) water for about five to ten minutes. This quick fix brings them to the right temperature and ensures your batter stays smooth and glossy from start to finish.
The Flour Factor: Sifting for Structural Integrity
While it might be tempting to reach for cake flour, all-purpose flour is actually the superior choice here. We need the slightly higher protein content of all-purpose flour to support the heavy pumpkin puree. It provides the “skeleton” that keeps the custard from collapsing into a puddle.
Sifting your dry ingredients is a non-negotiable step for the “Anti-Soggy” result. Pumpkin batter is thick, and clumps of flour can easily hide within it. These flour pockets trap moisture and create uneven “sunken” spots in your cake that never fully bake through.
By sifting the flour with the baking soda and powder, you ensure the leavening agents are perfectly distributed. This leads to a uniform rise across the entire 9×9 dish. You won’t end up with a cake that is puffy on the sides and raw in the middle.
Step-by-Step: Building the Anti-Soggy Batter
Start by whisking your pumpkin puree with both sugars until the mixture looks smooth and dark. You’ll notice the sugar starts to dissolve into the pumpkin moisture, creating a glossy base. This is the foundation of your flavor, so make sure there are no lumps of brown sugar remaining.
Next, add your room temperature eggs one at a time. You want to whisk vigorously after each addition. You aren’t just mixing; you are building structure. The mixture should look slightly lightened in color and very cohesive before you move on to the next egg.
Once the eggs are in, stir in the melted butter, milk, and vanilla. The batter should look like a thick, luxurious soup at this stage. If you see little bits of solid butter, your ingredients were too cold. However, if everything was at room temperature, it will be a perfectly smooth, orange liquid.
Folding Techniques to Prevent Gluten Development
When it’s time to add the dry ingredients, put the whisk away and grab a spatula. We want to avoid developing too much gluten, which would turn our silky custard into a tough, bread-like loaf. Use a “J-fold” motion: cut through the center, scoop under the bottom, and turn the batter over.
Stop folding the very second you see the last streak of white flour disappear. The batter should be thick, glossy, and heavy. If you overmix, you’ll knock out the air you worked so hard to incorporate with the eggs, leading to a flat, dense result.
Pour the batter into your greased ceramic dish and smooth the top. Ceramic is the preferred choice here because it heats up slowly and retains that heat evenly. This gentle cooking method is exactly what a custard-based cake needs to set without burning the edges.
Precision Baking: Achieving the Firm Jiggle
Baking this cake is all about the “visual cue.” At the 45-minute mark, start checking the center. You are looking for the “firm jiggle.” If you shake the pan gently, the center should move slightly like set gelatin, but it shouldn’t look liquid or wavy under the surface.
The edges should be a deep golden brown and starting to pull away slightly from the sides of the dish. This indicates that the outer structure is fully baked and supporting the softer interior. If the center still looks wet, give it another five minutes, but watch it closely.
Remember that every oven is different. If you use a metal pan instead of ceramic, the cake will bake faster, but the edges might get a bit crispier. Stick with ceramic if you want that uniform, melt-in-your-mouth custard experience from corner to corner.
The Science of the Cooling Period
This is the most difficult part of the recipe: you must wait. The cooling period is actually a continuation of the cooking process. Through a process called starch retrogradation, the flour and eggs continue to set and firm up as the temperature drops slowly.
If you cut into the cake while it’s hot, the steam will escape instantly, causing the internal structure to collapse. This is how you end up with a wet, compressed center. By letting it sit on a wire rack for at least an hour, you allow the moisture to distribute evenly throughout the crumb.
As the cake cools, the flavors also have time to marry. The spices become more pronounced, and the sweetness of the pumpkin deepens. Patience is truly the final ingredient that guarantees that perfect, clean slice every single time.
Troubleshooting Common Pumpkin Baking Pitfalls
If your cake rose beautifully in the oven but sank in the middle as it cooled, you likely had a leavening imbalance or pulled it out too soon. Ensure your baking soda is fresh and that you didn’t skip the “firm jiggle” test. An underbaked center simply doesn’t have the strength to hold its own weight.
Are the edges burnt while the middle is still raw? This usually happens in ovens that run too hot or if the baking dish is too thin. Check your oven calibration with a thermometer. If the edges are browning too fast, you can tent the dish loosely with foil for the last 15 minutes of baking.
A grainy texture is usually the result of cold eggs or sugar that didn’t fully dissolve. Make sure you whisk the pumpkin and sugar thoroughly before adding the eggs. If the eggs are cold, they prevent the sugar from breaking down properly, leaving you with a sandy mouthfeel instead of a smooth custard.
Flavor Variations and Ingredient Swaps
While canned pumpkin is the standard, you can absolutely use homemade puree. Roasted Hubbard squash or butternut squash puree offers a slightly sweeter, nuttier profile that works beautifully in this custard format. Just ensure your homemade puree isn’t too watery; strain it through cheesecloth if necessary.
For a dairy-free version, you can substitute the whole milk with full-fat coconut milk. The high fat content in coconut milk mimics the richness of dairy and complements the pumpkin spices perfectly. Use a high-quality plant-based butter stick for the melted butter component.
If you want some textural contrast, fold in half a cup of toasted, chopped pecans or walnuts at the very end. You could also drizzle a simple maple glaze over the cooled cake for an extra layer of autumnal sweetness. However, the cake is so rich on its own that a simple dollop of cream is usually plenty.
Make-Ahead Strategies and Storage Logistics
This is one of those rare desserts that actually tastes better on day two. As it sits in the refrigerator, the custard tightens up even further, and the spices become incredibly vibrant. It’s the perfect make-ahead dessert for a dinner party or holiday gathering.
Store any leftovers in an airtight container in the fridge for up to four days. Because of the high moisture content and the eggs, it shouldn’t be left out on the counter for more than a few hours. The cold temperature keeps the custard fresh and the base firm.
I do not recommend freezing this specific cake. Custard-based bakes often suffer from “syneresis” when frozen and thawed. This means the ice crystals break the delicate bond between the eggs and flour, causing the cake to release liquid and become unpleasantly spongy upon thawing.
Expert Tips for Professional Presentation
To get those perfect, “Instagram-worthy” squares, use a warm, wet knife. Run your knife under hot water, wipe it dry, and make one clean slice. Repeat the cleaning and warming process between every single cut. This prevents the custard from sticking to the blade and tearing the cake.
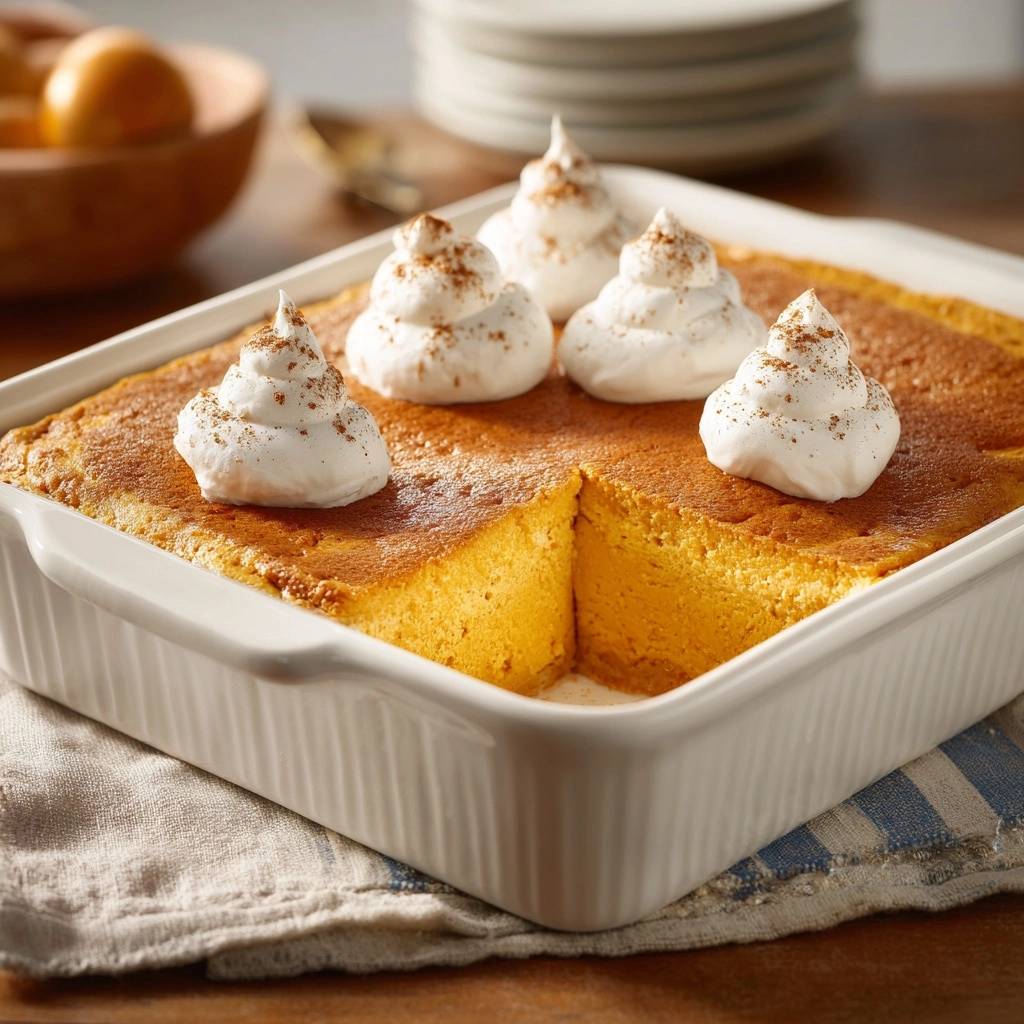
When it comes to the whipped cream, aim for stiff peaks. You want the cream to hold its shape on top of the cake rather than melting into it. A little bit of powdered sugar and vanilla in the cream will help stabilize it for a beautiful presentation that lasts.
Finally, don’t forget the olfactory appeal. A light dusting of extra cinnamon or freshly grated nutmeg right before serving hits the nose before the first bite. It signals to your guests that they are about to enjoy something warm, spiced, and perfectly crafted.
Frequently Asked Questions
Can I use pumpkin pie filling instead of pumpkin puree?
No, you should avoid pumpkin pie filling for this recipe. Pie filling comes pre-sweetened and pre-spiced, which will completely throw off the balance of the cake. Using it will likely result in a cake that is cloyingly sweet and may not set properly due to the extra additives.
Why did my cake “weep” liquid on the bottom after cooling?
This usually happens for two reasons: using cold eggs or cutting the cake while it was still warm. Cold eggs prevent a proper emulsion, causing the fats and liquids to separate during baking. Additionally, cutting the cake too early releases steam that should have stayed inside to help the starches set.
Can I bake this in a round cake pan instead of a 9×9 dish?
Yes, you can use a 9-inch round cake pan, but keep an eye on the bake time. Round pans sometimes bake slightly faster at the edges. Ensure the pan is at least 2 inches deep to accommodate the rise of the custard batter, and still look for that signature firm jiggle in the center.
How do I know if my baking soda and powder are still active?
To test baking soda, drop a pinch into a spoonful of vinegar; it should bubble vigorously. For baking powder, drop a pinch into hot water. If you don’t see immediate, active bubbling, your leaveners are expired. Using fresh leavening is crucial for preventing a dense, sunken cake.
Can I use a different spice blend if I don’t have pumpkin pie spice?
Absolutely. You can make your own by mixing 1.5 teaspoons of cinnamon, 1/2 teaspoon of ginger, 1/2 teaspoon of nutmeg, and 1/4 teaspoon of cloves or allspice. This DIY blend will give you the same warm, aromatic profile required for the recipe.
Does this cake need to be refrigerated?
Yes, because this cake has a high moisture content and a custard-like base with three eggs, it should be stored in the refrigerator. It will stay fresh and maintain its best texture for up to four days when kept chilled in an airtight container.
Spiced Pumpkin Custard Cake
Course: DessertCuisine: AmericanDifficulty: easy9
servings15
minutes50
minutes65
MinutesAmerican
Ingredients
15 ounces pumpkin puree (one standard can)
1 cup granulated sugar
1/2 cup light brown sugar, packed
3 large eggs, room temperature
1/2 cup unsalted butter, melted and cooled
1/2 cup whole milk, room temperature
1 teaspoon vanilla extract
1 1/2 cups all-purpose flour
1 teaspoon baking soda
1 teaspoon baking powder
1 tablespoon pumpkin pie spice
1/2 teaspoon salt
Whipped cream for topping
Extra cinnamon for dusting
Directions
- Preheat your oven to 350°F (175°C). Grease a 9×9 inch ceramic baking dish thoroughly with butter or non-stick spray.
- In a large bowl, whisk the pumpkin puree with the granulated sugar and brown sugar until smooth.
- Add the room temperature eggs one at a time, whisking vigorously after each addition. Using room temperature eggs is the secret to a stable emulsion that prevents the cake from separating and becoming soggy.
- Stir in the melted butter, milk, and vanilla extract until fully incorporated.
- In a separate bowl, sift together the flour, baking soda, baking powder, pumpkin pie spice, and salt. Sifting is essential to prevent dense flour pockets that trap moisture and create an uneven bake.
- Gradually fold the dry ingredients into the wet pumpkin mixture using a spatula. Stop as soon as no flour streaks remain; overmixing will develop gluten and toughen the custard texture.
- Pour the batter into the prepared ceramic dish and smooth the top with a spatula.
- Bake for 45 to 50 minutes. The key to the “Anti-Soggy” result is monitoring the set. Remove the cake when the edges are golden brown and the center is set but still has a very slight, firm jiggle.
- Let the cake cool completely in the pan on a wire rack for at least one hour. This resting period allows the starches to fully lock in the moisture so the bottom stays firm and the crumb sets properly.
- Slice into squares directly in the dish. Top each square with a generous dollop of whipped cream and a dusting of cinnamon before serving.
Notes
- Using room temperature eggs and milk is crucial for a stable emulsion. Sifting dry ingredients prevents dense flour pockets. Ensure the cake cools for at least one hour to allow the starches to set the crumb properly.


