
Few things in the kitchen are as frustrating as pulling a chocolate cake out of the oven only to watch the center slowly cave in. You’ve followed the steps, yet you’re left with a crater instead of a masterpiece. This Triple Layer Chocolate Cream Cake solves that heartbreak by using a specific temperature-staggering method that guarantees a level, sturdy crumb every single time.
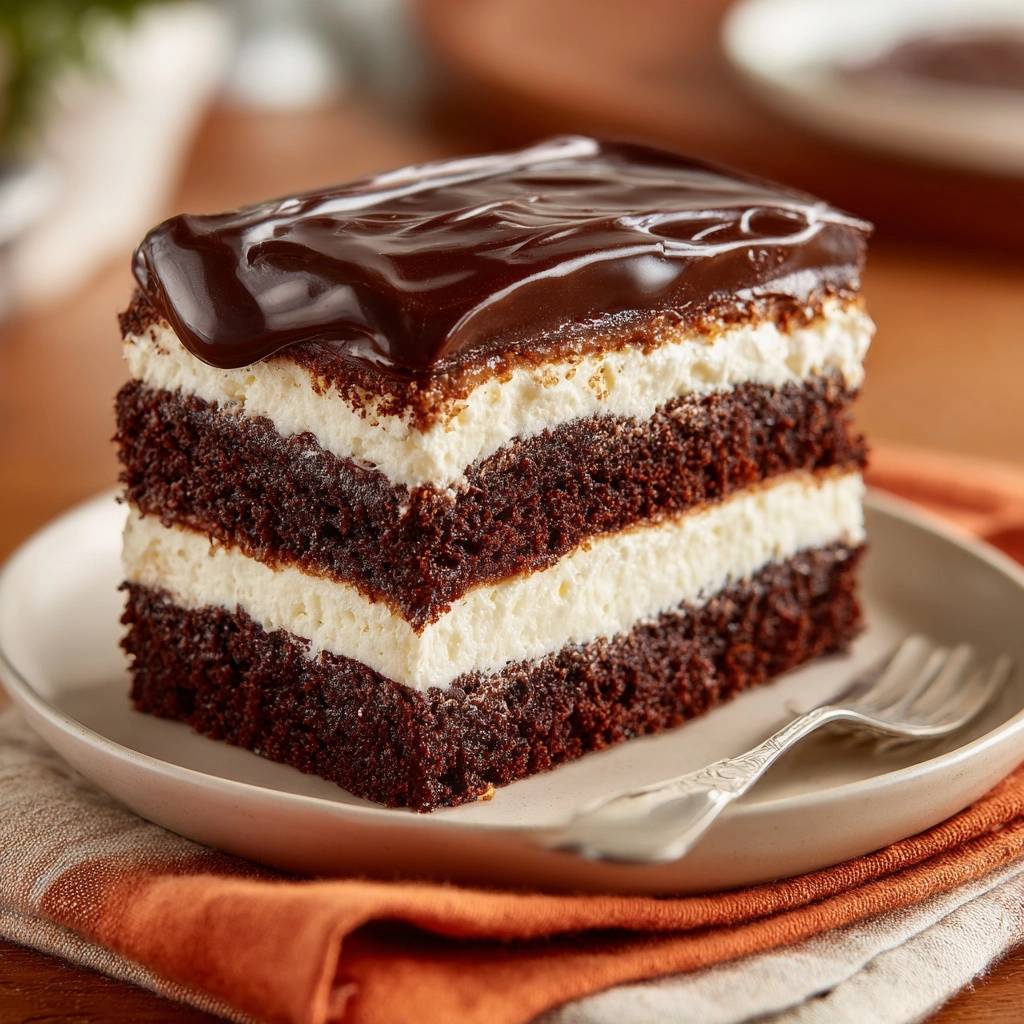
When you take your first bite, you’ll experience a perfect contrast of textures. The cake itself is incredibly moist and dark, providing a robust foundation for the cloud-like, stabilized cream filling. Finally, a silky ganache blankets the top, adding a luxurious richness that ties the whole dessert together. It’s a professional-grade bake that you can easily master at home.
The secret to this recipe’s success lies in the gradual cooling process. By leaving the oven door cracked at the end of the bake, you allow the cake’s internal structure to set slowly. This prevents the thermal shock that usually causes the delicate air bubbles to collapse, ensuring your layers stay tall and proud for assembly.
The Structural Science of a Level Cake
Baking is essentially a series of chemical reactions happening in a hot box. In this recipe, the baking soda and baking powder act as your primary leaveners. When the acidic buttermilk hits the baking soda, it creates carbon dioxide bubbles that lift the batter. However, if that lift happens too fast or the structure isn’t strong enough to hold it, the cake will retreat as it cools.
Temperature shock is the most common reason cakes sink in the middle. When you pull a hot cake into a cool kitchen, the sudden change causes the steam inside the crumb to condense instantly. By using the “gradual cooling” method, you give the flour’s proteins and the egg’s structure time to firm up. This extra five minutes in a cooling oven acts as a bridge, helping the cake maintain its volume and preventing that dreaded dip.
Essential Components for the Chocolate Base
Choosing the right flour is the first step toward a stable cake. While many reach for cake flour for a tender bite, this recipe uses all-purpose flour. The slightly higher protein content in all-purpose flour provides the “scaffolding” needed to support the heavy layers of cream and ganache without the cake crumbling under the weight.
Emulsification is equally important for a consistent texture. You’ll want to ensure your eggs and buttermilk are at room temperature before you start mixing. Cold ingredients don’t bond well with fats, which can lead to an uneven crumb. When these ingredients are warm, they create a smooth, homogenous batter that traps air more efficiently, leading to a better rise.
Sugar does more than just sweeten the cake; it also keeps it moist. It interferes with gluten development, ensuring that even with the structural strength of all-purpose flour, the cake remains tender. When combined with vegetable oil, which stays liquid at room temperature, you get a cake that feels soft and “melt-in-your-mouth” even after being refrigerated.
The Role of Hot Coffee in Blooming Cocoa
You might worry that adding a cup of hot coffee will make your cake taste like a latte, but it actually serves a different purpose. The hot liquid “blooms” the cocoa powder by dissolving the solids and releasing trapped flavor compounds. This process intensifies the chocolate profile, making it taste deeper and more complex.
As you whisk the hot coffee into the batter, you’ll notice the aroma immediately change from dusty cocoa to rich, dark chocolate. The heat also helps thin the batter, which ensures an even bake. The coffee’s acidity further reacts with the leavening agents, providing an extra boost of lift during the first few minutes in the oven.
Selecting the Right Cocoa Powder
For this specific recipe, natural unsweetened cocoa powder is your best friend. Because we rely on baking soda for lift, we need the natural acidity found in non-alkalized cocoa to trigger the reaction. Dutch-processed cocoa has had its acidity neutralized, which could result in a flat, dense cake if used here.
Natural cocoa also provides a slightly fruity, sharp chocolate flavor that balances the sweetness of the cream filling. When you look at the ingredients, remember that the cocoa is the star. Using a high-quality natural cocoa will result in a darker, more professional-looking sponge that stands out against the white cream.
Step-by-Step: Mixing and Baking for Stability
When you begin mixing your dry and wet ingredients, the most important rule is to stop as soon as the streaks of flour disappear. Over-mixing develops too much gluten, which turns a light cake into something tough and bread-like. You want to see a smooth, pourable batter that isn’t overworked.
Divide the batter evenly between your two 9-inch square pans. If one pan has more batter than the other, they will bake at different rates, which can mess with your assembly later. You can use a kitchen scale to be precise, or simply use a large measuring cup to ladle the batter into the pans alternately.
Once the pans are in the oven, resist the urge to move them around. The cake’s structure is at its most fragile during the first 20 minutes of baking. Any sudden movement or jolt can cause the air bubbles to pop before the flour and eggs have set, leading to an uneven surface or a sunken middle.
The Critical 30-Minute No-Peek Rule
Opening the oven door is the fastest way to ruin a chocolate cake. When you open the door, the internal temperature can drop by as much as 50 degrees in seconds. This sudden chill causes the rising batter to contract. If the structure hasn’t fully set, the cake will collapse and likely won’t rise again.
Wait until at least the 30-minute mark before checking for doneness. Use the oven light to peer through the glass instead. When the time is up, use the “cracked door” method. Turn off the heat and prop the door open just a few inches with a wooden spoon. This allows the heat to dissipate slowly, tempering the cake’s structure against the cooler air of your kitchen.
Creating the Stabilized Cream Filling
To get those thick, distinct white layers, you cannot rely on plain whipped cream alone. Standard whipped cream eventually weeps and loses its volume, which would cause your cake to sag. This recipe uses either unflavored gelatin or softened cream cheese to provide “backbone” to the filling.
If you choose the gelatin method, you’ll get a very clean, airy texture that mimics a high-end mousse. The cream cheese method, however, adds a slight tang and a much richer mouthfeel. Both options ensure that when you stack your cake, the filling stays exactly where you put it instead of oozing out the sides.
Make sure your heavy cream is ice-cold before you start. Cold fat globules join together much more easily, creating a stable foam. If your kitchen is particularly warm, you can even chill your mixing bowl and whisk attachment in the freezer for ten minutes before you begin.
Achieving Stiff Peaks Without Over-Whipping
The transition from soft peaks to stiff peaks happens quickly, so keep a close eye on the bowl. Soft peaks will slump over when you lift the whisk, while stiff peaks will stand straight up like a mountain. You want those stiff peaks for this cake so the layers can support the weight of the sponge above.
Be careful not to go too far. If the cream starts to look grainy or yellow, you are on the verge of making butter. If this happens, you can sometimes save it by gently folding in a tablespoon of fresh, un-whipped cold cream to smooth it back out. Once the stabilizer is in, stop mixing immediately.
The Ganache Finish: Temperature and Texture
A perfect ganache should be glossy, smooth, and thick enough to coat a spoon. We use a 2:1 ratio of chocolate to cream here to ensure it sets firmly enough to slice but remains soft to the bite. The “sit and stir” method is vital; letting the hot cream sit on the chocolate chips for five minutes melts them gently without scorching.
When you stir the ganache, start from the center and work your way out in small circles. This creates a stable emulsion, resulting in that beautiful mirror-like shine. If you stir too vigorously or too early, you might incorporate air bubbles, which will ruin the smooth look of the finished cake.
Timing the pour is everything. If the ganache is too hot, it will run right off the cake and melt your cream filling. If it’s too cold, it won’t spread evenly. Let it sit at room temperature until it reaches the consistency of thick honey. It should pool slightly on top and create those iconic, slow-moving drips down the sides.
Assembling the Triple Layer Architecture
Before you assemble, your cake layers must be completely cold. Even a hint of warmth will melt the stabilized cream, causing the layers to slide. For the cleanest look, use a long serrated knife to “torte” or slice the cakes horizontally. Keep your hand flat on top of the cake and use a gentle sawing motion to stay level.
Place your first layer on a plate and spread a generous, even layer of the cream filling. Don’t be afraid to go thick; the stabilizer will hold it up. When you place the next cake layer on top, press down very gently just to secure it. If you press too hard, you’ll force the cream out of the edges.
Once the layers are stacked and the final coating of cream is smoothed on the top and sides, let the cake chill for a bit before adding the ganache. This “flash chill” helps the cream firm up even more, providing a cold surface that helps the ganache set quickly as it drips down.
Troubleshooting Common Baking Hurdles
If your cream filling turns watery, it’s usually because the gelatin wasn’t bloomed or incorporated correctly. Always dissolve the gelatin in cold water first, then let it sit until it’s thick before gently warming it to a liquid state. If it’s added while too hot, it will melt the cream; if it’s too cold, it will create rubbery lumps.
A dry cake crumb is often the result of over-baking. Every oven is different, so start checking your cakes five minutes before the timer goes off. As soon as a toothpick comes out with just a few moist crumbs attached, it’s done. Remember, the cake will continue to cook slightly as it cools in the pan.
If your ganache looks “broken” or oily, don’t panic. This usually happens if the cream was too hot or if you stirred too fast. You can often fix it by whisking in a teaspoon of warm milk or a tiny bit of room-temperature cream. This helps re-emulsify the fats and brings back that glossy finish.
Sliding layers are almost always caused by heat. If your cake is sliding, stick it in the fridge immediately for 30 minutes. This will set the cream and stop the movement. Next time, ensure the cake layers are chilled in the fridge for an hour before you even attempt to assemble them.
Make-Ahead Strategies and Storage
This is one of those rare desserts that actually tastes better the next day. As the cake sits in the fridge, the moisture from the cream filling migrates slightly into the sponge, making it even more tender. It’s the perfect candidate for a party because you can make it 24 hours in advance.
Store the cake in an airtight container or a cake carrier to prevent it from picking up any fridge odors. Because of the high dairy content in the cream and the ganache, it must stay refrigerated. It will stay fresh and delicious for up to three or four days, though the ganache may lose a bit of its shine over time.
While you can freeze the individual chocolate sponge layers (wrapped tightly in plastic wrap), I don’t recommend freezing the fully assembled cake. The texture of the stabilized cream can become grainy or spongy once thawed, and the ganache may develop “bloom” or white spots from the moisture changes.
Expert Tips for Clean Slicing
To get those sharp, bakery-style slices where every layer is perfectly visible, you need a warm knife. Run your tall slicing knife under hot water for a minute, then wipe it completely dry with a clean towel. The heat from the blade will glide through the ganache and cream like butter.
The most important step for a clean look is to wipe the blade after every single cut. If you don’t, the chocolate from the ganache and the crumbs from the cake will smear into the white cream layers on the next slice. It takes an extra minute, but the professional results are well worth the effort.
How do I store leftovers?
You should store any leftover cake in an airtight container in the refrigerator. Because of the heavy cream and gelatin (or cream cheese), it needs to stay cold to maintain its structure. It will keep well for 3 to 4 days. If you don’t have a large enough container, you can carefully press plastic wrap against the cut sides of the cake to keep the sponge from drying out.
Why did my cake sink in the middle?
Cakes usually sink because of a sudden temperature change or under-baking. If you open the oven door too early, the rush of cool air collapses the air bubbles before the structure is set. Additionally, ensure your baking soda and powder are fresh; if they are expired, they won’t provide enough lift to keep the heavy chocolate batter upright.
Can I use a different liquid instead of coffee?
Yes, if you prefer not to use coffee, you can substitute it with boiling water. The primary goal of the hot liquid is to “bloom” the cocoa powder and dissolve the sugar. However, coffee is highly recommended because it acts as a flavor enhancer for the chocolate without leaving a noticeable coffee taste behind.
My cream filling isn’t stiff enough. What happened?
This usually happens if the heavy cream wasn’t cold enough or if the stabilizer wasn’t incorporated correctly. Ensure your cream has at least 36% fat content. If using gelatin, make sure it is fully dissolved and slightly cooled before adding. If the filling is still soft, try chilling the entire bowl in the fridge for 30 minutes and then whipping it again briefly.
Can I make this cake gluten-free?
You can substitute the all-purpose flour with a high-quality 1:1 gluten-free flour blend that contains xanthan gum. Keep in mind that gluten-free cakes can be more fragile, so you must be extra careful when slicing the layers horizontally. Let the cakes cool completely, or even chill them, before attempting to handle or stack them.
How do I fix a grainy ganache?
A grainy ganache is usually the result of the chocolate overheating or being stirred too vigorously. To fix it, you can try adding a tablespoon of warm (not boiling) heavy cream and stirring very gently. If that doesn’t work, a tiny splash of room-temperature milk can sometimes help the fats re-emulsify and smooth out the texture.
Triple Layer Chocolate Cream Cake
Course: DessertCuisine: AmericanDifficulty: easy12
servings25
minutes35
minutes60
MinutesAmerican
Ingredients
2 cups all-purpose flour
2 cups granulated sugar
3/4 cup unsweetened cocoa powder
2 teaspoons baking soda
1 teaspoon baking powder
1 teaspoon salt
1 cup buttermilk, room temperature
1/2 cup vegetable oil
2 large eggs, room temperature
2 teaspoons vanilla extract
1 cup hot coffee (the secret to blooming cocoa)
Cream Filling:
3 cups heavy whipping cream, cold
3/4 cup powdered sugar
1 teaspoon vanilla extract
1 tablespoon unflavored gelatin (dissolved in 2 tbsp water) or 4 oz softened cream cheese (to ensure the thick, stable layers shown in the image)
Chocolate Ganache:
1 cup semi-sweet chocolate chips
1/2 cup heavy cream
Directions
- Preheat your oven to 350°F. Grease and line two 9-inch square baking pans with parchment paper.
- In a large bowl, whisk together flour, sugar, cocoa, baking soda, baking powder, and salt.
- Add buttermilk, oil, eggs, and vanilla. Mix until just combined.
- To solve the sinking cake problem, slowly pour in the hot coffee while whisking. This blooms the cocoa and thins the batter perfectly. The key to preventing a sinkhole is to ensure your leavening agents are fresh and that you do not overbeat the batter once the liquid is added.
- Divide batter evenly between pans. Bake for 30 to 35 minutes.
- Crucial Step: Do not open the oven door before the 30-minute mark. A sudden drop in temperature is the leading cause of sinking centers. Once a toothpick comes out clean, turn off the oven and leave the door cracked for 5 minutes before removing the pans. This gradual cooling stabilizes the crumb structure. Cool completely.
- Prepare the Filling: Whip the cold heavy cream, powdered sugar, and vanilla until soft peaks form. Slowly stream in the dissolved gelatin (or beat in the softened cream cheese) and continue whipping until very stiff peaks form. This stability is essential for the thick white layers seen in the image.
- For the Ganache: Heat 1/2 cup cream until simmering, pour over chocolate chips, let sit for 5 minutes, and stir until glossy and thick.
- Assembly: Slice each cooled cake layer in half horizontally. To match the image, use two of these layers (or stack three for extra height). Spread a very thick, even layer of the stabilized cream between the cake layers. Top the final cake layer with another thick layer of cream, smoothing the edges.
- Pour the slightly cooled ganache over the top, allowing it to pool and slightly drip down the sides as pictured. Chill for at least 2 hours to set the cream and ganache before slicing with a warm knife.
Notes
- To prevent sinking, do not open the oven door before 30 minutes. Use fresh leavening agents and ensure the cream filling is stabilized with gelatin or cream cheese for thick, stable layers.


