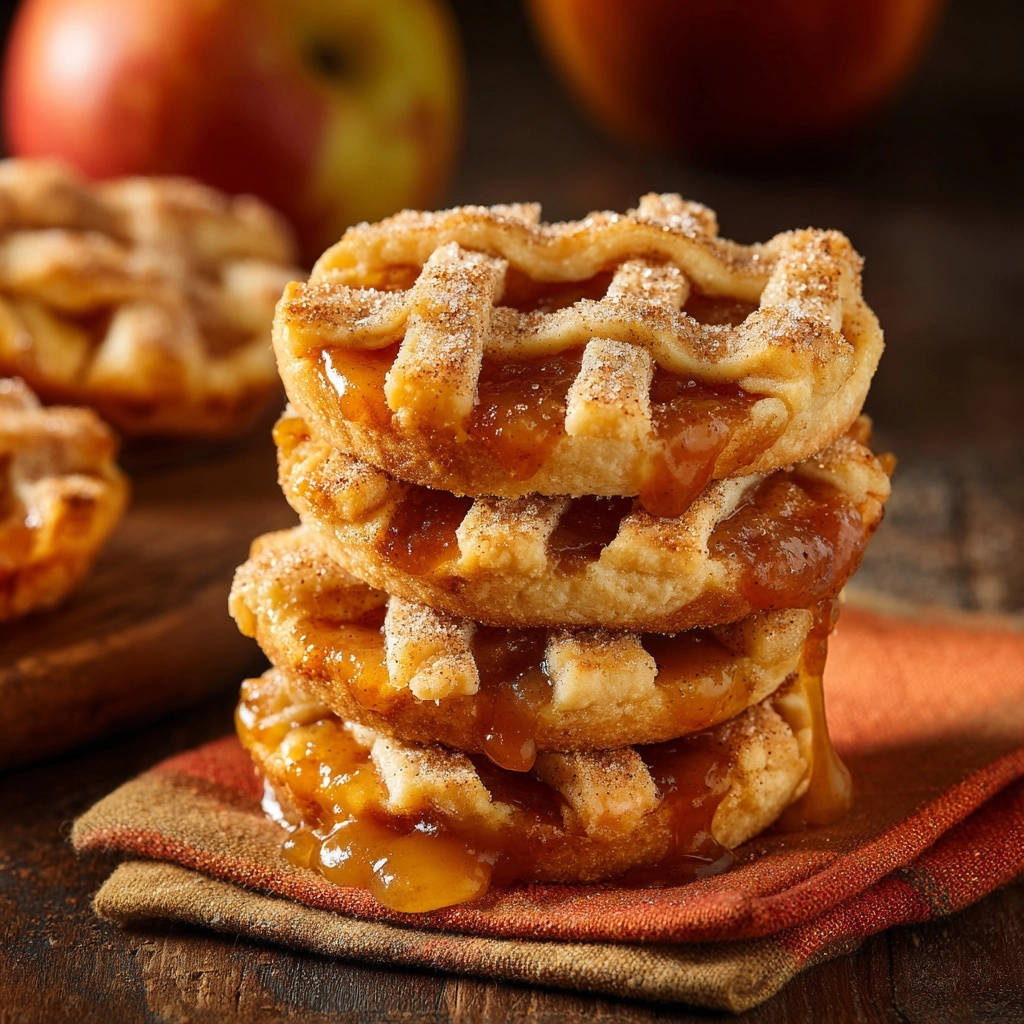
The Secret to No More Soggy Bottoms: Why This Recipe Works
The ultimate frustration with homemade apple pies is often a watery filling that seeps into the crust, turning it into a sad, soggy mess. This `Mini Apple Lattice Pies` recipe tackles that head-on with a simple, yet profoundly effective trick. It’s all about proactively managing the apples’ natural juices. We incorporate a crucial resting and draining step for the apples before they even meet the pie crust. This eliminates excess moisture, which is the primary culprit behind soggy crusts. Combined with a strategic touch of cornstarch, the filling remains beautifully thick and flavorful, ensuring that golden, crisp bottom we all crave.Gathering Your Orchard’s Bounty: Key Ingredients for Mini Apple Lattice Pies
Crafting the perfect `Mini Apple Lattice Pies` starts with selecting the right ingredients and understanding their role. Each component contributes to the ultimate flavor and texture.The Star: Choosing the Right Apple
For these `Mini Apple Lattice Pies`, I highly recommend firm, sweet-tart apples like Honeycrisp or Fuji. These varieties hold their shape beautifully during baking and provide a balanced sweetness. Avoid overly soft or mealy apples, which can turn to mush.Flaky Foundation: Pie Crust Essentials
Using refrigerated pie crusts is a fantastic shortcut that doesn’t compromise quality for these mini pies. They provide a consistently flaky and tender base with minimal effort. Ensure your pie crusts are well-chilled before handling for easier cutting and shaping.Sweet & Spiced Harmony: Flavor Enhancers
Granulated sugar adds sweetness, while cinnamon and nutmeg provide that classic warm apple pie spice. A touch of lemon juice isn’t just for flavor; it brightens the apple taste and crucially helps prevent the apples from browning too quickly.The Game Changer: Cornstarch’s Role
Cornstarch is the unsung hero of this `Mini Apple Lattice Pies` recipe. After draining the apple juices, a small amount of cornstarch is added to the fruit. It acts as a powerful thickening agent, ensuring that any remaining juices transform into a lovely, bubbly, cohesive filling during baking, not a watery soup.Tools for Tiny Tarts: Essential Equipment for Mini Apple Lattice Pies
Having the right tools simplifies the process and helps achieve consistently beautiful results for your `Mini Apple Lattice Pies`.Cutting and Shaping Helpers
A 3-inch round cookie cutter is essential for creating uniform pie dough circles, which is key for presentation. If you’re going for the classic look, a lattice cutter makes quick work of decorative tops. A sharp knife can also be used to cut thin strips for a lattice.Baking Vessel of Choice
A standard 12-cup muffin tin is the perfect vessel for these individual `Mini Apple Lattice Pies`. It provides the ideal shape and size, ensuring each pie bakes evenly and maintains its structure. Make sure to grease it thoroughly to prevent sticking.Basic Kitchen Essentials
You’ll also need a medium bowl for mixing the apple filling, measuring spoons for precise ingredient amounts, and a pastry brush for applying the melted butter wash. A wire rack is also important for proper cooling.Crafting Culinary Charm: Step-by-Step Mini Apple Lattice Pies
This section guides you through each step to ensure your `Mini Apple Lattice Pies` turn out perfectly. Follow these instructions carefully for the best results.- Preparing Your Apples for Peak Flavor:
Start by peeling, coring, and thinly slicing your chosen apple. Aim for uniform 1/8-inch slices for even cooking in your Mini Apple Lattice Pies.
Toss the slices with 1 tablespoon granulated sugar, cinnamon, nutmeg, and lemon juice. This initial seasoning begins the flavor infusion and draws out moisture.
- The Crucial Juice Drain & Cornstarch Coat:
Allow the seasoned apple mixture to rest for 10 minutes. This vital step encourages the apples to release their excess moisture, which is key to preventing a soggy crust.
After resting, carefully drain all accumulated liquid from the bowl. This is the simple trick that ensures your `Mini Apple Lattice Pies` have that perfectly crisp bottom.
Finally, sprinkle the cornstarch over the drained apples and toss until evenly coated. The cornstarch will thicken any remaining juices during baking, creating a luscious filling.
- Forming Your Lattice Pie Shells:
Unroll the refrigerated pie crusts onto a lightly floured surface. Use a 3-inch round cookie cutter or a glass rim to cut out 12 circles.
You may need to gently re-roll scraps to get all 12 circles, ensuring minimal waste. Handle the dough gently to maintain its flakiness.
- Assembling Your Mini Masterpieces:
Lightly grease a standard muffin tin to prevent sticking. Gently press 6 of the pie dough circles into the muffin cups, forming neat cups that will hold your filling.
Evenly divide the prepared apple filling among the 6 crust-lined muffin cups, making sure not to overfill them.
From the remaining 6 dough circles, create your signature lattice tops using a lattice cutter or by carefully cutting thin strips with a knife. Place these over the apple filling and press the edges firmly to seal, creating a beautiful enclosure.
- Baking to Golden Perfection:
Brush the tops of your assembled `Mini Apple Lattice Pies` with melted butter and sprinkle generously with a little extra granulated sugar. This creates a beautiful, golden-brown, glistening finish.
Preheat your oven to 400°F (200°C). Bake for 18-22 minutes, or until the crust is golden brown and the filling is visibly bubbly, indicating it’s cooked through.
- The Patient Cool-Down:
Allow the `Mini Apple Lattice Pies` to cool in the muffin tin for 5 minutes. This helps them set and makes them easier to remove without breaking.
Carefully transfer them to a wire rack to cool completely. This ensures the bottom stays crisp and prevents condensation from making the crust soggy.
Unlock Pie Perfection: Insider Tips for Mini Apple Lattice Pies
Elevate your `Mini Apple Lattice Pies` with these expert tips, ensuring every batch is a resounding success.-
Don’t Skip the Drain: The 10-minute rest and subsequent draining of apple juices are absolutely crucial for preventing a soggy bottom. This is the ultimate secret to crisp `Mini Apple Lattice Pies` and cannot be overemphasized.
-
Even Apple Slices: Uniformly thin apple slices (around 1/8 inch) ensure consistent cooking and tenderness in every bite of your `Mini Apple Lattice Pies`. Thicker slices might remain too firm, while thinner ones could turn to mush.
-
Chill Your Dough (If Rerolling): If you need to re-roll pie crust scraps, briefly chill the dough (10-15 minutes) before cutting. Cold dough is easier to handle, less sticky, and less prone to shrinking or tearing during shaping.
-
Perfect Lattice Technique: For an easy lattice, cut strips slightly wider than you think, as they may shrink slightly during baking. For visual appeal, aim for an even weave over the filling. Don’t worry if it’s not perfect; homemade charm is part of the appeal!
-
Watch the Edges: Ovens vary, so keep an eye on the pies, especially towards the end of baking. If the edges are browning too quickly, you can loosely tent the muffin tin with foil to protect them while the filling finishes cooking.
Solving Pie Problems: Common Mini Apple Lattice Pies Hiccups
Even seasoned bakers encounter minor issues. Here are solutions to common problems you might face when making `Mini Apple Lattice Pies`.My Crust Isn’t Crisp!
Ensure you rigorously drain the apple juices after the initial rest and before adding the cornstarch. Any excess moisture will inevitably lead to a soggy bottom. Also, make sure your oven is fully preheated to the correct temperature; a hot oven ensures the crust bakes quickly and crisps up.
The Filling Is Too Runny
This often points back to insufficient draining of the apple juices or not enough cornstarch. Double-check that all visible liquid is poured off after the 10-minute rest. Ensure apples are well coated with cornstarch, and don’t reduce the specified amount, as it’s critical for thickening.
My Lattice Burnt!
If your delicate lattice top is browning too quickly before the filling is fully cooked, gently tent the muffin tin with aluminum foil for the remainder of the baking time. This acts as a shield, protecting the crust while allowing the interior to finish baking perfectly.
Pies Stuck in the Muffin Tin
Make sure to grease your muffin tin thoroughly before pressing in the dough. You can use butter, baking spray, or shortening. Allowing the pies to cool for the recommended 5 minutes in the tin also helps them firm up and release more easily from the pan.
Enjoying Your Creations: Serving & Storage Tips for Mini Apple Lattice Pies
Once your `Mini Apple Lattice Pies` are baked to perfection, here’s how to best serve and store them.Best Ways to Serve
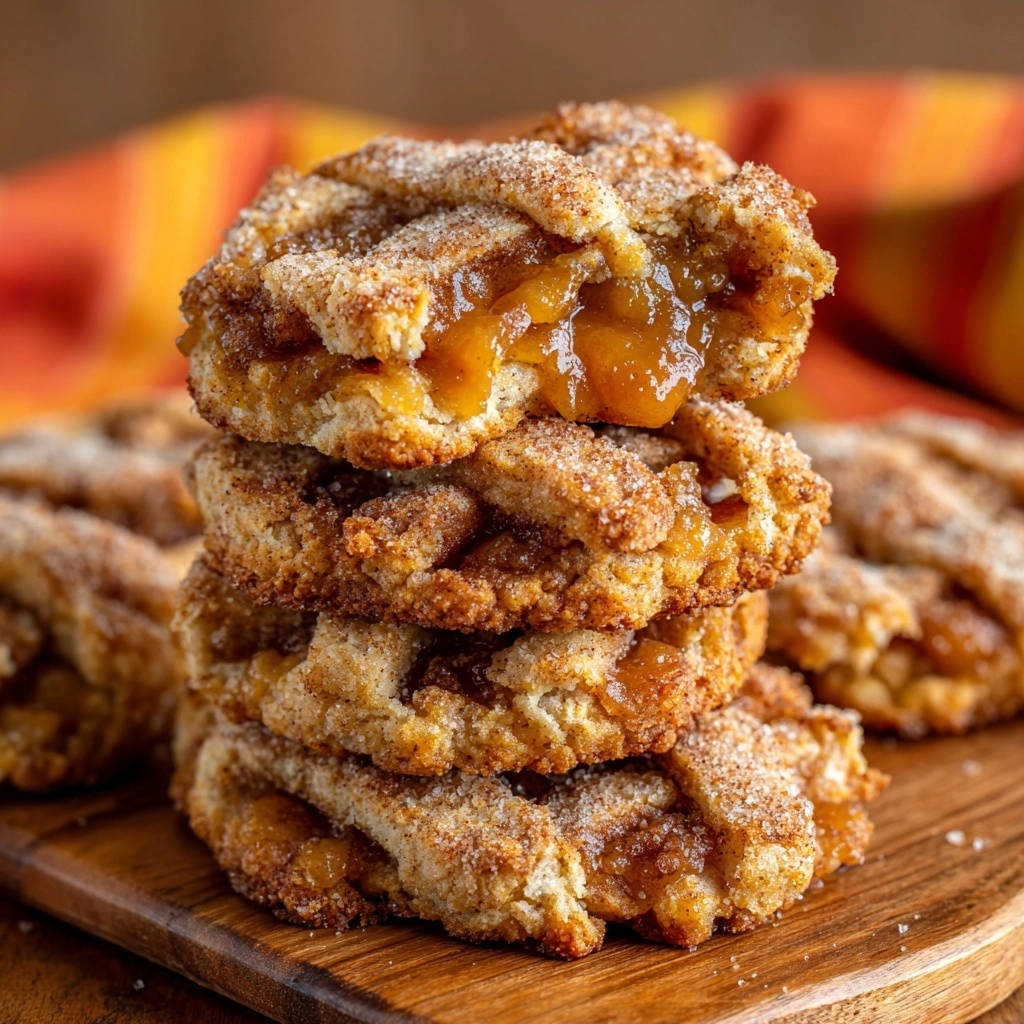
These `Mini Apple Lattice Pies` are delightful served warm, perhaps with a generous scoop of vanilla bean ice cream or a dollop of fresh whipped cream. The contrast of the warm, spiced apple filling with a cold, creamy topping is heavenly. They’re also delicious at room temperature for a convenient snack or dessert on the go.
Storing Leftovers
Store any leftover `Mini Apple Lattice Pies` in an airtight container at room temperature for up to 2-3 days. For longer storage, refrigerate them for up to 5 days. To refresh, a quick warm-up in a toaster oven can bring back some of that crispness.
Can I Make These Ahead?
Yes! You can prepare the apple filling (without the cornstarch) and store it in the refrigerator for up to 24 hours. Add the cornstarch just before assembling. You can also assemble the pies completely, cover them loosely, and refrigerate for a few hours before baking, especially useful for entertaining. For another make-ahead dessert, consider my recipe for Cozy Baked Apples with Crispy Crumble.
Your Top Mini Apple Lattice Pies Questions, Answered
Here are answers to some frequently asked questions about making `Mini Apple Lattice Pies`.Can I use other types of apples for Mini Apple Lattice Pies?
While Honeycrisp and Fuji are recommended for their firm texture and balanced sweetness, you can absolutely experiment with other baking apples. Good alternatives include Granny Smith (for a tarter pie, you might add a touch more sugar), Braeburn, Gala, or even a mix of varieties for more complex flavor. For more apple baking ideas, check out our Classic Apple Pie Recipe – Never Soggy Bottom.
What if I don’t have a lattice cutter?
No problem at all! You can easily create a lattice top by carefully cutting thin strips of pie dough with a sharp knife or a pastry wheel. Alternatively, for a different decorative top, use a small cookie cutter (like a star or leaf) to make cutouts and arrange them over the apple filling instead of a lattice.
Can I make these gluten-free?
Yes, you can! Simply substitute the refrigerated pie crusts with a good quality gluten-free pie crust, which are readily available in most grocery stores. Ensure your cornstarch is also certified gluten-free if cross-contamination is a concern, though most pure cornstarch is naturally gluten-free. The rest of the recipe ingredients are naturally gluten-free.
Can I freeze the baked Mini Apple Lattice Pies?
Absolutely! Once completely cooled, you can freeze baked `Mini Apple Lattice Pies`. Wrap each pie individually in plastic wrap, then place them in a freezer-safe bag or container for up to 2-3 months. To reheat, thaw at room temperature, then warm gently in a preheated oven (around 300°F/150°C) until heated through and the crust is crisp again.
Ready to Bake? Share Your Mini Apple Lattice Pies Story!
There’s immense satisfaction in pulling perfectly golden, crisp-bottomed `Mini Apple Lattice Pies` from the oven. This recipe takes the guesswork out of achieving that ideal texture, leaving you with delightful individual treats that are as charming to look at as they are to eat. We hope this guide empowers you to bake with confidence and create memorable moments, whether for a special occasion or simply a sweet everyday indulgence. Don’t forget to share your `Mini Apple Lattice Pies` creations with us on social media-we love seeing what you bake!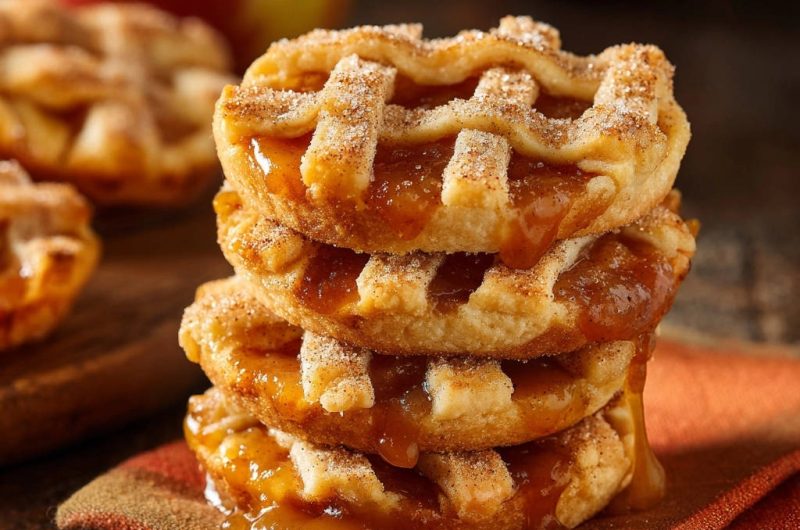
Mini Apple Lattice Pies
Course: DessertCuisine: American CuisineDifficulty: easy6
25
minutes20
45
minutesAmerican Cuisine
Ingredients
1 large apple, like Honeycrisp or Fuji
1 tablespoon granulated sugar, plus more for sprinkling
1/4 teaspoon ground cinnamon
1/8 teaspoon ground nutmeg
1 teaspoon lemon juice
1 tablespoon cornstarch
1 package (14.1 ounces) refrigerated pie crusts (2 crusts)
1 tablespoon unsalted butter, melted
Directions
- Peel, core, and thinly slice the apple. Aim for slices about 1/8 inch thick. Place the apple slices in a medium bowl.
- Add the 1 tablespoon granulated sugar, cinnamon, nutmeg, and lemon juice to the apple slices. Toss gently to combine. Let the mixture sit for 10 minutes. This crucial step allows the apples to release their natural juices.
- After 10 minutes, carefully drain off any accumulated liquid from the bottom of the apple bowl. This is key to preventing a watery filling and a soggy crust.
- Now, sprinkle the cornstarch over the drained apple mixture and toss again until the apples are evenly coated. The cornstarch will thicken any remaining juices during baking.
- Unroll the pie crusts onto a lightly floured surface. Using a 3-inch round cookie cutter or a glass rim, cut out 12 circles from the pie dough (you may need to re-roll scraps).
- Lightly grease a standard muffin tin. Gently press 6 of the pie dough circles into the bottom of the muffin cups, forming a cup.
- Divide the apple filling evenly among the 6 crust-lined muffin cups.
- From the remaining 6 dough circles, use a lattice cutter or carefully cut thin strips with a knife. Create a small lattice top for each mini pie and place it over the apple filling. Press the edges to seal.
- Brush the tops of the mini pies with the melted butter and sprinkle generously with a little more granulated sugar for that golden, sweet finish.
- Preheat your oven to 400 degrees Fahrenheit (200 degrees Celsius). Bake for 18-22 minutes, or until the crust is golden brown and the filling is bubbly.
- Let the mini pies cool in the muffin tin for 5 minutes before carefully transferring them to a wire rack to cool completely. Enjoy your perfectly crisp-bottomed mini apple pies!
Notes
- The crucial step for a crisp crust is draining the apple juices before adding cornstarch.