
I remember the frustration of wanting to make stunning, professional-looking truffles, only to have the chocolate seize or look dull. That’s a common hurdle, but I’ve finally cracked the code to achieving that perfectly smooth, glossy chocolate shell that makes these Minty Chocolate Dream Truffles truly irresistible.
This recipe isn’t just about delicious flavor; it’s about mastering the technique for a finish that will impress everyone, transforming your dessert table with ease and confidence.
Unlocking the Magic: Why These Minty Chocolate Dream Truffles Shine
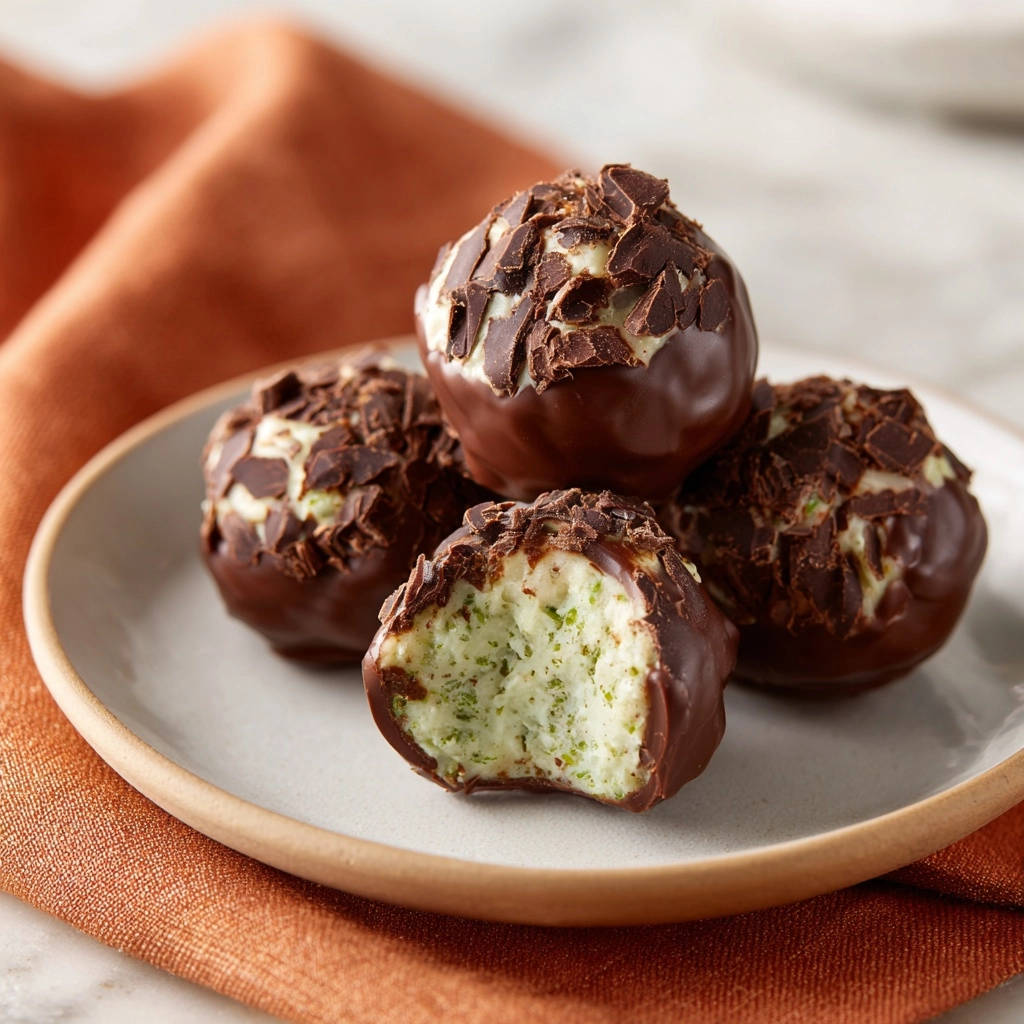
These Minty Chocolate Dream Truffles stand out not just for their vibrant flavor but for their flawless presentation. I’ll guide you to a consistently smooth, glossy chocolate coating that makes them look bakery-perfect.
Silky Smooth Finish: Our secret melting technique ensures your chocolate coating is always gleaming and never seized, providing that professional sheen.
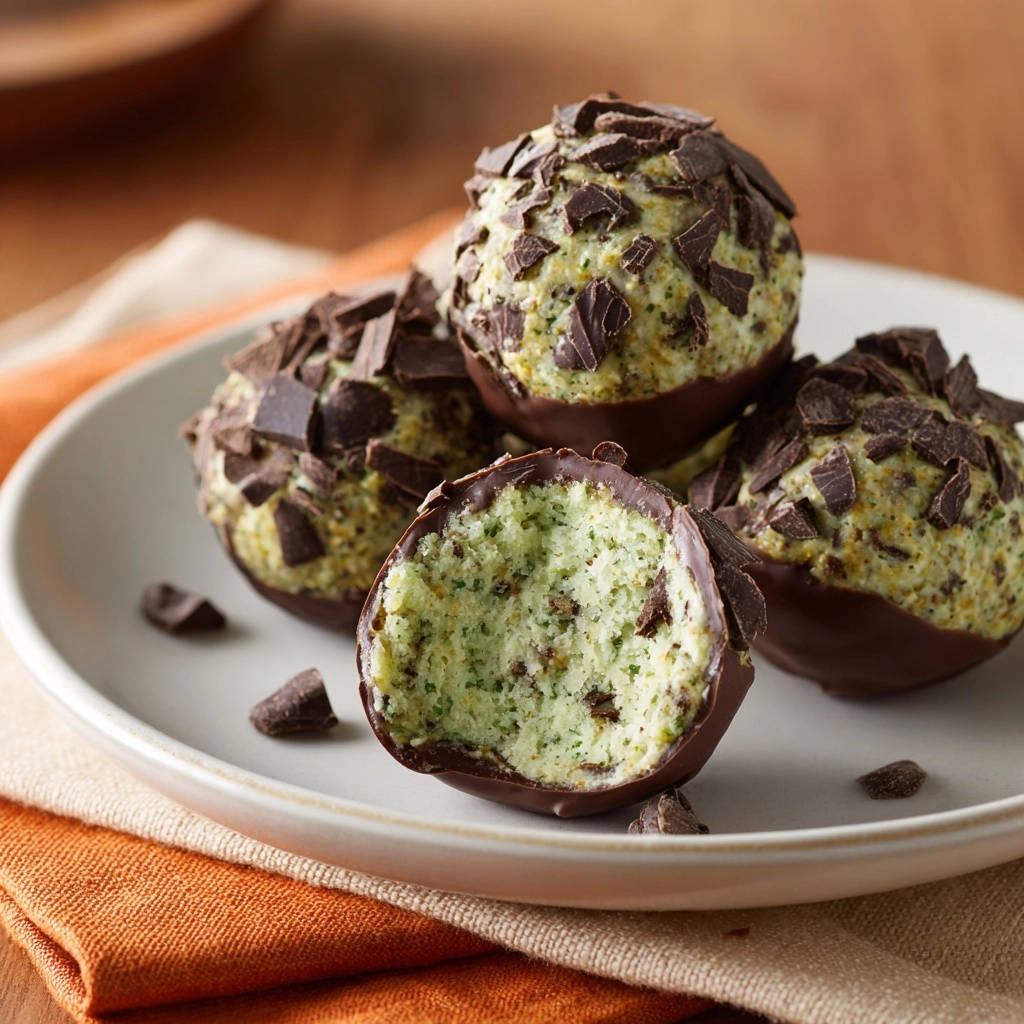
Perfectly Balanced Flavor: The cool burst of peppermint perfectly complements rich dark chocolate, creating a delightful harmony in every bite.
Effortless Elegance: With clear instructions and crucial tips, even a novice can create these stunning truffles with confidence and ease.
The Building Blocks: What You’ll Need for Dreamy Truffles
For the Silky Mint Filling
Cream Cheese (8 ounces, softened): Softened cream cheese is the foundation, giving the truffles their signature creamy, tangy base and melt-in-your-mouth texture.
Unsalted Butter (1/2 cup / 1 stick, softened): Butter adds richness and helps create a smooth, pliable truffle mixture for easy shaping.
Powdered Sugar (3 cups, sifted): Sifting is crucial here to prevent lumps, ensuring your truffle filling is perfectly smooth and sweet.
Peppermint Extract (1 teaspoon): This delivers the refreshing mint flavor. Adjust to your preference for a stronger or subtler minty kick.
Green Food Coloring (2-3 drops, optional): A few drops can enhance the mint theme visually, making your truffles look as vibrant as they taste.
Achieving the Flawless Chocolate Shell
Dark Chocolate Chips or Chopped Dark Chocolate (12 ounces): Quality chocolate is key for a superior taste and a beautiful, crack-free coating. Choose a good baking chocolate you enjoy eating.
Coconut Oil or Vegetable Shortening (1 tablespoon): This is your secret ingredient! It helps the chocolate melt smoothly, adds a beautiful gloss, and prevents it from seizing, ensuring a perfect dip every time.
Finishing Touch: Topping Ideas
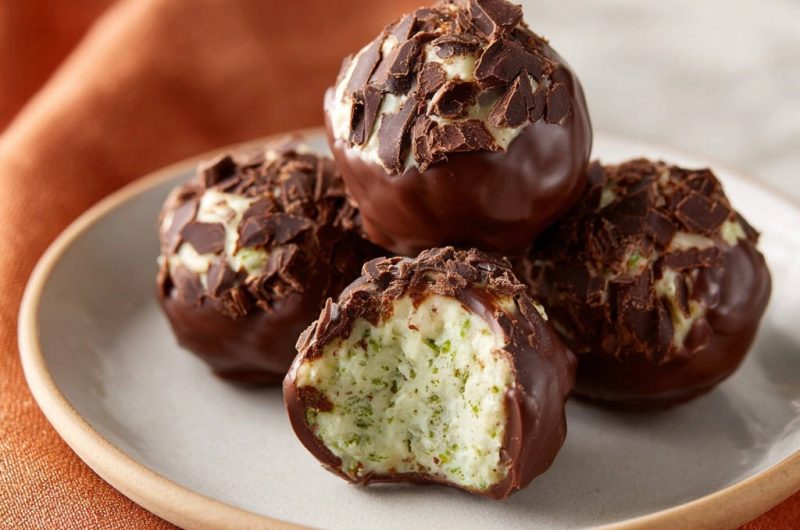
Chocolate Shavings or Finely Chopped Chocolate (1/4 cup): A classic and elegant topping that adds texture and reinforces the chocolate flavor.
Consider other fun options too, like festive sprinkles, a dusting of cocoa powder, crushed pistachios, or a drizzle of contrasting white chocolate.
Essential Tools for Your Truffle-Making Journey
Electric Mixer: Essential for thoroughly creaming the butter and cream cheese, ensuring a smooth truffle base.
Heat-Proof Bowl and Saucepan (for Double Boiler): The gentle, indirect heat of a double boiler is paramount for melting chocolate without seizing.
Parchment Paper-Lined Baking Sheets: This prevents sticking and makes chilling and handling the truffles much easier.
Small Scoop (1 tablespoon size) or Spoons: For consistent sizing, which ensures even dipping and a professional appearance.
Dipping Tool or Fork: A specialized tool or even a regular kitchen fork works wonders for coating truffles cleanly.
Your Path to Perfect Truffles: A Detailed How-To
Crafting the Minty Cream Cheese Core
Prepare the Truffle Filling: In a large mixing bowl, combine your softened cream cheese and softened butter. Beat with an electric mixer until the mixture is completely smooth and wonderfully creamy.
Gradually Add Sugar: Slowly incorporate the sifted powdered sugar into your cream cheese mixture. Continue beating until it’s fully integrated and the mixture becomes light and fluffy.
Infuse with Mint: Stir in the peppermint extract. If using, add the green food coloring now, mixing until the truffle base is uniformly colored and flavored throughout.
Chilling for Effortless Shaping
Chill the Filling: Cover the bowl tightly and refrigerate the truffle mixture for at least 1 hour. This chilling step is absolutely crucial; it firms the mixture enough to make rolling easy and mess-free.
The Art of the Silky Smooth Chocolate Dip
Achieve the Smooth, Glossy Coating (Double Boiler Setup): Fill a saucepan with about 1-2 inches of water and bring it to a gentle simmer over low heat. Place a heat-proof bowl (glass or metal) over the saucepan, ensuring the bowl’s bottom does not touch the simmering water. This indirect heat is your secret weapon against seized chocolate.
Melt Carefully: Add the dark chocolate and coconut oil (or shortening) to the heat-proof bowl. Stir gently and continuously as the chocolate melts. The consistent, low heat from the steam will melt the chocolate slowly and evenly, preventing any seizing and guaranteeing a beautiful, glossy finish.
Dip the Truffles: Working one truffle at a time, gently drop it into the melted chocolate. Use a fork or a dipping tool to carefully roll the truffle until it’s fully coated. Lift the truffle out, tapping the fork gently against the edge of the bowl to allow any excess chocolate to drip off.
Setting and Finishing Touches
Add Toppings Immediately: Place the dipped truffle back on your parchment-lined baking sheet. Immediately sprinkle with chocolate shavings or your chosen topping before the chocolate coating sets.
Chill to Set: Once all truffles are dipped, refrigerate them for at least 30 minutes, or until the chocolate coating is completely firm. Store these delightful treats in an airtight container in the refrigerator until you’re ready to serve.
Expert Tips for Truffle Triumph
Preventing Chocolate Seizing: The Game-Changer
The double boiler method is non-negotiable for a glossy finish. Even a single drop of water or steam directly into the chocolate can cause it to seize, becoming grainy and unusable. Ensure the bowl fits snugly over the saucepan, preventing any steam from escaping into the chocolate.Optimal Chilling for Easy Handling
Don’t rush the chilling! The initial hour ensures the filling is firm enough to roll without sticking. The second chill (after shaping) prevents the truffles from melting too quickly when they hit the warm chocolate, ensuring a smooth and even coat.Creative Garnishes and Topping Techniques
Beyond classic chocolate shavings, consider rolling finished truffles in finely crushed peppermints for extra minty crunch, a dusting of vibrant matcha powder, or even a swirl of contrasting white chocolate drizzle. The possibilities are endless for customizing your Minty Chocolate Dream Truffles!Achieving Uniform Truffle Size
For a professional, consistent look, use a small cookie scoop or a measuring spoon (like a 1-tablespoon measure) to portion out the truffle filling. This ensures all your truffles are roughly the same size, leading to even dipping and beautiful presentation.
Common Truffle Troubles & How to Solve Them
My chocolate is seizing/too thick!
This usually happens if water or steam gets into the chocolate, or if the heat is too high. If it’s seized, sadly, it’s often beyond saving for dipping. To prevent it, ensure no water gets into the bowl and maintain a gentle simmer, not a rolling boil, in your double boiler setup. If it’s just a bit too thick, adding a tiny bit more coconut oil (1/2 teaspoon at a time) can sometimes thin it out, but be careful not to add too much.
Truffles are too soft to roll/dip.
Insufficient chilling is the culprit here. Your filling needs to be quite firm to handle. If they’re too soft, pop them back into the refrigerator (or even the freezer for 10-15 minutes) until they are firm enough to easily roll into balls and hold their shape during dipping. Patience is key!
My chocolate coating isn’t shiny.
A dull finish can result from overheating the chocolate, not tempering it correctly (which our added fat helps with), or chilling too slowly. Ensure your chocolate is melted over low, consistent heat and remove it from the double boiler as soon as it’s mostly melted, stirring until smooth. For maximum shine, place the dipped truffles in the refrigerator quickly to set.
Storage & Make-Ahead Magic: Enjoying Truffles Longer
Best Practices for Freshness
Store your finished Minty Chocolate Dream Truffles in an airtight container in the refrigerator. They will maintain their delicious flavor and texture for up to 1-2 weeks.
Bringing them to room temperature for about 10-15 minutes before serving can enhance their melt-in-your-mouth quality.
Freezing for Future Indulgence
Yes, you can freeze these truffles! Place the set truffles in a single layer on a parchment-lined baking sheet and freeze until solid (about 1-2 hours). Once frozen, transfer them to a freezer-safe, airtight container, separating layers with parchment paper to prevent sticking. They will keep well for up to 2-3 months.
To thaw, simply transfer them to the refrigerator overnight or let them sit at room temperature for 30-60 minutes before serving.
Customize Your Creations: Exciting Truffle Variations
Flavor Swaps: Beyond Peppermint
While peppermint is classic, feel free to experiment with other extracts! Try almond, orange, or even raspberry extract for a different flavor profile that still pairs beautifully with chocolate. For a classic dessert combination, a touch of rich chocolate cake flavor could be added with a cocoa extract.
Chocolate Choices: A World of Possibilities
Adjust the chocolate to your taste preferences! While dark chocolate offers a sophisticated contrast, milk chocolate provides a sweeter, creamier coating. White chocolate can also be used for a different aesthetic and flavor, though it melts a bit differently and may require careful handling, similar to how one might handle chocolate for no-seize white chocolate clusters.
Decadent Fillings & Mix-Ins
Elevate the filling by incorporating finely chopped toasted nuts like pecans or walnuts, or even mini chocolate chips for extra texture. A tiny splash of a complementary liqueur (like crème de menthe or Irish cream) can also add an adult twist to your truffles.
Your Minty Chocolate Dream Truffles Questions Answered
Can I use other types of chocolate?
Absolutely! While dark chocolate is specified, you can use milk chocolate or white chocolate. Remember that different types of chocolate melt at varying temperatures and have different viscosities, so adjust your double boiler heat accordingly and observe closely.
Is food coloring optional?
Yes, the green food coloring is entirely optional. It primarily serves an aesthetic purpose, visually reinforcing the minty flavor. Your truffles will taste just as delicious without it!
How long do homemade truffles last?
When properly stored in an airtight container in the refrigerator, these truffles will stay fresh and delightful for up to two weeks.
Can I skip the chilling steps?
Skipping the chilling steps is highly discouraged. The chilling periods are crucial for the truffle mixture to firm up, making it easy to roll and ensuring the shaped truffles don’t melt too quickly during dipping. Without proper chilling, you’ll end up with a messy, frustrating experience.
Ready to Dazzle? Share Your Truffle Masterpiece!
There’s nothing quite like the satisfaction of creating something both beautiful and incredibly delicious. These Minty Chocolate Dream Truffles are a testament to that, offering a burst of cool mint and rich chocolate in a perfectly glossy package.
I encourage you to try this recipe and experience the joy of making truffles that truly shine. Share your stunning creations with us!
Minty Chocolate Dream Truffles
Course: DessertCuisine: American CuisineDifficulty: easy4
24 truffles30
minutes5
minutes180
minutesAmerican Cuisine
Ingredients
1 block (8 ounces) cream cheese, softened
1/2 cup (1 stick) unsalted butter, softened
3 cups powdered sugar, sifted
1 teaspoon peppermint extract
2-3 drops green food coloring (optional)
12 ounces dark chocolate chips or chopped dark chocolate
1 tablespoon coconut oil or vegetable shortening
1/4 cup chocolate shavings or finely chopped chocolate for topping
Directions
- Prepare the truffle filling: In a large bowl, using an electric mixer, beat the softened cream cheese and softened butter together until smooth and creamy.
- Gradually add the sifted powdered sugar to the cream cheese mixture, beating until fully incorporated and light.
- Stir in the peppermint extract and green food coloring (if using) until the mixture is uniformly colored and flavored.
- Chill the filling: Cover the bowl and refrigerate the truffle mixture for at least 1 hour, or until firm enough to roll. This is crucial for easy shaping.
- Shape the truffles: Once firm, scoop out small portions (about 1 tablespoon each) and roll them into smooth, round balls. Place the shaped truffles on a parchment-lined baking sheet. Return them to the refrigerator or freezer for another 30 minutes to firm up again. This prevents them from melting too quickly when dipped.
- Achieve the Smooth, Glossy Coating: Set up a double boiler by filling a saucepan with about an inch or two of water and bringing it to a gentle simmer over low heat. Place a heat-proof bowl (glass or metal) over the saucepan, ensuring the bottom of the bowl does not touch the water. Add the dark chocolate and coconut oil or shortening to the bowl.
- Melt Carefully: Stir the chocolate gently and continuously as it melts. The low, consistent heat from the steam will melt the chocolate slowly and evenly, preventing it from seizing and ensuring a beautiful, glossy finish. Do not let any water or steam get into the chocolate. Remove the bowl from the heat once the chocolate is mostly melted, stirring until completely smooth.
- Dip the truffles: Working with one truffle at a time, drop it into the melted chocolate. Use a fork or a dipping tool to gently roll the truffle in the chocolate until fully coated. Lift the truffle out, tapping the fork gently against the edge of the bowl to let any excess chocolate drip off.
- Place the dipped truffle back on the parchment-lined baking sheet. Immediately sprinkle with chocolate shavings or finely chopped chocolate before the coating sets.
- Chill to set: Once all truffles are dipped, refrigerate them for at least 30 minutes, or until the chocolate coating is completely firm.
- Store: Keep truffles refrigerated in an airtight container until ready to serve.
Notes
- Chilling the truffle filling is crucial for easy shaping. Ensure no water or steam gets into the chocolate during melting for a perfectly glossy coating.


