Oh, summer squash! It conjures up images of vibrant gardens and fresh, healthy meals. But let’s be honest, have you ever excitedly cooked beautiful zucchini and yellow squash, only for it to collapse into a sad, watery mess on your plate? I know I have! For years, I struggled with turning gorgeous summer squash into anything other than flavorless mush. It felt like a culinary defeat every time.
But don’t despair! I finally cracked the code. The secret to achieving perfectly tender, slightly browned, utterly delicious pan-seared summer squash isn’t complicated at all. It boils down to a simple technique that prevents that dreaded sogginess and unlocks the squash’s true potential. Get ready to transform your humble summer vegetables into a side dish (or light main!) you’ll crave.
Why This Pan-Seared Summer Squash Recipe is a Keeper
This isn’t just another way to cook squash; it’s the way to cook it if you value texture and flavor. Here’s why you’ll absolutely adore this pan-seared summer squash method:
- Say Goodbye to Soggy: Seriously, the number one win here. We employ a technique that ensures the squash stays firm yet tender, with fantastic browned edges.
- Quick & Easy: From start to finish, this recipe takes under 30 minutes. It’s perfect for busy weeknights or when you want a healthy side dish fast.
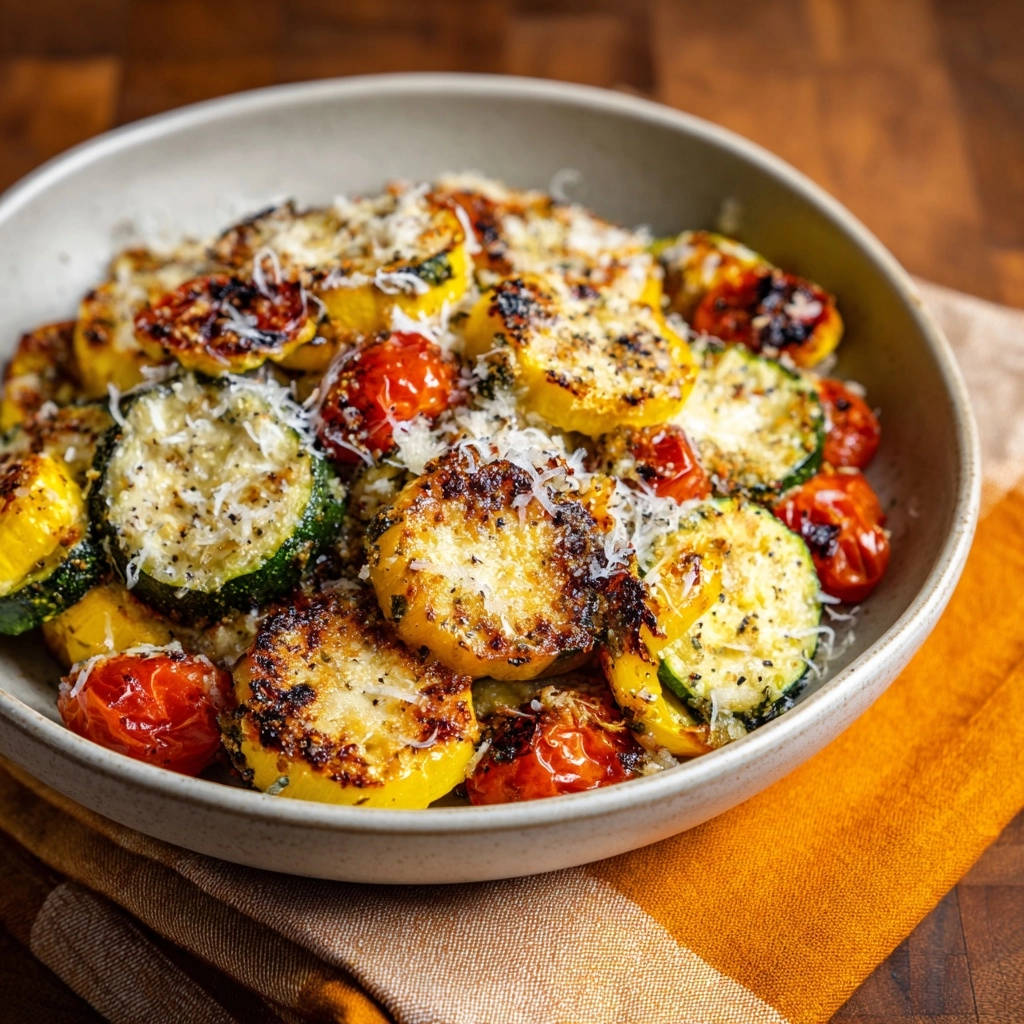
- Highlights Fresh Flavors: Searing brings out the natural sweetness of the squash and tomatoes, enhanced by simple seasoning and a touch of savory Parmesan.
- Versatile: It pairs beautifully with so many main dishes, from grilled meats to simple pasta or rice bowls.
- Minimal Ingredients: You only need a handful of fresh ingredients you likely already have or can easily find.
What You’ll Need for Perfect Pan-Seared Summer Squash
Gathering your ingredients is the first step to deliciousness. While the list is short, the quality and preparation of each element play a role in achieving that non-soggy, flavorful result.
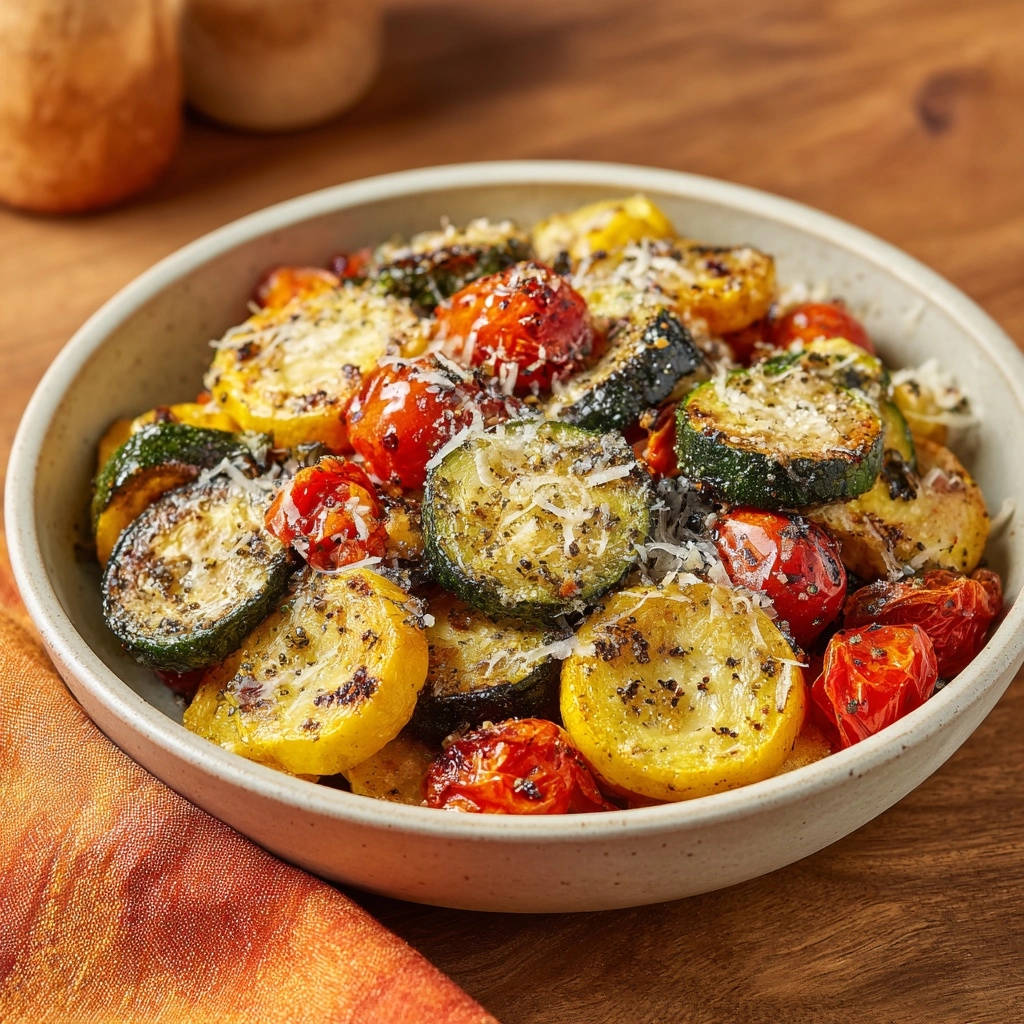
We start with the stars of the show: the summer squash itself. For this recipe, I love using a mix of both green zucchini and sunny yellow squash. Not only does it add beautiful color to the final dish, but they both have a similar texture and moisture content, making them ideal partners for pan-searing. Look for squash that feels firm and heavy for its size, without blemishes or soft spots. You’ll need two medium zucchini and two medium yellow squash.
Adding pops of sweetness and acidity are cherry tomatoes. A pint of these little gems will burst slightly in the hot pan, creating a light, flavorful sauce that coats the squash beautifully. You can use grape tomatoes as well; just make sure they are ripe and plump.
The cooking fat is crucial. We’ll use two tablespoons of good quality olive oil. Olive oil adds lovely flavor and has a high enough smoke point for the medium-high heat we’ll be using to achieve that crucial sear. Make sure your pan is properly heated before adding the oil, and the oil is shimmering before the vegetables go in.
Simple seasonings are all you need to let the fresh vegetable flavors shine. We’ll use half a teaspoon of salt and a quarter teaspoon of black pepper. Remember that salt not only adds flavor but also helps draw out some moisture initially, which is why the pan-searing technique is so important to counteract that!
Finally, a flourish of savory goodness comes from a quarter cup of grated Parmesan cheese. Added right at the end while the vegetables are still hot, it melts slightly, coating everything in a salty, nutty layer that takes this simple side dish to the next level. Freshly grated is always best for flavor and texture.
Here’s the full ingredient list:
- 2 medium zucchini, sliced into 1/2 inch rounds
- 2 medium yellow squash, sliced into 1/2 inch rounds
- 1 pint cherry tomatoes
- 2 tablespoons olive oil
- 1/2 teaspoon salt
- 1/4 teaspoon black pepper
- 1/4 cup grated Parmesan cheese
Crafting Your Pan-Seared Summer Squash: The Steps
Ready to achieve perfect, non-soggy summer squash every time? This process is straightforward, but paying attention to a couple of key details makes all the difference. Follow these steps, and you’ll be enjoying perfectly tender, beautifully browned squash in no time.
- Prepare Your Squash: Start by washing your zucchini and yellow squash. The key to even cooking is uniform slices. Aim for rounds that are about 1/2 inch thick. Too thin, and they’ll cook too quickly and might still get mushy; too thick, and they’ll take too long to soften. Use a sharp knife for clean cuts.
- Heat the Pan and Oil: Get a large, heavy-bottomed skillet or cast iron pan on your stove. Cast iron is excellent because it retains heat so well, helping you get a great sear. Turn the heat to medium-high. Let the pan get nice and hot before adding the olive oil. Once the oil is in, let it heat up until it’s shimmering slightly. This tells you the pan is ready to sear, not steam.
- Start the Searing Process (The Secret Step!): This is where we defeat sogginess! Carefully add the sliced squash to the hot pan in a single layer. This is absolutely critical. If you crowd the pan, the moisture released from the squash will lower the pan’s temperature, and the vegetables will steam instead of sear, resulting in that watery texture we’re avoiding. If all your squash doesn’t fit in one layer, cook it in batches. It takes a little more time, but it’s worth it!
- Sear the First Side: Once the squash is in a single layer, resist the urge to stir or flip immediately. Let it cook undisturbed for 3 to 4 minutes. You’ll know it’s ready to flip when you lift a piece and see beautiful, deep golden brown marks on the bottom. That color is flavor!
- Flip and Finish the Squash: Flip each slice of squash carefully. Let the second side cook for another 3 to 4 minutes, again undisturbed for the best browning. The squash should be tender when pierced with a fork but still hold its shape and have those lovely browned edges on both sides. Remove the perfectly seared squash from the pan and place it in a bowl for a moment.
- Cook the Tomatoes: Add your pint of cherry tomatoes directly to the hot pan (you can use the same pan; don’t worry about wiping it out). Cook them for 3 to 5 minutes, stirring occasionally. The high heat will cause them to soften, blister, and some will even burst, releasing their sweet, juicy insides.
- Combine and Season: Return the cooked, pan-seared squash to the pan with the blistered tomatoes. Now is the time to season. Sprinkle the half teaspoon of salt and quarter teaspoon of black pepper generously over the vegetables. Gently toss everything together to coat the squash and tomatoes evenly with the seasoning and any juices from the burst tomatoes.
- Serve and Finish: Transfer the hot pan-seared vegetables to your serving bowl. Immediately sprinkle the quarter cup of grated Parmesan cheese over the top. The residual heat from the squash and tomatoes will gently melt the cheese, creating a wonderfully savory finish. Serve hot and enjoy!
Tips for Perfect Pan-Seared Summer Squash Every Time
While the core recipe is simple, a few extra tips can elevate your pan-seared summer squash from good to absolutely unforgettable.
- Don’t Skip the Batch Cooking: I know it can be tempting to pile it all in, but seriously, overcrowding is the enemy of a good sear. Cooking in batches is the single most important tip for preventing soggy squash.
- Get Your Pan Hot: High heat is key to searing. Make sure your skillet is properly heated before adding the oil, and the oil is shimmering before the squash goes in.
- Listen to the Sizzle: You should hear a satisfying sizzle when the squash hits the pan. If you don’t hear it, your pan isn’t hot enough.
- Fresh is Best: This recipe relies on the freshness of the summer squash and tomatoes. Choose vibrant, firm vegetables for the best results. Avoid using frozen squash, as it releases too much water.
- Season Mindfully: Adding the main seasoning at the end helps control the flavor and prevents salt from drawing out excessive moisture from the squash too early in the cooking process.
Recipe Variations
This pan-seared summer squash is fantastic as is, but you can easily adapt it! For a little extra flavor, add a clove or two of minced garlic to the pan during the last minute of cooking the tomatoes – just be careful not to burn it. A sprinkle of fresh herbs like basil, parsley, or thyme added along with the Parmesan can brighten the dish considerably. A squeeze of fresh lemon juice just before serving adds a lovely tang. You can also experiment with different cheeses, like crumbled feta or goat cheese, which pair wonderfully with summer vegetables. For a dairy-free version, simply omit the Parmesan or use nutritional yeast for a cheesy flavor.
What to Serve With Pan-Seared Summer Squash
This versatile side dish complements a wide range of meals. It pairs beautifully with protein like our perfectly Pan-Seared Steak or Grilled Lemon Herb Chicken. It’s also fantastic tossed with pasta, similar to an Angel Hair Pasta with Burst Cherry Tomato Sauce, or served alongside a simple rice dish like our Juicy Chicken and Rice Bowl. For a lighter meal, it can stand on its own, perhaps with some crusty bread.
The technique of pan-searing vegetables is similar to how we achieve perfect results in dishes like our Crispy Roasted Brussels Sprouts or even Easy Pan-Fried Potatoes – high heat is key!
Your Pan-Seared Summer Squash Questions Answered (FAQ)
Got questions about making the best pan-seared summer squash? Here are some common ones:
Why is my summer squash still soggy?
The most common culprit is overcrowding the pan. When you put too many vegetables in at once, they release moisture, and instead of searing (getting those lovely browned bits), they end up steaming in their own liquid. Always cook in a single layer, in batches if necessary. Also, ensure your pan is hot enough before you start.
Can I use other types of squash?
This technique works best with summer squash varieties like zucchini and yellow squash due to their texture and relatively lower moisture content compared to, say, pumpkin or butternut squash. While you could try, cooking times and results will vary with denser winter squash.
Do I need a cast iron skillet?
While a cast iron skillet is excellent because it holds heat consistently, any large, heavy-bottomed skillet will work well. The key is a pan that distributes and retains heat effectively to get a good sear.
How thick should I slice the squash?
About 1/2 inch thick rounds are ideal. This thickness allows the squash to become tender in the center while still having enough surface area and substance to achieve a good sear on the outside without falling apart.
Can I add other vegetables?
Absolutely! Thinly sliced bell peppers, onions, or mushrooms can be added. Consider their cooking times – onions and peppers might need a head start before adding the squash, or you could cook them separately. Add garlic towards the end so it doesn’t burn.
How long do leftovers last?
Leftover pan-seared summer squash can be stored in an airtight container in the refrigerator for 2-3 days. Keep in mind that the texture will change slightly upon cooling and reheating – it won’t be quite as firm as freshly made, but it will still be delicious.
What’s the best way to reheat leftovers?
For the best texture, reheat leftovers in a skillet over medium heat until warmed through. Microwaving is faster but can sometimes make the squash a bit softer than desired.
Enjoy Your Homemade Pan-Seared Summer Squash!
There you have it! The simple secret to making pan-seared summer squash that is bursting with flavor and has that perfect tender-crisp texture, without a hint of sogginess. This recipe is so quick and easy, it’s bound to become a regular in your rotation, especially when summer squash is abundant.
Give this recipe a try and experience the difference a proper sear makes. It’s a game-changer! Let me know what you think in the comments below. Happy cooking!
Pan-Seared Summer Squash

Ingredients
- 2 medium zucchini, sliced into 1/2 inch rounds
- 2 medium yellow squash, sliced into 1/2 inch rounds
- 1 pint cherry tomatoes
- 2 tablespoons olive oil
- 1/2 teaspoon salt
- 1/4 teaspoon black pepper
- 1/4 cup grated Parmesan cheese
Directions
- Slice the zucchini and yellow squash into uniform 1/2 inch thick rounds.
- Heat a large, heavy-bottomed skillet or cast iron pan over medium-high heat. Add the olive oil.
- Once the oil is hot and shimmering slightly, add the sliced squash in a single layer. This is the key to preventing sogginess; crowding the pan will steam the vegetables instead of searing them. Cook in batches if necessary to avoid overcrowding.
- Let the squash cook undisturbed for 3 to 4 minutes until deep golden brown marks appear on the bottom.
- Flip each slice and cook for another 3 to 4 minutes on the second side until also browned and the squash is tender but not mushy. Remove the cooked squash from the pan and set aside in a bowl.
- Add the cherry tomatoes to the hot pan. Cook for 3 to 5 minutes, stirring occasionally, until they start to soften, blister, and some begin to burst.
- Return the cooked squash to the pan with the tomatoes.
- Season generously with salt and black pepper. Toss gently to combine the vegetables.
- Transfer the pan-seared vegetables to a serving bowl.
- Top immediately with the grated Parmesan cheese, allowing it to melt slightly from the heat of the vegetables. Serve hot.