Oh, peanut butter and chocolate. Is there a more universally loved pairing? It’s the dynamic duo of the dessert world! We’ve all swooned over buckeyes, reese’s cups, and countless other confections featuring this classic combination. But when it comes to making layered bars at home, sometimes the dream can turn into a bit of a gooey, crumbly nightmare when you try to slice them.
You know the feeling – you pull out that gorgeous pan of layered goodness, confident you’re about to create perfect squares of bliss, only for the knife to squish the layers, leaving you with messy blobs instead of neat treats. I’ve been there! I struggled for ages trying to get these bars to hold their shape, until I discovered the simple yet crucial techniques that make all the difference.
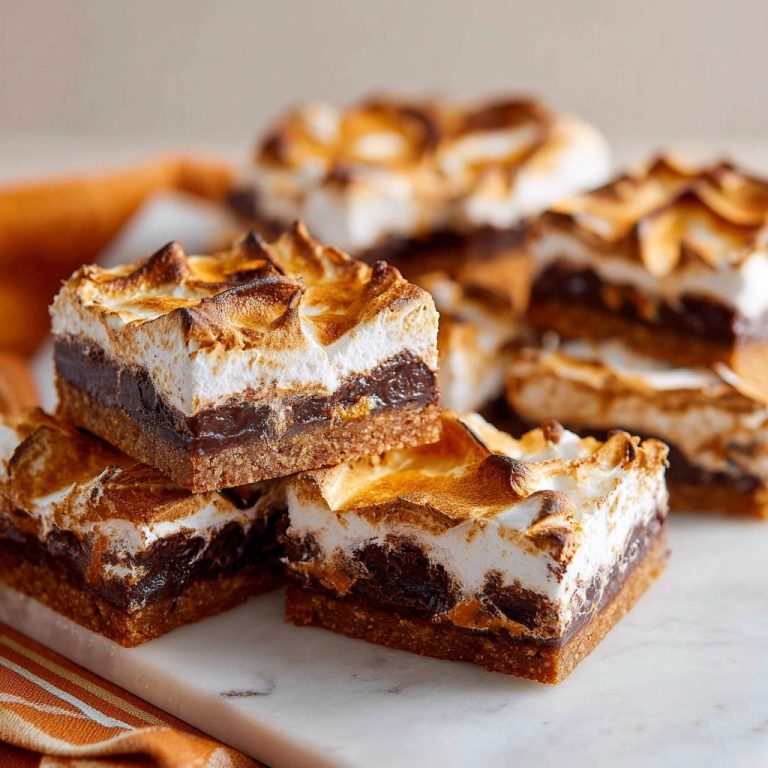
This recipe for Peanut Butter Chocolate Layered Bars isn’t just delicious (which it absolutely is!). It’s designed for stability, ensuring each bar is firm, holds its distinct layers beautifully, and slices cleanly. Get ready to make impressive, mess-free layered treats that will have everyone begging for the recipe.
The Secret to Bars That Hold Their Shape
Why do some layered bars turn into a sloppy mess? Often, it comes down to inadequate setting time and temperature control between layers. The “secret” here isn’t complicated; it’s simply patience and chilling! By properly chilling each layer before adding the next, and giving the final bars ample time in the refrigerator, you allow the fats (butter and peanut butter) and the chocolate to solidify firmly. This structural integrity is what prevents squishing and crumbling when you make that first cut.
Why These Peanut Butter Chocolate Layered Bars Are a Must-Make
Beyond the satisfaction of perfectly sliced bars, this recipe is a winner for many reasons:
- No-Bake Wonder: No oven required means these are perfect for hot weather or when you just don’t feel like baking.
- Classic Flavor Combo: Peanut butter and chocolate is a crowd-pleasing favorite that never goes out of style.
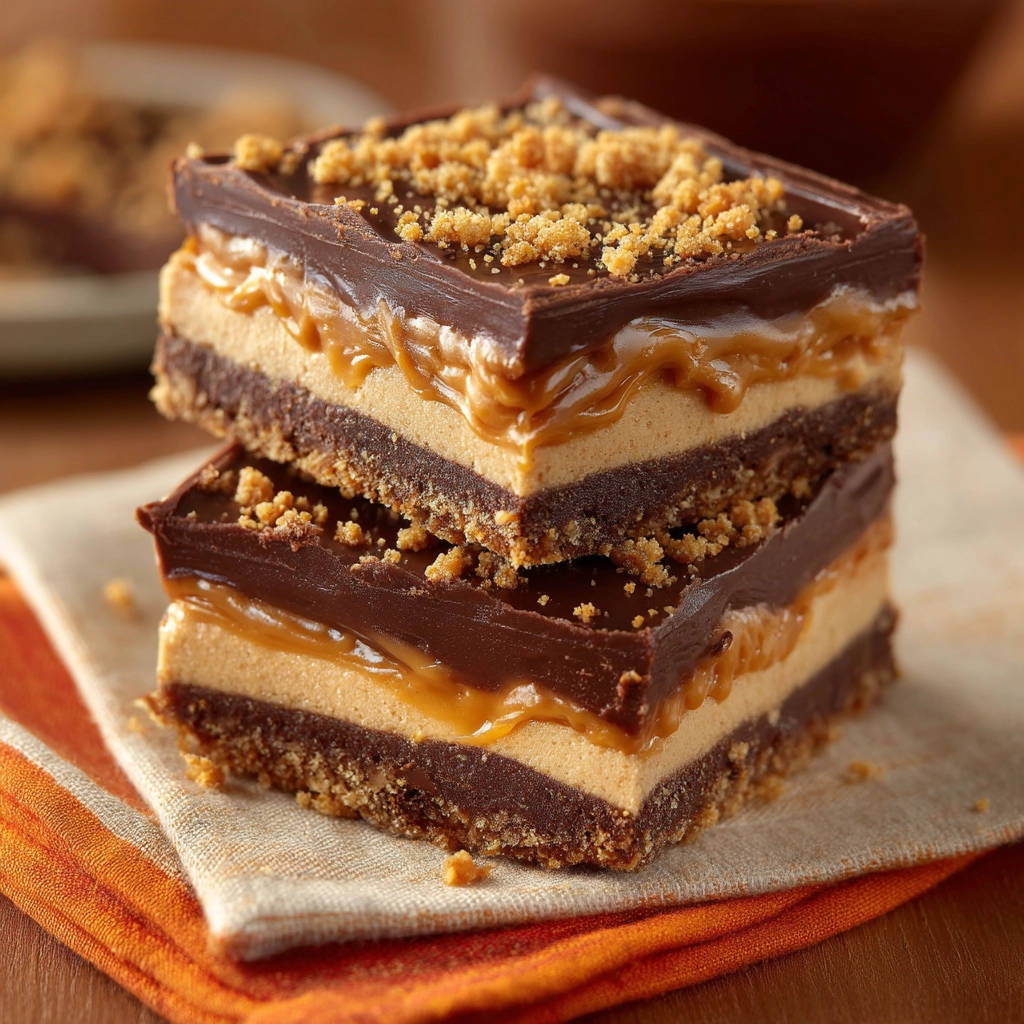
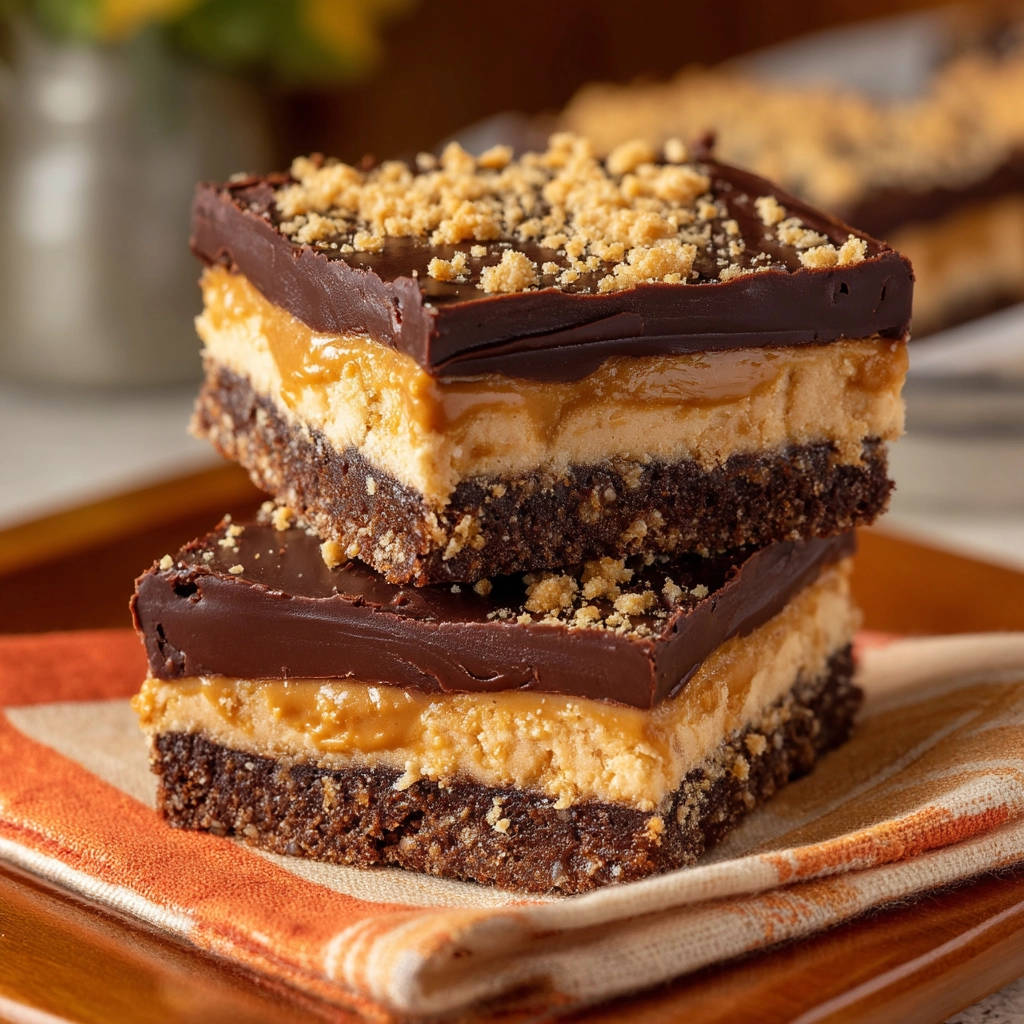
- Rich & Indulgent: Layers of crunchy cookie, creamy peanut butter filling, gooey caramel, and smooth chocolate create an irresistible texture and flavor profile.
- Surprisingly Simple: While layered, the steps are straightforward and don’t require advanced baking skills.
- Great for Sharing: Makes 16 substantial bars, perfect for parties, potlucks, or just sharing with loved ones.
Essential Ingredients for Your Layered Delight
Making these delectable layered bars starts with gathering high-quality ingredients that build each distinct layer. Think of it like building a delicious tower – each component plays a vital role in flavor, texture, and structure.
Building the Foundation: The Cookie Crust
Our base layer provides a wonderful crunchy contrast to the creamy fillings. For this, you’ll need:
- 2 cups chocolate cookie crumbs: Chocolate sandwich cookies, like OREOs (with or without the filling removed, depending on your preference), work perfectly here, offering a deep chocolate flavor and a fine crumb that presses into a solid base. You can buy pre-crushed crumbs or easily crush whole cookies yourself in a food processor or by placing them in a bag and crushing with a rolling pin.
- 1/2 cup melted unsalted butter: The melted butter binds the cookie crumbs together, creating a firm, stable crust that won’t fall apart. Using unsalted butter allows you to control the saltiness of the final bar.
The Creamy Heart: Peanut Butter Perfection
This is where the signature peanut butter flavor comes in, combined with elements that make it smooth, sweet, and stable enough to layer.
- 1 1/2 cups creamy peanut butter: Stick with creamy for the smoothest filling. Natural peanut butter can work, but its consistency can vary, sometimes requiring slight adjustments to the milk/cream quantity to achieve the right texture. Standard processed creamy peanut butter often yields the most consistent results for this recipe.
- 1/2 cup unsalted butter, softened: Just like in frosting, softened butter gives structure and richness to the peanut butter filling, helping it set up firmly when chilled. Make sure it’s truly softened (at room temperature but not melted) for easy beating.
- 1 teaspoon vanilla extract: A touch of vanilla enhances both the peanut butter and chocolate flavors, adding warmth and depth.
- 2 cups powdered sugar: This sweetens the peanut butter layer and, perhaps more importantly, gives it body and helps it set into a sliceable consistency.
- 1/4 cup milk or cream: Just a splash is needed to help achieve a smooth, beatable consistency for the peanut butter filling. Cream will add a slightly richer texture than milk.
The Irresistible Swirl & Chocolate Cap
These are the final, decadent layers that bring everything together visually and flavor-wise.
- 1/2 cup caramel sauce (store-bought or homemade): This layer is optional but highly recommended! It adds a gooey, sweet counterpoint to the peanut butter and chocolate. Use your favorite store-bought caramel or a rich homemade version.
- 1 1/2 cups chocolate chips (milk or semi-sweet): The top layer is a classic chocolate ganache-like topping. Use your preferred type of chocolate chip. Semi-sweet offers a nice balance, while milk chocolate makes it sweeter and creamier.
- 1/4 cup vegetable oil or coconut oil: Adding a bit of oil to the melted chocolate makes it smoother, easier to pour and spread, and helps it set with a clean snap when chilled. Coconut oil, if you like its subtle flavor, can also be used.
- 1/4 cup reserved chocolate cookie crumbs or graham cracker crumbs for topping: A final sprinkle of crumbs adds a little extra texture and decorative flourish to the top of the bars. Using graham cracker crumbs here would add a slightly different flavor profile if you want to mix it up!
Crafting Layers of Bliss: Your Step-by-Step Guide
Ready to transform these simple ingredients into stunning, sliceable chocolate peanut butter bars? Follow these steps carefully, paying close attention to the chilling times – they are your best friend in achieving that perfect firm texture!
- Prep Your Pan for Success: The very first step is crucial for easy bar removal. Line an 8×8 inch baking pan with parchment paper. Be sure to leave a generous overhang on at least two opposite sides. This overhang acts as “handles” later, allowing you to easily lift the entire slab of bars out of the pan before cutting.
- Create and Compact the Cookie Crust: In a medium bowl, combine your 2 cups of chocolate cookie crumbs with the 1/2 cup of melted butter. Stir them together until every crumb is moistened by the butter – it should look like wet sand. Pour this mixture into the bottom of your prepared 8×8 pan. Now, press it down firmly and evenly. You can use the bottom of a clean glass or a flat-bottomed measuring cup for this. Get it as compact and flat as possible. This ensures a solid, non-crumbly base. Pop this into the freezer for about 10 minutes while you prepare the next layer. This quick chill helps solidify the butter in the crust, making it a stable base for the peanut butter layer.
- Whip Up the Creamy Peanut Butter Layer: In a large mixing bowl (the bigger, the better for less mess!), combine the creamy peanut butter and softened butter. Use an electric mixer (or strong arm power with a whisk) to beat them together until the mixture is smooth and well-combined. Now, add the vanilla extract, the 2 cups of powdered sugar, and the 1/4 cup of milk or cream. Start on low speed to avoid a cloud of powdered sugar, then increase the speed. Beat until the mixture is light and fluffy, scraping down the sides of the bowl periodically to ensure everything is fully incorporated. The texture should be thick but spreadable.
- Layer the Peanut Butter & Add Caramel Swirls: Retrieve your chilled cookie crust from the freezer. Carefully dollop the peanut butter mixture over the crust. Use a spatula to spread it evenly across the entire surface. Aim for a smooth, flat layer. Next, drizzle the 1/2 cup of caramel sauce over the peanut butter layer. You can just pour it randomly or use a toothpick or knife to swirl it gently for a marbled effect. Don’t overmix the swirl into the peanut butter layer; you want distinct pockets of caramel. This chilling step is absolutely vital for the layers to set properly and prevents them from squishing when adding the liquid chocolate later. Return the pan to the freezer for at least 30 minutes, or until the peanut butter layer is firm enough that if you gently touch it, your finger doesn’t leave a significant dent.
- Melt the Chocolate Topping: While the peanut butter layer chills, melt your chocolate for the top. Place the 1 1/2 cups of chocolate chips and the 1/4 cup of vegetable or coconut oil in a microwave-safe bowl. Microwave in 30-second intervals, stirring well after each interval. Chocolate holds its shape even when melted, so stirring is essential to see its true consistency. Continue until the mixture is completely smooth with no lumps. Be careful not to overheat the chocolate, as this can cause it to seize. Alternatively, you can melt the chocolate and oil in a heatproof bowl set over a pot of simmering water (a double boiler), stirring until smooth. Once melted, let the chocolate mixture cool slightly for about 5 minutes. This prevents the hot chocolate from melting the peanut butter layer underneath when you pour it.
- Pour the Chocolate & Top with Crumbs: Take the pan out of the freezer again. Pour the slightly cooled melted chocolate evenly over the chilled peanut butter and caramel layers. Working quickly, use a spatula to spread the chocolate to cover the entire surface right to the edges. Before the chocolate sets (which happens quickly on the cold layer!), sprinkle the reserved 1/4 cup of cookie or graham cracker crumbs over the top for that finishing touch.
- Chill Until Completely Set: This is the second crucial chilling step that guarantees bars that hold their shape. Refrigerate the bars for at least 1 hour, but ideally 2 hours or even longer. The goal is for the chocolate layer to be completely firm and for the entire bar to be solid and cold throughout. Don’t rush this step!
- Slice Your Perfect Bars: Once the bars are fully chilled and firm, lift them out of the pan using the parchment paper overhang. Place the entire block onto a cutting board. For the cleanest cuts, use a sharp knife. Dip the knife blade in hot water and wipe it completely dry with a clean cloth before each cut. This warms the blade slightly, allowing it to slice through the chocolate without cracking it or dragging the layers. Slice into 16 squares (a common pattern is to cut into 4 rows by 4 rows). Store your beautiful, firm peanut butter chocolate layered bars in an airtight container in the refrigerator.
Expert Tips for No-Bake Perfection
Making these bars is quite forgiving, but a few extra tips can ensure your no-bake chocolate peanut butter bars turn out absolutely perfect every single time.
- Choose the Right Peanut Butter: As mentioned, creamy is best for the smoothest filling layer. If using natural peanut butter, make sure it’s well stirred. If it seems very stiff, you might need a tiny splash more milk or cream in the filling step.
- Don’t Skip the Chilling: I can’t stress this enough! The chilling times are non-negotiable for bars that hold their shape. Rushing these steps will result in a messy, difficult-to-slice dessert.
- Perfecting the Chocolate Layer: Be careful when melting chocolate chips. Overheating can cause them to seize, becoming thick and unusable. Melting in short intervals and stirring is key. Cooling it slightly before pouring also prevents it from melting the layers underneath.
- Clean Cuts Every Time: The hot knife trick is a game-changer for slicing through chocolate cleanly. Wipe the blade dry after dipping in hot water to prevent water from getting onto your bars. Re-dip and wipe between each cut for the neatest results.
- Pan Size Matters: This recipe is specifically for an 8×8 inch square pan. Using a different size will result in different layer thicknesses and may require adjusting chilling times.
- Storage: Keep these bars refrigerated in an airtight container. They stack well when properly chilled. They are best enjoyed cold directly from the fridge.
Serving Suggestions and Occasions
These peanut butter chocolate layered bars are rich and satisfying all on their own! Serve them chilled, sliced into neat squares. They are perfect for:
- Dessert after any meal.
- Taking to potlucks, picnics, or parties (they transport well when kept cold!).
- Lunchbox treats or afternoon snacks.
- Holiday dessert platters.
- Just because!
They pair wonderfully with a tall glass of cold milk. If you’re looking for other simple yet decadent desserts for a gathering, consider trying our Easy No-Bake Chocolate Cream Loaf or perhaps our Classic Chocolate Cream Pie.
Your Peanut Butter Chocolate Bars Questions Answered (FAQ)
Got questions about making these delightful layered bars? Here are some common ones:
Can I use graham cracker crumbs instead of chocolate cookie crumbs for the base?
Absolutely! Graham cracker crumbs make a delicious classic base for bars like these and pair wonderfully with both peanut butter and chocolate. The measurement would be the same: 2 cups graham cracker crumbs mixed with 1/2 cup melted butter.
What if I don’t have caramel sauce? Can I skip it?
Yes, you can skip the caramel layer. The bars will still be fantastic with just the cookie base, peanut butter filling, and chocolate topping. The caramel adds an extra layer of gooeyness and sweetness, but it’s not essential for the structure or basic flavor profile.
My peanut butter layer seems too stiff/too soft. What happened?
This can sometimes depend on the consistency of your peanut butter and how soft your butter was. If it’s too stiff to beat, add just a tiny splash more milk or cream (like a tablespoon at a time) until it’s a spreadable consistency. If it seems too soft after adding the powdered sugar, it might need a little extra chilling time to firm up properly before adding the chocolate layer.
Can I use crunchy peanut butter?
While the recipe calls for creamy for smoothness, you technically could use crunchy peanut butter if you prefer bits of peanuts in your filling. However, the layer might not be as smooth and uniform, which could affect the overall layering and slicing slightly. Stick to creamy for the best results with this specific structured bar recipe.
How long do these bars last, and how should I store them?
Store the bars in an airtight container in the refrigerator. They will keep well for up to a week. For longer storage, you can wrap individual bars or the whole slab tightly in plastic wrap and then place in a freezer-safe container or bag. They can be frozen for up to 2-3 months. Thaw them in the refrigerator before serving.
Why is the chocolate layer cracking when I cut?
Chocolate can be brittle when cold. Cracking usually happens if the chocolate is too cold or if the knife isn’t sharp and slightly warmed. Using the hot water and wiping technique described in the directions is the best way to prevent cracking and get those beautiful, clean edges.
Enjoy Your Homemade Treat!
There you have it – the secret to beautiful, sliceable Peanut Butter Chocolate Layered Bars! No more worrying about gooey messes. These bars are the perfect combination of textures and flavors, guaranteed to satisfy any sweet craving. They’re simple enough for a weeknight treat but impressive enough for any special occasion.
Give this recipe a try and experience the joy of perfectly layered, firm bars. Don’t forget to leave a comment below and let me know how yours turned out! Happy slicing!
Peanut Butter Chocolate Layered Bars

Details
- Prep time: 25 minutes
- Total time: 2 hours 25 minutes (includes chilling)
- Servings: 16 bars
Ingredients
- 2 cups chocolate cookie crumbs (like OREO crumbs)
- 1/2 cup melted unsalted butter
- 1 1/2 cups creamy peanut butter
- 1/2 cup unsalted butter softened
- 1 teaspoon vanilla extract
- 2 cups powdered sugar
- 1/4 cup milk or cream
- 1/2 cup caramel sauce (store-bought or homemade)
- 1 1/2 cups chocolate chips (milk or semi-sweet)
- 1/4 cup vegetable oil or coconut oil
- 1/4 cup reserved chocolate cookie crumbs or graham cracker crumbs for topping
Directions
- Line an 8×8 inch baking pan with parchment paper, leaving an overhang on the sides for easy removal.
- In a medium bowl, mix the 2 cups chocolate cookie crumbs and 1/2 cup melted butter until well combined. Press this mixture firmly and evenly into the bottom of the prepared pan. Use the bottom of a glass or measuring cup to get a compact layer. Place the pan in the freezer for 10 minutes while you prepare the next layer.
- In a large bowl, beat together the creamy peanut butter and softened butter until smooth. Add the vanilla extract, powdered sugar, and milk or cream. Beat until light and fluffy, scraping down the sides of the bowl as needed.
- Spread the peanut butter mixture evenly over the chilled cookie crumb crust. Smooth the top with a spatula. Drizzle the caramel sauce in swirls over the peanut butter layer. Return the pan to the freezer for at least 30 minutes, or until the peanut butter layer is firm enough to touch without leaving a dent. This chilling step is crucial for the layers to set properly and prevents them from squishing when adding the chocolate and later cutting.
- In a microwave-safe bowl, melt the chocolate chips and vegetable or coconut oil in 30-second intervals, stirring well after each interval, until smooth. Alternatively, melt over a double boiler. Let the melted chocolate cool slightly for about 5 minutes.
- Pour the cooled melted chocolate evenly over the chilled peanut butter and caramel layers. Spread quickly to cover the entire surface. Sprinkle the reserved cookie crumbs over the top.
- Refrigerate the bars for at least 1 hour (and preferably 2 hours) until the chocolate layer is completely set and the bars are firm throughout. This extended chilling time is key to achieving bars that hold their shape when cut.
- Once fully chilled and firm, lift the bars out of the pan using the parchment paper overhang. Place on a cutting board. Use a sharp knife dipped in hot water and wiped dry for each cut to slice into 16 squares. This technique helps achieve clean edges and prevents the chocolate from cracking or dragging the layers. Store bars in an airtight container in the refrigerator.