
Ever pull a cherry cobbler from the oven only to find the topping drowned in a soggy, juicy mess? You’re not alone. This recipe ends that frustration with a smart two-step bake. First, the cherries thicken on their own, then the buttery drop biscuits go on top for that perfect golden crunch.
So why does this work so much better? Traditional cobblers dump everything together, and the fruit’s juices steam up the oven, turning biscuits mushy. Here, you parbake the filling to trap those juices into a glossy syrup. In addition, the drop biscuit method lets steam escape, keeping everything crisp.
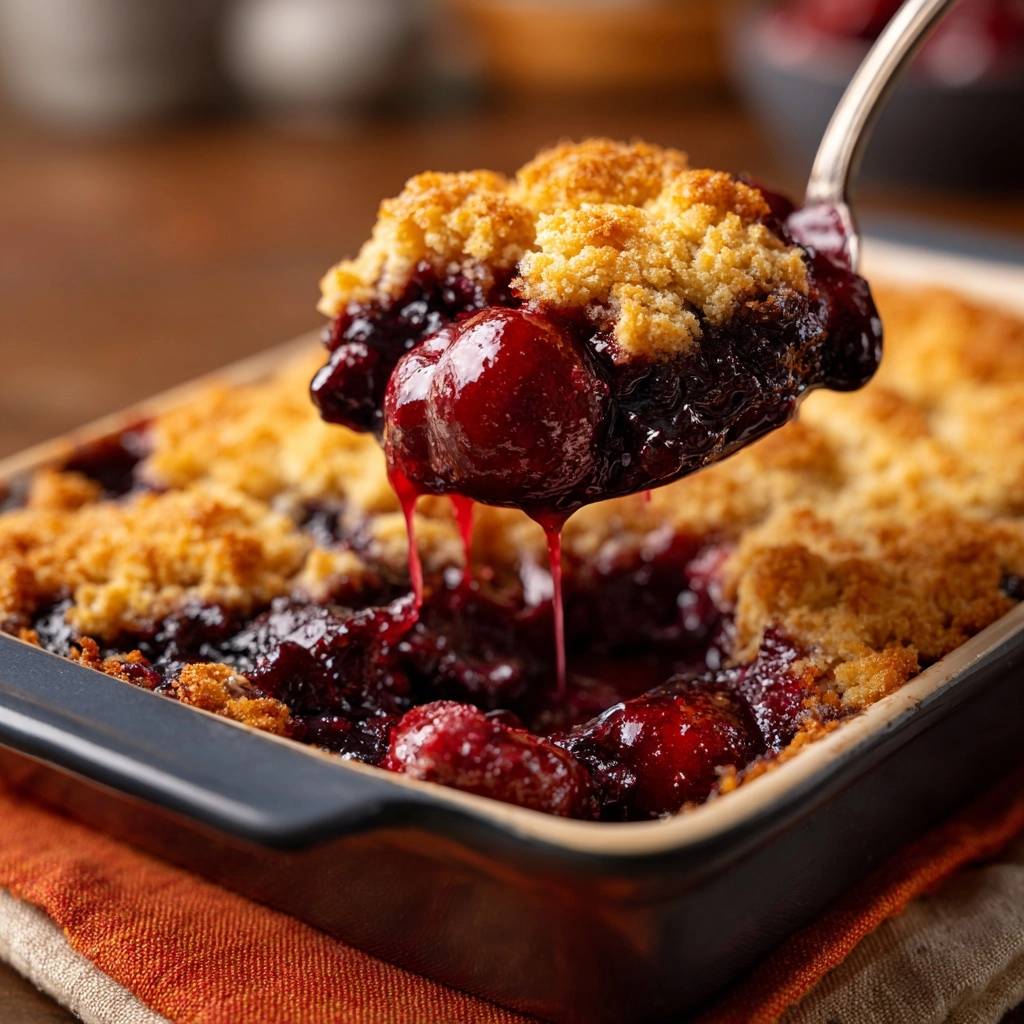
The real secret lies in the cornstarch slurry on the cherries and cold butter cubes in the dough. Cornstarch gelatinizes early, locking in moisture, while cold butter creates flaky lift without soaking it up. You’ll get bubbling tart-sweet cherries under biscuits that shatter with every bite. This serves 8, with 15 minutes prep and 40 minutes total bake time. Finally, it fixes every soggy cobbler you’ve ever made.
Why Cherry Cobbler Toppings Turn Soggy
Juice Overload in Traditional Recipes
Fresh cherries pack 60 to 70 percent water. When you heat them, that juice floods out fast. Therefore, in one-pan recipes, steam saturates the topping, breaking down its structure into mush.
Baking science backs this up. Fruit pectin softens above 160 degrees F, releasing even more liquid. However, this recipe’s pre-thickening step contrasts that perfectly. You evaporate excess moisture first, so your biscuits stay dry and crisp.
Skip the parbake, and you’re stuck with soup. But follow this, and the filling holds firm under a crunchy lid. It’s a game-changer for fruit desserts.

The Parbake Solution for Dry Crunch
At 375 degrees F, the 15-minute solo bake hits magic. Cornstarch gelatinizes around 180 degrees F, swelling to trap juices into a thick syrup. You’ll see bubbling edges and a glossy center.
This step evaporates water and concentrates sugars. Therefore, the base stabilizes before the topping hits. Skipping it dooms your cobbler to sogginess, no matter the recipe.
Visual cues matter here. Look for thickened juices that don’t slosh when you jostle the dish. That means it’s ready for the crisp layer above.
Cherry Filling Ingredients Breakdown
Fresh Pitted Cherries: Peak Season Choice
Grab 4 cups, about 2 pounds, of sweet or tart pitted cherries. Pit them by hand to keep the fruit whole and juicy. Fresh ones give superior texture with that burst-in-your-mouth pop.
Compared to frozen, fresh cherries hold shape better and taste brighter. Plus, they’re loaded with antioxidants and vitamin C. In addition, peak summer season means maximum flavor.
Frozen works in a pinch, but thaw and drain them first. Fresh just edges it out for that perfect cobbler bite.
Sugar, Cornstarch, Lemon Ratios Explained
Toss cherries with 1/2 cup sugar to draw out juices for maceration. Then, 2 tablespoons cornstarch thickens without the gumminess of flour. One tablespoon lemon juice adds brightness and lowers pH to activate the starch.
These ratios prevent runny filling. However, if you swap honey for sugar, cut it by 1/4 cup since it’s sweeter. Test them, and you’ll never get soup again.
Lemon’s acidity balances the cherries’ tart-sweet vibe too. It keeps everything fresh and vibrant.
Drop Biscuit Topping Components
Flour, Baking Powder, Salt Base
One cup all-purpose flour builds structure. Add 1 teaspoon baking powder for lift, 1/4 teaspoon salt for savoriness, and 1/4 cup sugar for caramelized edges. This lean dough shines in cobblers over rolled biscuits.
Drop style means less handling, so no tough gluten. Therefore, it crisps up beautifully on hot fruit. Watch for overworking, though; it toughens fast.
These basics create tender, golden bites that contrast the juicy base perfectly.
Cold Butter and Milk Technique
Cube 6 tablespoons cold unsalted butter into the dry mix. Use a pastry cutter for pea-sized bits; it coats flour to limit gluten. Unsalted avoids bitterness as sugars caramelize.
Stir in 1/2 cup milk just until shaggy. Overmixing adds moisture that soaks into fruit. A food processor works too, but pulse briefly.
This method delivers flaky height without excess liquid. Your topping stays crisp for days.
Science of Crisp Cherry Cobbler Layers
Cornstarch Slurry Gelatinization
Excess moisture delays the Maillard reaction, that browning magic for flavor and crunch. At 375 degrees F, parbaking evaporates water first, concentrating sugars for better caramelization later.
Starch blooms and sets around 203 degrees F, forming a gel that holds juices. Side-by-side tests prove it: parbaked bases stay firm under toppings, while others turn to mush.
Therefore, this phase locks in the glossy syrup you crave. No more steamed-flat disasters.
Butter Steam for Biscuit Lift
Start with butter at 32 to 40 degrees F. It melts gradually in the oven, releasing steam for double the height. The cut-in method coats flour particles, inhibiting tough gluten.
Drop biscuits beat pie crust here because gaps allow ventilation. Hot fruit below sears the bottoms crisp. In addition, no rolling preserves those flaky layers.
Result? Tall, golden topping that doesn’t sink into the filling. Science makes it foolproof.
Step-by-Step: Parbaking Cherry Base
Oven Preheat and Cherry Toss
Preheat to exactly 375 degrees F. In a bowl, toss cherries with 1/2 cup sugar, 2 tablespoons cornstarch, and 1 tablespoon lemon juice. Look for a shiny, even slurry coating every fruit.
Spoon into an 8×8 glass dish for even heat conduction. Bake uncovered so steam escapes. This sets up the thick base.
Glass helps you watch the transformation without opening the door.
15-Minute Bake and Juice Check
After 15 minutes, edges bubble and center thickens slightly. Rotate if your oven heats unevenly. Juices should look syrupy, not watery.
This stabilizes pH for better topping grip. A quick cool-down firms it up. Don’t skip; it’s your crisp insurance.
If it boils over, lower the rack next time.
Step-by-Step: Assembling Crisp Topping
Mixing Dough While Base Bakes
Time it right: whisk flour, 1/4 cup sugar, baking powder, and salt while cherries parbake. Cut in cold butter to pea-sized crumbs, no bigger.
Stir in milk for a shaggy dough only. Hot cherries below provide bottom heat for rise. Overmix, and it toughens.
Sync keeps things efficient and hot.
Dropping Spoonfuls with Steam Gaps
Drop 8 to 10 heaping tablespoons over the hot cherries. Space them 1/2 inch apart for expansion and steam vents. Don’t spread; ragged edges crisp best.
Into the hot dish for an immediate sear. Gaps prevent steaming the tops flat. You’ll smell the buttery promise right away.
This layout ensures even golden crunch.
Final Bake and Cooling Guide
25-Minute Golden Crisp Finish
Bake middle rack at 375 degrees F for 25 minutes. Rotate at 15 for even browning. Done when topping’s deep gold; toothpick pulls clean from biscuits.
Aromas of caramelized sugar fill the kitchen. Therefore, trust your nose too. Perfect crunch awaits.
Pro tip: fan ovens may need 5 minutes less.
10-Minute Rest for Set Juices
Let it cool on the counter 10 minutes. Pectin thickens residual juices into a sliceable fill. Rushing serves soup; patience pays off.
Room temp keeps topping crisp; fridge softens it. Therefore, serve warm for best texture.
That rest transforms goo to glory.
Avoiding Soggy Cherry Cobbler Pitfalls
Overmixing Dough Disasters
Overmixing wakes gluten, turning biscuits tough and chewy. Signs include smooth dough and flat bake. Fix by stirring milk minimally for shaggy bits.
Cold butter thawing early adds moisture too. Keep it icy till the end. Therefore, work fast.
Undermix for tenderness every time.
Skipping Parbake Consequences
No parbake means soupy disasters; juices flood the topping mid-bake. Real cobblers turn to mush. At altitude, add 1 teaspoon extra cornstarch.
Always parbake to evaporate first. It saves every fruit dessert. Don’t learn the hard way.
One step, zero regrets.
Cherry Cobbler Flavor Variations
Mixed Berry or Peach Swaps
Swap 1:1 with mixed berries or peaches. Adjust sugar down for tart berries, up for sweet peaches. Black cherries add depth; cherry extract amps flavor without booze.
Keep cornstarch the same for thick fill. These twists keep the crisp method intact. You’ll love the variety.
Fresh summer fruit shines brightest.
Spice and Nut Additions
Add 1/2 teaspoon cinnamon to filling for warmth. Almond extract in dough pairs perfectly, or sprinkle chopped pecans before final bake.
For vegan, swap milk for oat or almond. Nuts toast crisp on top. Therefore, customize endlessly.
Spices elevate without overpowering cherries.
Make-Ahead Cherry Cobbler Strategies
Freezing Parbaked Base
Parbake, cool, and freeze the base up to 3 months in a bag. Thaw overnight in fridge, top fresh, and bake as directed. Full cobbler freezes too; rebake from frozen at 375 for 35 minutes.
Label with dates for ease. This makes weeknights simple. Quality holds beautifully.
Pro tip: wrap tightly to avoid freezer burn.
Storage for Crisp Retention
Store airtight at room temp up to 2 days. Fridge lasts 5 days; re-crisp slices at 350 degrees F for 5 minutes. Topping stays crunchy with care.
Avoid plastic wrap alone; it traps moisture. Therefore, glass containers work best. Enjoy leftovers guilt-free.
Reheating revives day-two magic.
Pairing Cherry Cobbler Sides
Creamy Vanilla Ice Cream Match
Vanilla ice cream’s cold cream cuts the cobbler’s warmth and richness. It melts into tart-sweet pools. Homemade no-churn scoops up perfectly beside.
Contrast makes every bite crave-worthy. Therefore, never skip it. Pure bliss.
Oh man, that first melty forkful…
Fresh Whipped Cream or Yogurt
Whip cream with a touch of sugar for light clouds. Greek yogurt adds tang to balance sweetness. Coffee or tea cleanses the palate between bites.
Stabilize whip with cornstarch for peaks that hold. These pairings elevate casually. Simple and spot-on.
Yogurt’s my go-to for breakfast cobbler.
Cherry Cobbler FAQ
Can I Use Frozen Cherries?
Yes, thaw and drain them for 30 minutes, then pat dry thoroughly. Add 1 teaspoon extra cornstarch to handle extra moisture. Texture stays close to fresh, but fresh pops more. It works great off-season.
Why Cold Butter in Topping?
Cold butter creates steam pockets as it melts slowly, giving flaky lift and crisp edges. Room-temp butter soaks into dough flat like pancakes. Always cube straight from fridge and work quick. That’s your crunch guarantee.
Gluten-Free Cherry Cobbler Adaptation?
Use a 1:1 gluten-free flour blend plus 1/4 teaspoon xanthan gum for structure. Keep all other steps the same; parbake is key. It bakes up tender and crisp, just like original. Test one batch to dial sweetness.
How to Fix Runny Filling?
Parbake 15 minutes extra or stir in 1 teaspoon more cornstarch next time. If it’s already baked, broil 2 minutes to evaporate. Always check for syrupy thickness post-parbake. Fixes runny woes fast.
Scaling for Larger Crowds?
Double everything for a 9×13 dish; times stay the same. Use convection fan off or reduce 25 degrees F to avoid over-browning. Parbake checks still apply. Serves 16 perfectly; crisp scales up beautifully.

Cherry Cobbler
Course: DessertCuisine: AmericanDifficulty: easy6
servings15
minutes40
minutes55
MinutesAmerican
Ingredients
4 cups fresh pitted cherries
3/4 cup granulated sugar, divided
2 tablespoons cornstarch
1 tablespoon lemon juice
1 cup all-purpose flour
1 teaspoon baking powder
1/4 teaspoon salt
6 tablespoons cold unsalted butter, cubed
1/2 cup milk
Directions
- Preheat oven to 375 degrees F. In a medium bowl, toss cherries with 1/2 cup sugar, cornstarch, and lemon juice until evenly coated. This slurry is key: it absorbs juices as they heat, preventing a soupy fill that soaks toppings.
- Transfer cherry mixture to an 8×8-inch or similar baking dish. Bake uncovered for 15 minutes until juices bubble and thicken slightly. Remove from oven. This parbake step evaporates excess liquid, creating a stable base so your topping stays crisp, not soggy.
- While cherries bake, make the topping. In a bowl, whisk flour, remaining 1/4 cup sugar, baking powder, and salt. Cut in cold butter with a fork or pastry cutter until crumbly pea-sized bits form. Cold butter melts in the oven for flaky lift without absorbing fruit moisture. Stir in milk just until dough forms; do not overmix.
- Drop spoonfuls of dough evenly over hot cherries, leaving gaps for steam escape and even crisping.
- Bake 25 minutes more until topping is golden and crisp. Let cool 10 minutes; juices set firm while topping stays crunchy. Serve warm.
Notes
- Use fresh pitted cherries for best results. The parbake step is key to preventing soggy topping. Let cool 10 minutes before serving for firm juices and crunchy topping.


