
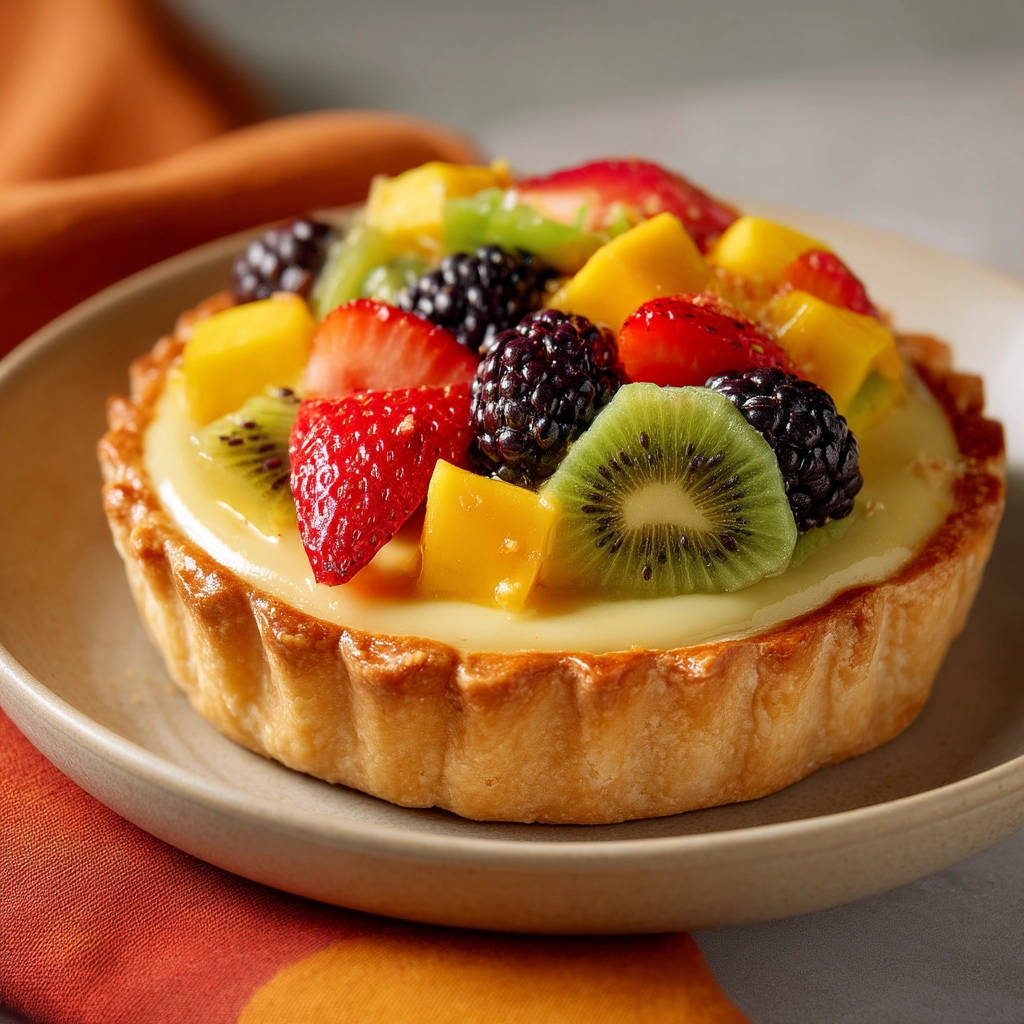
Is there anything more delightful than a slice of fresh fruit tart? The vibrant colors, the creamy filling, and the sweet, juicy fruit – it’s a feast for the eyes and the taste buds. But let’s be honest, a soggy crust can ruin the entire experience. I’ve been there, struggling with tarts that turn soft before I even get a chance to enjoy them. That’s why I’m so excited to share this recipe for a truly Perfected Fruit Tart, complete with a simple, foolproof trick to ensure a crisp, golden crust every single time!
Why You’ll Love This Fruit Tart
This fruit tart recipe is a winner for so many reasons:
- The Crust: The secret to a non-soggy crust is blind baking! We’ll walk you through the process, ensuring a crisp, sturdy base for all that delicious filling and fruit.
- The Pastry Cream: Rich, creamy, and perfectly vanilla-scented, this pastry cream is the ideal complement to the tart crust and fresh fruit. It’s surprisingly easy to make at home!
- The Fruit: The possibilities are endless! Use your favorite seasonal fruits to create a visually stunning and incredibly flavorful tart.
- It’s Impressive, Yet Easy: This fruit tart looks like it came straight from a fancy bakery, but it’s surprisingly simple to make at home.
Gathering Your Ingredients for Perfected Fruit Tart
Before we dive into the baking process, let’s gather our ingredients. This recipe is all about fresh, high-quality ingredients that will shine in the finished product. We’re building layers of flavor and texture, starting with a buttery crust, then a creamy vanilla-infused pastry cream, and finishing with a beautiful array of fresh fruit. Let’s break down what you’ll need for each component:
For the Perfectly Crisp Tart Crust:
The crust is the foundation of our fruit tart, and it’s crucial to get it right. We’re aiming for a buttery, slightly sweet, and incredibly crisp crust that can stand up to the creamy filling and juicy fruit. Here’s what you’ll need:
- 1 and 1/2 cups all-purpose flour: This forms the structure of our crust. For the best results, use a good quality all-purpose flour.
- 1/2 cup granulated sugar: Adds sweetness and helps to create a tender crust.
- 1/4 teaspoon salt: Enhances the flavors of the other ingredients and balances the sweetness.
- 1/2 cup cold unsalted butter, cut into small cubes: The key to a flaky crust! Make sure the butter is very cold before you start. This prevents the gluten from over-developing.
- 1 large egg yolk: Adds richness and helps to bind the dough together.
- 2 tablespoons ice water: Just enough to bring the dough together without making it too wet. The ice water keeps the butter cold!
For the Creamy Vanilla Pastry Cream:
This pastry cream is the heart of our fruit tart. It’s smooth, rich, and infused with vanilla flavor. It provides a wonderful contrast to the crisp crust and the bright, fresh fruit. Here’s what you’ll need:
- 2 cups whole milk: Provides the base for our pastry cream. Whole milk creates the richest, creamiest texture.
- 1/2 cup granulated sugar: Sweetens the pastry cream and helps to thicken it.
- 4 large egg yolks: Adds richness, color, and helps to thicken the pastry cream.
- 1/4 cup cornstarch: This is our thickening agent. It ensures a smooth, stable pastry cream.
- 1 teaspoon vanilla extract: Adds that classic vanilla flavor. Use a high-quality vanilla extract for the best results.
For the Fresh Fruit Topping:
This is where you can really let your creativity shine! Choose your favorite seasonal fruits to create a beautiful and delicious tart. Here are some suggestions, but feel free to mix and match:
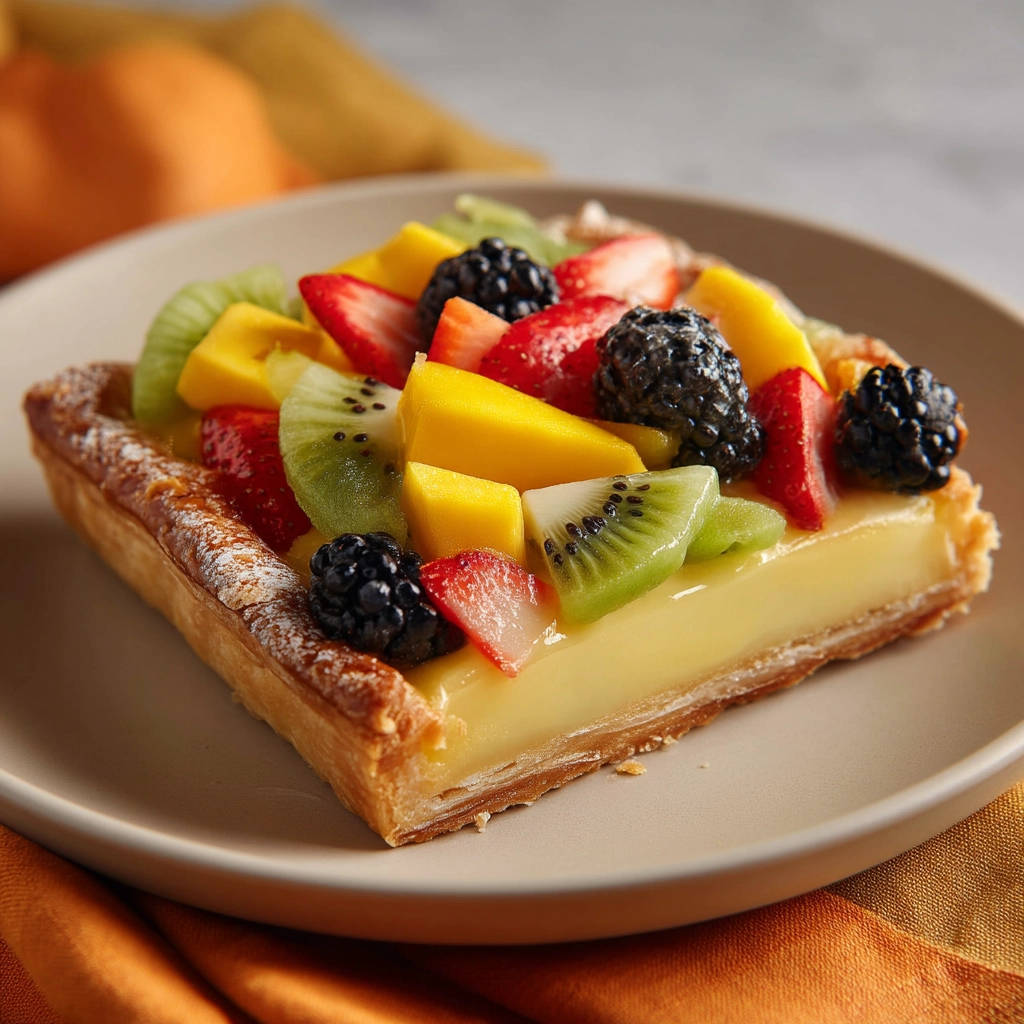
- 1 cup sliced fresh strawberries: Adds sweetness and a vibrant red color.
- 1 cup mixed fresh blackberries: Adds a slightly tart and juicy flavor.
- 1 cup sliced kiwi: Adds a tangy flavor and a beautiful green color.
- 1 cup diced fresh mango: Adds a tropical sweetness and a vibrant orange color.
Remember, the key is to use fresh, ripe fruit for the best flavor and appearance. Don’t be afraid to experiment with different combinations to find your perfect mix!
Crafting Your Fruit Tart: Step-by-Step
Now that we have all of our ingredients gathered, it’s time to start baking! Don’t be intimidated by the multiple steps – each one is relatively simple, and the end result is well worth the effort. The most important thing to remember is to take your time and follow the instructions carefully. Let’s get started!
- Make the Tart Dough: In a food processor, pulse together the flour, sugar, and salt until well combined. This ensures that the dry ingredients are evenly distributed. Add the cold, cubed butter and pulse until the mixture resembles coarse crumbs. It’s important to keep the butter cold to prevent the gluten from over-developing, which can result in a tough crust. In a small bowl, whisk together the egg yolk and ice water. Add this mixture to the food processor and pulse until the dough just comes together. Be careful not to overmix the dough, as this will also lead to a tough crust. The dough should be slightly crumbly but hold together when pressed.
- Chill the Dough: Gather the dough into a disc, wrap it tightly in plastic wrap, and refrigerate for at least 30 minutes. This chilling period is crucial because it allows the gluten to relax, making the dough easier to roll out. It also helps to firm up the butter, which contributes to a flakier crust. You can even chill the dough overnight for added convenience.
- Prepare to Bake the Crust: Preheat your oven to 375 degrees F (190 degrees C). On a lightly floured surface, roll out the chilled dough into a 12-inch circle. Carefully transfer the dough to a 9-inch tart pan with a removable bottom, pressing it gently into the bottom and up the sides. Use your fingers to trim any excess dough from the edges of the pan. Prick the bottom of the crust all over with a fork. This prevents the crust from puffing up during baking.
- Blind Bake the Crust (The Key Step for No More Soggy Crust!): This is the secret weapon against soggy tart crusts! Line the tart shell with parchment paper or foil, pressing it snugly against the dough. Fill the lining with pie weights, dried beans, or rice. These weights will prevent the crust from shrinking or slumping during baking. Bake for 15 minutes. Carefully remove the parchment paper and weights. Continue baking for another 10-15 minutes, or until the crust is golden brown and fully cooked through. This ensures that the bottom of the crust is sealed and won’t absorb moisture from the filling. Let the crust cool completely on a wire rack before filling.
- Make the Pastry Cream: In a medium saucepan, heat the milk over medium heat until it just begins to simmer. Be careful not to let it boil. In a separate bowl, whisk together the sugar, egg yolks, and cornstarch until smooth. This mixture is called a “slurry” and it is the base of the pastry cream. Gradually whisk about half of the hot milk into the egg yolk mixture, tempering it gently. Tempering the egg yolks prevents them from scrambling when added to the hot milk. Pour the tempered egg mixture back into the saucepan with the remaining milk. Cook over medium heat, whisking constantly, until the mixture thickens significantly and comes to a boil. Remove from heat and stir in the vanilla extract. Pour the pastry cream into a clean bowl, press plastic wrap directly onto the surface to prevent a skin from forming, and refrigerate until completely chilled, at least 2 hours.
- Assemble the Tart: Once the crust is completely cool and the pastry cream is chilled, spread the pastry cream evenly into the baked tart shell. Arrange the sliced and diced fresh fruit decoratively over the pastry cream. Get creative and arrange the fruit in a visually appealing pattern!
- Chill and Serve: Refrigerate the finished tart for at least 30 minutes before slicing and serving. This allows the pastry cream to firm up further and the flavors to meld together. Enjoy!
Tips for Perfect Fruit Tart Every Time
Want to make sure your fruit tart is a masterpiece? Here are a few extra tips to help you along the way:
- Keep everything cold! Cold butter, cold water, and a chilled dough are essential for a flaky crust.
- Don’t overmix the dough! Overmixing develops the gluten, resulting in a tough crust. Mix just until the dough comes together.
- Blind bake thoroughly! This is the key to preventing a soggy crust. Make sure the crust is fully cooked and golden brown before filling it.
- Use high-quality ingredients! The better the ingredients, the better the tart.
- Get creative with the fruit! Use your favorite seasonal fruits and arrange them in a visually appealing pattern.
What to Serve With Fruit Tart
While this perfected fruit tart is delicious on its own, it pairs wonderfully with a variety of other treats and beverages. It would be a welcome addition to any brunch spread, perhaps alongside some golden cottage cheese fritters or a savory offering like this sausage and bread bake. For a lighter dessert option, try pairing it with a refreshing fruit salad.
Your Fruit Tart Questions Answered (FAQ)
Can I make the tart crust ahead of time?
Yes! In fact, I highly recommend it. You can make the tart dough up to 2 days in advance and store it in the refrigerator, wrapped tightly in plastic wrap. You can also blind bake the crust and store it at room temperature for up to 24 hours before filling it.
Can I use a different type of flour for the crust?
While all-purpose flour works best, you can experiment with other flours. For a slightly nuttier flavor, try using whole wheat pastry flour. If you need a gluten-free option, use a gluten-free all-purpose flour blend.
Can I use different fruit for the topping?
Absolutely! This recipe is very flexible. Use your favorite seasonal fruits, such as berries, peaches, plums, or grapes. Just make sure the fruit is fresh and ripe.
How do I store leftover fruit tart?
Store leftover fruit tart in the refrigerator, covered tightly, for up to 2 days. The crust may soften slightly over time, but it will still be delicious.
Enjoy Your Homemade Fruit Tart!
There you have it – a recipe for a truly Perfected Fruit Tart with a crisp, never-soggy crust! I hope you enjoy making and sharing this delicious dessert with your friends and family. Don’t forget to leave a comment below and let me know how your fruit tart turns out. And be sure to share your photos on social media!


