There’s nothing quite like biting into a sweet, tender kernel of corn, especially when it’s been kissed by the heat of the oven, developing those delicious little charred bits. Roasted corn on the cob is a classic for a reason! It’s a staple side dish at barbecues, potlucks, and weeknight dinners alike.
However, if you’ve ever tried roasting corn at home, you might have encountered a common frustration: dry kernels. You want that perfect balance – juicy and tender on the inside, with just the right amount of smoky char on the outside. Achieving that balance consistently can feel like a culinary puzzle.
For years, I struggled with this myself. My roasted corn chunks would sometimes come out tough or dry, missing that burst of sweetness I craved. But after much experimenting, I stumbled upon a simple, game-changing trick that guarantees perfectly moist and incredibly flavorful roasted corn every single time. Get ready to say goodbye to dry, disappointing corn!
Why These Roasted Corn Chunks Are a Must-Try
So, what makes this recipe for seasoned roasted corn chunks stand out? It’s all about that secret step, plus a few other key elements that lock in flavor and ensure a delightful texture.
Here are just a few reasons you’ll absolutely fall in love with this method:
- Guaranteed Juiciness: The unique par-cooking step ensures the corn kernels stay plump and tender, even after hitting the high heat of the oven.
- Incredible Flavor: A simple yet powerful blend of seasonings penetrates the corn, enhancing its natural sweetness with savory and smoky notes.
- Beautifully Charred: Roasting in chunks allows for more surface area to achieve those desirable caramelized, slightly charred spots.
- Quick & Easy: With minimal prep and a short cook time, this recipe is perfect for busy weeknights or impromptu gatherings.
- Versatile Side Dish: These corn chunks pair beautifully with almost any main course, from grilled chicken to roasted meats or seafood.
Forget wrestling with foil or hoping your grill is just the right temperature. This oven method for roasted corn chunks is foolproof and delivers consistently delicious results.
Gathering Your Ingredients for Juicy Roasted Corn Chunks
One of the beauties of this recipe is its simplicity. You likely have most of these ingredients in your pantry right now! The key is starting with fresh, quality corn and enhancing its natural flavor with just a few simple additions.
When selecting your corn, look for ears that have vibrant green husks that are tightly wrapped. The silk should be slightly sticky and golden or brown. Avoid ears with dry or black silk, or husks that are peeling back, as these can be signs of older corn. Gently feel the kernels through the husk to ensure they are plump and firm all the way to the tip.
Here’s what you’ll need to bring this recipe to life:
- 4 ears fresh corn on the cob, husked
- 2 tablespoons olive oil or melted butter
- 1 teaspoon smoked paprika: This spice is a powerhouse, bringing a wonderful depth and a hint of that smoky flavor you might associate with grilling, even though we’re using the oven.
- 1/2 teaspoon garlic powder: A savory essential that complements the sweetness of the corn beautifully. It’s easier to distribute evenly than fresh garlic for this application.
- 1/4 teaspoon black pepper: Adds a touch of warmth and subtle bite. Freshly ground is always best for maximum flavor.
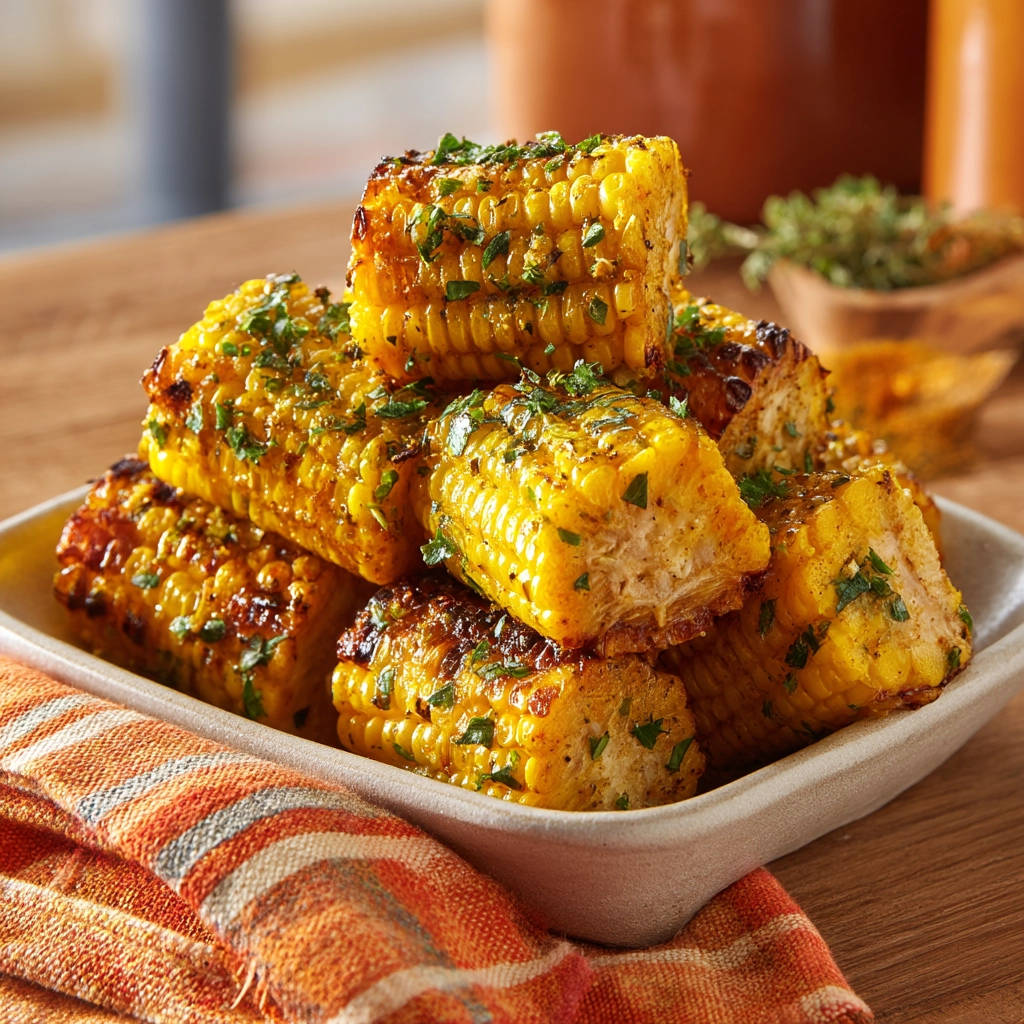
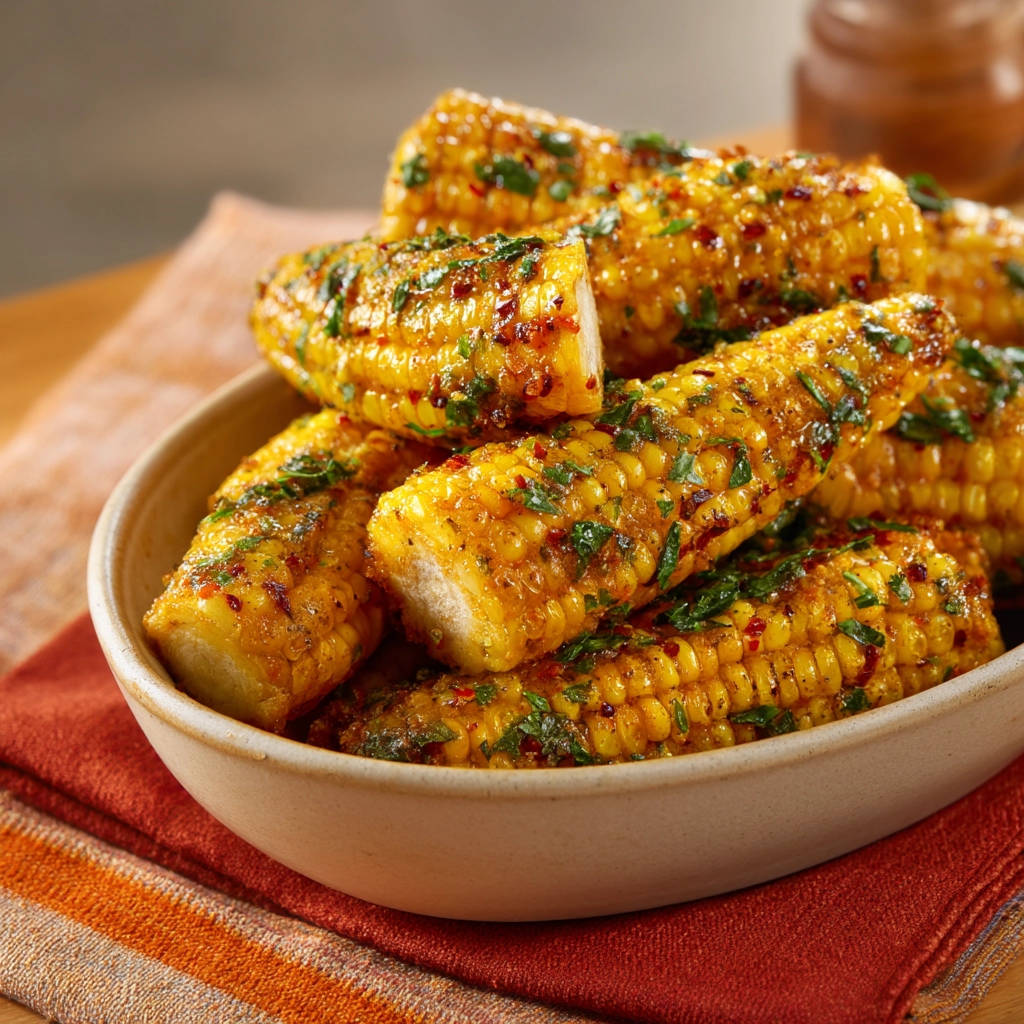
- 1/4 cup finely chopped fresh parsley: This isn’t just a garnish! Added at the end, it provides a burst of fresh, herbaceous flavor that brightens everything up.
- Salt to taste: Sweet corn loves salt. You’ll add this at the end to bring out all the flavors.
Using good quality olive oil will impart a fruity note, while melted butter will give you that classic rich, buttery corn flavor. Either works wonderfully, so choose based on your preference!
Making Perfectly Roasted Corn Chunks: A Step-by-Step Guide
Ready to transform simple ears of corn into an unforgettable side dish? This process is straightforward, and I’ll walk you through each step, explaining the ‘why’ behind the actions to ensure your success.
The magic really happens in the par-boiling step – it’s the secret weapon against dry corn. Let’s get started!
-
Prepare Your Workspace and Preheat: Before you do anything else, set your oven to preheat to a hot 400 degrees F (200 degrees C). A hot oven is crucial for roasting, as it allows the corn to cook quickly and develop those desirable charred edges without drying out. While the oven heats, line a large baking sheet with parchment paper. This makes cleanup incredibly easy later on – trust me on this one!
-
Cut the Corn into Chunks: Take each husked ear of corn and cut it crosswise into 3 or 4 smaller chunks. Using a sharp chef’s knife is essential here. Stand the corn on its end and carefully cut down through the cob. The chunks make serving easy and also allow more surface area to get deliciously roasted and seasoned.
-
Perform the Juicy Secret (Par-Boil): This is the critical step that prevents dry corn! Bring a large pot of water to a rolling boil on your stovetop. Once boiling vigorously, carefully add your corn chunks to the water. Let them boil for just 3 minutes. This brief bath helps hydrate the kernels from the inside out and partially cooks them, giving them a head start. It ensures they’ll be tender and juicy by the time they’re finished roasting in the dry heat of the oven.
-
Drain and Prepare Seasoning: After their short boil, carefully drain the corn chunks using a colander. Let them sit for a moment to shed excess water. While they drain, grab a large mixing bowl. In this bowl, combine the olive oil (or melted butter), smoked paprika, garlic powder, and black pepper. Give it a quick whisk to combine the seasonings evenly.
-
Toss to Coat: Add the drained, par-cooked corn chunks directly into the bowl with the oil and seasoning mixture. Use tongs or a large spoon to gently toss everything together. Ensure each corn chunk is well coated with the delicious mixture. This ensures every bite is bursting with flavor.
-
Arrange for Roasting: Spread the seasoned corn chunks out on your prepared baking sheet in a single layer. It’s important not to overcrowd the pan. If the corn is too crowded, it will steam instead of roast, and you won’t get those lovely charred bits. Use two baking sheets if necessary.
-
Roast to Perfection: Place the baking sheet in your preheated oven. Roast for 20 to 25 minutes. Halfway through the roasting time (around 10-12 minutes), take the pan out and use tongs to flip the corn chunks. This helps them brown and char evenly on all sides. Keep roasting until the kernels look tender and you see those beautiful caramelized, slightly darkened spots appearing.
-
Finish and Serve: Remove the roasted corn chunks from the oven. Transfer them back into the same mixing bowl you used for seasoning (no need for extra dishes!). Add the finely chopped fresh parsley and salt to taste. Toss gently to distribute the parsley and salt. The heat from the corn will help the flavors meld. Serve your perfectly juicy and flavorful roasted corn chunks immediately!
Expert Tips for Roasting Corn Chunks
Achieving roasted corn perfection is easy with this method, but a few extra tips can elevate your results even further:
- Don’t Skip the Par-Boil: Seriously, this is the key. Those 3 minutes in boiling water are the difference between dry corn and juicy corn.
- Pat Dry (Slightly): After draining the corn from the boil, letting them sit for a minute or two in the colander helps shed excess water. While you don’t need them bone dry, less surface moisture helps the oil and seasonings stick better and encourages roasting over steaming.
- High Heat is Your Friend: Roasting at 400°F (200°C) is important. This temperature is hot enough to develop flavor and char quickly without drying out the pre-cooked kernels.
- Don’t Overcrowd: As mentioned in the steps, giving the corn space on the baking sheet is crucial for proper roasting and charring.
- Customize Your Seasoning: The smoked paprika, garlic powder, and pepper mix is fantastic, but feel free to play! Add a pinch of cayenne pepper for a little heat, onion powder alongside garlic powder, or a dash of chili powder for a different smoky profile.
- Fresh Herbs Make a Difference: While dried parsley could technically work, fresh parsley adds a vibrant, clean finish that dried just can’t replicate. Try cilantro for a Mexican-inspired twist!
- Salt at the End: Salting corn too early can draw out moisture. Adding it right before serving ensures the salt enhances the flavor without compromising texture.
- Check for Doneness: Roasting time can vary based on your oven and the size of your corn chunks. Look for visual cues: tender kernels, some shriveling, and charred spots. Taste a piece if unsure!
Serving Suggestions for Roasted Corn Chunks
These juicy seasoned roasted corn chunks are incredibly versatile and make a fantastic companion to so many dishes. Their sweet, savory, and slightly smoky flavor profile complements a wide range of main courses.
Think about pairing them with grilled favorites like Grilled Lemon Herb Chicken or Pan-Seared Steak. They’re also a perfect side for Juicy Chicken Skewers or juicy burgers.
They aren’t just for grilling season, though! Enjoy them alongside oven-roasted meats, meatloaf, or even simpler meals like pasta or rice bowls. They’re also a colorful and flavorful addition to grain bowls or a fantastic base for a simple corn salad.
Consider serving them with other roasted vegetables like Easy Crispy Roasted Potatoes or Crispy Roasted Brussels Sprouts for a complete roasted veggie feast. Don’t forget a fresh salad on the side, like an Easy Kale Salad, to complete the meal.
Your Roasted Corn Chunks Questions Answered (FAQ)
Have a few questions popping up? Let’s address some common queries about making delicious roasted corn chunks.
Can I use frozen corn instead of fresh?
This recipe is specifically designed for fresh corn on the cob because the par-boiling step helps hydrate and plump the fresh kernels before roasting. Frozen corn is already blanched, so the texture might be slightly different and it could potentially become mushy or still dry out if not handled carefully. While you could attempt it, the guaranteed juicy result comes from using fresh corn with the par-boiling technique.
How do I get more char on my corn chunks?
If you love heavily charred corn, you can increase the roasting time slightly, keeping a close eye on it. You can also use the broiler for the last 1-3 minutes, but watch it very closely as broilers can char things quickly, sometimes unevenly, and even burn them if you’re not attentive.
Can I make these Roasted Corn Chunks on the grill?
Absolutely! While the oven method is fantastic and consistent, you can adapt this for the grill. Par-boil the corn chunks as directed. Then, toss them with the oil and seasonings. Place them directly on a preheated grill (medium-high heat) or in a grill basket. Grill for about 10-15 minutes, flipping occasionally, until tender and charred to your liking. The par-boiling is still the key to preventing dryness on the grill!
What are some other seasoning ideas for Roasted Corn Chunks?
The basic oil and seasoning mix is a great starting point. You could add a pinch of cayenne pepper or chili flakes for heat. A squeeze of lime juice after roasting adds brightness. Parmesan cheese sprinkled on top right after they come out of the oven is also delicious. For a different flavor profile, try a sprinkle of cumin, coriander, or a smoky BBQ seasoning blend (check ingredients to ensure no pork).
How should I store and reheat leftover Roasted Corn Chunks?
Allow any leftovers to cool completely, then store them in an airtight container in the refrigerator for up to 3-4 days. To reheat, spread them on a baking sheet and warm in a 350°F (175°C) oven for 5-10 minutes until heated through. You can also gently warm them in a skillet on the stovetop.
Enjoy Your Delicious Roasted Corn Chunks!
There you have it – the simple secret to achieving perfectly juicy, flavorful, and slightly charred roasted corn chunks right in your oven. This recipe is easy enough for a beginner but yields results that will impress everyone.
Whether you’re looking for the perfect summer side dish, a way to brighten up a weeknight meal, or just really love delicious corn, this recipe is sure to become a favorite in your rotation. Give it a try and let me know what you think!
Did you try this recipe? How did your corn chunks turn out? Share your thoughts and any seasoning variations you loved in the comments below!
Seasoned Roasted Corn Chunks

Ingredients
- 4 ears fresh corn on the cob, husked
- 2 tablespoons olive oil or melted butter
- 1 teaspoon smoked paprika
- 1/2 teaspoon garlic powder
- 1/4 teaspoon black pepper
- 1/4 cup finely chopped fresh parsley
- Salt to taste
Directions
- Preheat oven to 400 degrees F (200 degrees C). Line a baking sheet with parchment paper for easy cleanup.
- Cut each ear of corn crosswise into 3 or 4 chunks.
- This is the trick for juicy corn: Bring a large pot of water to a boil. Add the corn chunks and boil for just 3 minutes. This par-cooking step helps keep the corn tender and moist during roasting.
- Carefully drain the corn chunks. In a large bowl, combine the olive oil or melted butter, smoked paprika, garlic powder, and black pepper.
- Add the par-cooked corn chunks to the bowl and toss until evenly coated in the oil and seasoning mixture.
- Spread the seasoned corn chunks in a single layer on the prepared baking sheet.
- Roast for 20-25 minutes, flipping the corn halfway through, until the kernels are tender and slightly charred in spots.
- Remove from the oven. In the same bowl used for seasoning (no need to wash), toss the hot corn chunks with fresh chopped parsley and salt to taste. Serve immediately.