

For years, I struggled with filled pastries, watching my beautifully fried shells succumb to a soggy fate mere minutes after filling. It was a disheartening culinary challenge, but through countless tests, I finally uncovered the single game-changing technique that guarantees your Quick Layered Cream Horns remain perfectly crisp, bite after glorious bite. This recipe isn’t just about a delicious treat; it’s about mastering the art of enduring pastry perfection, proving that gourmet results are entirely achievable in your home kitchen.
Why This Recipe for Quick Layered Cream Horns Belongs in Your Kitchen
Say Goodbye to Soggy Shells Forever: Our Crispness Guarantee
The frustration of a perfectly golden, crispy pastry turning soft and unappetizing is a common baker’s lament. This recipe, however, directly tackles that issue with its revolutionary filling preparation, ensuring your cream horn shells retain their delightful crunch long after being filled.
Our unique method actively prevents moisture transfer, delivering a crispness that lasts, transforming a delicate dessert into a reliably perfect treat every time.
Achieving Perfect Layers and Flaky, Golden Perfection
Beyond preventing sogginess, this recipe excels in creating visually stunning cream horns. You’ll achieve beautifully puffed, golden-brown shells with distinct, airy layers that are a testament to expertly handled puff pastry.
Each bite offers a satisfying crunch, leading to a smooth, rich cream filling, making for an unforgettable textural experience.
A Gourmet Treat, Simplified for Every Home Baker
While Quick Layered Cream Horns exude a professional, patisserie quality, this recipe streamlines the process. We leverage convenient ingredients and focus on clear, actionable steps that make achieving gourmet results surprisingly accessible.
Enjoy the satisfaction of crafting an impressive dessert with a manageable active time, perfect for any occasion.
Your Essential Toolkit for Flawless Cream Horns
The Iconic Shapes: Cream Horn Molds
Metal cream horn molds are indispensable for shaping the characteristic conical form of these pastries. Their sturdy, non-stick surface ensures the pastry holds its elegant shape during frying and releases easily once cooled.
Frying Safely and Successfully: Deep Pot, Thermometer, and Tongs
A deep pot or Dutch oven is crucial for safe deep-frying, allowing sufficient oil depth. A reliable deep-fry thermometer is paramount for maintaining the precise oil temperature needed for perfectly cooked, non-greasy shells.
Long, heat-resistant tongs are essential for safely placing, turning, and removing the delicate shells from the hot oil.
Precision and Presentation: Piping Bag and Star Tip
A large piping bag fitted with a wide star tip allows for quick, clean, and professional-looking filling. This ensures the cream is evenly distributed and beautifully presented, enhancing the overall appeal of your cream horns.
The Ricotta’s Best Friend: Cheesecloth or Fine Mesh Strainer
These tools are fundamental for the anti-soggy secret. A cheesecloth or fine mesh strainer, ideally lined with coffee filters, is necessary to efficiently drain excess liquid from the ricotta cheese.
This critical draining process ensures the ricotta filling is dense and dry, preventing it from moistening the pastry shell.
Unveiling the Ingredients for Irresistible Quick Layered Cream Horns
The Flaky Foundation: Frozen Puff Pastry Sheets
Utilizing pre-made frozen puff pastry sheets is a smart shortcut, delivering consistent flakiness and buttery flavor without the extensive effort of making pastry from scratch.
Ensure your pastry is fully thawed but still cold enough to handle easily, as this preserves its delicate layers.
The Anti-Soggy Dream Team: Whole Milk Ricotta and Cream Cheese
Whole milk ricotta, meticulously drained, forms the backbone of our firm, non-soggy filling. Its creamy texture provides substance and subtle sweetness.
Softened cream cheese adds a rich tang and stabilizes the filling, contributing to its luxurious smoothness and ensuring it holds its shape beautifully.
Sweetness and Aroma: Powdered Sugar, Vanilla Extract, and Fine Salt
Powdered sugar sweetens the filling and contributes to its airy texture, dissolving smoothly without grittiness. A touch of vanilla extract infuses a classic, warm aroma that complements the dairy perfectly.
Fine salt is a flavor enhancer, balancing the sweetness and brightening all the other notes in the cream filling.
Golden Glaze and Frying Medium: Large Egg and Vegetable Oil
A beaten large egg serves as an egg wash, imparting a beautiful golden-brown color and a slight sheen to the pastry shells during frying. It also helps seal the pastry edges.
Vegetable oil, with its high smoke point and neutral flavor, is the ideal choice for deep-frying, ensuring the shells fry evenly to a crisp, non-greasy finish.
The Finishing Touches: Toasted Sliced Almonds and Extra Powdered Sugar
Toasted sliced almonds offer a delightful textural contrast and a nutty aroma, elevating the presentation and flavor profile. They adhere beautifully to the filled ends of the horns.
A final dusting of extra powdered sugar just before serving adds an elegant, classic finish, enhancing visual appeal and providing a delicate, melt-in-your-mouth sweetness.
The Core Secret: Preparing the Anti-Soggy Ricotta Filling Base (Crucial Step!)
Why Draining Ricotta is Your Golden Rule for Crispness
The fundamental reason behind draining ricotta cheese is simple yet profound: moisture. Ricotta naturally contains a significant amount of water, which, if not removed, will inevitably migrate into your crispy pastry shells.
This moisture transfer is the primary culprit behind soggy pastries. By thoroughly draining the ricotta, we eliminate this source of sogginess, guaranteeing a filling that supports and preserves the delicate crunch of your cream horns.
Step-by-Step Draining for Optimal Ricotta Perfection
To begin this crucial step, place the whole milk ricotta cheese into a cheesecloth or a fine mesh strainer that has been lined with coffee filters. Position this assembly over a bowl to catch the liquid.
Cover the setup and refrigerate it for at least 4 hours, or ideally overnight. You’ll know it’s properly drained when a significant amount of liquid has collected in the bowl, and the ricotta itself is noticeably firmer and drier. Discard the collected liquid before proceeding.
Mastering the Art of Quick Layered Cream Horns: A Detailed Guide
Prepping the Pastry: From Sheet to Elegant Strips
- Thaw and Cut:
Gently unfold one sheet of thawed puff pastry on a lightly floured surface. Using a sharp knife or pastry wheel, cut the pastry sheet into 6 strips, each approximately 1 inch wide.
Ensuring even strips helps them bake uniformly and wrap smoothly around the molds, creating a consistent final product.
- The Golden Glaze: Egg Wash Application:
Lightly brush each pastry strip with the beaten egg wash.
This egg wash provides a beautiful golden sheen during frying and helps seal the pastry layers, preventing them from unraveling.
Expert Wrapping: Shaping Your Cream Horn Shells
- Wrap with Precision:
Starting from the pointed end, wrap each pastry strip diagonally around a metal cannoli form or cream horn mold, slightly overlapping the pastry as you go.
The slight overlap is crucial for creating a continuous, sealed shell without gaps, ensuring structural integrity during frying and maintaining the horn shape.
- Secure the Edges:
Gently pinch the edges where the pastry strip ends meet the next layer to ensure they hold their shape.
This crucial step prevents the pastry from unraveling when it hits the hot oil, maintaining the horn’s iconic structure and a clean finish.
Frying for Flawless Crispness: Achieving Golden Perfection
- Heat the Oil:
In a deep pot or Dutch oven, heat the vegetable oil to a consistent 350°F (175°C).
Using a reliable thermometer is vital for perfect frying; too cool, and the pastry absorbs excess oil, becoming greasy; too hot, and it burns before cooking through, remaining raw inside.
- Fry to Golden Perfection:
Carefully place 3 or 4 wrapped shells into the hot oil, frying them for 2 to 3 minutes, turning gently, until they are deep golden brown and beautifully puffed.
Avoid overcrowding the pot, as this will lower the oil temperature and lead to uneven cooking, compromising crispness.
- Drain Immediately:
Using tongs, remove the fried shells from the oil and immediately transfer them to a paper towel-lined plate.
Prompt draining removes excess oil and is essential for maintaining their delightful crispness and preventing them from becoming greasy.
Cooling and Preparing the Shells for Filling
- Handle with Care:
Once the shells are cool enough to handle, carefully slide them off the metal forms.
Allowing them to cool slightly prevents burns and makes removal smoother, minimizing the risk of breakage.
- Complete Cooling is Key:
Allow the shells to cool completely before attempting to fill them.
Warm shells will cause the cream filling to melt, compromising both texture and crispness and potentially leading to a soggy pastry.
Crafting the Stiff and Airy Cream Filling
- Combine Ingredients:
In a large bowl, combine the completely drained ricotta, softened cream cheese, 1/2 cup powdered sugar, vanilla extract, and salt.
Ensure the cream cheese is softened to room temperature for a truly smooth, lump-free mixture that creams easily.
- Beat to Perfection:
Beat the mixture on medium speed until it is completely smooth, wonderfully airy, and very stiff.
The stiffness of this filling is paramount to preventing shell sogginess; do not under-beat, as adequate aeration ensures the filling holds its structure and resists moisture release.
The Grand Finale: Filling, Garnishing, and Serving
- Pipe with Style:
Spoon the finished cream filling into a large piping bag fitted with a wide star tip. Pipe the filling immediately into the cooled pastry shells, filling from both ends toward the middle for even distribution.
A wide star tip creates a beautiful, professional swirl, making your cream horns visually stunning and enticing.
- Add a Crunchy Finish:
Dip the exposed ends of the filled pastries into the toasted sliced almonds.
This adds a delightful textural contrast and an elegant, nutty flavor, enhancing the overall gourmet experience.
- The Perfect Dusting:
Dust generously with extra powdered sugar just before serving to achieve the beautiful finish.
This final touch adds a subtle sweetness and a classic pastry shop appearance, making your Quick Layered Cream Horns truly irresistible.
Chef’s Insights: Tips for Flawless Quick Layered Cream Horns
The Magic of Precise Temperature Control for Frying
Maintaining a consistent oil temperature of 350°F (175°C) is non-negotiable for perfectly golden, crispy shells. Use a reliable thermometer and adjust heat as needed, especially after adding cold pastry, to prevent greasy or undercooked results.
Patience Pays Off: Don’t Rush the Ricotta Drainage
The 4-hour (or ideally overnight) draining time for the ricotta is the absolute cornerstone of this recipe’s anti-soggy promise. Do not shortchange this step; drier ricotta equals significantly crispier shells that truly last.
The Power of a Stiff and Velvety Filling
Ensure your cream filling is beaten until it’s very stiff and airy, holding firm peaks. This robust consistency is essential for supporting the pastry shell from within and preventing any moisture transfer that could lead to sogginess, preserving the crispness.
Handling Puff Pastry for Optimal Flakiness
Work quickly with puff pastry to keep it cold, which helps maintain its flaky layers during baking. Avoid overworking the dough, and ensure your strips are evenly cut and securely wrapped around the molds for consistent results.
Timing Your Powdered Sugar Dusting for Visual Appeal
Always dust with extra powdered sugar just before serving. This prevents the sugar from absorbing ambient moisture and disappearing, ensuring that beautiful, fresh-from-the-bakery finish is seen and enjoyed immediately.
Troubleshooting Common Quick Layered Cream Horns Challenges
“My Cream Horn Shells Are Soggy After Filling!”
This is almost always due to insufficient draining of the ricotta cheese. Ensure the ricotta is very dry, ideally drained overnight. Also, make sure the shells are completely cool before filling, and for best results, fill them just before serving.
“My Pastry Unraveled During Frying!”
This typically happens if the pastry strips weren’t pinched securely enough where they overlap on the molds. Ensure adequate overlap and firmly pinch the edges together. Also, check your oil temperature; too low, and the pastry might not seal quickly enough.
“The Cream Filling is Lumpy or Not Stiff Enough”
Lumpy filling suggests the cream cheese wasn’t softened enough before mixing; it needs to be at room temperature for a smooth blend. If the filling isn’t stiff, the ricotta likely still contained too much moisture, or it wasn’t beaten long enough to incorporate sufficient air and achieve a firm consistency.
“My Cream Horns Taste Too Oily”
If your shells are oily, the frying oil temperature was likely too low. The pastry will absorb excess oil if it doesn’t cook quickly enough to form a crust. Ensure your oil maintains a steady 350°F (175°C) and promptly drain the shells on paper towels after frying.
Elevating Your Quick Layered Cream Horns: Serving & Storage Tips
Creative Serving Suggestions for an Impressive Display
Arrange your filled cream horns elegantly on a platter, perhaps with a dusting of cocoa powder or a few fresh berries for color. A light drizzle of raspberry coulis or melted chocolate can add an extra touch of gourmet flair, making them perfect for special occasions.
Storing Your Masterpieces for Lasting Freshness
Unfilled, fried shells can be stored in an airtight container at room temperature for up to 2-3 days, or frozen for up to a month. The prepared cream filling can be refrigerated for up to 2 days. Always assemble and fill just before serving to maintain ultimate crispness.
Make-Ahead Magic: Prep Smart, Serve Fresh
Take full advantage of the draining ricotta step by preparing it the day before. You can also fry and cool the shells ahead of time, storing them until needed. This proactive preparation allows you to assemble and serve these delightful Quick Layered Cream Horns with minimal active time on the day of your event, making entertaining stress-free. For another delightful make-ahead dessert, consider our easy apple walnut baked oatmeal cups.
Your Quick Layered Cream Horns Questions Answered
Can I Bake Quick Layered Cream Horns Instead of Frying?
While frying gives these cream horns their signature crispness and rich flavor, you can bake them as an alternative. Bake at 400°F (200°C) for 15-20 minutes, or until golden brown and puffed. The texture will be flakier rather than fried-crispy, but still delicious.
What if I Don’t Have Cream Horn Molds?
If you don’t have metal cream horn molds, you can improvise by creating cones from aluminum foil. Roll heavy-duty foil into a cone shape and grease it well before wrapping the pastry. Ensure they are sturdy enough to handle the frying process without collapsing.
Is it Possible to Make the Cream Filling Dairy-Free?
Achieving the precise texture and richness of this filling can be challenging without dairy. However, you could experiment with drained dairy-free ricotta alternatives and vegan cream cheese, though the final consistency and flavor may vary. For more inspiration on delicate cream-filled pastries, check out our recipe for easy cream puffs that never collapse.
How Long Do Quick Layered Cream Horns Stay Crispy Once Filled?
Thanks to our anti-soggy secret, these Quick Layered Cream Horns maintain their crispness much longer than traditional versions. They are best enjoyed within a few hours of filling, but can stay delightfully crisp for a full day if stored properly in an airtight container at room temperature.
Ready to Impress? Your Quick Layered Cream Horns Await!
You now possess the secret to creating truly unforgettable Quick Layered Cream Horns – pastries that deliver on their promise of enduring crispness and creamy indulgence. No more sad, soggy shells; only perfectly textured, beautifully presented treats that will earn you rave reviews and solidify your reputation as a master baker.
Don’t let the thought of frying intimidate you; this recipe simplifies the process, making gourmet results achievable in your own kitchen. Gather your ingredients, embrace the anti-soggy secret, and prepare to delight your taste buds and impress your guests with these show-stopping delights.
We encourage you to try this recipe, share your magnificent creations with us on social media, and savor every crispy, creamy bite. Happy baking!

Quick Layered Cream Horns
Course: PastryCuisine: American CuisineDifficulty: easy12
rolls20
minutes15
minutes35
minutesAmerican Cuisine
Ingredients
1 (17.3 ounce) package frozen puff pastry sheets, thawed
1 large egg, beaten (for egg wash)
2 cups whole milk ricotta cheese
1 (8 ounce) package cream cheese, softened
1/2 cup powdered sugar, plus extra for dusting
1 teaspoon vanilla extract
1/4 teaspoon fine salt
1 cup sliced almonds, toasted
4 cups vegetable oil, for frying
Directions
- Prepare the Anti-Soggy Filling Base (The Crucial Step): This step is the key to preventing sogginess. Place the ricotta cheese in a cheesecloth or a fine mesh strainer lined with coffee filters over a bowl. Cover and let it drain in the refrigerator for at least 4 hours, or ideally overnight, until all excess liquid has been removed. The drier the ricotta, the crispier your shell will remain. Discard the drained liquid.
- Prep the Pastry: Lightly flour a clean surface. Unfold one sheet of thawed puff pastry. Cut the pastry sheet into 6 strips, approximately 1 inch wide. Lightly brush the strips with egg wash.
- Form the Rolls: Wrap each strip diagonally around a metal cannoli form or cream horn mold, slightly overlapping the pastry as you go. Pinch the edges gently where the pastry strip ends meet the next layer to ensure they hold their shape.
- Fry the Shells: Heat the vegetable oil in a deep pot or Dutch oven to 350 degrees F. Carefully place the wrapped shells into the hot oil, frying 3 or 4 at a time. Fry for 2 to 3 minutes, turning gently, until they are deep golden brown and puffed. Remove with tongs and immediately transfer to a paper towel lined plate.
- Cool and Remove Forms: Once the shells are cool enough to handle, carefully slide them off the metal forms. Allow the shells to cool completely before filling.
- Finish the Filling: In a large bowl, combine the drained ricotta, softened cream cheese, 1/2 cup powdered sugar, vanilla extract, and salt. Beat on medium speed until the mixture is completely smooth, airy, and very stiff. The stiffness of this filling is essential for maintaining shell crispness.
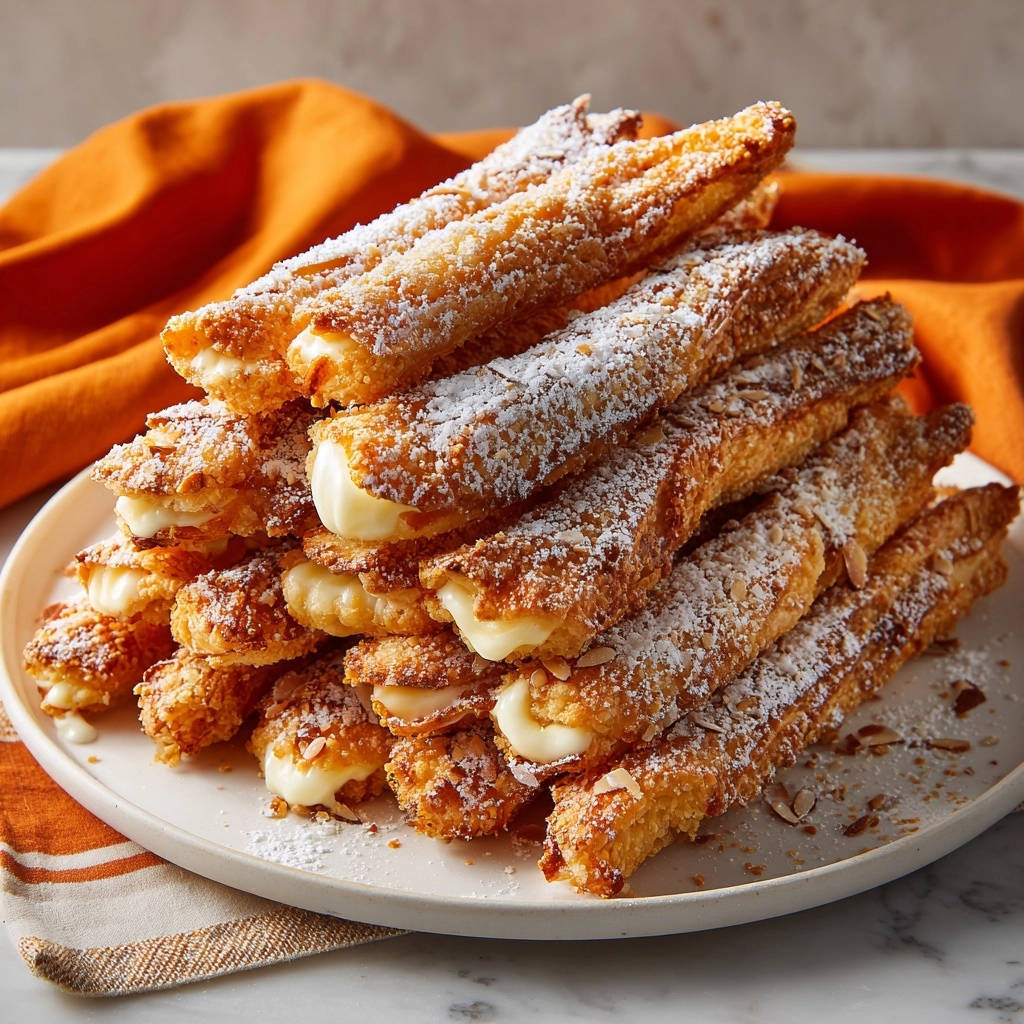
- Assemble and Serve: Spoon the finished cream filling into a large piping bag fitted with a wide star tip. Pipe the filling immediately into the cooled pastry shells, filling from both ends toward the middle. Dip the exposed ends of the filled pastries into the toasted sliced almonds. Dust generously with extra powdered sugar just before serving to achieve the beautiful finish shown in the picture. The crispy shell will hold up beautifully, thanks to the drained filling.
Notes
- Ricotta draining is critical for crisp, non-soggy shells. Allow at least 4 hours, or overnight.


