
Ever popped a red velvet cake ball in your mouth only for it to crumble into a sticky mess? Those frustrating failures end here. This recipe delivers smooth, sturdy red velvet cake bites that hold their shape through every dip, thanks to a spot-on cream cheese ratio and a firm-chill trick. No more no-bake cake truffles turning into disasters.
Most home cooks mess up the balance, so their cake balls fall apart or get soggy. However, this method fixes that with precision. You’ll get glossy, poppable treats that taste like velvet heaven and look pro-level.
The secret lies in the exact 4:1 cake-to-cream cheese ratio. It binds without sogginess, and that 30-minute fridge chill locks everything in. Trust me, one bite and you’ll crave these red velvet cake balls nonstop.
Why Red Velvet Cake Balls Disintegrate (And How to Fix It)
Red velvet cake balls often crumble because folks skimp on cream cheese or skip proper chilling. Without enough binder, the crumbs lack structure. In addition, dipping warm balls causes instant meltdown.
This recipe’s 4:1 ratio uses cream cheese’s fats to coat every crumb, creating a dough that stays firm. Therefore, your red velvet cake balls won’t disintegrate. Science backs it: cream cheese acts as an emulsifier, preventing sogginess while holding shape.
Picture failed balls versus these sturdy ones, coated in glossy white chocolate. The difference? Precise ratios and chill time. No more heartbreak at parties.
The Cream Cheese-to-Cake Ratio Secret
Stick to 4 cups cake crumbs and 8 oz softened cream cheese. This keeps the dough firm, not mushy. Softened cream cheese mixes evenly, so fats bind crumbs perfectly.
Other recipes overload cream cheese, leading to greasy balls. However, this balance ensures sturdy red velvet cake balls every time. You’ll feel the dough come together smoothly in your hands.
Firm-Chill Technique for Structural Integrity
Chill balls in the fridge for 30 minutes, not the freezer. This solidifies fats without cracking. Room-temp dipping spells disaster, as warmth causes breakage.
Therefore, the chill boosts red velvet cake balls’ stability. It preps them for chocolate adhesion without crumbling. Simple, but game-changing.
Core Ingredients for Sturdy Red Velvet Cake Balls
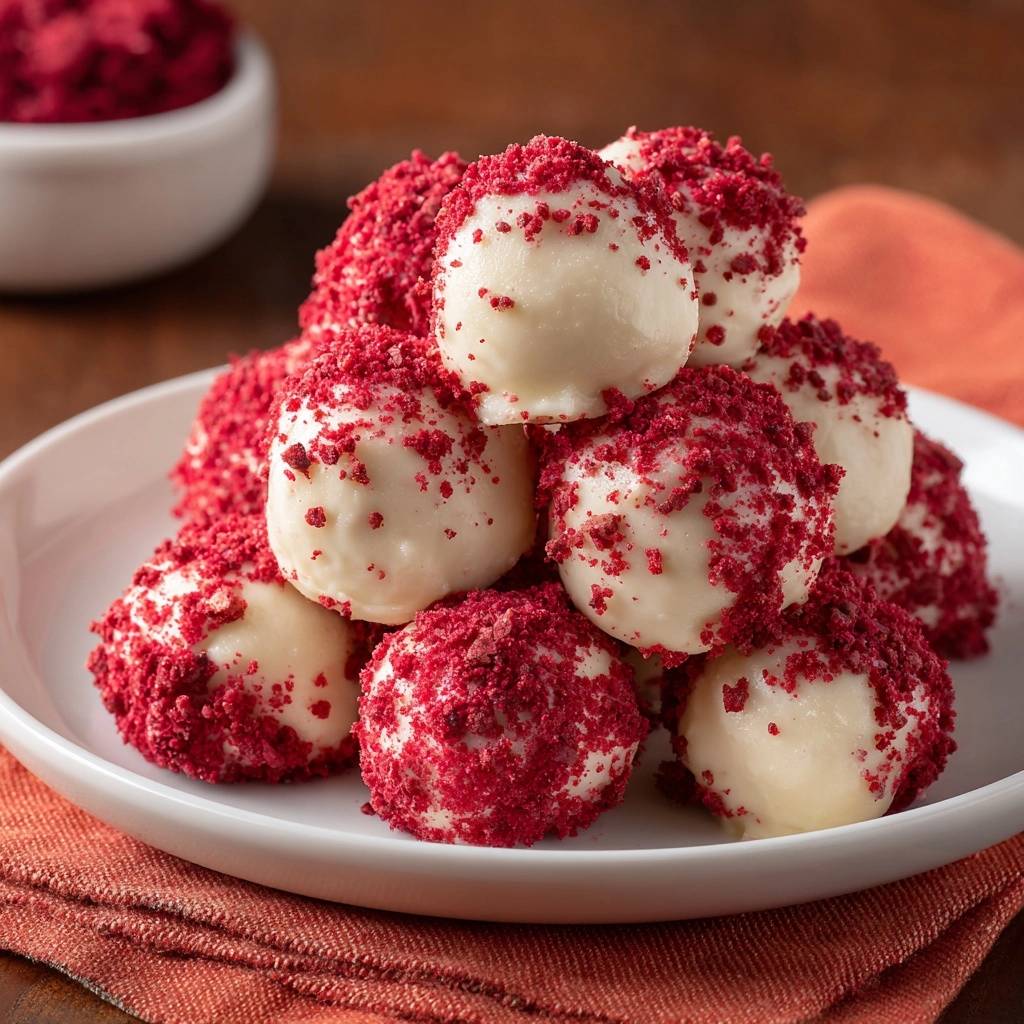
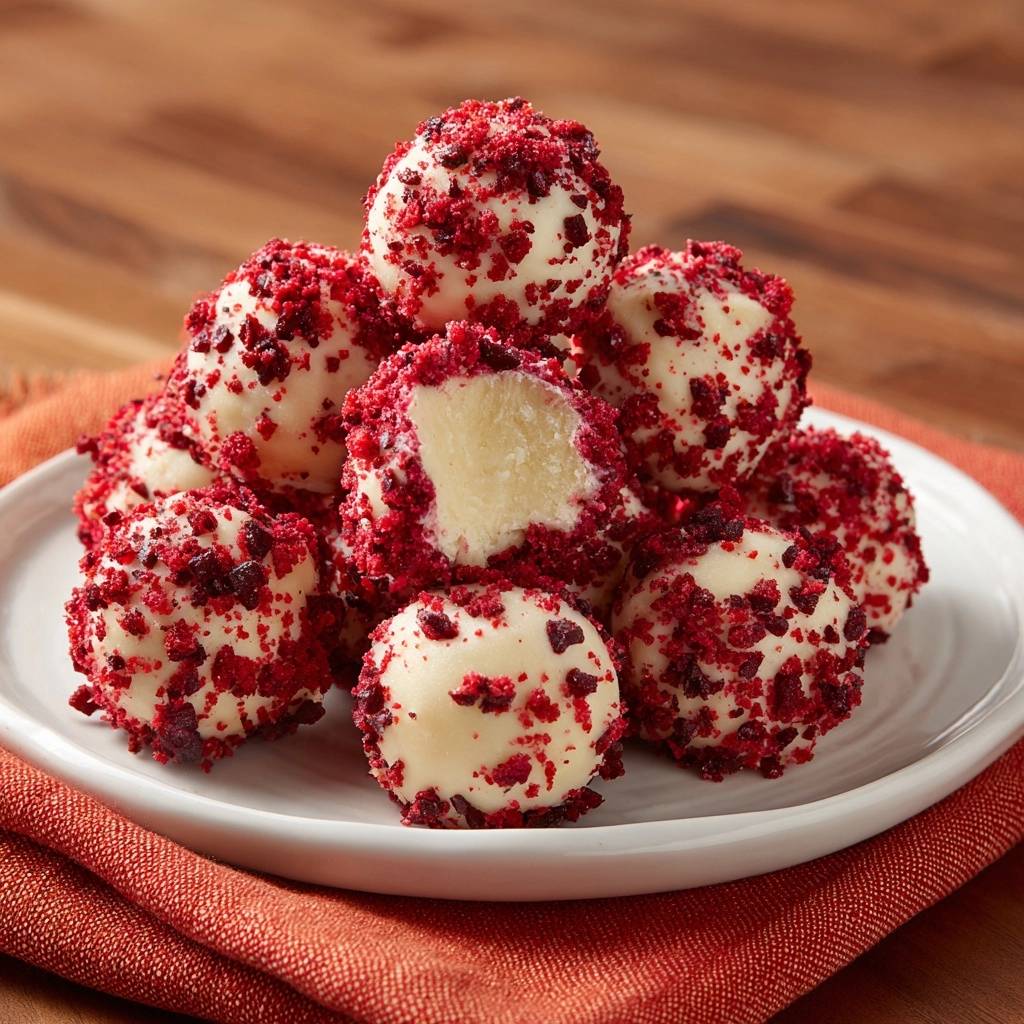
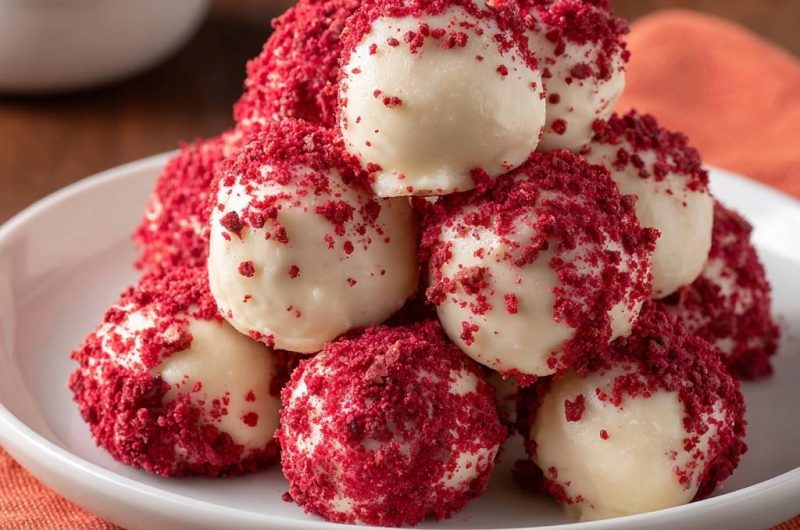
Start with a box of red velvet cake mix or 4 cups baked crumbs for the base. Cream cheese, 8 oz softened, binds it all. White chocolate chips, 12 oz, form the shell, and red crumbs or sanding sugar add festive coating.
Full-fat cream cheese works best; low-fat versions fail to bind. In addition, quality chips melt smoothly. These picks ensure your red velvet cake balls ingredients deliver perfection.
No box mix? Bake from scratch, but cool fully. Substitutions like neufchâtel weaken structure, so stick close.
Choosing Box Mix vs. Homemade Cake Crumbs
Duncan Hines red velvet mix gives consistent, fine crumbs. Homemade offers control, but bake and cool evenly to avoid dense spots. Crumble finely for best texture.
Box mix saves time without sacrificing taste. Either way, full cooling prevents steam from softening the dough.
White Chocolate Melting for Smooth Dipping
Use 12 oz chips, not bark, for perfect viscosity. Ghirardelli or Guittard prevent seizing. Melt in bursts to avoid scorching.
This ensures a silky dip that coats red velvet cake balls evenly. Chips hold up better than bars.
History and Evolution of Red Velvet Cake Balls
Red velvet traces back to the 1920s Waldorf Astoria, a Southern cake with cocoa and red hue from food coloring. It evolved into bite-sized treats in the 2000s Pinterest era. No-bake cake balls turned classics into party staples.
White chocolate contrasts the red perfectly, mimicking cream cheese frosting. Therefore, red velvet cake balls became a twist on tradition. Fun fact: the color popped from beets originally, now it’s reliable dye.
From Southern Cakes to Bite-Sized Truffles
Cake pops inspired crumbling cake into balls, refined to sturdy versions. Southern roots met modern no-bake hacks. Cultural hits at holidays keep them popular.
These red velvet cake balls nod to grandma’s cake, now portable and poppable.
Step-by-Step: Forming Perfect Red Velvet Cake Balls
Bake the cake per package, cool fully, then crumble into fine bits. Mix in softened cream cheese by hand. Mash until uniform dough forms, no dry spots.
The dough smells rich and holds when squeezed. This step sets up crumble-free success. Pro tip: wear gloves if hands get sticky.
Baking and Crumbling the Red Velvet Base
Follow package for even bake, cool 2 hours. Crumble by hand or fork for fine texture. Lumpy crumbs lead to weak balls, so press through fingers.
You’ll see moist, even crumbs ready to bind.
Mixing Dough with Precise 4:1 Ratio
Soften cream cheese 30 minutes. Mash into crumbs firmly but don’t overwork. Dough feels like playdough, smooth and pliable.
No air pockets means no weak spots later.
Shaping and Chilling Red Velvet Cake Balls
Scoop 1-tablespoon portions, roll tightly. Press to eliminate voids, place on parchment. Chill fridge 30 minutes until firm.
Uniform size ensures even dipping. The chill makes them sturdy, ready for chocolate. Oh man, they feel solid and promising.
Rolling Tight for Air-Free Balls
Roll with palm pressure for smooth spheres. Aim for 1-inch balls. Consistency prevents dipping mishaps.
Tight rolls mean no cracks later.
Dipping and Coating Red Velvet Cake Balls
Melt chocolate in 30-second bursts, stir smooth. Dip chilled ball with fork, tap excess. Roll immediately in red crumbs, chill 1.5 hours.
Speed keeps structure intact. The result? Glossy, festive red velvet cake balls that snap satisfyingly.
Melting White Chocolate Without Seizing
Microwave 30 seconds, stir vigorously. Repeat until fluid, under 110°F. Add a teaspoon oil if thick.
Smooth melt clings perfectly.
Quick Coating in Red Cake Crumbs
Roll wet balls in crumbs for stick. Sanding sugar works too, adds crunch. Even coating looks pro.
Chill sets it fast.
The Science of Non-Crumbling Red Velvet Cake Balls
Cream cheese fats emulsify with cake crumbs, forming a stable matrix. Chilling crystallizes structure for strength. Dipping works because cold surfaces quick-set chocolate.
This combo defies gravity, no falls. Fats bind like glue, chill adds snap.
Fat Binding and Emulsion Chemistry
Casein proteins in cream cheese link crumbs. 4:1 ratio optimizes without excess moisture. Result: firm, sliceable dough.
Chilling Effects on Chocolate Adhesion
Cold balls create surface tension for quick chocolate set. Prevents sliding off. Perfect physics for poppable treats.
Avoiding Common Red Velvet Cake Balls Mistakes
Overmixing turns dough soggy; stop when uniform. Skip chill, and they crack on dip. Hot chocolate melts balls instantly.
Fix with ratios and fridge time. Therefore, troubleshooting red velvet cake balls gets easy.
Overmixing and Sogginess Pitfalls
Mix just until combined, dough holds shape. Excess work releases moisture. Test: pinch doesn’t stick to fingers.
Dipping Disasters and Fixes
Use fork under ball, tap gently. Match cold balls to warm-not-hot chocolate. Rework cracks by re-chilling.
Flavor Variations for Red Velvet Cake Balls
Swap base to chocolate cake, dip in dark chocolate for contrast. Add peppermint extract to dough. Keep red with sprinkles or nuts.
Stuff with extra cream cheese for gooey center. These tweaks keep the red velvet vibe fun.
Chocolate-Dipped vs. White Chocolate Versions
Dark chocolate adds bitterness to sweet cake. White keeps classic contrast. Both shine with red coating.
Make-Ahead and Storage for Red Velvet Cake Balls
Store airtight in fridge up to 1 week. Freeze up to 2 months, thaw in fridge overnight. No sweating if sealed well.
Package in tins for gifting. Pro tip: freeze pre-dipped dough balls for quick batches.
Freezing Dough Balls Pre-Dip
Flash-freeze shaped balls on sheet, then bag. Thaw in fridge before dipping. Saves time for holidays.
Pairing Red Velvet Cake Balls with Drinks and Desserts
Coffee cuts the sweetness perfectly. Milk balances richness. Hot cocoa amps cozy vibes.
Layer on holiday boards with cookies. Sparkling cranberry juice refreshes alongside.
Troubleshooting Red Velvet Cake Balls Issues
Cracking During Dipping Solutions
Over-chilling dries them out; stick to 30 minutes. Warm chocolate slightly if needed. Re-roll cracks post-dip.
Sticky or Sweaty Balls Fixes
High humidity? Chill longer and store airtight. Avoid room temp display over 2 hours.
Uneven Coating Troubleshooting
Press crumbs firmly while wet. Shake off excess chocolate first. Uniform rolls prevent bald spots.
FAQ
How do I store leftover red velvet cake balls?
Keep them in an airtight container in the fridge for up to 1 week. They freeze beautifully for 2 months; wrap individually in plastic, then bag tightly. Thaw in the fridge overnight to avoid sweating, and they’ll taste fresh. Don’t leave at room temp over 2 hours to prevent softening.
Why do my red velvet cake balls crumble when dipping?
The most common issue is skipping the 30-minute firm chill or wrong ratio. Without chill, fats stay soft and break under chocolate weight. Fix by using exactly 4 cups crumbs to 8 oz cream cheese, roll tight, and fridge-chill before dipping. Test one first if unsure.
Can I substitute ingredients in red velvet cake balls?
Swap box mix for homemade crumbs, but measure 4 cups finely crumbled. Use full-fat cream cheese; low-fat won’t bind well and leads to crumbly results. For white chocolate, chips beat bark, but add 1 tsp coconut oil if it thickens. Avoid milk chocolate, as it melts too soft.
Why is my dough too sticky or dry for red velvet cake balls?
Sticky means too much cream cheese or humid day; add 1/4 cup more crumbs. Dry? Crumbs were overbaked or not softened cream cheese; knead in 1 tsp milk. Always mash by hand for even mix, and dough should form a firm ball without cracking.
How do I melt white chocolate without it seizing for cake balls?
Microwave in 30-second bursts, stirring well each time. Stay under 110°F to avoid graininess. If seizing starts, stir in 1 tsp neutral oil like vegetable. Use quality chips, and dip chilled balls quickly for best adhesion without lumps.
Can I make red velvet cake balls ahead for a party?
Yes, shape and chill dough balls up to 2 days ahead, or freeze for a month. Dip day-of for freshness. Fully made balls store 1 week in fridge, but crisp up coating by chilling briefly before serving. Perfect for holidays without last-minute stress.
Red Velvet Cake Balls
Course: DessertCuisine: AmericanDifficulty: easy4
40 cake balls30
minutes30
minutes120
MinutesAmerican
Ingredients
1 box red velvet cake mix (or 4 cups baked and cooled red velvet cake crumbs)
8 oz cream cheese, softened
12 oz white chocolate chips
1/4 cup red cake crumbs or red sanding sugar (for coating)
Directions
- Bake the red velvet cake according to package instructions (or use pre-baked cake), cool completely, then crumble into fine crumbs in a large bowl.
- Add softened cream cheese to the crumbs. Mash and mix with your hands or a spoon until it forms a uniform dough – this exact 4:1 cake-to-cream cheese ratio is the anti-crumbly bind that holds everything together without sogginess.
- Scoop 1-tablespoon portions and roll tightly into smooth balls, pressing firmly to eliminate air pockets. Place on a parchment-lined baking sheet.
- Chill balls in the fridge (not freezer) for 30 minutes – this key firm-chill step solidifies the structure so they won’t crumble when dipped, while keeping them soft enough for perfect chocolate adhesion.
- Melt white chocolate chips in a microwave-safe bowl in 30-second bursts, stirring until smooth.
- Dip each chilled ball into melted chocolate using a fork, tap off excess, and place back on the sheet. Work quickly – the chill prevents breakage.
- Immediately roll wet balls in red crumbs or sanding sugar for even coating. Return to sheet.
- Chill 1.5 hours until set. Serve or store in fridge. Enjoy crumble-free perfection!
Notes
- Use the 4:1 cake-to-cream cheese ratio for the perfect bind. Chill in fridge (not freezer) before dipping to prevent crumbling.


