
I remember the early days of baking, when creating those stunning, deeply cracked Red Velvet Crinkle Cookies felt like a culinary enigma. The powdered sugar would vanish, the crinkles would barely appear, and the result was far from the picture-perfect vision I had in mind.
Through countless trials, I finally cracked the code, discovering the precise techniques that guarantee gorgeously deep crinkles and an irresistibly soft, chewy texture every single time. This isn’t just another recipe; it’s your definitive guide to baking Red Velvet Crinkle Cookies that will impress everyone.
The “Cracked Code” to Flawless Red Velvet Crinkle Cookies
This recipe isn’t about guesswork; it’s engineered for success, delivering cookies that are both visually stunning and profoundly delicious. We tackle the common frustrations head-on, ensuring your treats achieve that coveted crinkled effect.
Forget powdered sugar that melts away or faint, uninspiring cracks. Our method focuses on two critical, often overlooked steps: meticulous dough chilling and a unique two-step powdered sugar rolling process.
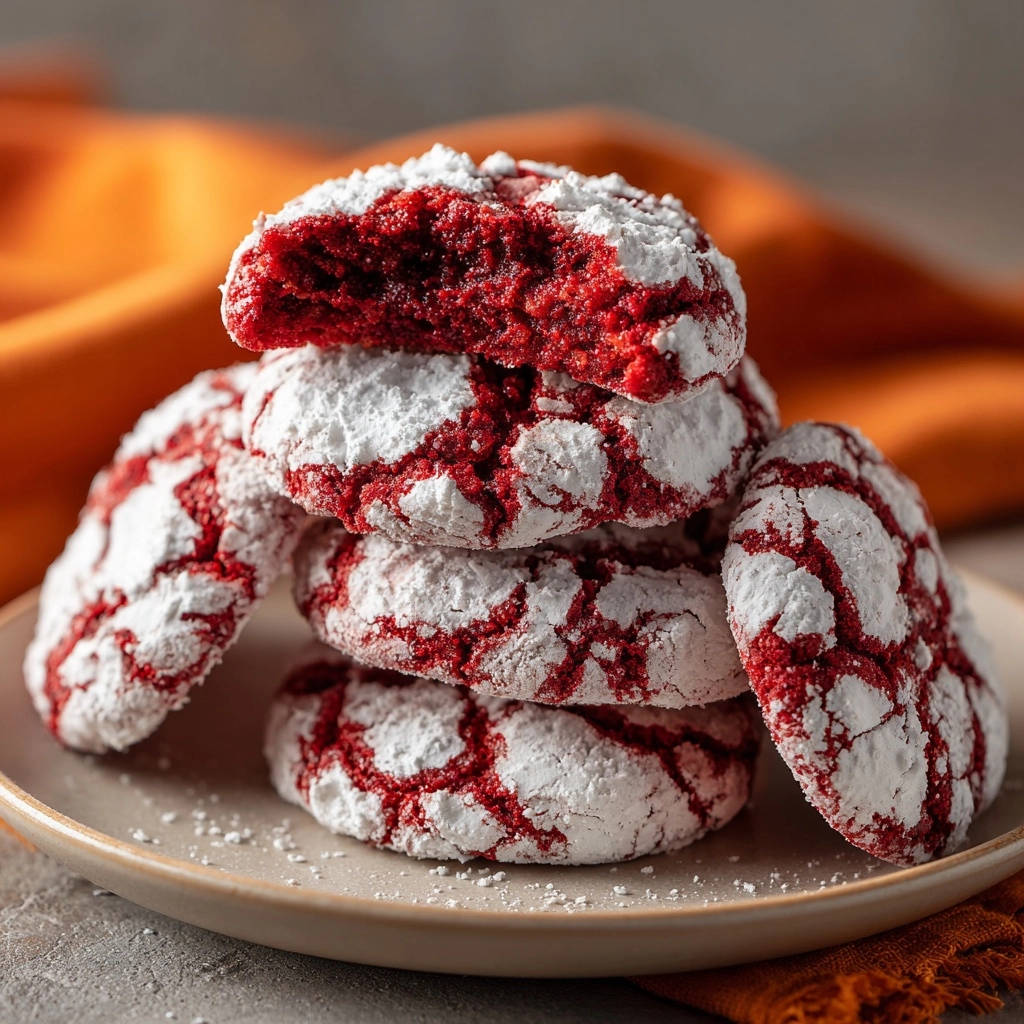
These techniques work in harmony to produce Red Velvet Crinkle Cookies that are consistently picture-perfect, boasting a vibrant red hue and an incredibly soft, chewy interior with every bite.
Essential Ingredients for Irresistible Red Velvet Crinkle Cookies
High-quality ingredients are the foundation of any great cookie. Here’s what you’ll need and why each component is crucial for our Red Velvet Crinkle Cookies.
Flour & Cocoa: The Foundation of Flavor
All-purpose flour forms the structural base, giving our cookies their perfect chew.
Unsweetened cocoa powder provides a subtle chocolate note and darkens the red for a classic, rich appearance.
Sweeteners & Leavening: Achieving Perfect Texture
Granulated sugar ensures a sweet, tender crumb that complements the cocoa and adds to the cookie’s softness.
Baking soda reacts with the buttermilk to create a gentle rise, contributing to a wonderfully soft and airy texture.
A pinch of salt balances the sweetness, enhancing all the other flavors in the dough.
The Wet Team: Richness and Binding
Softened unsalted butter creates a rich, creamy base for our dough, ensuring a melt-in-your-mouth feel and even spread.
Large eggs bind the ingredients together, adding essential moisture and contributing to the cookie’s overall tenderness and structure.
The Signature Red Velvet Hue & Tang
Red food coloring is crucial for the iconic vibrant color of Red Velvet Crinkle Cookies, making them instantly recognizable.
Buttermilk adds a subtle tang, enhancing the classic red velvet flavor and interacting with the baking soda for perfect lightness.
The Crinkle Magic: Powdered Sugar Duo
Our recipe uniquely calls for two separate quantities of powdered sugar for an essential two-step rolling process.
This method is precisely what guarantees those deep, pronounced crinkles that define the perfect Red Velvet Crinkle Cookie, making them truly stand out.
Tools for Your Red Velvet Crinkle Cookies Success
Having the right tools makes the baking process smoother and helps ensure excellent results. Here are the essentials for making Red Velvet Crinkle Cookies.
Standard Baking Essentials
Mixing Bowls: You’ll need at least two – one for whisking dry ingredients and a larger one for creaming wet ingredients.
Measuring Cups & Spoons: Accuracy is key in baking, so ensure you have a full set for precise measurements.
Whisk & Rubber Spatula: A whisk helps evenly distribute dry ingredients, while a spatula is ideal for scraping bowls and gently folding.
Specialized Items for Crinkle Perfection
Electric Mixer: Essential for creaming butter and sugar until light and fluffy, which is vital for cookie texture.
Parchment Paper: Lining your baking sheets with parchment prevents sticking, promotes even baking, and makes cleanup a breeze.
Wire Cooling Rack: Allows air to circulate around the cookies, ensuring they cool completely without becoming soggy on the bottom.
The Journey to Perfectly Crinkled Red Velvet Cookies
Follow these detailed steps closely to achieve Red Velvet Crinkle Cookies with that perfect, eye-catching crackle and delightful soft texture.
- Prepare Dry Ingredients:
In a medium bowl, whisk together the all-purpose flour, unsweetened cocoa powder, baking soda, and salt. Set this mixture aside.
This crucial step ensures all dry leavening agents and flavorings are evenly distributed throughout the dough, which is essential for uniform texture and consistent rise.
- Cream Butter and Sugar:
In a large bowl, using an electric mixer on medium-high speed, cream together the softened unsalted butter and granulated sugar until the mixture is visibly light in color and fluffy in texture, typically for 2-3 minutes.
This process incorporates vital air into the butter and sugar mixture, which contributes significantly to the cookies’ final soft texture and helps prevent excessive spreading during baking.
- Incorporate Wet Ingredients:
Beat in the large eggs one at a time, ensuring each egg is fully incorporated into the butter mixture before adding the next. Afterward, stir in the vanilla extract and the red food coloring until the mixture is uniformly colored and vibrant.
Adding eggs individually helps maintain the emulsification, preventing the mixture from separating. Don’t hesitate to use enough red food coloring to achieve that signature, bold red velvet hue!
- Combine Wet and Dry:
Gradually add the prepared dry ingredients to the wet ingredients, alternating with the buttermilk. Start and end with the dry ingredients. Mix on low speed only until just combined, being extremely careful not to overmix.
Alternating between dry and wet ingredients helps prevent overmixing the flour, which can develop too much gluten and result in tough, dense Red Velvet Crinkle Cookies. Stop mixing as soon as no dry streaks of flour remain visible.
- Chill the Dough (Essential Step!):
Cover the cookie dough tightly with plastic wrap and chill it in the refrigerator for at least 2 hours, or ideally, up to overnight. This step is absolutely non-negotiable for success.
Chilling allows the dough to firm up, making it much easier to handle and preventing excessive spreading during baking. More importantly, it helps the powdered sugar adhere properly, guaranteeing those deep, lasting, and visually stunning crinkles on your Red Velvet Crinkle Cookies.
- Preheat Oven and Prep Baking Sheets:
Once your dough is thoroughly chilled, preheat your oven to 350°F (175°C). Line baking sheets with parchment paper for non-stick baking and effortless cleanup.
- Set Up Two-Step Powdered Sugar Bowls (The Crinkle Secret!):
Place the first 1 cup of powdered sugar in one shallow bowl. Place the remaining 1/2 cup of powdered sugar in a separate shallow bowl. Keep these distinct.
This precise two-step rolling process is the absolute key secret for achieving those deep, lasting, and visually stunning crinkles that define perfect Red Velvet Crinkle Cookies.
- First Roll in Powdered Sugar:
Scoop dough by tablespoonfuls, forming uniform balls about 1.5 inches in diameter. Roll each dough ball first in the first bowl of powdered sugar, ensuring each is coated with a light, even layer.
This initial dusting provides a slightly dry surface for the second, heavier coat to adhere to without absorbing too much moisture from the dough, setting the stage for impressive crinkles.
- Second, HEAVY Roll in Powdered Sugar (Guaranteed Crinkles!):
Immediately after the first coat, roll each dough ball very generously in the second bowl of powdered sugar. Ensure each ball is completely covered with a thick, visible, almost caked layer of powdered sugar.
This heavy second coat is the secret to guaranteed perfect crinkles on your Red Velvet Crinkle Cookies. As the cookie expands during baking, it will push through this thick sugar layer, creating those beautiful, deep cracks.
- Arrange and Bake:
Place the heavily coated dough balls about 2 inches apart on the prepared baking sheets to allow for even airflow and adequate spreading.
Bake for 9 to 11 minutes, or until the edges are just set but the centers still look soft and slightly puffy. Do not overbake, as this can make the cookies dry and diminish the pronounced crinkles.
- Cool and Admire:
Let the baked Red Velvet Crinkle Cookies cool on the baking sheet for 5 minutes. This allows them to set slightly before you carefully transfer them to a wire rack to cool completely.
As they cool, the beautiful crinkles will become even more pronounced and defined, and the cookies will firm up to their perfect soft, chewy texture.
Chef’s Notes: Mastering Your Red Velvet Crinkle Cookies
Beyond the steps, these expert tips will elevate your Red Velvet Crinkle Cookies from good to absolutely phenomenal.
The Chill Factor: Why It’s Non-Negotiable
Patience Pays Off: Never skip or shorten the chilling time for your Red Velvet Crinkle Cookies dough! A properly chilled dough is significantly less sticky and much easier to roll into perfect balls. This also prevents your cookies from spreading excessively into flat discs in the oven.
Crinkle Formation: The cold, firm dough allows the powdered sugar to adhere much better, forming a stable, slightly crisp outer crust. This crust then cracks beautifully as the cookie expands in the oven, giving you those signature, deep crinkles.
The Art of the Double Roll: Precision Matters
Light First Coat: The initial roll in powdered sugar for your Red Velvet Crinkle Cookies should be light and even. This creates a slightly dry, receptive surface for the second, much heavier coat of powdered sugar to cling to, preventing it from dissolving into the dough.
Heavy Second Coat: Be incredibly generous with the second roll! The thicker and more complete the layer of powdered sugar, the more pronounced and distinct your crinkles will be. Ensure every part of the dough ball is completely covered.
Don’t Overmix, Don’t Overbake: Texture Perfection
Gentle Mixing: Overmixing the dough, especially after adding flour, develops gluten excessively. This can lead to tough, dense Red Velvet Crinkle Cookies, so mix only until the ingredients are just combined.
Watch the Clock (and Edges): Oven temperatures can vary, so monitor your cookies closely. Begin checking your Red Velvet Crinkle Cookies around the 9-minute mark. You’re looking for edges that are set, but centers that still appear slightly soft. They will continue to firm up as they cool on the baking sheet.
Achieving Deeper Red: Color Enhancements
Gel Food Coloring Power: For the most vibrant Red Velvet Crinkle Cookies, opt for a high-quality gel food coloring. It’s more concentrated than liquid food coloring, allowing you to achieve an intense red hue with less added liquid, which is better for dough consistency.
Cocoa Balance: The 1/4 cup of unsweetened cocoa powder in the recipe provides flavor depth and helps create a darker base, which in turn makes the red color pop even more. Avoid increasing the cocoa powder too much, as it can overpower the red hue and make your cookies more chocolatey than red velvet.
Solving Common Red Velvet Crinkle Cookie Challenges
Even with a great recipe, baking can sometimes present unexpected hurdles. Here’s how to troubleshoot common issues with Red Velvet Crinkle Cookies.
Crinkles Didn’t Appear or Powdered Sugar Melted?
This is most frequently due to insufficient chilling of the dough or an inadequate second, heavy coat of powdered sugar.
Ensure your dough is chilled for the full recommended 2 hours, and generously roll the dough balls in the second bowl of powdered sugar, making sure they are completely caked on all sides.
Cookies Spread Too Much?
Over-spreading can be caused by dough that wasn’t chilled long enough, butter that was too soft (partially melted), or an oven that wasn’t preheated to the correct temperature.
Always start with firm, thoroughly chilled dough, ensure your butter is softened but not melted, and consider verifying your oven temperature with an oven thermometer for accuracy.
Dry or Cakey Texture?
This usually indicates either overbaking the Red Velvet Crinkle Cookies or overmixing the dough during the preparation stage.
Mix the dough only until the ingredients are just combined, and remove cookies from the oven when the edges are set but the centers still look slightly soft. They will continue to firm up as they cool to achieve that perfect chewiness.
Faded Red Color?
Sometimes the vibrant red color can dull during the baking process, or simply not be as intense as desired.
Ensure you’re using a high-quality red food coloring, preferably gel-based for more concentrated pigment and less liquid. Also, be mindful not to use too much cocoa powder, as this can naturally deepen the overall color beyond what’s ideal for a vivid red velvet.
Serving, Storing, and Making Ahead for Convenience
These tips will help you enjoy your Red Velvet Crinkle Cookies at their best, whether fresh from the oven or planned for future enjoyment.
Best Ways to Enjoy Your Red Velvet Crinkle Cookies
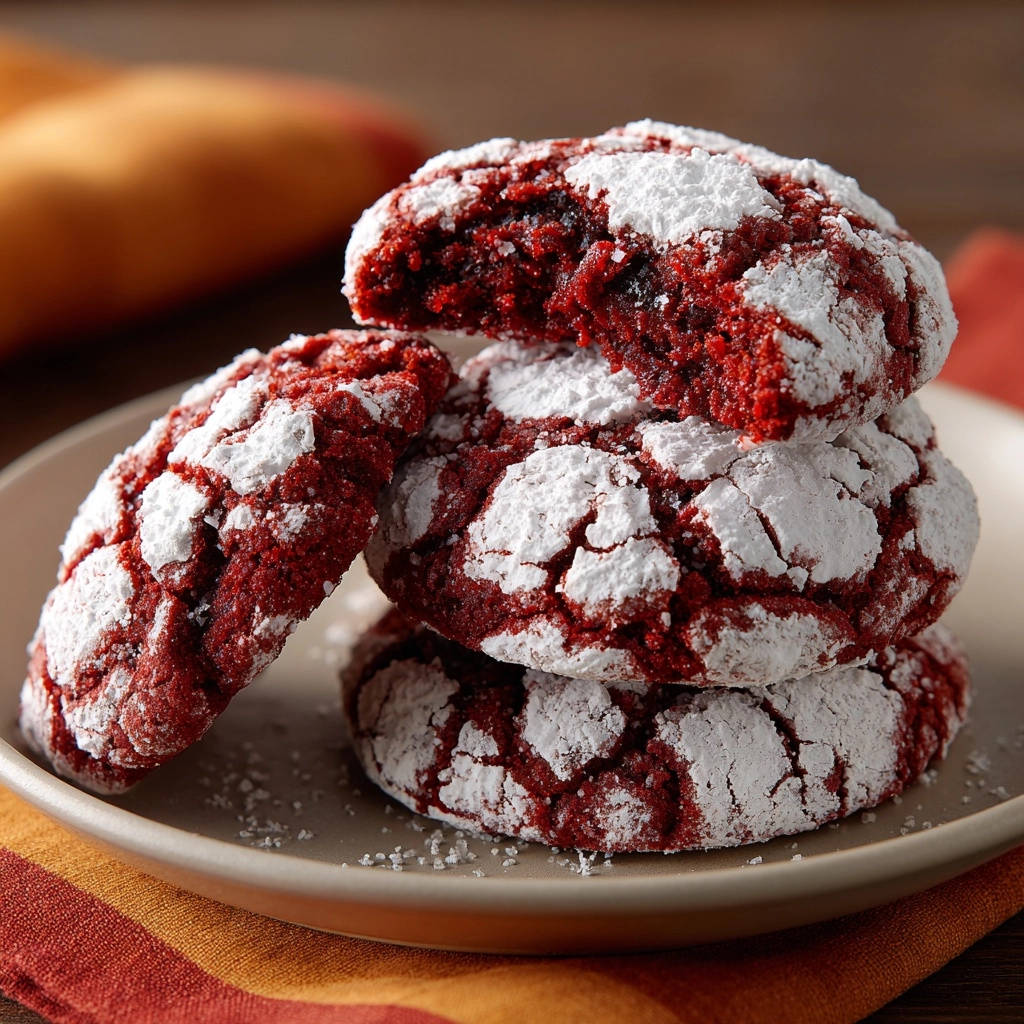
These beautiful Red Velvet Crinkle Cookies are delightful on their own, a perfect treat for an afternoon pick-me-up or a festive dessert.
Their vibrant color and charming crinkles make them an excellent addition to holiday platters, bake sales, or as a special treat served with a glass of cold milk, hot coffee, or even a scoop of vanilla ice cream.
Keeping Your Red Velvet Crinkle Cookies Fresh
Store baked Red Velvet Crinkle Cookies in an airtight container at room temperature for up to 3-5 days to maintain their soft texture.
If you notice the powdered sugar starting to absorb moisture over time, you can give them a light re-dusting with a sieve before serving for a fresh appearance.
Make-Ahead Dough Options
The prepared Red Velvet Crinkle Cookies dough can be made ahead and stored, covered tightly, in the refrigerator for up to 2-3 days, making entertaining much easier.
You can also scoop and roll the dough balls (after completing both powdered sugar coating steps), then freeze them on a parchment-lined baking sheet until solid. Once frozen, transfer them to a freezer-safe bag for up to 2 months. Bake from frozen, adding a few extra minutes (2-4 minutes) to the baking time.
Your Top Questions About Red Velvet Crinkle Cookies Answered
Here are answers to some of the most common questions about baking these delightful crinkle cookies.
Can I use gel food coloring instead of liquid?
Yes, absolutely! Gel food coloring is often more concentrated and can achieve a more vibrant red hue with less liquid, which is highly beneficial for maintaining optimal cookie dough consistency.
When substituting, start with half the amount of liquid coloring suggested in the recipe and add more incrementally until you reach your desired intense red shade.
Why is chilling the dough so important for crinkle cookies?
Chilling is paramount for Red Velvet Crinkle Cookies for several crucial reasons. It firms up the dough, making it much easier to handle and preventing it from spreading too rapidly in the oven, which would result in flat cookies.
More importantly, the cold dough allows the powdered sugar to adhere properly, creating a stable outer layer that cracks beautifully as the cookie bakes and expands, yielding those signature deep crinkles.
What if I don’t have buttermilk? Can I substitute it?
Yes, you can easily make a buttermilk substitute at home. For every 1/2 cup of buttermilk required, simply combine 1/2 cup of regular milk (dairy or non-dairy options work) with 1/2 tablespoon of white vinegar or lemon juice.
Let this mixture sit for 5-10 minutes until it slightly curdles. While the texture might be subtly different, this substitute works very well in a pinch. For more creative solutions in the kitchen, explore our comprehensive guide to ingredient substitutions.
Can I freeze the dough or baked Red Velvet Crinkle Cookies?
Yes, both the dough and baked Red Velvet Crinkle Cookies freeze beautifully, making them excellent for meal prep or future enjoyment!
For dough, scoop and roll the balls (ensuring both powdered sugar steps are complete), then freeze them on a parchment-lined baking sheet until solid. Once firm, transfer to a freezer-safe bag for up to 2 months. Bake from frozen, adding 2-4 minutes to the original baking time.
Baked Red Velvet Crinkle Cookies can be frozen in an airtight container for up to 3 months. Simply thaw them at room temperature for a few hours before serving.
If you’re looking for another delightful cookie recipe that freezes well, our Chewy Orange Ginger Crinkle Cookies are a fantastic option.
Share Your Red Velvet Crinkle Cookies Masterpiece!
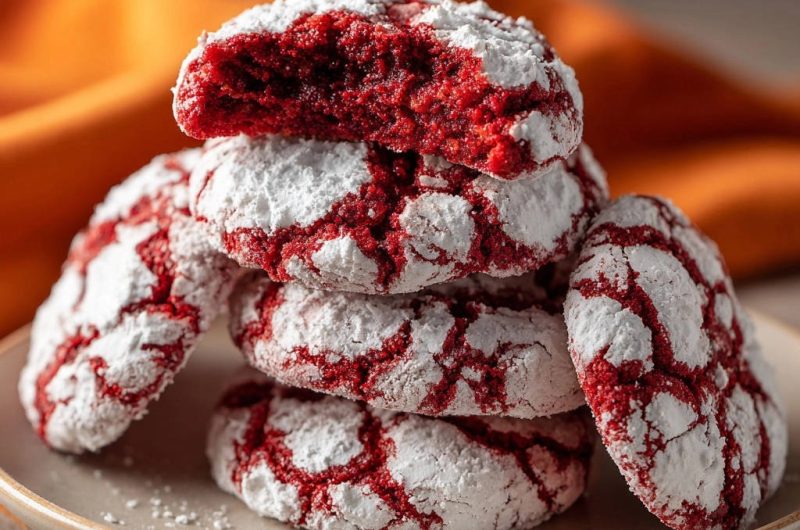
You’ve now unlocked the definitive secrets to baking truly stunning and deliciously soft Red Velvet Crinkle Cookies, complete with those perfect, deep cracks that everyone adores. This recipe is more than just ingredients and steps; it’s your new go-to for creating edible joy, whether for a special occasion or simply to brighten an ordinary day.
We absolutely love seeing your culinary creations! Share your beautiful Red Velvet Crinkle Cookies on social media and tag us, or leave a comment below with your experience, any delightful variations you tried, and tips you discovered. Happy baking!
Red Velvet Crinkle Cookies
Course: DessertCuisine: American CuisineDifficulty: easy24
cookies20
minutes10
minutes30
minutesAmerican Cuisine
Ingredients
2 1/4 cups all-purpose flour
1/4 cup unsweetened cocoa powder
1 teaspoon baking soda
1/4 teaspoon salt
1 cup (2 sticks) unsalted butter, softened
1 3/4 cups granulated sugar
2 large eggs
1 tablespoon vanilla extract
2 ounces red food coloring (liquid or gel)
1/2 cup buttermilk
1 cup powdered sugar (for first rolling step)
1/2 cup powdered sugar (for second rolling step)
Directions
- In a medium bowl, whisk together the flour, cocoa powder, baking soda, and salt. Set aside.
- In a large bowl, cream together the softened butter and granulated sugar until light and fluffy.
- Beat in the eggs one at a time, then stir in the vanilla extract and red food coloring until well combined and vibrant.
- Gradually add the dry ingredients to the wet ingredients, alternating with the buttermilk. Begin and end with the dry ingredients. Mix until just combined. Be careful not to overmix.
- Cover the cookie dough and chill it in the refrigerator for at least 2 hours, or up to overnight. This chilling step is essential for the dough to firm up, which helps maintain the cookie’s shape and ensures the powdered sugar adheres properly for the best crinkles.
- Preheat your oven to 350°F (175°C). Line baking sheets with parchment paper.
- Place the first 1 cup of powdered sugar in a shallow bowl. Place the remaining 1/2 cup of powdered sugar in a separate shallow bowl. This distinct two-step rolling process is key for achieving those deep, lasting crinkles.
- Scoop dough by tablespoonfuls, forming balls about 1.5 inches in diameter. Roll each dough ball first in the first bowl of powdered sugar, ensuring a light, even coat.
- Immediately after the first coat, roll each dough ball very generously in the second bowl of powdered sugar. Make sure each ball is completely covered with a thick, visible layer of powdered sugar. This heavy second coat is the secret to guaranteed perfect crinkles as the cookie expands during baking.
- Place the coated dough balls about 2 inches apart on the prepared baking sheets.
- Bake for 9 to 11 minutes, or until the edges are set but the centers are still soft. Do not overbake, as this can make the cookies dry.
- Let the cookies cool on the baking sheet for 5 minutes before carefully transferring them to a wire rack to cool completely. As they cool, the beautiful crinkles will become even more pronounced.
Notes
- The chilling step and the two-step powdered sugar rolling process are essential for achieving deep, lasting crinkles.


