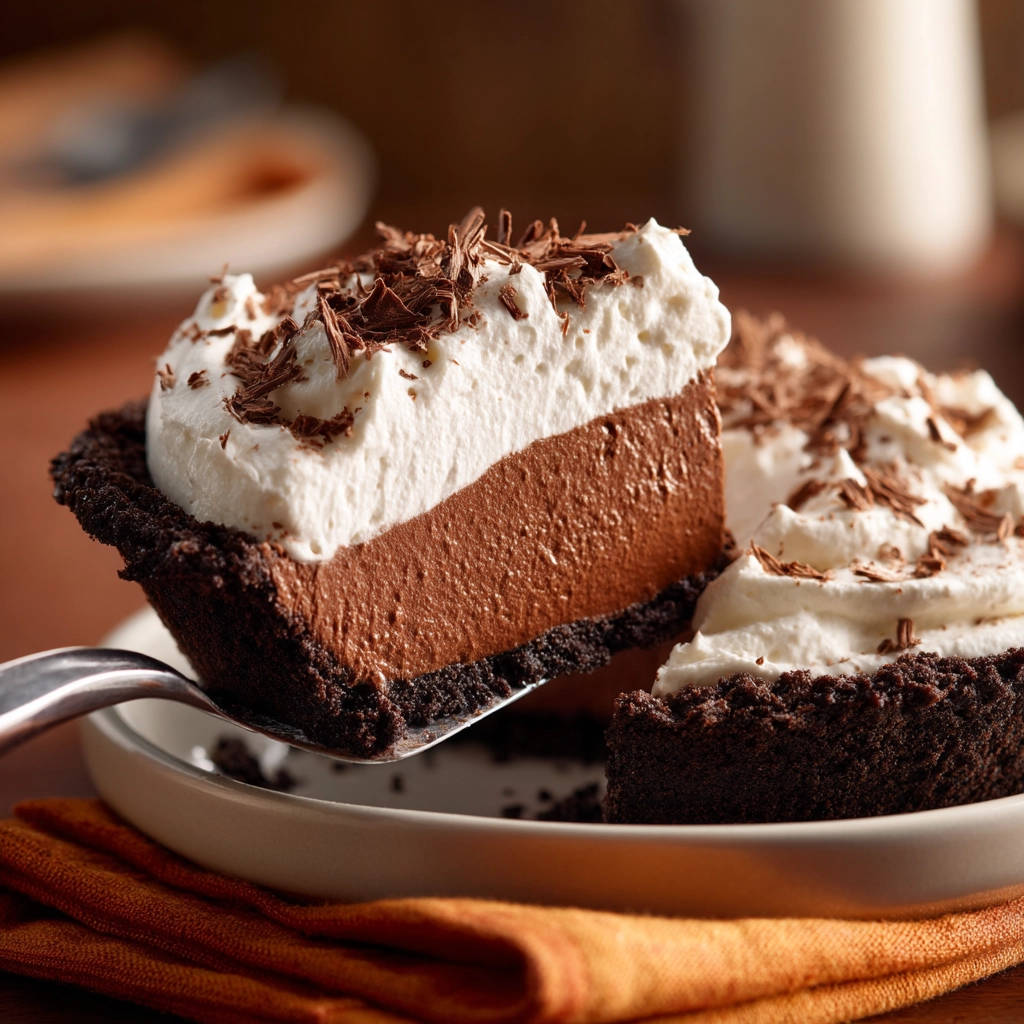
Why You’ll Love This Rich Chocolate Cream Pie
This isn’t just another chocolate pie recipe; it’s a solution. It’s the answer to your pie-setting prayers, wrapped in a rich, chocolatey hug.
Here’s why this recipe is about to become your new favorite:
- Guaranteed Set: The specific cooking method for the filling ensures it thickens properly and slices cleanly, eliminating those disappointing runny pie moments.
- Deep Chocolate Flavor: Using both cocoa powder and semi-sweet chocolate creates layers of rich, intense chocolate goodness that isn’t overly sweet.
- Easy Crust: A simple press-in cookie crust means no rolling or complicated pastry techniques. Quick and delicious!
- Creamy Perfection: The homemade whipped cream topping adds an essential light and airy contrast to the dense, smooth filling.
- Simple Technique: While the result is impressive, the actual steps are straightforward and easy to follow, even for novice bakers.
What You’ll Need: Gathering Ingredients for Your Rich Chocolate Cream Pie
Creating this dreamy dessert starts with gathering a few simple, yet key, ingredients. The quality of your chocolate will certainly shine through here, but honestly, even with standard pantry staples, this pie is utterly delicious. Think of these as the building blocks for your chocolate masterpiece.
We start with the foundation – a sturdy, flavorful crust. For that, you’ll need:
About 1 1/2 cups of chocolate cookie crumbs, which is roughly equivalent to crushing up about 24 standard chocolate sandwich cookies (like Oreos, with or without the filling, your choice!). These crumbs provide that deep chocolate base and a delightful crunch that contrasts beautifully with the creamy filling. You’ll bind these crumbs together with 1/4 cup of unsalted butter, melted until it’s liquid gold. The butter helps hold the crust together so it doesn’t crumble apart when you slice it.
Next comes the star of the show: the Rich Chocolate Cream Pie filling. This is where we build that smooth, luscious texture and intense chocolate flavor. You’ll need:
Four large egg yolks, which contribute richness and act as a crucial thickener, working alongside our starch. Granulated sugar, 3/4 cup of it, provides sweetness without overpowering the chocolate. For that pure cocoa flavor, you’ll use 1/4 cup of unsweetened cocoa powder. Choosing a good quality cocoa can really enhance the depth of flavor here. The secret weapon for that perfect set is 1/4 cup of cornstarch. This starchy powerhouse, when properly heated, is what transforms the liquid mixture into a sliceable filling.
To make the base of our creamy filling, you’ll need 2 1/2 cups of whole milk. The fat content in whole milk contributes to the filling’s luxurious texture. And of course, you can’t have chocolate cream pie without chocolate! Grab 6 ounces of good quality semi-sweet chocolate, chopped into small pieces so it melts easily into the hot mixture. A full teaspoon of vanilla extract is added at the end to enhance all those lovely flavors and add a touch of warmth.
Finally, the crowning glory: the whipped cream topping. This is simple but essential for balance. You’ll need:
1 1/2 cups of very cold heavy cream. Keeping it well-chilled is key to getting those beautiful stiff peaks when you whip it. A quarter cup of powdered sugar sweetens the cream lightly and dissolves smoothly. Another half teaspoon of vanilla extract mirrors the vanilla in the filling, tying the flavors together. And for a final flourish, you’ll want about 1 ounce of semi-sweet chocolate reserved for shaving over the top before serving.
Ingredients List for Quick Reference
- 1 1/2 cups chocolate cookie crumbs (about 24 cookies)
- 1/4 cup unsalted butter, melted
- 4 large egg yolks
- 3/4 cup granulated sugar
- 1/4 cup unsweetened cocoa powder
- 1/4 cup cornstarch
- 2 1/2 cups whole milk
- 6 ounces semi-sweet chocolate, chopped
- 1 teaspoon vanilla extract
- 1 1/2 cups heavy cream, very cold
- 1/4 cup powdered sugar
- 1/2 teaspoon vanilla extract (for whipped cream)
- 1 ounce semi-sweet chocolate, for shaving
Making the Magic Happen: Step-by-Step for Your Rich Chocolate Cream Pie
Okay, let’s turn these wonderful ingredients into that guaranteed-to-set, show-stopping Rich Chocolate Cream Pie! Follow these steps closely, paying special attention to the filling instructions, and you’ll be rewarded with perfection.
- Prepare the Crust: Start by getting your pie base ready. In a medium-sized mixing bowl, combine your chocolate cookie crumbs with the melted butter. Stir them together until every crumb is moistened, looking like wet sand. This ensures the crust will hold its shape. Now, take this mixture and press it firmly and evenly into the bottom and all the way up the sides of a standard 9-inch pie plate. Use the bottom of a glass or a flat measuring cup to really compact it down – this is important for a sturdy crust. Once formed, pop the pie plate into the refrigerator to chill while you move on to the filling. Chilling helps the butter solidify, setting the crust structure before the hot filling goes in.
- Begin the Filling (Off Heat): Grab a medium saucepan. Before turning on any heat, whisk together your four egg yolks, granulated sugar, cocoa powder, and cornstarch until you have a smooth, uniform mixture. It might be a bit thick at this stage. Now, gradually whisk in just about 1/2 cup of the total milk. This small amount of liquid helps create a smooth, lump-free paste with the dry ingredients and yolks. Once that’s perfectly smooth and looks like a thick slurry, whisk in the remaining 2 cups of milk into the saucepan.
- Cook the Filling (On Heat – The Crucial Step!): Place the saucepan over medium heat. Now, the work begins! You need to whisk constantly and vigorously. Why constantly? Because you have starches and egg yolks in there, both of which can scorch on the bottom or clump up if not agitated. Keep whisking until the mixture thickens significantly – it will become visibly thicker, coating the back of a spoon – and just begins to come to a gentle boil. Don’t stop here! This next part is absolutely KEY for the guaranteed set: continue whisking and letting it boil gently for a full 1 minute. Boiling for this minute fully activates the cornstarch’s thickening power and helps set the egg yolks properly. Trust me, this minute makes all the difference between a perfectly sliceable pie and a runny mess.
- Finish the Filling: Immediately remove the saucepan from the heat once the 1-minute boil is complete. Add your chopped semi-sweet chocolate and the first teaspoon of vanilla extract to the hot mixture. Let it sit for about 30 seconds to a minute to allow the chocolate to start melting from the residual heat. Then, whisk everything together until the chocolate is completely melted and the filling is wonderfully smooth, glossy, and intensely chocolatey.
- Assemble the Pie: Retrieve your chilled cookie crust from the refrigerator. Carefully pour the hot chocolate filling directly into the crust. Use a spatula to spread the top evenly if needed. It will look perfectly smooth and inviting.
- Chill the Pie (Patience is a Virtue!): This is the second critical step for a perfect set. The pie MUST chill for at least 4 hours, but ideally, leave it in the refrigerator overnight. This extended chilling time allows the starches and egg yolks to fully set and the flavors to meld. Do not rush this step! A properly chilled pie will be firm and ready to slice cleanly.
- Prepare the Whipped Cream: When your pie is nearing the end of its chilling time (or just before serving), make the whipped cream. Pour the very cold heavy cream into a large bowl. Using an electric mixer, start beating on medium speed until soft peaks begin to form – the cream will hold a gentle shape but the tips will curl over. Gradually add the powdered sugar and the second half teaspoon of vanilla extract. Increase the mixer speed to high and continue beating until stiff peaks form. This means the cream will hold its shape firmly when you lift the beater. Be careful not to overbeat, or you’ll end up with butter!
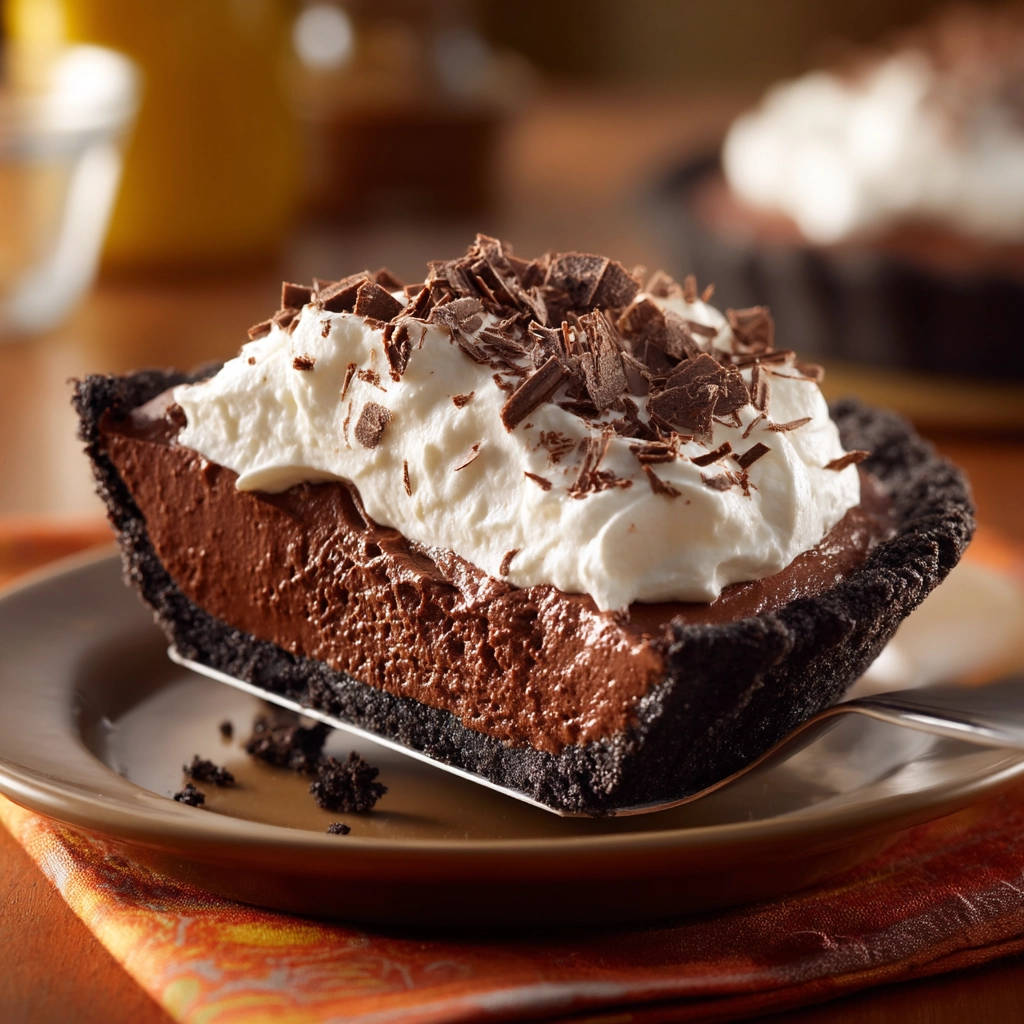
- Top and Serve: Spoon or pipe the freshly made whipped cream generously over the completely chilled and set pie. For the final touch, take your reserved 1 ounce of semi-sweet chocolate. Use a vegetable peeler or a sharp knife to shave curls or shards of chocolate over the whipped cream. Slice your beautiful, perfectly set Rich Chocolate Cream Pie and serve!
Expert Tips for Chocolate Cream Pie Perfection
You’ve got the core recipe down, but here are a few extra tips to ensure your Rich Chocolate Cream Pie is absolutely spectacular every single time you make it.
- Don’t Skip the Boil Time: Seriously, that 1-minute gentle boil while whisking is the non-negotiable secret. It’s what activates the cornstarch fully and guarantees a firm set.
- Patience with Chilling: As mentioned in the steps, the chilling time is just as vital as the cooking time for the set. Resist the urge to cut into it early! Overnight chilling gives the best results.
- Quality Matters (But Don’t Stress): While gourmet chocolate and cocoa powder will yield the richest flavor, this recipe is quite forgiving. Use what you have and what you enjoy!
- Preventing Lumps: Whisking the dry ingredients and egg yolks into a paste with a small amount of milk before adding the rest is key to avoiding lumps in your filling. Constant whisking while cooking is also crucial.
- Whipped Cream Wisdom: Always use cold heavy cream! If your bowl is also cold, even better. Stop beating as soon as stiff peaks form to keep it light and airy.
- Crust Variations: Not a fan of chocolate cookies? You could try this recipe with a graham cracker crust! While this recipe uses a press-in, chilling it is still important.
Serving Suggestions
This Rich Chocolate Cream Pie is heavenly all on its own, but a few simple additions can take it over the top. A sprinkle of sea salt flakes on top of the chocolate shavings can provide a lovely flavor contrast. Fresh raspberries or strawberries add a burst of freshness and color that pairs wonderfully with rich chocolate. For a truly decadent experience, serve it alongside a cold glass of milk or even a frozen chocolate drink or a warm mocha frappe.
Your Rich Chocolate Cream Pie Questions Answered (FAQ)
Got questions about making this decadent dessert? Here are some of the most common queries I get about making Rich Chocolate Cream Pie.
Can I use a different type of chocolate in the filling?
Yes, you absolutely can! Using darker chocolate will result in a less sweet, more intense chocolate flavor. If you prefer a sweeter pie, you could use milk chocolate, but be aware it might make the filling slightly less firm than semi-sweet or dark chocolate due to differing cocoa butter content. For best results and a reliable set, stick with semi-sweet or bittersweet chocolate (around 60-70% cacao).
My filling still isn’t thickening after boiling for a minute. What went wrong?
The most common culprit here is not boiling for a full minute at a sufficient temperature, or not boiling gently while whisking. Ensure your heat is truly at medium, that the mixture is bubbling gently across the surface, and that you time that minute from when the boil begins, all while continuing to whisk. If it still seems thin after the minute, you can try cooking for another 30 seconds to a minute, whisking constantly. If it thickens off-heat, it’s usually enough; the chilling will finish the process.
How far in advance can I make this pie?
You can make the filling a day in advance and store it covered in the refrigerator. Reheat it gently over low heat, whisking frequently, just until pourable before pouring into the chilled crust. However, for the absolute best texture and set, it’s best to pour the fresh, hot filling into the chilled crust and then chill the assembled pie. The assembled pie (without whipped cream topping) can be made up to 2 days in advance and stored tightly covered in the refrigerator. Add the whipped cream and chocolate shavings just before serving for the freshest look and texture.
Can I make this Rich Chocolate Cream Pie gluten-free?
Yes, you can easily make this pie gluten-free! Simply substitute the regular chocolate cookie crumbs for gluten-free chocolate cookie crumbs. The rest of the ingredients are typically gluten-free, but always check ingredient labels to be sure, especially for the cocoa powder and chocolate.
How do I store leftover Rich Chocolate Cream Pie?
Any leftover pie should be covered tightly with plastic wrap or stored in an airtight container and kept in the refrigerator. It will typically stay fresh for 3-4 days. The whipped cream may lose some of its volume over time, but the filling will remain perfectly set.
Ready to Bake? Enjoy Your Slice of Chocolate Heaven!
There you have it – the recipe for a truly reliable, incredibly delicious Rich Chocolate Cream Pie that promises a perfect slice every time. No more pie puddles, just smooth, decadent chocolate goodness nestled in a crisp cookie crust, crowned with fluffy whipped cream. Give this recipe a try and see for yourself how simple it is to achieve pie perfection. It’s ideal for holidays, celebrations, or just because you deserve a fantastic slice of pie.
Have you tried this recipe? What are your favorite pie-making tips? Let me know in the comments below! And don’t forget to share a photo of your beautiful, perfectly set Rich Chocolate Cream Pie!
Rich Chocolate Cream Pie

Ingredients
- 1 1/2 cups chocolate cookie crumbs (about 24 cookies)
- 1/4 cup unsalted butter, melted
- 4 large egg yolks
- 3/4 cup granulated sugar
- 1/4 cup unsweetened cocoa powder
- 1/4 cup cornstarch
- 2 1/2 cups whole milk
- 6 ounces semi-sweet chocolate, chopped
- 1 teaspoon vanilla extract
- 1 1/2 cups heavy cream, very cold
- 1/4 cup powdered sugar
- 1/2 teaspoon vanilla extract
- 1 ounce semi-sweet chocolate, for shaving
Directions
- Make the crust. In a medium bowl, combine the chocolate cookie crumbs and melted butter until the crumbs are moistened. Press firmly into the bottom and up the sides of a 9-inch pie plate. Place the crust in the refrigerator to chill while you make the filling.
- Make the filling. In a medium saucepan off the heat, whisk together the egg yolks, granulated sugar, cocoa powder, and cornstarch until smooth. Gradually whisk in about 1/2 cup of the milk to create a smooth paste. Add the remaining 2 cups of milk to the saucepan.
- Place the saucepan over medium heat and cook, whisking constantly, until the mixture thickens significantly and comes to a gentle boil. Continue to whisk and boil gently for 1 minute to ensure the cornstarch is cooked and the filling is thick. This step is key for a perfect set.
- Remove the saucepan from the heat. Add the chopped chocolate and 1 teaspoon of vanilla extract. Whisk until the chocolate is completely melted and the filling is smooth and glossy.
- Pour the hot filling into the chilled cookie crust. Use a spatula to smooth the top.
- Chill the pie for at least 4 hours, or preferably overnight, until the filling is completely set and firm. This dedicated chilling time is absolutely essential for achieving the guaranteed perfect set promised in the title.
- Make the whipped cream. In a large bowl, beat the very cold heavy cream with an electric mixer on medium speed until soft peaks form. Gradually add the powdered sugar and 1/2 teaspoon of vanilla extract. Increase the speed to high and beat until stiff peaks form.
- Spoon or pipe the whipped cream over the chilled pie. Use a vegetable peeler or sharp knife to shave the remaining 1 ounce of chocolate over the whipped cream before serving.