There’s a special kind of magic in a perfect slice of chocolate pie. The deep, dark richness of the chocolate, the contrast of a flaky crust, and that melt-in-your-mouth filling. But let’s be honest, nothing is more disappointing than anticipation turning into a bite of grainy, less-than-velvety chocolate filling. It’s happened to me more times than I care to admit!
For years, I chased that elusive, perfectly silky smooth chocolate fudge pie. I tried countless recipes, tweaked ingredients, and still, sometimes, that dreaded grainy texture would appear. It felt like a mystery I couldn’t solve.
Then, I discovered the little trick that changed everything. It’s a simple technique, one that might seem small, but it makes all the difference between a good chocolate pie and a truly unforgettable, silken dream. With this recipe, you can achieve that pure chocolate velvet texture every single time. Say goodbye to graininess and hello to the smoothest, richest Rich Chocolate Fudge Pie you’ve ever tasted.
Why You’ll Love This Rich Chocolate Fudge Pie
This isn’t just another chocolate pie recipe; it’s a guarantee of a truly decadent experience. So, what makes this particular rich chocolate fudge pie stand out from the crowd?
Firstly, the texture is unparalleled. We’re talking about a filling so smooth and luscious, it feels like pure chocolate silk gliding across your tongue. It’s firm enough to hold its shape when sliced, yet melts beautifully in your mouth.
Secondly, the flavor is intensely chocolatey without being overwhelmingly sweet. Using unsweetened baking chocolate provides a deep, authentic cocoa flavor that sugar alone can’t deliver.
Thirdly, while it delivers gourmet results, the process is surprisingly manageable. Even if you’ve struggled with chocolate pies before, the key steps are easy to follow and implement, ensuring success.
Finally, this rich chocolate fudge pie is a showstopper. Whether it’s for a holiday gathering, a special celebration, or just because you need a serious chocolate fix, this pie is guaranteed to impress anyone lucky enough to get a slice.
Gathering Your Ingredients for This Silky Smooth Chocolate Pie
Making a perfect chocolate pie starts with understanding the role each ingredient plays in creating that divine texture and rich flavor. While the list is simple, the quality of your ingredients will shine through in the final product.
Here’s what you’ll need to assemble your silky smooth chocolate filling:
- 1 pre-made 9-inch pie crust, in pan
- 4 ounces unsweetened baking chocolate, chopped
- 1 stick (1/2 cup) unsalted butter
- 1 1/2 cups granulated sugar
- 1/4 cup all-purpose flour
- 1/2 teaspoon salt
- 2 large eggs, lightly beaten
- 1 teaspoon vanilla extract
- Whipped cream and cocoa powder for topping (optional)
Let’s talk about a few of these stars. The unsweetened baking chocolate is non-negotiable for that deep, dark, authentic chocolate flavor that defines a rich fudge pie. Unlike chocolate chips or sweetened bars, unsweetened chocolate provides the foundational intensity. Using a good quality brand here will truly elevate your pie.
Unsalted butter adds richness and helps create that smooth, almost ganache-like consistency when melted with the chocolate. Always opt for unsalted butter so you can control the salt level yourself.
The combination of granulated sugar and a small amount of all-purpose flour provides sweetness and acts as a crucial thickening agent, giving the filling structure without making it dense or gummy. The salt is important too – it balances the sweetness and enhances the chocolate flavor.
And then there are the large eggs. These are vital binders for the filling, helping it set as it bakes. As you’ll see in the instructions, how you handle the eggs is the secret weapon for achieving that perfect, silky texture.
Finally, vanilla extract rounds out the flavors, adding a touch of warmth and complexity that complements the chocolate beautifully. Don’t skip it!
Crafting Your Rich Chocolate Fudge Pie: Step-by-Step
Ready to create some chocolate magic? Follow these steps closely, paying special attention to the temperature control and mixing techniques, and you’ll be rewarded with a truly silky smooth filling.
- Get Your Oven Ready: Begin by preheating your oven to 350 degrees F (175 degrees C). A consistently heated oven is important for even baking and setting the pie properly. Place your pie crust in its pan onto a baking sheet; this makes transferring the pie to and from the oven much easier and catches any potential spills.
- Melt the Chocolate Base: Grab a medium saucepan and place it over low heat. Add your chopped unsweetened baking chocolate and the unsalted butter. Gently melt them together, stirring constantly with a whisk or silicone spatula. Keep the heat low to prevent the chocolate from scorching. Continue stirring until the mixture is completely smooth and glossy, with no streaks of butter or solid bits of chocolate remaining. Once smooth, remove the saucepan from the heat.
- Combine Dry Ingredients: In a separate bowl, measure out your granulated sugar, all-purpose flour, and salt. Whisk these dry ingredients together thoroughly. This step is simple but effective; it ensures the flour and salt are evenly distributed within the sugar, preventing any potential pockets of dry ingredients that could lead to lumps in your final filling.
- Whisk Dry into Wet: Now, gradually begin whisking the whisked sugar-flour-salt mixture into the warm, melted chocolate and butter. Add it a little at a time, whisking continuously, until everything is well combined and you have a thick, smooth chocolate paste.
- The Silky Secret: Tempering the Eggs: This is arguably the most crucial step for that silky texture! Take your lightly beaten large eggs. They should be in a small bowl. Now, carefully ladle about half a cup of the warm chocolate mixture slowly into the beaten eggs while simultaneously whisking the eggs vigorously. Keep whisking the eggs the entire time you’re adding the warm chocolate. This process is called tempering, and it gently warms the eggs, bringing their temperature up gradually without cooking them. If you added the cool eggs directly to the hot chocolate mixture, they would likely scramble, resulting in a grainy, unpleasant texture.
- Incorporate Tempered Eggs: Once the eggs have been tempered with some of the warm chocolate mixture, it’s safe to add them to the main chocolate mixture in the saucepan. Pour the tempered egg mixture back into the saucepan, and immediately begin whisking continuously. Whisk until the eggs are fully incorporated and the entire filling mixture is uniform, smooth, and has a beautiful glossy sheen. Stir in the vanilla extract at this point.
- Fill the Crust: Pour the luscious, glossy chocolate filling into the prepared 9-inch pie crust in its pan. Use a spatula to scrape out every last bit of that precious chocolatey goodness! Smooth the top gently if needed, but avoid over-handling.
- Bake Carefully: Place the pie, still on its baking sheet, into your preheated oven. Bake for 45 to 55 minutes. You’re looking for a specific doneness: the edges of the filling should appear set and slightly puffed, while the very center should still have a slight wobble when the pan is gently shaken. This slight wobble is key! Overbaking will cause the eggs to cook too much and seize, leading directly to that grainy texture we are trying to avoid. It’s better to underbake slightly than overbake.
- Cool Completely and Chill: Once baked, carefully remove the pie from the oven and place it on a wire rack to cool completely. This cooling time is absolutely critical for the filling to finish setting and firming up into that wonderful, silky texture. Do not rush this step! After it has cooled to room temperature, transfer the pie to the refrigerator. Refrigerate for at least 2 to 3 hours before slicing. Chilling allows the filling to become perfectly set and ensures the cleanest slices and best possible texture.
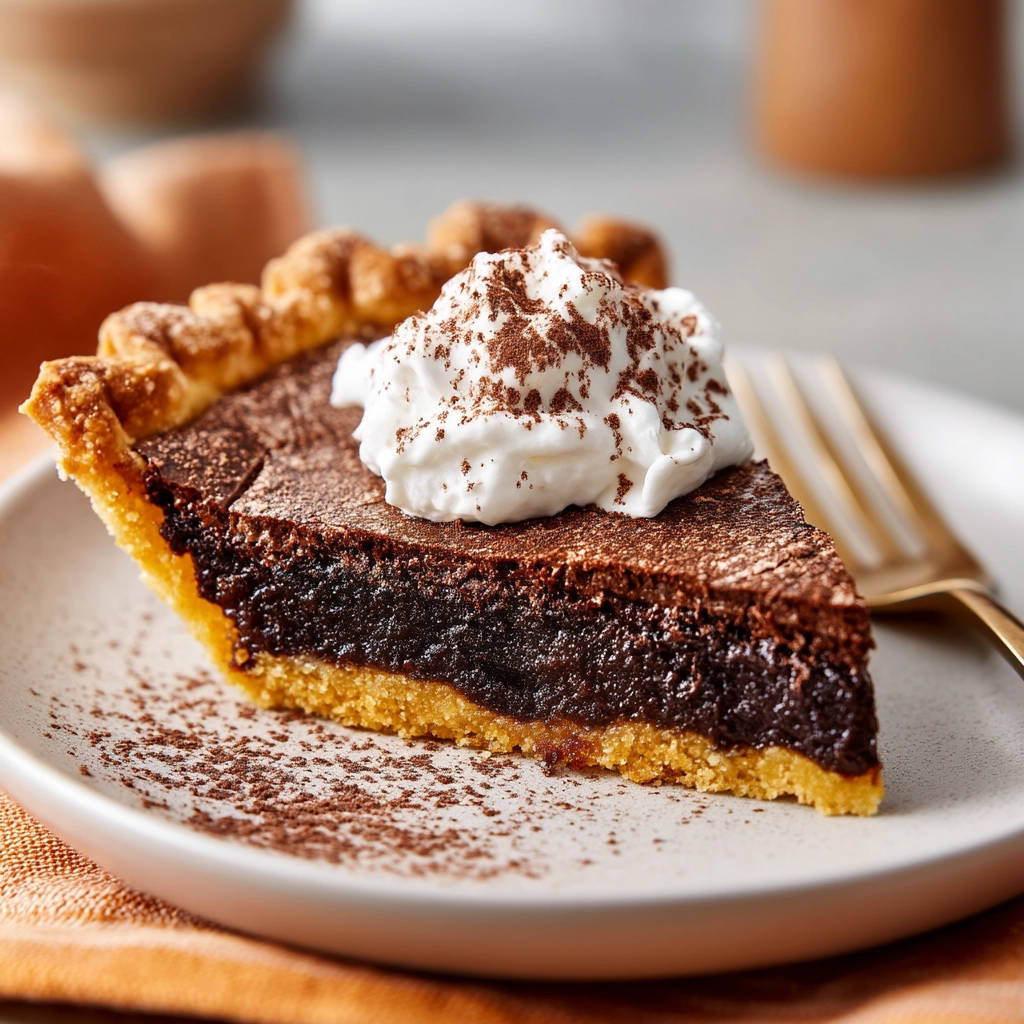
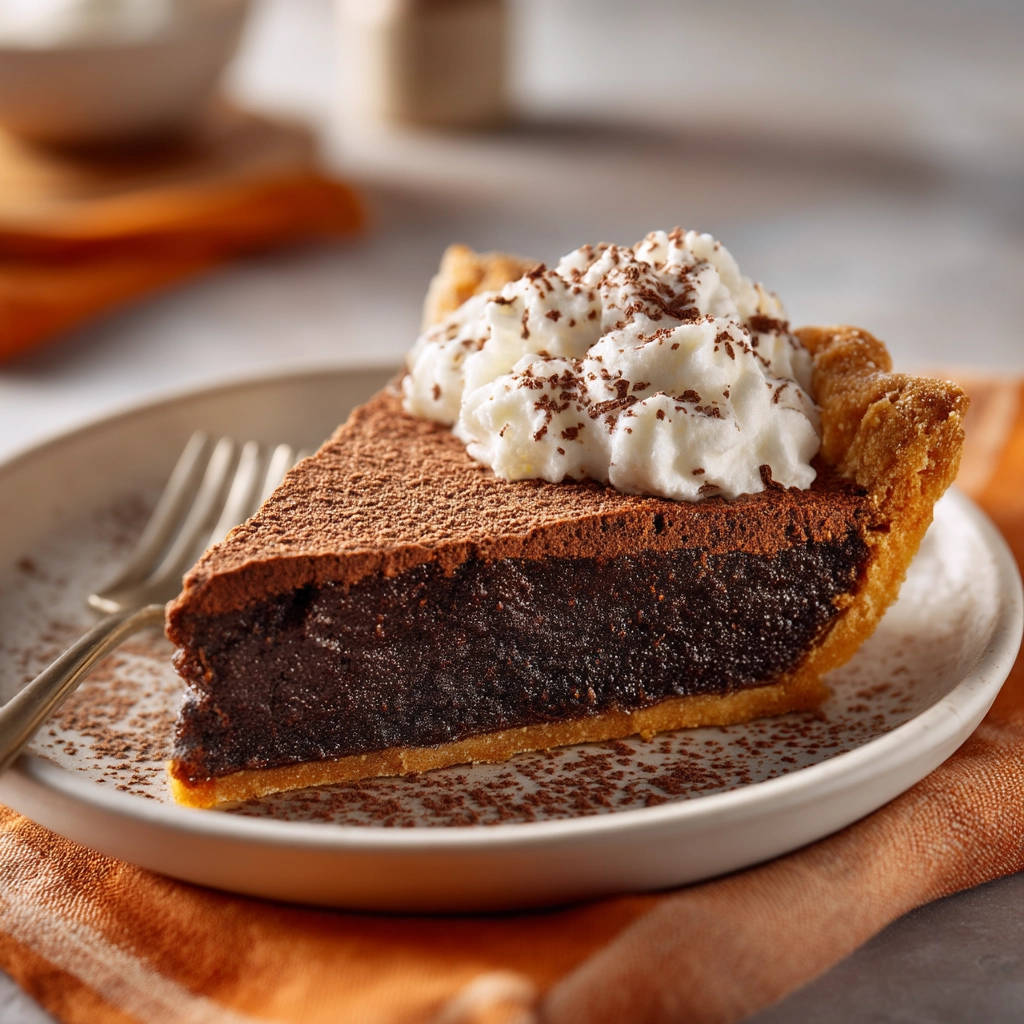
- Serve and Enjoy: Serve your Rich Chocolate Fudge Pie chilled. The classic topping is a generous dollop of whipped cream and a light dusting of cocoa powder, which adds an extra layer of indulgence and beautiful presentation.
Tips for Perfect Rich Chocolate Fudge Pie Every Time
Achieving that dreamy, silky texture consistently is easy once you know the tricks. Here are a few extra tips to ensure your rich chocolate fudge pie is always a success:
- Master the Tempering: The egg tempering step (Step 5) is truly the secret weapon. Don’t skip it, and be sure to whisk the eggs constantly while slowly pouring in the warm chocolate mixture. This gradual warming prevents the eggs from scrambling.
- Low Heat for Melting: When melting the chocolate and butter, always use low heat. High heat can burn the chocolate, resulting in a bitter flavor and a less smooth mixture from the start. Patience is key here.
- Don’t Overbake!: This is the second major culprit for grainy pie. Keep a close eye on the pie during the last 10-15 minutes of baking. The slight wobble in the center is your indicator that it’s done. Remember, it will continue to set as it cools.
- Cool Completely and Chill: Just like overbaking, not allowing the pie to cool completely on the counter and then chill in the refrigerator will result in a softer, less-set, and potentially grainy texture. Allow the full cooling and chilling time for the best results.
- Crust Options: While a pre-made crust is convenient, you can certainly use your favorite homemade pastry crust. A classic flaky butter crust or even a chocolate cookie crumb crust would pair wonderfully with this rich filling.
- Make Ahead: This pie is an excellent make-ahead dessert! Bake and chill it a day in advance, and it will be perfectly set and ready to serve.
- Chocolate Quality Matters: Since the chocolate flavor is so prominent, using good quality unsweetened baking chocolate will make a noticeable difference in the depth and richness of the pie.
Serving Suggestions and Pairings
A slice of this Rich Chocolate Fudge Pie is incredibly satisfying on its own, but a few simple additions can make it even more special.
As mentioned, classic toppings like fresh whipped cream (homemade is always best!) and a dusting of high-quality cocoa powder or chocolate shavings are simple and elegant. For a bit of contrast, a sprinkle of flaky sea salt over the top before serving can enhance the chocolate flavor beautifully.
Fresh berries, especially raspberries or strawberries, offer a lovely bright counterpoint to the rich chocolate. A simple berry compote or coulis can also be drizzled over the top.
Looking for a beverage pairing? A cold glass of milk is classic, but for something a bit more indulgent, pair a slice with our refreshing Ultimate Frozen Chocolate Drink. The double dose of chocolate is pure bliss!
Your Rich Chocolate Fudge Pie Questions Answered (FAQ)
Got questions about making the perfect Rich Chocolate Fudge Pie? Here are some common queries and their answers to help you succeed.
Why is my chocolate pie filling grainy?
Graininess is the most common issue with chocolate pies, and it’s usually due to one of two main culprits: overbaking or improperly handled eggs. Overbaking causes the proteins in the eggs to seize up and creates a curdled texture. Not tempering the eggs correctly (adding cold eggs directly to hot chocolate mixture without gradually warming them) can also cause them to scramble slightly, leading to graininess. Always follow the tempering step carefully and rely on the visual cues for doneness in the oven (slight wobble in the center).
Can I use a different kind of chocolate?
This recipe specifically calls for unsweetened baking chocolate for its intense, deep flavor. Using semi-sweet or milk chocolate will result in a much sweeter pie with a different flavor profile and may require adjusting the sugar amount and potentially the thickener. If you want a different type of chocolate pie, like a Classic Chocolate Cream Pie, it often uses different techniques and ingredients. For this specific rich chocolate fudge pie, stick to unsweetened for best results.
How long does this chocolate fudge pie last and how should I store it?
Store the pie in the refrigerator, covered loosely with plastic wrap or foil. It will keep well for 3-4 days. For the best texture and flavor, keep it chilled until just before serving.
Can I freeze Rich Chocolate Fudge Pie?
Yes, you can freeze baked Rich Chocolate Fudge Pie. Once completely cooled and chilled, wrap the entire pie (or individual slices) tightly in plastic wrap, then again in aluminum foil. It can be frozen for up to 1-2 months. Thaw it overnight in the refrigerator before serving. Be aware that the texture might change slightly after freezing and thawing, potentially becoming a little less perfectly smooth, but it will still be delicious.
Is it ok if the center is still a little soft after baking?
Absolutely! In fact, it’s preferred. The slight wobble in the center indicates that the pie is perfectly cooked. It will continue to set significantly as it cools on the wire rack and then chills in the refrigerator. Removing it from the oven when the center still has a slight jiggle prevents overbaking and ensures that desired silky texture.
What if I don’t have a pre-made crust?
No problem! You can use your favorite homemade double crust pastry recipe, but you’ll only need one crust for this pie. Prepare your dough, roll it out, fit it into a 9-inch pie plate, flute the edges, and then proceed with filling and baking as directed. Blind baking the crust is not necessary for this recipe as the filling and crust bake together.
Enjoy Your Homemade Rich Chocolate Fudge Pie!
Now that you know the secret to that perfectly silky smooth filling, get ready to bake a Rich Chocolate Fudge Pie that will disappear faster than you can slice it. The combination of intense chocolate flavor and luxurious texture is truly a match made in dessert heaven. This recipe proves that gourmet results are achievable at home with just a few simple techniques.
Don’t hesitate to give this recipe a try. You’ll be amazed at the difference the proper technique makes. It’s time to bake the chocolate pie of your dreams!
Did you make this Rich Chocolate Fudge Pie? We’d love to hear how it turned out! Leave a comment below and let us know your favorite part. Happy Baking!
Rich Chocolate Fudge Pie

Ingredients
- 1 pre-made 9-inch pie crust, in pan
- 4 ounces unsweetened baking chocolate, chopped
- 1 stick (1/2 cup) unsalted butter
- 1 1/2 cups granulated sugar
- 1/4 cup all-purpose flour
- 1/2 teaspoon salt
- 2 large eggs, lightly beaten
- 1 teaspoon vanilla extract
- Whipped cream and cocoa powder for topping (optional)
Directions
- Preheat your oven to 350 degrees F (175 degrees C).
- In a medium saucepan over low heat, melt the chopped chocolate and butter together, stirring constantly until completely smooth. Remove from heat.
- In a separate bowl, whisk together the granulated sugar, flour, and salt. This helps prevent lumps.
- Gradually whisk the sugar mixture into the melted chocolate mixture until well combined and smooth.
- In a small bowl, lightly beat the eggs. This is key for the smooth filling. Slowly pour about half a cup of the warm chocolate mixture into the beaten eggs while whisking the eggs constantly. This tempers the eggs and prevents them from scrambling when added to the hot chocolate.
- Pour the tempered egg mixture back into the main chocolate mixture, whisking continuously until everything is fully incorporated and the mixture is uniform and glossy. Stir in the vanilla extract.
- Pour the filling into the prepared pie crust.
- Bake for 45 to 55 minutes, or until the center is just set when gently shaken. The edge should look firm, but the very center may still have a slight wobble. Do NOT overbake, as this can cause a grainy texture.
- Let the pie cool completely on a wire rack. This is crucial for the filling to fully set and achieve its smooth texture. Refrigerate for at least 2-3 hours before slicing for the best texture.
- Serve chilled, topped with whipped cream and a dusting of cocoa powder if desired.