

There is nothing more frustrating than watching a delicious filling melt out of a cookie and stick to the pan, leaving you with a hollow shell. I’ve refined this technique specifically to solve that problem, guaranteeing a perfect, stretchy, gooey center every time.
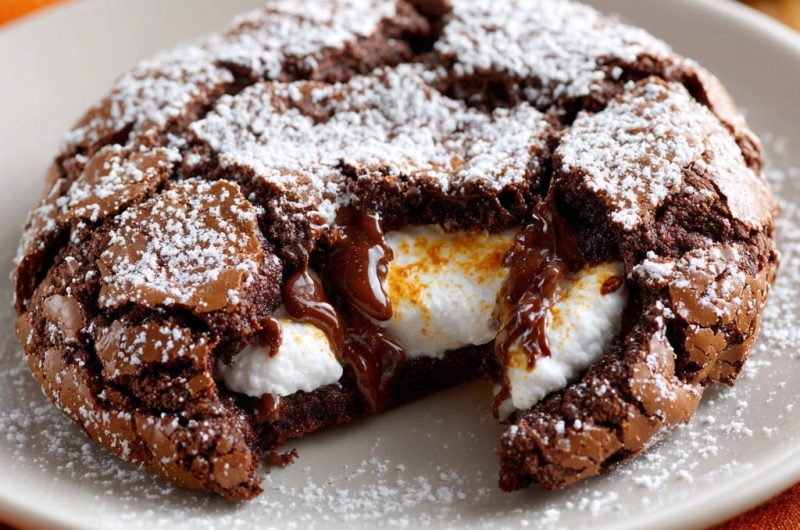
This method ensures that your Rich Double Chocolate S’mores Cookie will have a beautiful, crackled, fudgy exterior that completely locks the marshmallow interior safely inside during baking.
The Secret Formula: Why This Rich Double Chocolate S’mores Cookie Recipe Never Fails
The Frozen Filling Method: Sealing the Gooey Center
The core innovation here is starting with a frozen marshmallow. Because the marshmallow is frozen solid, it buys you precious minutes in the oven before it starts to melt.
During these minutes, the double chocolate cookie dough has time to set and solidify around the filling.
By the time the marshmallow begins to liquify, the dough shell has formed a complete, protective barrier, preventing any leakage.
Achieving That Perfect Crinkled, Fudgy Texture
This recipe uses a high ratio of cocoa powder and very little flour, which is the foundational secret to achieving a deep, fudgy, brownie-like crumb rather than a cakey one.
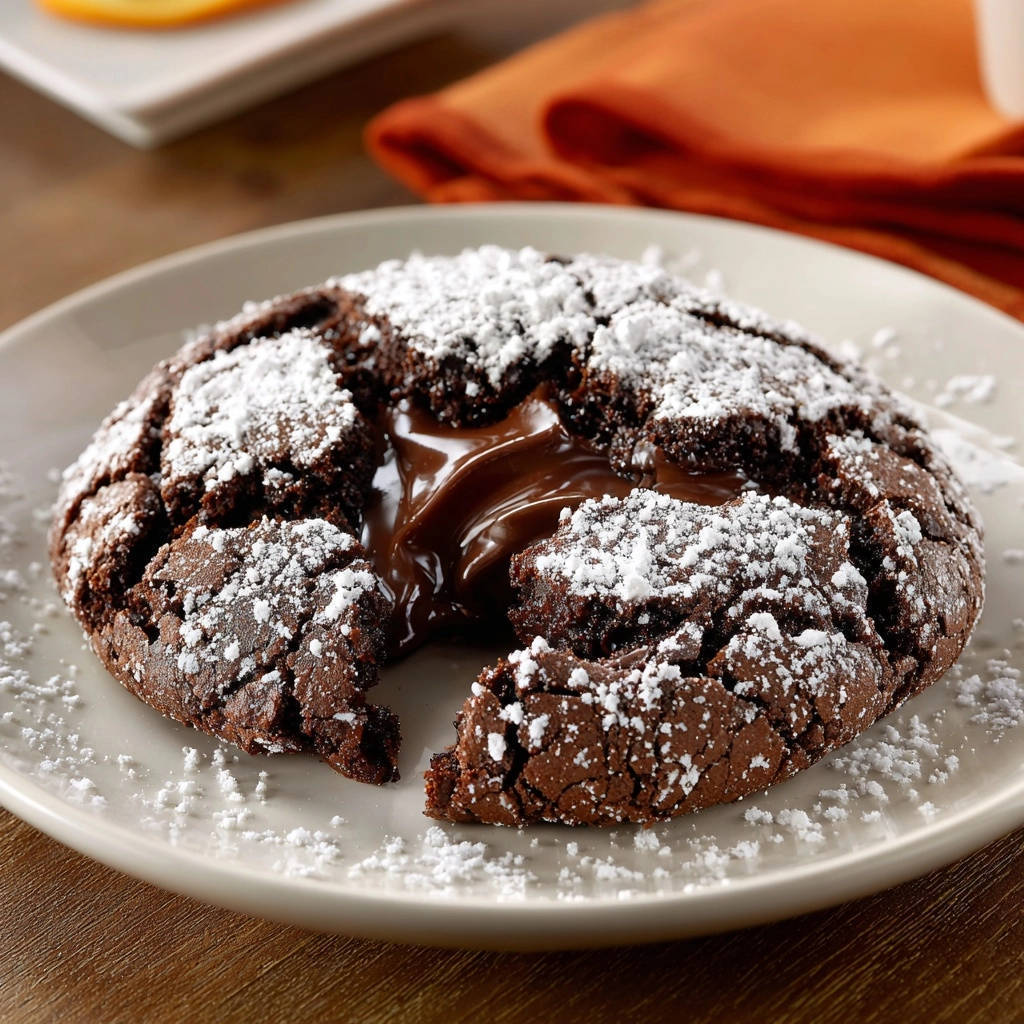
The beautiful, deep crackles are achieved by using a double sugar roll-especially the final heavy coating of powdered sugar.
As the cookie expands in the oven, that thick, sugary crust resists stretching, forcing the dough underneath to crack dramatically, exposing the rich interior.
Beyond Basic: The Critical Role of Cooling
When these cookies first come out of the oven, the melted marshmallow inside is essentially liquid and extremely hot.
Removing the cookie prematurely will cause the entire structure to deflate immediately, resulting in a flat cookie and potentially broken filling.
Allowing the Rich Double Chocolate S’mores Cookie to rest on the hot pan for 10 minutes leverages residual heat to gently stabilize and set the melted marshmallow into a firm, yet still wonderfully gooey, state.
Essential Tools for Your Perfect Cookie Adventure
Having the right kitchen equipment makes the process of creating these complex stuffed cookies seamless and guarantees better, consistent results.
Stand Mixer or Hand Mixer: Necessary for properly creaming the butter and sugars until light and fluffy, ensuring maximum air incorporation.
Parchment Paper: Crucial for preventing sticky filling from adhering to the baking sheet and ensuring easy removal, even if a tiny leak occurs.
Cookie Scoop (2 Tablespoon size): Ensures uniform sizing for consistent baking results, which is key when stuffing the centers.
Wire Rack: For final cooling after the initial 10-minute resting period on the hot pan, preventing the bottoms from becoming soggy.
Building a Deeply Fudgy Base: A Look at Critical Ingredients
The Flour and Leavening Ratio
We use significantly less flour than a standard cookie recipe, replacing that volume with unsweetened cocoa powder.
This low flour ratio minimizes gluten development, which is essential for that dense, chewy, fudgy result.
Baking powder is used as the sole leavening agent because it provides a rapid initial lift without spreading the dough too thin.
Selecting the Right Cocoa Powder
For a true “double chocolate” profile, a high-quality cocoa powder is vital.
Dutch-process cocoa powder creates a darker, deeper chocolate flavor and a richer color because it has been alkalized, smoothing out the acidity.
Using 100% Dutch-process will deliver the darkest, most intense chocolate s’mores cookie possible.
The Power of Brown Sugar for Chewiness
We use equal parts of granulated sugar and packed brown sugar.
The molasses in the brown sugar contributes significant moisture and a hint of caramel flavor, which is responsible for the coveted soft and chewy interior texture.
Granulated sugar helps promote spreading and crispness around the edges, balancing the chewiness from the brown sugar.
Room Temperature Eggs and Softened Butter
Room temperature butter and eggs are non-negotiable for superior texture in any cookie.
They emulsify much more effectively with the sugars, creating a homogenous, stable dough structure.
This strong emulsion traps air during the creaming stage, leading to a lighter, fluffier cookie base before the cocoa powder is added.
From Dough to Delicious: The Step-by-Step Baking Method
- Preparing the Elements and Sifting Dry Ingredients:
Start by placing the marshmallows in the freezer-this is non-negotiable! Next, combine your dry ingredients thoroughly in a separate bowl. This step prevents pockets of leavening agents.
- Creaming for Structure: The 2-Minute Rule:
Beat the butter and sugars for the full two minutes as described. Proper creaming incorporates air, which is vital for the eventual lift and texture of the cookie.
The mixture should look pale yellow and almost fluffy; it should not look dense or greasy.
- Mixing Wet and Dry (The Stop Point):
When incorporating the dry ingredients, mix only until just combined. Overmixing develops gluten, which will result in a tough or cakey Rich Double Chocolate S’mores Cookie.
Stop the mixer as soon as you see the final streaks of flour and cocoa powder disappear, then fold in any optional chocolate chips by hand.
- The Critical Dough Chill:
Refrigerate the dough for a minimum of 30 minutes. Chilling firms the fat, which drastically minimizes spreading during baking, maintaining the thick, fudgy structure.
This dough is also very sticky; chilling makes it much easier to handle and wrap around the marshmallow.
- The Guaranteed Gooey Center Sealing Process:
This is the most crucial step. Use the two-tablespoon scoop, flatten the dough, center the frozen marshmallow, and ensure there are absolutely no cracks or seams where the filling can escape.
Pinch the edges firmly and gently roll the sealed dough ball between your palms to smooth out the surface.
- Applying the Double Sugar Roll:
First, roll lightly in granulated sugar for a slightly sticky base. Then, immediately and heavily roll in the powdered sugar. The thick powdered sugar coating is what generates the signature crinkle pattern.
Don’t be shy with the powdered sugar-the thicker the coating, the more dramatic the final crackle will be.
- Baking and Visual Cues:
Bake at 350°F (175°C) for 11-13 minutes. Look for edges that are just set, while the center still looks slightly puffed and soft. They will not look fully baked yet.
If you see any marshmallow begin to bubble out, remove the pan immediately-it’s better to slightly underbake than risk a full leak.
- The Final Resting Period:
Leave the baked cookies on the hot sheet pan for 10 minutes after removing them from the oven. This residual heat allows the marshmallow structure to set firmly inside the cookie shell.
After the 10 minutes, transfer the cookies to a wire rack to finish cooling completely, unless you plan to serve them warm immediately.
Expert Tips and Techniques for Next-Level Rich Double Chocolate S’mores Cookie
Pre-Portion the Dough: If you are chilling the dough for longer than 30 minutes, pre-scoop the dough balls (without the marshmallow) and wrap them individually. This makes the sealing process much faster when you are ready to bake.
Use Premium Marshmallows: High-quality marshmallows often hold their structure better when frozen, resulting in a more predictable gooey center.
Prevent Burnt Bottoms: Use a light-colored baking sheet. Darker pans absorb more heat and can cause the bottoms of the Rich Double Chocolate S’mores Cookie to brown or burn before the centers are set.
Add Chocolate Chips (Internal or External): If using the optional chocolate chips, stir them into the dough. For an extra aesthetic touch, gently press a few extra chips into the top of the dough ball before the sugar roll.
Optimize Egg Temperature Quickly: If you forget to set out your eggs, place them in a bowl of warm (not hot) tap water for 5 minutes. This rapidly brings them to the correct room temperature.
Troubleshooting Fails: Solving Common S’mores Cookie Problems
Problem: My Filling Leaked and Sticked to the Pan
The primary cause of leakage is an insufficient seal or thawing marshmallows. Ensure the dough is completely wrapped around the frozen marshmallow with no visible seams before rolling.
Handle the dough balls gently after sealing to avoid cracking the outer shell before they hit the oven.
Also, make sure the dough was chilled for the minimum 30 minutes. Warm dough is too soft to maintain the seal when exposed to oven heat.
Problem: The Cookies Were Cakey or Dry
This is often a sign of overmixing the dough when adding the dry ingredients. Mix only until the flour streaks disappear, no further.
Alternatively, you may have overbaked them. Remember, these cookies are meant to look slightly underdone and soft when you pull them out; they set up entirely during the 10-minute cool-down period.
Double-check your flour and cocoa measurements; too much dry ingredient will drastically change the fudgy texture.
Making Ahead, Storing, and Flavor Variations
Freezing Baked vs. Unbaked Rich Double Chocolate S’mores Cookie Dough
The best method for making ahead is freezing the pre-rolled, unbaked dough balls. Follow the instructions through Step 7 (the double sugar roll), then place the finished balls on a parchment-lined sheet pan in the freezer until solid.
Transfer the frozen dough balls to a freezer-safe bag or container. When ready to bake, place them directly on the prepared pan and add 2-4 minutes to the original baking time.
Baked cookies can also be frozen in an airtight container for up to 2 months, but they are best eaten fresh for optimal gooeyness.
Storage and Freshness
Store finished Rich Double Chocolate S’mores Cookie treats in an airtight container at room temperature for up to 4 days.
If you prefer the marshmallow filling to be warm and stretchy again, microwave the stored cookies for 10-15 seconds before serving.
Flavor Swaps: Customizing Your Fudgy S’mores Treat
While the classic marshmallow center is divine, you can swap it out for a frozen square of caramels or a peanut butter cup, provided it is fully encased in dough.
To deepen the chocolate flavor, consider adding a teaspoon of instant espresso powder to the dry ingredients before mixing; it won’t taste like coffee but will enhance the richness of the cocoa.
For a spicy twist on these stuffed cookies, add a pinch of cayenne pepper to the dry ingredients for a subtle Mexican hot chocolate undertone.
Ready to Bake? Share Your Rich Double Chocolate S’mores Cookie Success!
With the critical sealing and chilling secrets now in your arsenal, you are ready to conquer the ultimate stuffed cookie challenge.
This Rich Double Chocolate S’mores Cookie delivers intense flavor, a signature crinkle, and a pull-apart center every single time.
Bake a batch today and prepare for the rave reviews! Don’t forget to tag us in your baking photos when you share your masterpiece.
Rich Double Chocolate S’mores Cookie
Course: DessertCuisine: American CuisineDifficulty: easy4
12 large cookies25
minutes12
minutes37
minutesAmerican Cuisine
Ingredients
1 cup all purpose flour
3/4 cup unsweetened cocoa powder
1 teaspoon baking powder
1/4 teaspoon salt
1/2 cup (1 stick) unsalted butter, softened
1/2 cup granulated sugar
1/2 cup packed brown sugar
2 large eggs, room temperature
1 teaspoon vanilla extract
12 large marshmallows (or 24 small ones)
1/2 cup powdered sugar (for rolling)
1/4 cup granulated sugar (for rolling)
1/2 cup chocolate chips (optional, for extra melt)
Directions
- Prepare the Filling and Dough Base: Place the 12 large marshmallows on a parchment-lined plate and place them in the freezer while you prepare the cookie dough.
- Mix the Dry Ingredients: In a medium bowl, whisk together the flour, cocoa powder, baking powder, and salt. Set aside.
- Cream the Wet Ingredients: In a large bowl, beat the softened butter until creamy. Add both the granulated and brown sugars and beat until light and fluffy, about 2 minutes. Beat in the eggs one at a time, followed by the vanilla extract.
- Combine: Gradually add the dry ingredients to the wet ingredients, mixing only until just combined. The dough will be thick and fudgy. Stir in the optional chocolate chips.
- Chill the Dough: Wrap the dough tightly in plastic wrap and refrigerate for at least 30 minutes. This is critical for preventing spreading and keeping the filling sealed.
- The Guaranteed Gooey Center Method (Sealing): Place the powdered sugar and the extra granulated sugar in separate shallow bowls. Remove the dough from the fridge. Take out the frozen marshmallows. Scoop about 2 tablespoons of dough and flatten it slightly in your hand. Place one frozen marshmallow directly in the center of the dough. Carefully wrap the dough completely around the marshmallow, pinching and smoothing the edges until the marshmallow is fully encased and there are no visible seams. Ensure the seal is tight.
- Prepare for Baking: Roll the tightly sealed dough ball first in the bowl of granulated sugar, then immediately and heavily roll it in the powdered sugar. The thick coating of powdered sugar helps create those deep cracks and forms a protective crust.
- Bake: Preheat your oven to 350 degrees F. Line a baking sheet with parchment paper. Place the sealed dough balls about 2 inches apart. Bake for 11 to 13 minutes. Do not overbake. The cookie edges should be set, but the center should still look very soft and slightly puffed.
- Finish: Let the cookies cool completely on the baking sheet for 10 minutes before transferring them to a wire rack. Cooling on the sheet allows the melted marshmallow to firm up just enough to hold its shape inside the cookie shell without deflating, guaranteeing that gooey pull when you break them open. Serve warm.
Notes
- Chilling the dough is critical for successful sealing and preventing spreading during baking.


