There’s something incredibly comforting about a freshly baked loaf of bread. The aroma filling your kitchen, the warm crust, the promise of a delicious slice… but if you’ve ever baked a fruit and nut bread, you know the potential heartache. You slice into your beautiful creation, only to find all those yummy additions – the sweet cranberries and crunchy walnuts – have decided to take a little trip to the bottom of the loaf. It’s a common frustration, but one that is easily solved with a simple, brilliant trick.
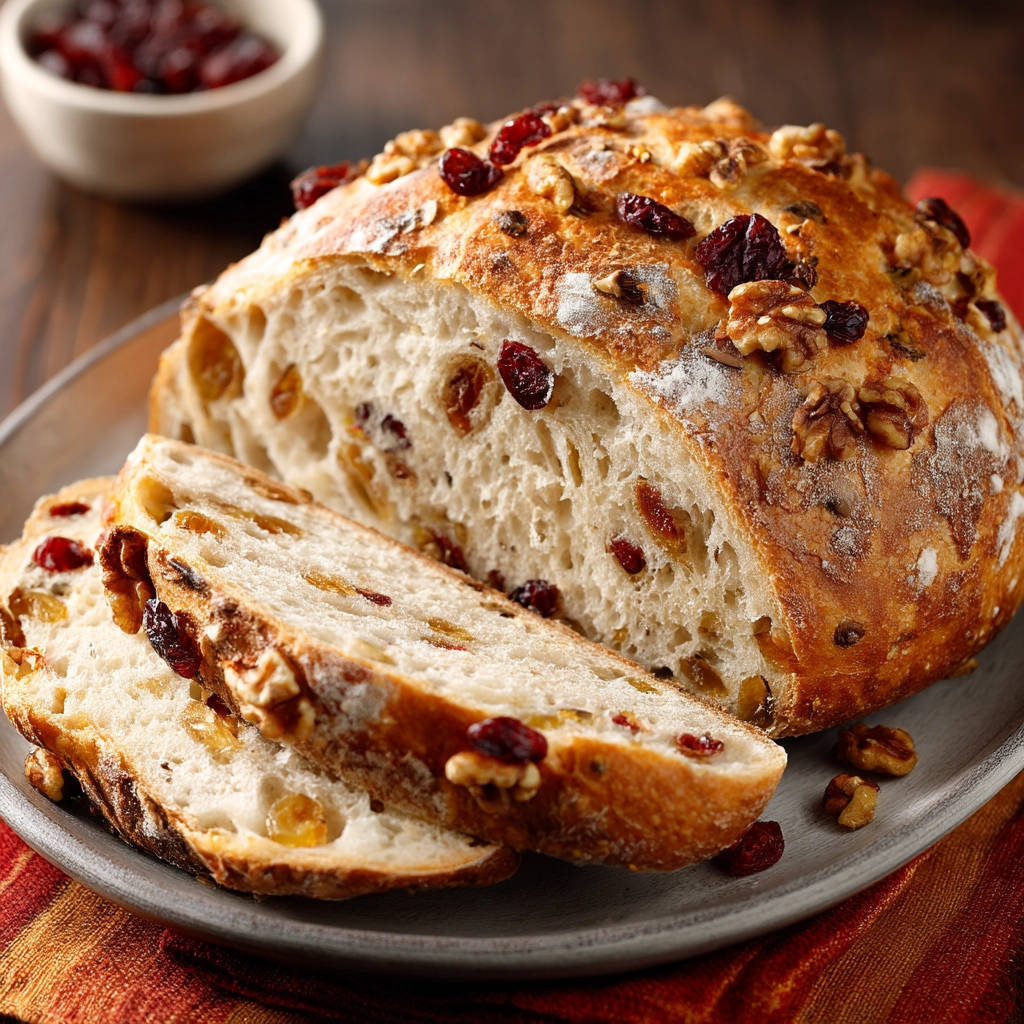
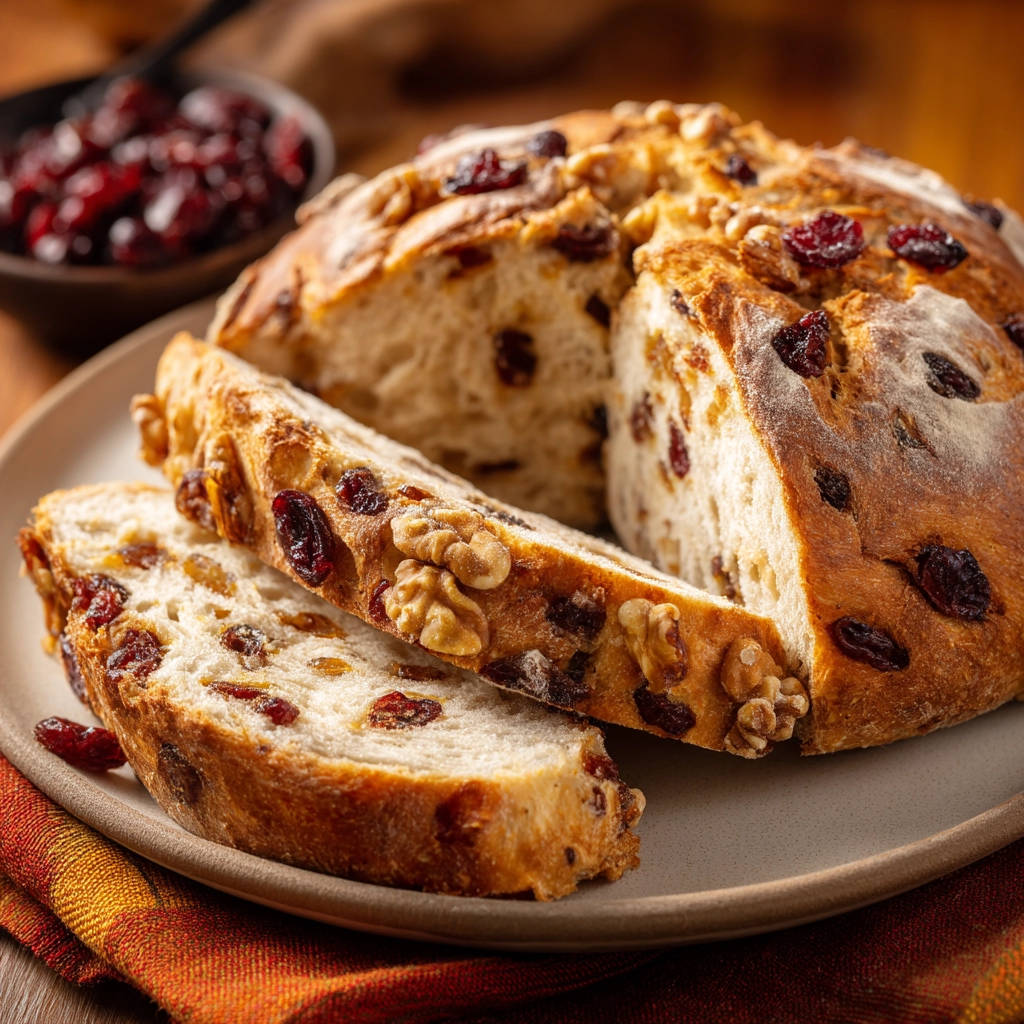
This rustic cranberry walnut bread recipe delivers on all fronts: a perfectly chewy crust, a soft interior, and importantly, an even distribution of those delightful bursts of cranberry tartness and walnut crunch throughout every single slice. Say goodbye to sad, bottom-heavy loaves! I’m going to share the little secret that makes all the difference, turning a potentially frustrating bake into a guaranteed success.
Why You’ll Absolutely Adore This Cranberry Walnut Bread
Beyond solving the pesky sinking fruit problem, this bread is a true joy to make and even more so, to eat! It’s got a lovely, slightly chewy crust and a tender crumb inside, making it perfect for any time of day.
- Even Distribution: Thanks to our secret trick, you get the perfect balance of cranberries and walnuts in every bite.
- Amazing Texture Contrast: The soft bread, chewy dried cranberries, and crisp walnuts create a symphony of textures.
- Cozy, Rustic Flavors: Cranberries and walnuts are a classic pairing that feels warm and inviting, perfect for a cool morning or afternoon snack.
- Simple & Approachable: While it looks impressive, this recipe uses straightforward techniques that even newer bread bakers can master.
- Versatile Enjoyment: Delicious on its own, toasted, or served alongside your favorite meals.
Gathering Your Simple Ingredients for Rustic Cranberry Walnut Bread
One of the beauties of this rustic loaf is that it uses pantry staples for the base, with just a few key additions for flavor and texture. Each component plays a crucial role, from providing structure to activating the yeast to preventing that dreaded sinking issue.
Let’s walk through what you’ll need. We’re using basic all-purpose flour for the main structure, readily available and easy to work with. Active dry yeast is our leavening agent, responsible for that lovely rise and airy texture. Salt isn’t just for flavor; it also helps control the yeast activity and strengthens the gluten structure. A touch of sugar feeds the yeast and aids in browning the crust. Warm water at the correct temperature is essential to wake up that active dry yeast.
Then come the stars of the show: dried cranberries, bringing their signature tart chewiness, and chopped walnuts, adding earthy flavor and crunch. And finally, our secret weapon: a couple of tablespoons of extra all-purpose flour. This might seem odd, but this extra flour is precisely what coats the fruit and nuts, creating friction and preventing them from sinking to the bottom during the rise and bake. It’s a small amount, but it makes a world of difference!
- 3 cups all-purpose flour, plus extra for dusting work surfaces
- 2 teaspoons active dry yeast
- 1 teaspoon salt
- 1 tablespoon sugar
- 1 and 1/2 cups warm water (ideally between 105-115 degrees F)
- 1 cup dried cranberries
- 1 cup chopped walnuts
- 2 tablespoons all-purpose flour (for coating)
Crafting Your Beautiful Loaf: Step-by-Step Guidance
Making this bread is a rewarding process. It involves minimal kneading, relying mostly on time and gentle handling to develop the dough. Follow along, and you’ll have a gorgeous, evenly distributed loaf in no time!
- Begin by combining your dry base ingredients in a large mixing bowl. Whisk together the 3 cups of all-purpose flour, the active dry yeast, salt, and sugar. Whisking helps distribute these ingredients evenly, ensuring everything is ready to go when the liquid is added.
- Next, pour in the warm water. Remember, the water temperature is important for activating the yeast – too cold and they’ll be sluggish, too hot and you might kill them! Use a wooden spoon or sturdy spatula to stir everything together. Don’t worry about developing gluten yet; just mix until all the dry bits are incorporated and you have a very wet, sticky, “shaggy” dough. This loose consistency is key to the rustic texture. Cover the bowl tightly with plastic wrap.
- Now comes the first rise, also known as the bulk fermentation. Let the covered dough rest at room temperature. This can take anywhere from 1 to 2 hours, depending on the warmth of your kitchen. You’re looking for the dough to visibly double in size and show plenty of bubbles on the surface and sides. This slow rise develops flavor and texture.
- While your dough is on its first rise, prepare the cranberries and walnuts with our special technique. In a separate small bowl, combine the dried cranberries and chopped walnuts. Sprinkle the 2 tablespoons of extra all-purpose flour over them. Toss everything together thoroughly, making sure every cranberry and every piece of walnut is coated in a fine layer of flour. This coating is the unsung hero, providing structure and preventing the fruit and nuts from slipping down through the wet dough.
- Once the dough has successfully doubled and is full of bubbles, gently scrape it out onto a lightly floured surface. Be prepared for it to be quite loose and sticky – this is normal! Avoid adding excessive extra flour at this stage, as it can toughen the bread.
- Gently fold the dough over itself a few times. This helps build a little tension. Now, scatter the floured cranberries and walnuts evenly over the top of the dough.
- Using a very gentle hand, fold and lightly knead the dough just enough to incorporate the fruit and nuts. The goal is simply to distribute them throughout the dough without overworking it. Overworking can lead to a tough loaf. A few gentle folds and presses are all it takes.
- Shape the dough into a round loaf. It doesn’t need to be perfectly symmetrical; the rustic shape is part of its charm! If you’re baking on a baking stone or sheet, dust the surface generously with flour or cornmeal to prevent sticking. If you’re using a Dutch oven (a fantastic way to get a great crust!), prepare it now according to your preferred method – usually, this means preheating the Dutch oven itself in the oven.
- Cover your shaped loaf (either with a light cloth, parchment paper, or by putting the lid on the Dutch oven if preheating) and let it rest for a second short rise, about 30 minutes. This allows the dough to relax and puff up slightly while your oven heats up. Make sure your oven is preheating to a hot 425 degrees F (220 degrees C).
- Just before placing the loaf in the oven, take a sharp knife, razor blade, or a bread lame and score the top of the loaf. Scoring isn’t just for looks; it helps control where the bread expands as it bakes, resulting in a better shape and a crispier crust.
- It’s time to bake! Place the loaf in the preheated oven. If using a Dutch oven, place the loaf inside (carefully!) and bake with the lid on for the first 20 minutes. Baking covered creates steam, which keeps the crust soft initially, allowing the loaf to expand fully. If you’re not using a Dutch oven, you can create steam by placing a pan filled with hot water on a rack below the bread as it bakes.
- After 20 minutes, if using a Dutch oven, carefully remove the lid. The bread will have puffed up beautifully. Continue baking for another 25-30 minutes. You’ll know it’s done when the crust is a deep golden brown and an instant-read thermometer inserted into the center of the loaf reads between 200-210 degrees F (93-99 degrees C).
- The hardest part: waiting! Once baked, transfer the loaf to a wire rack and let it cool completely. Seriously, resist the urge to slice into it while it’s hot. Cooling is crucial for the internal structure and texture to set properly. Slicing too early can result in a gummy, dense crumb. Patience is key!
Tips for Perfect Rustic Cranberry Walnut Bread Every Time
Achieving that perfect loaf is simple with a few insider tips. These little tricks will ensure your bread is everything you dreamed of and more.
- Check Your Yeast: Make sure your active dry yeast is fresh. You can test it by dissolving the yeast and a pinch of sugar in a little of the warm water from the recipe. If it doesn’t get foamy and bubbly within 5-10 minutes, your yeast might be dead, and you’ll need to use a new packet.
- Warm Environment for Rising: Yeast loves warmth! If your kitchen is cool, find a warm spot for the dough to rise, like a slightly warm (but turned off) oven, near a sunny window, or on top of a warm appliance.
- Don’t Over-Knead: This is a rustic, no-knead style dough for a reason. Gentle folding is enough to develop the necessary structure and incorporate the fruit and nuts. Over-kneading can lead to a tough bread.
- Proper Water Temperature: As mentioned, aiming for 105-115°F (40-46°C) is ideal for active dry yeast. Use a thermometer if you can!
- Cool Completely: We can’t stress this enough. Letting the bread cool on a wire rack allows steam to escape and the crumb structure to stabilize, resulting in that lovely texture.
Serving Suggestions for Your Rustic Masterpiece
This bread is incredibly versatile! Enjoy a slice simply slathered with butter or cream cheese. It also makes fantastic toast. Consider pairing it with a comforting bowl of soup, like our Creamy Split Pea Soup, or alongside a fresh salad like the Easy Kale Salad for a complete meal.
For a sweet treat, try it toasted with jam or honey. It’s also surprisingly good sliced thinly and served with a cheese board. Thinking about other breakfast bakes? You might also enjoy making Classic Blueberry Scones or Fluffy Homemade Biscuits if you love starting your day with fresh baked goods.
Your Cranberry Walnut Bread Questions Answered (FAQ)
Got questions about baking this delightful loaf? Here are some common queries and helpful answers.
Can I use fresh cranberries or frozen cranberries instead of dried?
While delicious, fresh or frozen cranberries contain a lot more moisture. Using them directly in this dough might make it too wet and could still lead to sinking. If you wanted to try them, you would likely need to reduce the water slightly and perhaps toss them with the flour as well, but dried cranberries are recommended for the best result with this specific recipe method.
What if I don’t have active dry yeast? Can I use instant yeast?
Yes, you can typically substitute instant yeast for active dry yeast. The main difference is that instant yeast doesn’t require proofing first. You can often just mix it directly into the dry ingredients. However, since this recipe calls for warm water added separately, you can simply proceed as written, using the warm water to activate the instant yeast as well. It might rise a little faster, so keep an eye on your dough.
Can I use different nuts or dried fruit?
Absolutely! Feel free to swap out the walnuts for pecans, almonds, or a mix. Other dried fruits like raisins, chopped dried apricots, or cherries would also work wonderfully. Just be sure to chop larger fruits into smaller pieces and toss whatever fruit and nut combination you use with the 2 tablespoons of flour to prevent sinking.
My dough isn’t rising. What went wrong?
Several things can cause a dough not to rise. The most common issues are inactive yeast (check the expiration date and try the proofing test mentioned in the tips), water that was too hot or too cold, or a room that is too cold for proofing. Ensure your water temperature is correct and find a warm spot for the dough to rest.
How should I store the leftover bread?
Once completely cooled, store the bread at room temperature. You can keep it in a bread box, a clean linen towel, or a paper bag to maintain a crisper crust, or in a plastic bag or airtight container for a softer crust. It will stay fresh for 2-3 days. For longer storage, slice the cooled bread and freeze the slices in a freezer-safe bag. You can then pop slices directly into the toaster.
Why do I need to score the bread before baking?
Scoring the bread provides weak spots on the surface. As the bread bakes and expands rapidly in the hot oven (oven spring!), the scores allow the loaf to burst open in a controlled manner, rather than cracking haphazardly. It helps the loaf rise taller and creates a beautiful, professional-looking crust.
Enjoy Your Homemade Cranberry Walnut Bread!
Baking bread from scratch is one of the most rewarding kitchen experiences, and this rustic cranberry walnut loaf is a perfect example. With that simple trick to keep your fruit and nuts suspended, you’re guaranteed a beautiful, flavorful loaf every single time. Share it with loved ones, enjoy it solo with your morning coffee, or serve it alongside your favorite meal. It’s a recipe that’s sure to become a cherished go-to.
Give this recipe a try and let me know how it turns out in the comments below! What are your favorite ways to enjoy cranberry walnut bread?
Rustic Cranberry Walnut Bread
Ingredients
- 3 cups all-purpose flour, plus extra for dusting
- 2 teaspoons active dry yeast
- 1 teaspoon salt
- 1 tablespoon sugar
- 1 and 1/2 cups warm water (about 105-115 degrees F)
- 1 cup dried cranberries
- 1 cup chopped walnuts
- 2 tablespoons all-purpose flour
Directions
- In a large bowl, whisk together 3 cups of flour, the active dry yeast, salt, and sugar.
- Pour in the warm water and stir with a wooden spoon or spatula until a shaggy dough forms. It will be sticky. Cover the bowl with plastic wrap and let it rise at room temperature for 1 to 2 hours, or until doubled in size and bubbly.
- While the dough is rising, prepare the cranberries and walnuts. In a separate small bowl, toss the dried cranberries and chopped walnuts with the 2 tablespoons of flour. Make sure they are well coated. This flour coating is the key to helping them stay suspended in the dough.
- Once the dough has risen, gently scrape it out onto a lightly floured surface. It will be loose and sticky.
- Gently fold the dough over a few times. Then, scatter the floured cranberries and walnuts over the dough. Gently fold and knead the dough just enough to evenly distribute the fruit and nuts, being careful not to overwork it.
- Shape the dough into a rustic round loaf. If using a baking stone or sheet, dust it with flour or cornmeal. If using a Dutch oven, prepare it according to your preferred method (usually preheating with the lid on).
- Cover the loaf and let it rest for 30 minutes while your oven preheats to 425 degrees F.
- Just before baking, score the top of the loaf with a sharp knife or lame.
- Bake for 20 minutes with steam (if using a Dutch oven, bake covered). Then, if using a Dutch oven, remove the lid and continue baking for another 25-30 minutes, or until the crust is golden brown and the internal temperature reaches 200-210 degrees F. If not using a Dutch oven, you can create steam by placing a pan of hot water on the rack below the bread.
- Let the bread cool completely on a wire rack before slicing. This is important for the texture.