

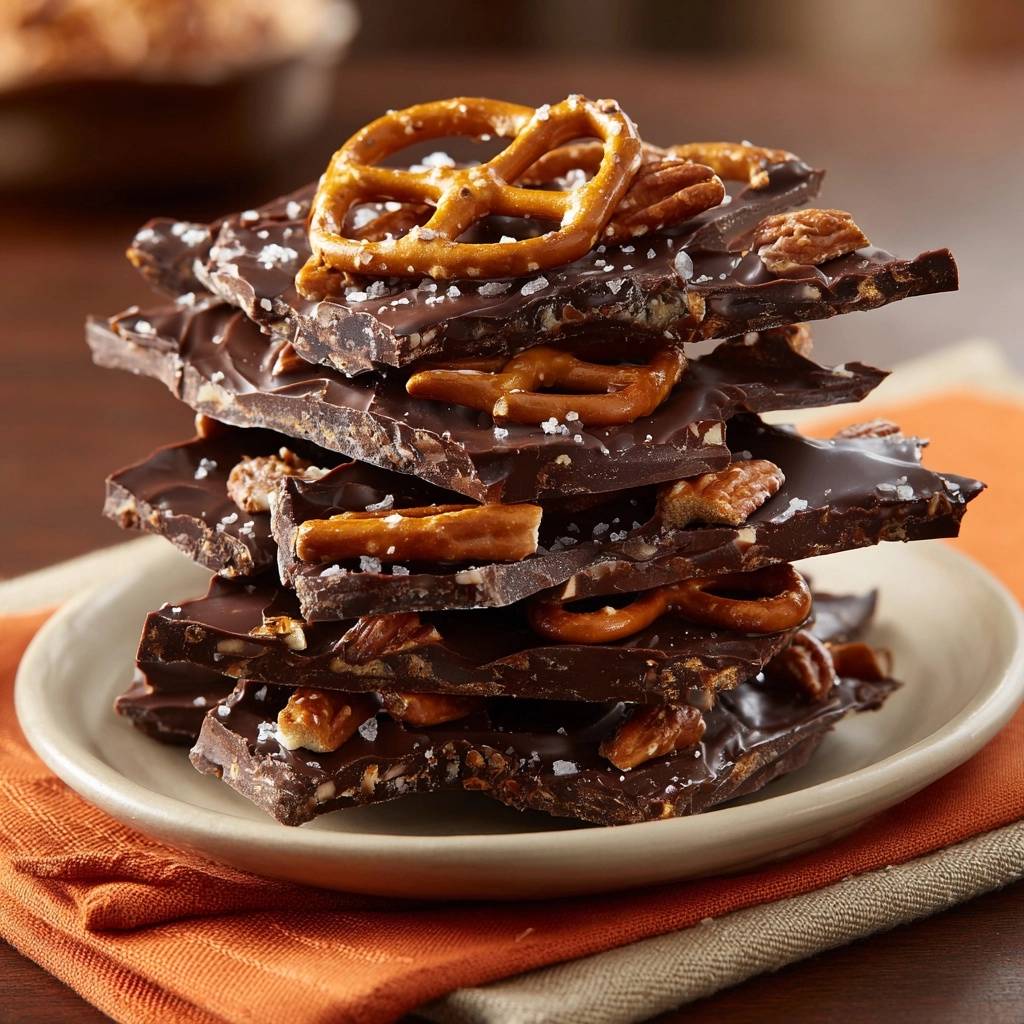
Imagine biting into a shard of dark chocolate that shatters with a crisp, professional snap, immediately followed by the buttery crunch of a toasted pecan and the salty hit of a pretzel. Most homemade chocolate bark looks great for an hour but quickly turns into a disappointing, chewy mess as the pretzels absorb moisture and lose their life. This recipe focuses on the perfect contrast between 70% cacao bitterness and the savory elements of salt and nuts, ensuring every bite remains as fresh as a high-end confectionary shop.
The secret to this success isn’t just the ingredients; it’s the way we handle the physics of the chocolate itself. We’re moving beyond simply melting chocolate to creating a stable structure that locks out humidity. By using a specific cooling method and a moisture-stripping trick for the pretzels, you’ll create a treat that stays “shatter-crisp” even days after you make it.
I’ve found that the real trick to professional bark is the temperature of your toppings. If you add cold nuts or slightly damp pretzels to warm chocolate, you’re inviting condensation to ruin your hard work. Always ensure your toasted pecans and pretzels are at room temperature and bone-dry before they ever touch the dark chocolate pool.
The Science of the Perfect Chocolate Snap
When you melt chocolate, you’re essentially breaking down a complex crystalline structure. To get that glossy finish and the signature “snap” when you break a piece, you have to encourage the formation of Beta-V crystals. These specific crystals are the strongest and most stable, but they only form within a very narrow temperature window. If you just melt a bar and let it cool, the chocolate will likely be soft, dull, and prone to melting the second your fingers touch it.
Furthermore, untempered chocolate contains “unbound” fats that move freely. This is a disaster for pretzels because that fat and residual moisture migrate directly into the porous surface of the pretzel. Within hours, your crunchy snack becomes stale. By tempering the chocolate, we create a tight, dense lattice that acts as a shield. This shield keeps the chocolate firm at room temperature and, more importantly, keeps the moisture away from your pretzels.
Why Moisture is the Enemy of Pretzels
Pretzels are incredibly hygroscopic, which is a fancy way of saying they act like little sponges for any moisture in their environment. They will pull water from the air or even from the chocolate itself if it isn’t set correctly. Once a pretzel absorbs even a tiny amount of moisture, its starch structure softens, and that satisfying crunch vanishes. Our goal is to create a “Moisture Barrier” by ensuring the chocolate sets rapidly and firmly, effectively shrink-wrapping the pretzel in a protective layer of cacao solids.
Essential Components for Dark Chocolate Bark
Quality is everything when the ingredient list is this short. I recommend using a high-quality dark chocolate bar with 60% to 70% cacao. At this percentage, the chocolate has enough cocoa butter to flow smoothly but enough solids to provide a deep, complex flavor. Avoid chocolate chips if possible, as they often contain stabilizers designed to help them hold their shape under heat, which can make for a grainy or overly thick bark.
In addition to the chocolate, a teaspoon of coconut oil is a fantastic secret weapon. It thins the chocolate just enough to make spreading it a breeze and adds a beautiful, mirror-like gloss to the finished product. Since we aren’t using any dairy or pork-based fats, the coconut oil provides that rich mouthfeel without interfering with the purity of the dark chocolate flavor.
Selecting and Toasting the Pecan Halves
Raw pecans are fine for a salad, but they are insufficient for a high-quality bark. Toasting the pecans is a non-negotiable step because it develops the oils and creates a deeper, woodsy flavor that stands up to the dark chocolate. More importantly, the heat from toasting creates a dry, crisp exterior. This fat-barrier prevents the nut from absorbing moisture from the chocolate, ensuring the pecan stays as crunchy as the pretzel.
The Best Pretzels for Structural Integrity
While you might be tempted to use pretzel sticks, mini-twists are the superior choice for bark. The classic “three-hole” shape of a mini-twist provides more surface area for the chocolate to “lock” into. This structural interlocking makes the bark less likely to crumble into tiny pieces when you break it. Before you start, always taste a pretzel from the bag; if it doesn’t have a loud, sharp crack, it’s already too stale to use.
Step-by-Step: Preparing the Base and Toppings
Preparation is the key to a stress-free chocolate project. Start by lining a heavy baking sheet with parchment paper or a silicone mat. I prefer parchment because it allows for a bit more airflow underneath. If you live in a humid climate, your pretzels might already be slightly soft even in a sealed bag. To fix this, put them in a 300°F oven for about 3 to 5 minutes.
This “oven-drying” hack is a game changer. It drives off any surface humidity that has settled into the nooks and crannies of the pretzel. Once they come out of the oven, let them cool completely on a wire rack. Never add warm toppings to your tempered chocolate, as the heat will break the temper you worked so hard to achieve. Have your salt and toasted pecans ready in small bowls so you can work quickly once the chocolate is poured.
The Seeding Method: Tempering Without a Machine
The seeding method is the most reliable way to temper chocolate at home. You’ll need a double boiler, which is just a glass bowl set over a pot of barely simmering water. Ensure the water never touches the bottom of the bowl, or the chocolate will overheat and scorch. Place two-thirds of your chopped chocolate and the coconut oil in the bowl. Stir gently until the chocolate reaches 115°F. At this point, it’s fully melted and the old crystal structures are gone.
Remove the bowl from the heat and begin adding the remaining one-third of solid chocolate in small handfuls. This solid chocolate acts as a “seed,” providing a template for the Beta-V crystals to follow. Stir constantly. As the solid pieces melt, they will cool the mixture down. You are looking for the temperature to drop to between 88°F and 90°F. This curve is essential; it’s the “sweet spot” where the chocolate becomes stable, glossy, and ready to snap.
Managing Temperature Without a Thermometer
If you don’t have a digital thermometer, you can use visual and tactile cues. Dip a spoon into the chocolate and set it on a piece of parchment paper. In a tempered state, the chocolate should begin to set around the edges within 2 to 3 minutes. It should look smooth and start to lose its wet shine. If it stays melted and runny after 5 minutes, it’s too warm and needs more stirring or a few more “seed” pieces of chocolate.
Assembly: Achieving the Professional Rustic Look
Once your chocolate is tempered, pour it immediately onto the center of your prepared baking sheet. Use an offset spatula to spread it toward the edges. You want to aim for a thickness of about 1/4 inch. If the chocolate is too thin, it won’t have the strength to hold the heavy pecans. If it’s too thick, it becomes difficult to bite through comfortably. This “Goldilocks” thickness ensures every shard is structurally sound but still elegant.
Work with a sense of urgency here. Tempered chocolate begins to set much faster than untempered chocolate. You want the surface to be wet enough that the toppings can partially sink in, but firm enough that they don’t disappear to the bottom. A rustic look is best, so don’t worry about perfect symmetry. The beauty of bark lies in its irregular, handcrafted appearance.
Strategic Topping Placement for Maximum Crunch
Instead of just scattering the pretzels and pecans from high above, take a moment to lightly press them into the chocolate. This “encapsulation” is vital. By pushing the pretzels slightly into the chocolate, you are sealing the bottom and sides from oxygen and humidity. Finish with a generous sprinkle of coarse sea salt. The salt needs to hit the chocolate while it’s still tacky so it sticks firmly rather than rolling off once the bark is dry.
The Rapid-Set Technique: Fridge vs. Room Temp
The final step in ensuring a perfect snap is the cooling process. While many people leave bark on the counter, I recommend the “Rapid-Set” technique. Place the tray in the refrigerator for exactly 20 minutes. This controlled chill “shocks” the crystals into their final, stable form before any ambient moisture in the room can soften the pretzels. It creates an immediate barrier that preserves the crunch.
However, do not use the freezer. The extreme cold of a freezer causes sugar bloom, which results in those unappealing white streaks on the surface. It also leads to heavy condensation when you bring the bark back to room temperature, which will make your pretzels soggy almost instantly. Stick to the fridge, set a timer, and remove it as soon as the chocolate is firm to the touch.
Troubleshooting Common Bark Failures
If you notice white streaks or a dull, greyish film on your chocolate, it has “bloomed.” This usually happens because the chocolate got too hot or wasn’t tempered correctly. While it’s still safe to eat, it won’t have that crisp snap. To prevent this next time, be more precise with your seeding and ensure you don’t skip the stirring process, which is what distributes the stable crystals throughout the batch.
Another common issue is toppings falling off the bark once it’s broken. This happens if the chocolate was already too cool when you added the pecans and pretzels. If you find your chocolate is setting too fast, you can very briefly hover a hairdryer on low heat over the surface to re-soften it just enough for the toppings to stick. Finally, if the chocolate melts instantly on your fingers, it’s a sign of a poor temper. Keeping the bark in a cool, dry place will help, but the real fix is in the temperature curve during the melting phase.
Storage Logistics to Maintain Texture
Once the bark is set and broken into shards, storage is your next priority. Use an airtight glass container rather than a plastic bag. Glass is better at keeping out odors and moisture. Store the container in a cool, dark pantry. While it’s tempting to keep it in the fridge, the constant temperature fluctuations every time you open the door can cause the pretzels to lose their crunch. If your house is very warm, the fridge is okay, but make sure the container is truly airtight.
Expert Tips for Customizing Your Bark
Once you master the base technique, you can get creative with the flavors. A teaspoon of fine espresso powder stirred into the melted chocolate adds a sophisticated depth that pairs beautifully with the pecans. You can also experiment with different salts. While coarse sea salt is classic, a Smoked Maldon salt adds a campfire quality that makes the dark chocolate feel even richer. Just ensure any additions are completely dry to avoid seizing the chocolate.
Alternative Nut and Seed Pairings
If you have a pecan allergy or just want to switch things up, the ratios remain the same. Toasted almonds and sesame seeds offer a wonderful crunch and a slightly more savory profile. For a festive look, pumpkin seeds (pepitas) provide a vibrant green color that pops against the dark chocolate. Regardless of the nut or seed you choose, always perform that dry toast in a pan or oven first to ensure maximum flavor and crunch.
Frequently Asked Questions
Can I use chocolate chips instead of bar chocolate?
You can, but it is not recommended for the best results. Chocolate chips contain stabilizers and less cocoa butter than high-quality bars. This means they don’t flow as well when melted and are much harder to temper correctly. For a professional snap and gloss, always reach for a high-quality chocolate bar and chop it finely yourself.
Why did my chocolate seize and turn grainy?
Seizing happens when even a tiny drop of water gets into the melting chocolate. This causes the sugar and cacao to clump together into a gritty paste. To avoid this, ensure your bowl and spatula are bone-dry. Also, be careful when using a double boiler; steam rising from the bottom pot can sometimes sneak into the bowl and cause the chocolate to seize.
How do I get perfectly clean breaks instead of shards?
If you prefer uniform squares over rustic shards, use a long, sharp chef’s knife. Heat the blade under hot water, wipe it completely dry, and press it firmly into the set bark. The heat from the blade will help slice through the chocolate without it splintering. However, most people find the irregular, hand-broken shards to be part of the charm of homemade bark.
Can I make this with white or milk chocolate?
Yes, but the tempering temperatures are different. Milk chocolate should be heated to 105°F-110°F and cooled to 84°F-86°F. White chocolate is even more delicate; heat it to 100°F-105°F and cool it to 82°F-84°F. Because white and milk chocolate have higher sugar and milk solid content, they are more prone to scorching, so watch your heat very closely.
How long will the pretzels stay crunchy?
If you followed the tempering and rapid-set instructions, the pretzels should stay perfectly crunchy for about 5 to 7 days in an airtight container. After a week, even the best-tempered chocolate will eventually allow some moisture transfer. For the absolute best experience, enjoy the bark within the first three days of making it.
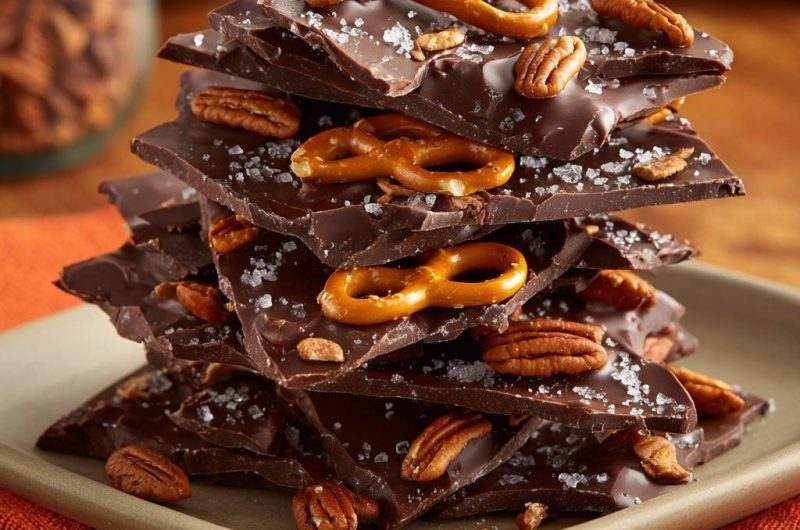
Salted Pecan and Pretzel Dark Chocolate Bark
Course: DessertCuisine: AmericanDifficulty: easy12
servings10
minutes5
minutes15
Minutes185
kcalAmerican
Ingredients
16 ounces high-quality dark chocolate (60% to 70% cacao), finely chopped
1 cup mini salted pretzels
1 cup pecan halves, toasted
1 tablespoon coarse sea salt (or fleur de sel)
1 teaspoon coconut oil (optional, for a glossy finish)
Directions
- Line a large baking sheet with parchment paper or a silicone baking mat. This ensures the bark releases cleanly without sticking.
- To solve the soggy pretzel problem, ensure your pecans and pretzels are completely dry. If your kitchen is humid, place the pretzels on a baking sheet in a 300°F oven for 3-5 minutes to drive off surface moisture. Let them cool completely to room temperature before adding to the chocolate.
- Temper the chocolate: Place two-thirds of the chopped chocolate and the coconut oil in a glass bowl over a pot of barely simmering water (double boiler method). Ensure the bottom of the bowl does not touch the water. Stir until the chocolate reaches 115°F. Remove from heat and gradually stir in the remaining one-third of solid chocolate. Continue stirring until all chocolate is melted and the temperature drops to 88°F-90°F. This “seeding” method ensures the chocolate sets firmly and won’t bloom or soften the pretzels.
- Pour the tempered chocolate onto the prepared baking sheet. Use an offset spatula to spread it into an even layer, approximately 1/4 inch thick.
- Immediately press the whole pretzels and toasted pecan halves into the warm chocolate. Sprinkle the coarse sea salt generously over the top while the chocolate is still wet to ensure it adheres.
- The Snap Secret: Place the tray in the refrigerator (not the freezer, to avoid condensation) for 20 minutes. This controlled rapid set creates a moisture barrier around the base of the pretzels before they can absorb any ambient humidity.
- Once fully firm, remove from the refrigerator and break the bark into large, rustic shards by hand or with a sharp knife. Store in an airtight container in a cool, dry place to maintain the perfect crunch.
Notes
- To prevent soggy pretzels, ensure they are completely dry by briefly warming them in the oven if your kitchen is humid. Use the refrigerator, not the freezer, to set the chocolate to avoid condensation.


