
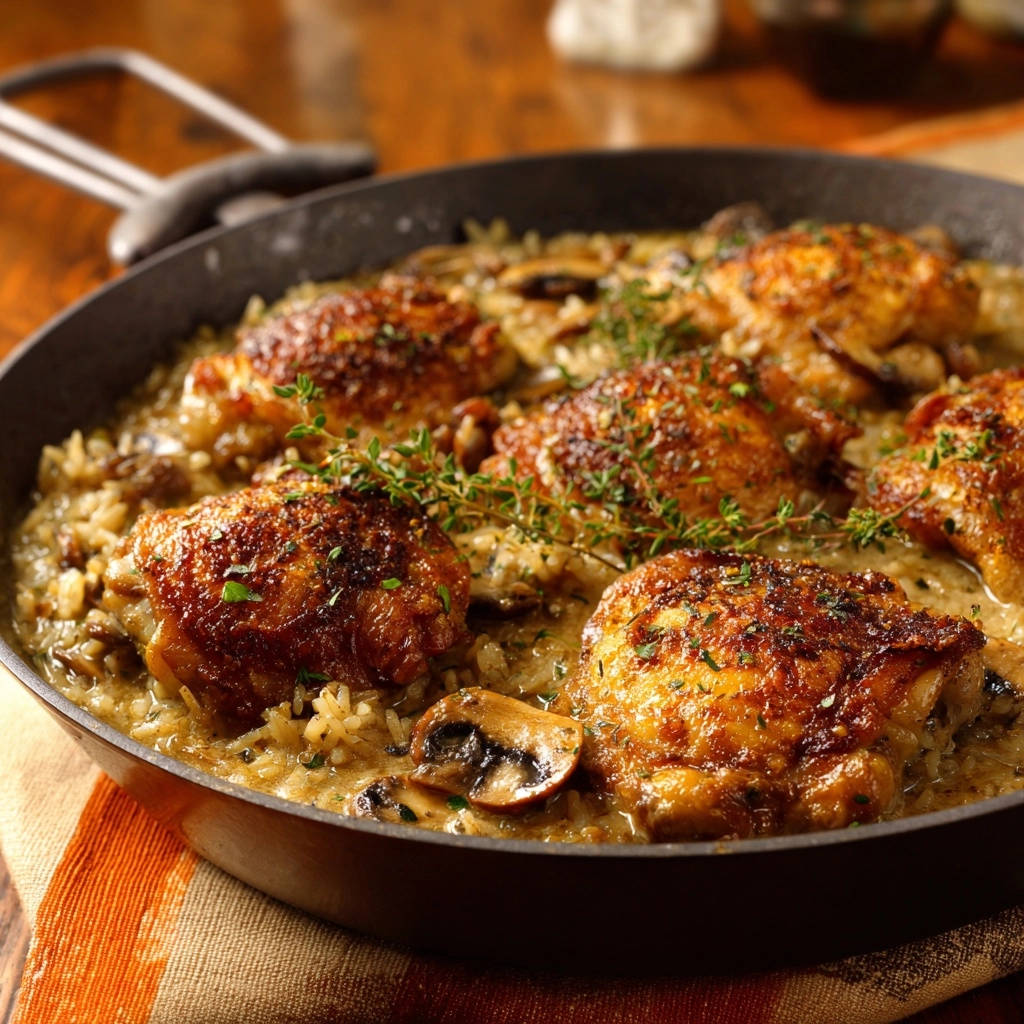
I confess, achieving truly crispy chicken skin in a saucy, one-pan dish used to be my culinary white whale. Too often, the delicious broth would turn that golden skin into a soggy disappointment. But after countless trials, I’ve finally cracked the code to ensure your Skillet Chicken & Mushroom Rice boasts perfectly crisp, deeply flavorful skin every single time, nestled atop a rich, umami-packed rice base.
This recipe transforms a beloved comfort meal into an effortless masterpiece. It’s the ultimate weeknight dinner that feels gourmet, bringing together tender chicken and creamy, savory rice in one harmonious pan.
Why This Skillet Chicken & Mushroom Rice Will Be Your New Favorite
The Crispy Skin Secret, Revealed
This Skillet Chicken & Mushroom Rice recipe prioritizes searing the chicken thighs to an unparalleled crispness before they even meet the rice. This crucial step creates a barrier, preserving that golden crunch even as the dish simmers.
No more compromises between flavorful rice and satisfyingly crackly skin; you get both in every bite.
One-Pan Wonder: Less Mess, More Flavor
The beauty of this dish lies in its simplicity. Everything, from searing the chicken to simmering the rice, happens in a single skillet.
This not only minimizes cleanup but also allows all those incredible flavors-from the rendered chicken fat to the sautéed mushrooms-to meld and deepen throughout the cooking process.

Comfort Food, Elevated: Rich Flavors, Simple Steps
This isn’t just another chicken and rice dish; it’s a deeply satisfying meal designed for ease and maximum flavor. It combines the rustic comfort of a hearty stew with the elegance of perfectly cooked ingredients.
Despite its impressive outcome, the steps are straightforward and accessible, making it an ideal choice for both seasoned cooks and enthusiastic beginners.
At a Glance: Prep, Cook, and Servings
Time Commitment
This savory skillet creation is surprisingly quick to bring to the table.
Prep Time: 15 minutes
Cook Time: 40 minutes
Total Time: 55 minutes
Yields and Portions
This recipe is perfectly scaled for a delicious family meal or for generous servings with delectable leftovers.
Servings: 4
It’s hearty enough for a main course, providing satisfying portions for everyone.
Your Kitchen Arsenal: Essential Tools for Skillet Success
Must-Have Equipment
Large Oven-Safe Skillet (10-12 inch): Crucial for searing chicken and cooking rice in one pan. Cast iron or stainless steel with a tight-fitting lid are ideal for even heat distribution and retaining moisture.
Meat Thermometer: Ensures chicken is cooked to a safe 165°F without overcooking, guaranteeing juicy results.
Other Basic Tools: Measuring cups and spoons for accuracy, a sturdy chopping board and sharp knife for prep, and tongs for safely handling hot chicken.
Building Blocks of Flavor: What You’ll Need
For the Irresistibly Crispy Chicken
Bone-In, Skin-On Chicken Thighs: These are the star of our Skillet Chicken & Mushroom Rice. The bone adds incredible flavor to the rice, while the skin is essential for that coveted crispy texture.
Olive Oil: A good quality olive oil is used for searing the chicken, contributing to a rich, golden crust and flavorful rendered fat for the rice.
Salt & Black Pepper: Simple, yet vital seasonings. They enhance the natural flavors of the chicken and contribute to its perfectly seasoned skin.
The Hearty Mushroom Rice Base
Yellow Onion: This aromatic forms the foundation of our rice base. When sautéed, it provides a sweet, savory depth that caramelizes beautifully.
Cremini Mushrooms: Sliced cremini mushrooms add a wonderful umami richness and earthy flavor. You can substitute with shiitake or button mushrooms for a similar effect.
Garlic: Minced garlic infuses the rice with a pungent, warm aroma. Adjust the quantity to your preference for a bolder flavor.
Medium-Grain White Rice: This type of rice is crucial for the desired creamy, slightly chewy texture that absorbs flavors beautifully. Avoid long-grain rice which can become dry, or short-grain which might become too sticky. Rinsing is optional, depending on how starchy you like your rice.
Low-Sodium Chicken Broth: The liquid base for the rice. Using “warmed” broth helps maintain the skillet’s temperature for even cooking, and “low-sodium” allows you to control the overall saltiness of the dish.
Fresh Thyme: A few sprigs of fresh thyme impart a fragrant, earthy note that complements both the chicken and mushrooms. Fresh rosemary or sage can also be lovely alternatives.
Your Path to Perfect Skillet Chicken & Mushroom Rice: A Detailed Guide
Phase 1: Achieving Golden, Crispy Chicken Skin
Prepare the Chicken: Pat the chicken thighs absolutely dry with paper towels. This step is non-negotiable; moisture is the enemy of crispy skin, preventing proper browning. Season both sides generously with salt and pepper.
Sear for Crispiness: Heat olive oil in a large oven-safe skillet over medium-high heat until it shimmers. Carefully place the chicken thighs skin-side down, ensuring the pan is not crowded; cook in batches if necessary.
Sear undisturbed for 8 to 10 minutes until the skin is deeply golden brown and incredibly crispy. Resist the urge to move them, allowing a perfect crust to form.
Flip and Remove: Flip the chicken thighs and cook for just 2 to 3 minutes on the flesh side, which helps render a little more fat without fully cooking them through. Remove the chicken from the skillet and set it aside, leaving all that delicious rendered fat in the pan for the rice.
Phase 2: Building the Aromatic Mushroom Rice Base
Sauté Aromatics and Mushrooms: Reduce the heat to medium. If needed, add a small splash more olive oil to the rendered chicken fat. Add the chopped onion and cook for 3 to 4 minutes until it softens and becomes translucent.
Next, add the sliced mushrooms and continue cooking for 5 to 7 minutes, stirring occasionally. They will release their liquid and then begin to brown beautifully, concentrating their umami flavor. Stir in the minced garlic and cook for just 1 minute more until fragrant, being careful not to burn it.
Toast the Rice: Add the uncooked medium-grain white rice to the skillet with the vegetables. Stir for 2 minutes to toast the rice kernels slightly. This toasting step prevents the rice from becoming mushy and adds a subtle, nutty depth of flavor to your Skillet Chicken & Mushroom Rice.
Season the rice and vegetables with the remaining salt and black pepper.
Deglaze and Simmer: Pour in the warmed chicken broth. Bring the mixture to a gentle simmer, making sure to scrape up any browned bits (fond) from the bottom of the pan with your spoon. This deglazing process releases incredibly rich flavors that will infuse into your rice.
Phase 3: Simmering to Perfection
Nestle the Chicken: Carefully nestle the seared chicken thighs back into the rice mixture, skin-side up. It’s crucial to ensure the crispy skin remains above the liquid line as much as possible to preserve its crunch. Add the fresh thyme sprigs around the chicken.
Cover and Cook: Cover the skillet tightly with a lid or foil and reduce the heat to low. Allow it to simmer undisturbed for 20 to 25 minutes, or until the rice has absorbed most of the liquid and the chicken is cooked through.
The chicken should reach an internal temperature of 165°F (74°C) as measured with a meat thermometer.
Rest and Fluff: Remove the skillet from the heat and let it rest, still covered, for 5 minutes. This resting period allows the rice to steam and fully absorb any remaining moisture, making it perfectly tender.
Remove the thyme sprigs, fluff the rice gently with a fork, garnish with fresh thyme, and serve immediately, savoring that perfectly crispy chicken skin!
Chef’s Secrets: Elevating Your Skillet Chicken & Mushroom Rice
The Power of Dry Chicken: Truly, this is the golden rule. Patting your chicken thighs completely dry removes surface moisture, allowing the skin to crisp and brown much more effectively rather than steam.
Warm Broth for Even Cooking: Adding warmed chicken broth prevents the skillet’s temperature from dropping drastically. This ensures the rice starts cooking immediately and consistently, leading to a more even and tender texture without a crunchy center.
Don’t Peek! The Lid is Your Friend: Once the skillet is covered, resist the urge to lift the lid frequently. Each time you do, precious steam escapes, which can extend cooking time and lead to unevenly cooked or dry rice.
Scraping the Pan: A Flavor Bomb: Deglazing by scraping up the browned bits (fond) from the bottom of the pan is critical. These concentrated savory bits are packed with flavor and will dissolve into your broth, enriching the entire dish.
Resting is Non-Negotiable: The final rest, still covered, is vital. It allows the rice grains to relax and absorb any last bit of moisture, becoming perfectly tender. For the chicken, it gives the juices time to redistribute, ensuring every bite is moist and flavorful.
Common Questions & Troubleshooting for Your Skillet Creation
Problem: Soggy Chicken Skin
This usually happens if the chicken wasn’t patted dry enough before searing, the pan wasn’t hot enough, or it was crowded, preventing proper browning. Ensure the skin remains above the liquid line during simmering.
Problem: Undercooked or Mushy Rice
If rice is undercooked, the heat might have been too low, or the broth wasn’t warmed, causing a temperature shock. Mushy rice often indicates too much liquid or cooking at too high a heat. Always allow the dish to rest, covered, for at least 5 minutes off the heat.
Problem: Flavor Falling Flat
Ensure you season generously, especially the chicken. Toasting the rice thoroughly, allowing the mushrooms to deeply brown, and using fresh herbs like thyme significantly boost the overall depth of flavor.
Make It Your Own: Creative Variations & Dietary Swaps
Herb & Spice Twists
Experiment with different herbs like fresh rosemary or sage, or a blend of Italian herbs. A pinch of smoked paprika can add a beautiful color and a smoky depth, enhancing the savory notes of the chicken and mushrooms.
Vegetable Boosts
Stir in a handful of fresh spinach or frozen peas during the last 5 minutes of cooking for added greens. Diced bell peppers or carrots can be added with the onion for extra color and nutrients, providing another layer of flavor and texture.
Protein Alternatives
While bone-in, skin-on chicken thighs are ideal for this dish, you can use bone-in, skin-on chicken breasts, adjusting cooking times as needed to prevent drying. Pork chops could also be an exciting alternative, ensuring they are seared well before simmering.
Dairy-Free & Gluten-Free Adaptations
This recipe is naturally dairy-free! To ensure it’s gluten-free, simply use a certified gluten-free low-sodium chicken broth. All other ingredients are typically naturally gluten-free, but always check labels if you have severe sensitivities.
Serving Suggestions, Storage & Make-Ahead Tips
What to Serve Alongside
This Skillet Chicken & Mushroom Rice is a complete meal on its own. However, a simple side of crisp green salad with a vinaigrette dressing, some crusty bread to soak up any extra sauce, or lightly steamed green beans makes a perfect complement.
Best Practices for Leftovers
Store any leftover Skillet Chicken & Mushroom Rice in an airtight container in the refrigerator for up to 3-4 days. Ensure it cools completely before storing to maintain freshness and safety.
Reheating for Optimal Taste
To reheat, add a splash of chicken broth or water to the skillet or microwave-safe dish. Cover and warm gently on the stovetop over low heat until heated through, or in the microwave. This helps the rice stay moist and prevents the chicken from drying out.
Can You Make This Ahead?
While best enjoyed fresh, you can prep some components in advance. Chop your onion and mushrooms a day ahead. You can also pat dry and season your chicken thighs, storing them in the fridge, ready for searing. The entire dish can be cooked and stored, reheating as described above.
Your Top Skillet Chicken & Mushroom Rice Questions Answered
Why warm the chicken broth?
Warming the chicken broth before adding it to the skillet is a small but impactful step. It helps maintain the skillet’s cooking temperature, ensuring the rice begins to cook evenly immediately and preventing any temperature shock that can lead to unevenly cooked grains.
Can I use boneless, skinless chicken?
Yes, you can use boneless, skinless chicken thighs or breasts, but the cooking time will be significantly shorter. You will, of course, miss out on the wonderfully crispy skin that makes this recipe unique, and the bone’s flavor contribution to the rice base.
What kind of rice is best for this dish?
Medium-grain white rice is highly recommended for this recipe. Its starch content and grain size allow it to absorb liquid beautifully, resulting in a creamy, tender, and cohesive texture without becoming overly starchy or mushy. Long-grain varieties may result in a drier dish.
Is this recipe freezer-friendly?
While technically freezer-friendly, the texture of the rice can become softer, and the chicken skin may lose its crispness upon thawing and reheating. If freezing, cool completely, store in airtight containers for up to 2-3 months, and reheat gently on the stovetop with a splash of broth.
Ready to Create a Skillet Masterpiece?
Now that you’re armed with all the tips and tricks for truly crispy chicken skin and deeply flavorful rice, it’s time to make this Skillet Chicken & Mushroom Rice your next culinary triumph. This dish promises comfort, incredible flavor, and that satisfying crunch we all crave in a one-pan meal.
Dive into your kitchen and prepare to impress yourself and your loved ones with this effortlessly elevated dinner. Don’t forget to share your experience and any personal twists you add!
Skillet Chicken & Mushroom Rice
Course: Main CourseCuisine: American CuisineDifficulty: easy4
servings15
minutes40
minutes55
minutesAmerican Cuisine
Ingredients
6 bone-in, skin-on chicken thighs
1 tablespoon olive oil, plus more if needed
1 teaspoon salt, divided
1/2 teaspoon black pepper, divided
1 small yellow onion, chopped
8 ounces cremini mushrooms, sliced
2 cloves garlic, minced
1 1/2 cups uncooked medium-grain white rice
4 cups low-sodium chicken broth, warmed
2 sprigs fresh thyme, plus more for garnish
Directions
- Pat the chicken thighs absolutely dry with paper towels. This is critical for crispy skin. Season both sides generously with 3/4 teaspoon of the salt and 1/4 teaspoon of the black pepper.
- Heat 1 tablespoon of olive oil in a large oven-safe skillet over medium-high heat until shimmering. Carefully place the chicken thighs skin-side down in the hot skillet. Do not crowd the pan; cook in batches if necessary. Sear undisturbed for 8 to 10 minutes, or until the skin is deeply golden brown and very crispy.
- Flip the chicken thighs and cook for another 2 to 3 minutes on the flesh side, just to render some fat. Remove the chicken from the skillet and set aside, leaving the rendered fat in the pan.
- Reduce the heat to medium. If there is less than 1 tablespoon of fat remaining, add a splash more olive oil. Add the chopped onion to the skillet and cook for 3 to 4 minutes until softened. Add the sliced mushrooms and cook for another 5 to 7 minutes, stirring occasionally, until they have released their liquid and browned. Stir in the minced garlic and cook for 1 minute more until fragrant.
- Add the uncooked rice to the skillet with the vegetables. Stir for 2 minutes to toast the rice kernels slightly. Season with the remaining 1/4 teaspoon salt and 1/4 teaspoon black pepper.
- Pour in the warmed chicken broth. Bring the mixture to a gentle simmer, scraping up any browned bits from the bottom of the pan.
- Carefully nestle the seared chicken thighs back into the rice mixture, skin-side up, ensuring the crispy skin remains above the liquid line as much as possible. Add the fresh thyme sprigs.
- Cover the skillet tightly with a lid or foil and reduce the heat to low. Simmer for 20 to 25 minutes, or until the rice has absorbed most of the liquid and the chicken is cooked through (internal temperature 165F).
- Remove from heat and let it rest, covered, for 5 minutes. Remove the thyme sprigs. Fluff the rice gently with a fork. Garnish with fresh thyme and serve immediately, enjoying that perfectly crispy chicken skin!
Notes
- Critical for crispy skin: pat chicken thighs absolutely dry and ensure skin stays above liquid line during simmer.


