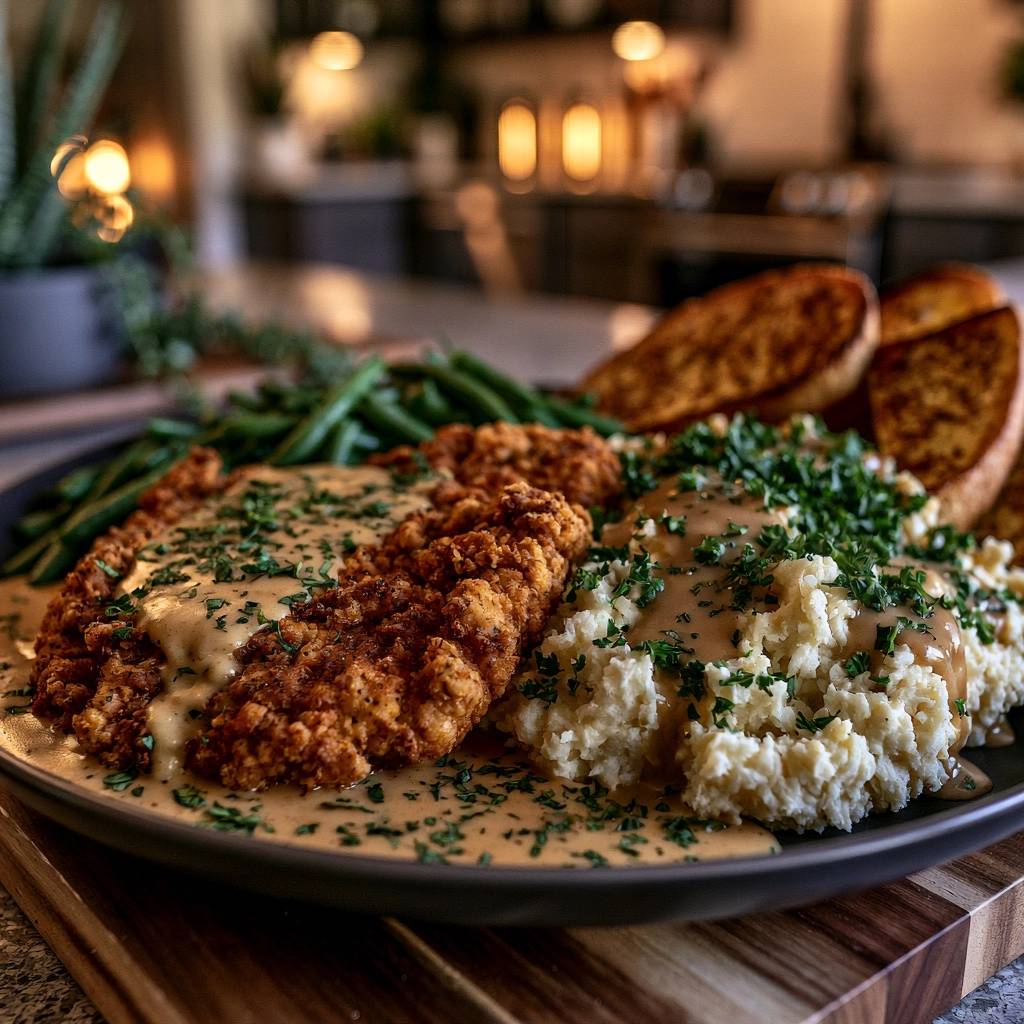
There is a specific kind of magic that happens when you take a humble piece of beef and treat it like world-class fried chicken. Southern Fried Chicken Steak and Gravy is the ultimate “working man’s steak,” a dish born from the need to make leaner, tougher cuts of meat taste like a million bucks. It is a cornerstone of Southern comfort, offering a satisfying crunch that gives way to tender, savory beef, all smothered in a blanket of rich, velvety gravy.
The biggest heartbreak in any kitchen is a soggy crust that slides right off the meat the moment your fork touches it. Most diner versions suffer from this “sliding skin” syndrome because they rush the process. This recipe focuses on an “Anti-Soggy” method that ensures your breading stays locked to the steak, maintaining its structural integrity even under a heavy pour of cream gravy. It is about elevating a classic through better technique and a few smart pantry swaps.
The secret to that legendary, craggy texture is actually a two-part trick involving cornstarch and a mandatory resting period. By adding cornstarch to your flour, you create a more brittle, glass-like crunch that doesn’t soften as quickly as pure wheat flour. When you pair that with a fifteen-minute rest on a wire rack before frying, the coating hydrates and glues itself to the beef. You’ll never deal with a naked steak again.
The Anatomy of a Perfect Cube Steak
To make a stellar chicken fried steak, you have to start with cube steak. This isn’t a specific cut of meat from the cow, but rather a preparation method usually applied to top round or sirloin. The butcher runs the meat through a mechanical tenderizer, which leaves those characteristic “cube” indentations. This process breaks down tough connective tissues, allowing a lean cut to become tender enough to cut with a side of a fork.
When you’re at the butcher counter, look for steaks that are uniform in thickness, ideally about half an inch thick. If they are too thick, the breading will burn before the center reaches the right temperature. If they are too thin, they can become leathery during the frying process. You want a bright red color with minimal large gristle lines, as the mechanical tenderizer can only do so much against heavy silver skin.
Why Cornstarch is the Secret to Crunch
Traditional recipes often call for 100% all-purpose flour, but that can lead to a crust that is either too doughy or too hard. By replacing a portion of that flour with cornstarch, you effectively lower the protein content of the dredge. Since cornstarch doesn’t develop gluten, it creates a coating that is remarkably crisp and airy. This is the same principle used in high-end tempura or Korean fried chicken.
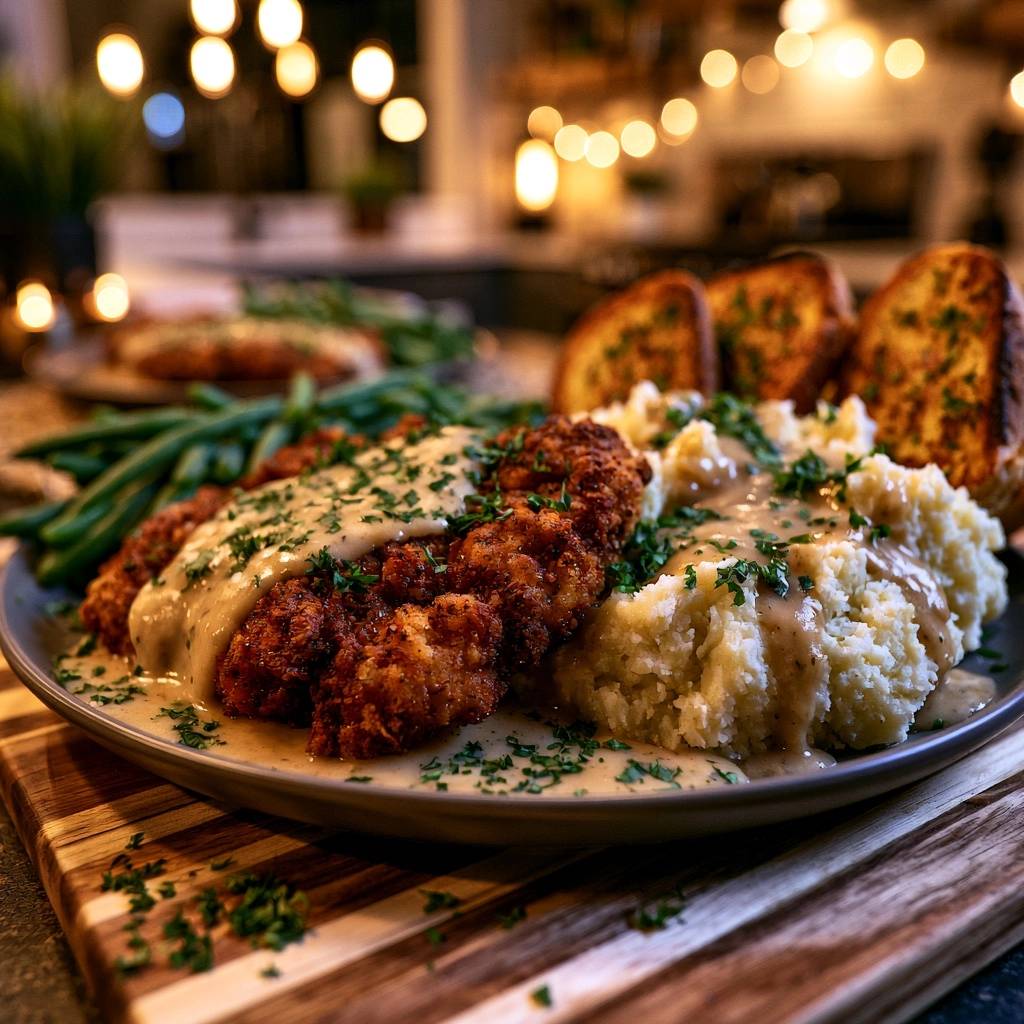
Furthermore, cornstarch is a moisture-wicking powerhouse. It helps absorb any residual juices from the beef that might otherwise steam the crust from the inside out. This results in a brittle, golden shell that stands up to the moisture of the gravy. You get that satisfying “shatter” when you bite into it, which is the hallmark of a professionally made fried steak.
Essential Components for the Double-Dredge Coating
The flavor of your steak lives and dies by the seasoning in your flour. We use a heavy hand with garlic and onion powders to provide a savory base, while smoked paprika adds a subtle earthiness and a beautiful golden-red hue to the finished product. Don’t be afraid of the black pepper; it provides a gentle heat that cuts through the richness of the frying oil and the cream-based sauce.
For the wet component, whole milk is non-negotiable. The fats and proteins in whole milk help the egg wash bind more effectively to the initial layer of flour. If you use water or skim milk, the wash is too thin and won’t hold enough of the second flour coating to create those jagged, crispy bits we’re looking for. A dash of hot sauce in the egg wash doesn’t make it spicy, but it adds a necessary hit of acidity that brightens the entire flavor profile.
The Role of Heat: Choosing Your Frying Oil
Choosing the right oil is about balancing smoke point and flavor. Vegetable oil or canola oil are the standard choices because they have high smoke points and a neutral taste. This allows the flavor of the seasoned beef and the creamy gravy to take center stage without any oily aftertaste. Peanut oil is another fantastic option if you want an even crispier finish, though it is more expensive.
Avoid using butter or olive oil for the frying stage. Butter has milk solids that will burn at the temperatures required for a good fry, leaving bitter black specks on your beautiful crust. Save the butter for your mashed potatoes! You want about half an inch of oil in the pan—just enough to come halfway up the side of the steak—to ensure the edges get crispy without fully submerging the meat and making it greasy.
Step-by-Step: Mastering the Double-Dredge Technique
Setting up a proper dredging station is the best way to keep your kitchen clean and your steaks perfect. Use the “dry hand/wet hand” method: use your left hand for the dry flour and your right hand for the egg wash. This prevents your fingers from becoming breaded “clubs” halfway through the process. Start by tossing the steak in the flour, then the egg, and then back into the flour for the final coat.
During that second flour dip, you need to be aggressive. Use the palms of your hands to firmly press the flour into the wet steak. You want to create “nooks and crannies” on the surface. These irregular bits of dough are what transform into the ultra-crunchy “crags” during frying. These little ridges are also perfect for trapping and holding onto the gravy later on.
The Hydration Phase: Why You Must Rest the Meat
This is the step most home cooks skip, and it’s the reason their breading falls off. Once the steaks are coated, place them on a wire rack for at least 10 to 15 minutes. During this time, the moisture from the meat and the egg wash begins to hydrate the flour. This turns the dry coating into a tacky, cohesive paste that bonds tightly to the surface of the beef.
If you drop a freshly floured steak directly into hot oil, the moisture inside the meat turns to steam instantly. That steam has nowhere to go, so it pushes the crust away from the meat, creating a gap. By resting the steak, you allow the proteins to knit together. This ensures that when you finally cut into your steak, the meat and the crust stay together as one perfect bite.
Frying for Maximum Texture and Color
A heavy cast-iron skillet is the best tool for this job because it holds heat exceptionally well. When you add cold meat to hot oil, the temperature drops rapidly. Cast iron minimizes this drop, ensuring the oil stays hot enough to sear the crust immediately. If you don’t have a thermometer, dip the handle of a wooden spoon into the oil; if it bubbles steadily around the wood, you’re ready to fry.
Don’t overcrowd the pan. Fry only two steaks at a time so they have plenty of room to breathe. If the steaks are touching, they will steam each other, and you’ll lose that crispiness. Look for a deep, mahogany brown color before flipping. It usually takes about 3 to 4 minutes per side. Remember, the beef is thin and tenderized, so it cooks very quickly; we are primarily focused on perfecting the crust.
The Wire Rack vs. Paper Towel Debate
Most people instinctively reach for paper towels to drain fried food, but that is a mistake here. When you place a hot, fried steak on a flat paper towel, the heat from the bottom of the steak creates steam. That steam gets trapped between the steak and the towel, which quickly turns your crunchy bottom crust into a soggy mess. It’s a tragedy you can easily avoid.
Instead, use an elevated wire rack set over a baking sheet. This allows air to circulate 360 degrees around the steak, letting the excess oil drip away while keeping the crust dry and crisp. If you need to keep the first batch warm while you finish the rest, you can slide the entire baking sheet into a 200°F oven. The wire rack will keep the air moving and the crunch intact.
Building a Velvety Beef and Cream Gravy
The gravy is not an afterthought; it is the soul of the dish. After frying the steaks, you’ll see dark, flavorful bits stuck to the bottom of the pan. This is called “fond,” and it is concentrated flavor. Pour off the excess oil but keep those browned bits! We use the leftover seasoned flour from our dredging station to make the roux, which carries all those spices directly into the sauce.
By using beef broth as the base before adding heavy cream, you get a much deeper, more savory flavor than a standard white gravy. The broth provides a salty, meaty backbone that complements the steak perfectly. The heavy cream then rounds everything out, creating a luxurious, silky texture that feels incredibly indulgent. It’s the bridge that connects the crispy steak to the soft mashed potatoes.
Achieving the Perfect Sauce Consistency
The key to a smooth gravy is adding your liquid slowly. Start with just a splash of broth and whisk it into the flour and oil paste until it forms a thick clumps. Keep adding liquid a little at a time, whisking constantly. This prevents lumps from forming. Once all the broth is in, pour in the heavy cream and let it simmer. It will thicken as it heats, so be patient.
If your gravy gets too thick, simply whisk in another splash of broth or milk to thin it out. If it’s too thin, let it simmer for a few more minutes to reduce. You’re looking for a “nappe” consistency, which is a fancy way of saying it should be thick enough to coat the back of a spoon without immediately running off. Taste it at the very end; it usually needs a generous crack of fresh black pepper to be truly authentic.
Troubleshooting Common Coating Failures
If your breading is falling off in large sheets, it’s almost always because the meat was too wet before the first flour dip or you didn’t let it rest long enough. Next time, pat the steaks dry with a paper towel before you start the dredging process. Also, ensure your oil is truly at 350°F. If the oil is too cool, the breading will soak up the fat and become heavy, causing it to pull away from the meat.
If your crust is getting too dark too fast, your oil is likely too hot. Cast iron holds heat so well that you may need to turn the burner down slightly after the first batch. On the flip side, if the crust looks pale and greasy, your oil temperature has dropped too low. Always give the oil a minute or two to come back up to temperature between batches for the most consistent results.
Optimal Side Dish Pairings
To do this steak justice, you need the classic “holy trinity” of sides. First and foremost are buttery mashed potatoes. You want them smooth and creamy so they can act as a secondary vessel for that incredible gravy. Use Yukon Gold potatoes for the best natural buttery flavor and a texture that isn’t too grainy. A little extra garlic in the mash never hurt anyone either.
For a bit of freshness and crunch, steamed green beans are the way to go. They provide a bright pop of color and a snap that contrasts with the soft potatoes and rich steak. Finally, don’t forget the bread. A thick slice of toasted Texas toast or a warm buttermilk biscuit is essential for “mopping” the plate. You won’t want to leave a single drop of that gravy behind.
Make Ahead Strategies and Reheating Tips
While this dish is undeniably best served fresh from the skillet, you can do some prep work to save time. You can mix your seasoned flour and prepare the steaks through the resting phase up to two hours in advance. Just keep the breaded steaks on the wire rack in the refrigerator. This actually helps the coating bond even tighter, making for an even better fry when you’re ready for dinner.
If you have leftovers, stay away from the microwave! The microwave will turn that glorious crust into a rubbery, sad coating. Instead, reheat the steaks in a 375°F oven or an air fryer for about 5 to 8 minutes. This will recrisp the exterior without overcooking the beef. Reheat the gravy separately in a small saucepan over low heat, adding a splash of milk to loosen it back up to its original velvety state.
Expert Tips for Professional Results
Use a cast iron skillet if you have one. The superior heat retention ensures that your oil temperature doesn’t plummet when the meat hits the pan, which is the number one cause of greasy breading. If you don’t have cast iron, use the heaviest stainless steel pan you own.
Bring your beef to room temperature for about 20 minutes before you start dredging. Cold meat can cause the oil temperature to drop too quickly and can also lead to uneven cooking. A room-temperature steak fries much more predictably and stays tender.
Don’t skimp on the black pepper in the gravy. Southern gravy is traditionally “peppery.” The bite of the pepper is what balances the heavy cream and the fried coating. Use freshly cracked pepper if possible; the pre-ground stuff lacks the floral, spicy punch that makes this dish sing.
Check your oil between batches. If you see a lot of burnt flour bits floating in the oil, carefully wipe the pan out with a wad of paper towels (using tongs!) and add fresh oil. Burnt bits will stick to your second batch of steaks and give them a bitter, scorched flavor.
Frequently Asked Questions
Can I use chicken instead of beef?
Absolutely! If you use boneless, skinless chicken breasts, just be sure to pound them out to an even half-inch thickness first. This version is technically just “Fried Chicken,” but using this specific double-dredge and gravy method will give you a result very similar to the classic steak version. The cooking time may increase by a minute or two to ensure the chicken is cooked through.
What if I don’t have a wire rack?
If you don’t have a wire rack for resting or draining, you can use a crumpled-up piece of parchment paper or even clean brown paper bags. The goal is to avoid a flat, solid surface where steam can collect. However, a wire rack is truly the best tool for the job because it allows for maximum airflow. If you must use paper towels, change them frequently so the steak never sits in a pool of oil or moisture.
How do I keep the first steaks warm while finishing the batch?
The best method is to place a wire rack on a baking sheet and keep it in a 200°F oven. As each steak finishes frying, move it to the rack in the oven. This keeps them hot and allows any excess oil to drip away without making the bottom soggy. They can stay in the oven for up to 30 minutes without losing their quality.
Can I make this gluten-free?
Yes, you can substitute the all-purpose flour with a high-quality 1-to-1 gluten-free flour blend. Since this recipe already uses cornstarch (which is naturally gluten-free), the transition is quite easy. The crust might be slightly more fragile, so handle the steaks gently when flipping. For the gravy, the gluten-free flour will work just fine as a thickener in the roux.
Why is my gravy lumpy?
Lumpy gravy usually happens when the liquid is added too quickly to the roux (the flour and oil mixture). To fix it, you can vigorously whisk the gravy or even carefully pour it into a blender and pulse it until smooth. Next time, remember to add the broth just a few tablespoons at a time at the beginning, whisking until a smooth paste forms before adding the rest of the liquid.
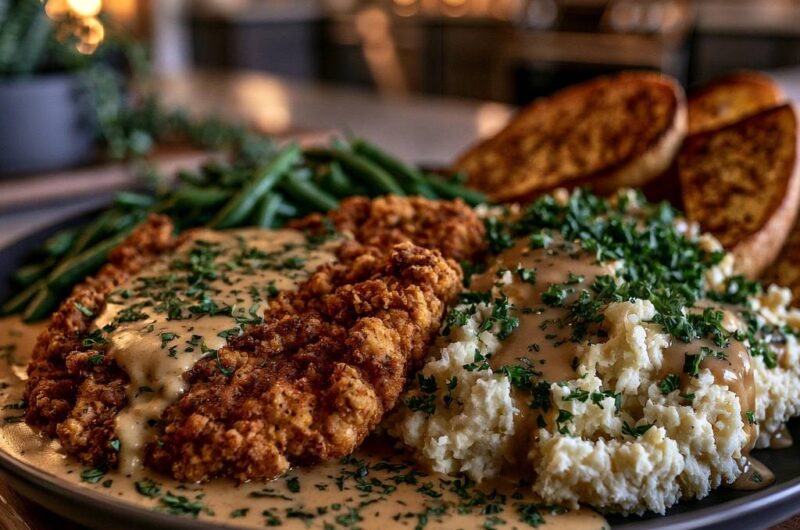
Southern Fried Chicken Steak and Gravy
Course: Main CourseCuisine: AmericanDifficulty: easy4
servings20
minutes15
minutes35
Minutes680
kcalAmerican
Ingredients
4 cube steaks (beef)
1 1/2 cups all-purpose flour
1/2 cup cornstarch (for extra crunch)
2 teaspoons garlic powder
1 teaspoon onion powder
1 teaspoon smoked paprika
1 teaspoon black pepper
1 1/2 teaspoons salt
2 large eggs
1/2 cup whole milk
1 tablespoon hot sauce (optional, for the egg wash)
Vegetable oil for frying
2 cups beef broth
1/2 cup heavy cream
1/4 cup fresh parsley, finely chopped
Side of mashed potatoes, steamed green beans, and thick-cut toasted bread
Directions
- Prepare the Dredge: In a shallow bowl, whisk together the flour, cornstarch, garlic powder, onion powder, paprika, salt, and pepper. In a second bowl, whisk the eggs, milk, and hot sauce.
- The Double-Dredge: Dredge each steak in the flour mixture, shaking off the excess. Dip into the egg wash, then return to the flour mixture for a second coating. Press the flour firmly into the meat with your palms to create those craggy bits that turn crispy when fried.
- The Secret Rest: Place the breaded steaks on a wire rack for 10 to 15 minutes before frying. This allows the flour to hydrate and bond to the meat, ensuring the coating doesn’t slide off in the pan.
- Fry: Heat 1/2 inch of oil in a heavy cast-iron skillet to 350°F. Fry the steaks for 3 to 4 minutes per side until deep golden brown and crusted. Remove to a clean wire rack to drain; do not place on paper towels, as the steam will make the bottom soggy.
- The Gravy: Carefully pour off all but 3 tablespoons of the hot frying oil, keeping the browned bits in the pan. Whisk in 3 tablespoons of the leftover seasoned flour and cook for 2 minutes over medium heat until light brown. Slowly whisk in the beef broth and heavy cream. Simmer, whisking constantly, until thick and velvety.
- Assembly: Plate the steaks alongside a generous portion of mashed potatoes and green beans. Pour the hot gravy over the steak and potatoes. Garnish heavily with fresh chopped parsley and serve with toasted bread to soak up the extra sauce.
Notes
- Do not drain the fried steaks on paper towels; use a wire rack to prevent steam from making the bottom coating soggy.