
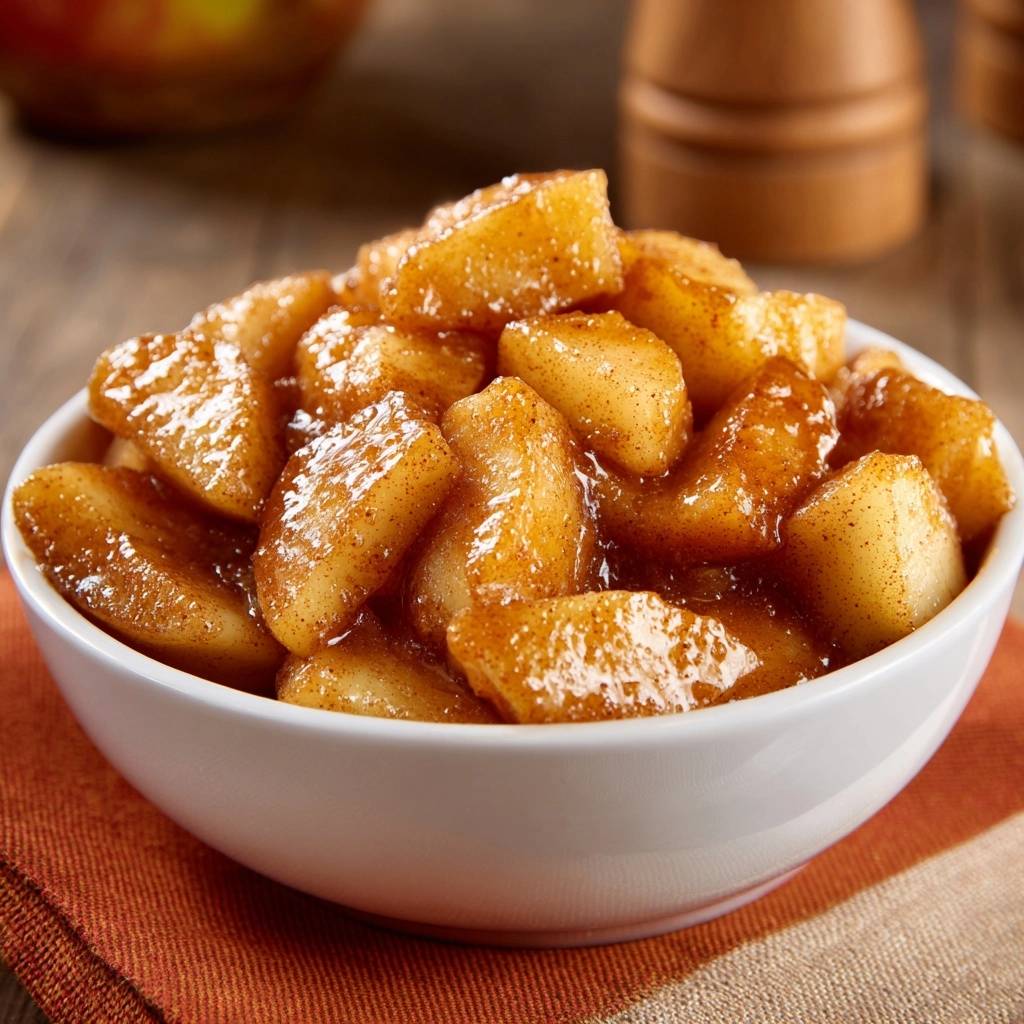
Imagine the scent of warm cinnamon and bubbling brown sugar filling your kitchen as a cast-iron skillet sizzles on the stove. These Southern style skillet cinnamon apples offer a sophisticated contrast between a firm, tart fruit center and a velvety, spiced glaze that clings to every curve. Unlike the watery, pale apple slices often found in cafeterias, these boast a deep golden hue and a structural integrity that makes them feel like a gourmet treat.
In Southern kitchens, skillet apples have long bridged the gap between a humble side dish for savory meats and a decadent topping for morning oats. The challenge most home cooks face is the dreaded “mush factor,” where the fruit collapses into a grainy sauce before the flavors fully develop. This recipe solves that by focusing on heat management and the specific timing of your sugar application to ensure a professional result every time.
The secret to this success is the initial high-heat sear, which creates a caramelized exterior “crust” that locks the juices inside the apple chunk. By searing the fruit before adding any liquid or sugar, you preserve the cellular structure of the apple so it stays tender yet distinct. I’ve found that skipping this step is the number one reason skillet apples turn into applesauce, so keep that pan hot and your spatula still for those first few minutes.
The Physics of the Perfect Apple Texture
Achieving the perfect bite requires an understanding of pectin, the natural glue that holds fruit cells together. When you apply heat, pectin begins to break down, which is why apples eventually soften and turn mushy. However, by starting with a high-heat sear, you trigger a rapid evaporation of surface moisture and a light caramelization of the fruit’s natural sugars.
This process creates a structural barrier on the outside of each apple chunk. Think of it as a protective “shell” that allows the interior to steam into a buttery softness while the exterior remains defined. If you start with low heat, the pectin dissolves slowly and the juices leak out, resulting in a collapsed, soggy mess rather than the plump, glossy chunks we’re aiming for here.
Selecting the Best Fruit for Sautéing
Not all apples are created equal when it comes to the intense heat of a skillet. You need a variety with a dense cell structure and a high acid content to balance the richness of the butter and brown sugar. Softer varieties like McIntosh or Red Delicious have a loose cellular matrix that disintegrates almost instantly when heated, making them poor choices for this specific method.
I always recommend choosing a firm, “baking-ready” apple that can withstand both the sear and the subsequent steaming phase. Look for fruit that feels heavy for its size and has a tight, unblemished skin. This ensures that the apple has enough internal moisture to soften without losing its shape during the fifteen-minute cooking process.
Why Granny Smith Provides the Best Contrast
Granny Smith apples are the gold standard for this dish because of their aggressive tartness and high pectin levels. The sharp acidity cuts right through the heavy molasses of the brown sugar, preventing the dish from feeling cloying. Furthermore, their sturdy flesh holds up beautifully under high heat, maintaining a satisfying “toothsome” quality even after they are fully glazed.
Honeycrisp: The Premium Sweet Alternative
If you prefer a naturally sweeter profile, Honeycrisp is your best bet. These apples are famous for their “explosive” cell structure, which gives them that signature snap when eaten raw. That same density translates well to the skillet, allowing the apples to stay juicy and firm. Just keep in mind they have less acid than Granny Smiths, so that extra tablespoon of lemon juice is vital for balance.
Essential Components for the Cinnamon Glaze
The glaze is more than just a sauce; it’s an emulsion that should coat the apples like a thick syrup. Each ingredient plays a specific role in building the flavor profile and achieving that iconic glossy finish. Using high-quality spices is also key, as the heat of the skillet will bloom the oils in the cinnamon and nutmeg, making them much more fragrant than they are in the jar.
The Role of Unsalted Butter and Salt
Using unsalted butter gives you total control over the seasoning of the dish. Butter provides the fat necessary to carry the fat-soluble flavors of the cinnamon and nutmeg across your palate. A single pinch of salt might seem counterintuitive for a sweet dish, but it actually acts as a flavor magnifier, making the apple taste “more like an apple” and brightening the warm spices.
Light Brown Sugar vs. Dark Brown Sugar
Light brown sugar is the preferred choice here because it contains just enough molasses to add a hint of caramel without overpowering the fruit. Dark brown sugar has a much higher molasses content, which can turn the sauce a muddy color and introduce a slightly bitter edge. Light brown sugar keeps the glaze vibrant and translucent, allowing the natural color of the apples to shine through.
The Slurry: Achieving a Professional Gloss
The cornstarch slurry is the “pro move” that separates home cooking from restaurant-quality results. Unlike flour, which creates an opaque, matte sauce, cornstarch creates a clear, high-shine glaze. When the starch granules hit the boiling liquid, they swell and bond, creating a thick consistency that clings heavily to the fruit rather than pooling at the bottom of the bowl.
Step-by-Step: Searing and Steaming the Apples
Success in the kitchen often comes down to patience and observation. As you move through these phases, pay close attention to the visual cues the apples are giving you. You’ll see the fruit transform from raw, matte chunks into glistening, golden jewels as the sugars and starches work their magic in the pan.
Phase 1: The High-Heat Initial Sear
Once your butter is bubbling and hot, drop the apples in and resist the urge to stir. You need three full minutes of undisturbed contact with the hot metal to develop that essential sear. If you move them too early, the pan temperature will drop, and the apples will begin to release their juices and steam prematurely. You’re looking for a light golden-brown edge on the side touching the skillet.
Phase 2: Spicing and Deglazing the Skillet
After the sear, lower the heat and add your spices and sugar. As the sugar melts, it will combine with the butter to form a dark, fragrant liquid. Adding the lemon juice and water (or cider) at this stage serves to “deglaze” the pan. This means the liquid lifts all those flavorful browned bits—known as fond—off the bottom of the skillet and incorporates them into your growing sauce.
Phase 3: The Controlled Steam Method
Covering the skillet with a lid is a crucial step that uses the trapped moisture to cook the apples from the inside out. This five-minute steaming period ensures the centers are fork-tender while the seared exteriors keep the chunks intact. When you lift the lid, the apples should look slightly translucent but still hold their sharp edges, indicating they are perfectly cooked through.
Troubleshooting Common Skillet Apple Issues
Even simple recipes can go sideways if the temperature or timing is off. If your sauce looks thin or your apples feel too hard, don’t panic. Most skillet apple issues are easily fixed with a few quick adjustments before the dish leaves the stove. The goal is a thick, lava-like glaze and fruit that yields easily to a fork.
Preventing a Cloudy or Gritty Sauce
A cloudy sauce usually happens if the cornstarch slurry isn’t mixed thoroughly or if it’s added to a pan that isn’t bubbling. Always whisk your cornstarch with cold water right before pouring it in to ensure no clumps remain. If the sugar burns before you add the liquid, the sauce will taste bitter and look dark; if this happens, it’s best to wipe the pan and start over to save your fruit.
Fixing Overly Tart or Overly Sweet Batches
Apple sweetness varies wildly from batch to batch. If your finished dish is too tart, stir in an extra tablespoon of sugar while the sauce is still hot. Conversely, if it’s too sweet, a tiny splash of apple cider vinegar or an extra squeeze of lemon juice will provide the necessary acid to balance the flavors. Always taste a small piece of the fruit before serving to check the balance.
Serving Suggestions and Regional Pairings
While these apples are a natural fit for dessert, their versatility in savory applications shouldn’t be overlooked. The balance of sweet, salt, and acid makes them a fantastic companion for heavy, fat-rich proteins. They act as a palate cleanser, cutting through the richness of a meal and adding a bright, fruity note to the plate.
Savory Accompaniments for Roasted Meats
In the South, it’s very common to see these apples served alongside roasted poultry or pan-seared lamb chops. The cinnamon and nutmeg complement the earthy flavors of the meat, while the glaze acts as a built-in sauce. They are also a classic pairing for breakfast items like beef sausages or thick-cut turkey bacon, providing a sweet counterpoint to the salty meat.
Breakfast and Dessert Applications
For a classic treat, spoon these warm apples over a bowl of steel-cut oats or a stack of thick pancakes. The glaze will seep into the grains or cake, flavoring every bite. If you’re serving them for dessert, nothing beats a scoop of high-quality vanilla bean gelato. The cold creaminess of the ice cream melting into the hot, spiced glaze creates a temperature contrast that is absolutely addictive.
Storage and Reheating for Optimal Texture
Skillet apples are best enjoyed immediately while the glaze is at its glossiest. However, if you have leftovers, they can be stored in an airtight container in the refrigerator for up to five days. The sauce may thicken or become slightly gelatinous when cold, but it will loosen back up once you apply a little heat.
Refrigeration and Freezing Limits
I strongly advise against freezing these apples. The freezing and thawing process breaks down the cell walls of the fruit, turning your beautiful chunks into mush. Additionally, the cornstarch bond in the glaze often “weeps” or separates when frozen, leaving you with a watery mess. Stick to the fridge and enjoy them within a few days for the best experience.
The Best Way to Reheat Without Mushiness
Avoid the microwave if possible, as it tends to cook the apples further and can make the sauce rubbery. Instead, place the apples in a small skillet over low heat. Add a teaspoon of water or apple cider to help loosen the glaze. Stir gently until the sauce is bubbling and the apples are warmed through; this preserves the emulsion and keeps the fruit from overcooking.
Expert Tips for Large Batch Cooking
If you’re cooking for a crowd, the biggest mistake you can make is crowding the pan. If the apples are piled on top of each other, they won’t sear; they’ll just steam immediately, and you’ll lose that beautiful texture. It’s much better to work in two batches, searing the apples separately and then combining them all in the pan for the final steaming and glazing steps.
Frequently Asked Questions
How do I keep the apples from turning brown while I’m prepping?
As you peel and chop your apples, toss the chunks in a bowl with a little lemon juice or cold water mixed with a pinch of salt. This prevents oxidation, which is the chemical reaction that turns apple flesh brown when exposed to air. Just be sure to pat them dry with a paper towel before adding them to the hot butter so they sear instead of steaming.
Can I use a different thickener besides cornstarch?
You can use arrowroot powder as a direct substitute for cornstarch if you prefer. However, I don’t recommend using flour. Flour creates a cloudy, opaque sauce that tastes slightly “pasty” and doesn’t have the same beautiful shine. If you don’t have any starch, you can simmer the liquid longer to reduce it into a syrup, but the apples may overcook in the process.
Why are my apples still hard after the cooking time?
This usually happens if the apples were cut into chunks larger than one inch or if the lid wasn’t fitting tightly enough to trap the steam. If they are still too firm, add another tablespoon of water, put the lid back on, and simmer for an additional 2-3 minutes. The “fork-tender” test is your best friend here—the fork should slide in easily but the apple shouldn’t fall apart.
Can I make this recipe ahead of time?
Yes, you can make these up to a day in advance. Store them in the fridge and reheat them on the stovetop as directed above. While they are most impressive right out of the pan, the flavors actually deepen overnight as the spices permeate the fruit. Just be prepared to add a tiny splash of liquid when reheating to bring that glossy glaze back to life.
What if I don’t have apple cider for the liquid?
Plain water works perfectly fine and is what the recipe calls for! The brown sugar, butter, and spices provide plenty of flavor on their own. If you want a little extra punch, you can use orange juice or even a bit of pear juice. The main goal of the liquid is to provide the moisture needed for steaming and to create the base for your glossy glaze.
Southern Style Skillet Cinnamon Apples
Course: Side Dish or DessertCuisine: AmericanDifficulty: easy4
servings10
minutes15
minutes25
Minutes245
kcalAmerican
Ingredients
4 large Granny Smith or Honeycrisp apples, peeled and cut into 1-inch thick chunks
4 tablespoons unsalted butter
1/2 cup light brown sugar, packed
1 teaspoon ground cinnamon
1/4 teaspoon ground nutmeg
1 tablespoon lemon juice
1 tablespoon cornstarch mixed with 2 tablespoons cold water (slurry)
1/4 cup water or apple cider
Pinch of salt
Directions
- Melt the butter in a large skillet over medium-high heat. Once the butter is bubbling and hot, add the apple chunks in a single layer.
- Sear the apples undisturbed for 3 minutes. This high-heat contact is essential to firm up the exterior of the fruit so they maintain their structural integrity.
- Reduce the heat to medium. Sprinkle the brown sugar, cinnamon, nutmeg, and salt evenly over the apples. Toss gently with a silicone spatula to coat.
- Pour in the lemon juice and the 1/4 cup of water (or cider). Cover the skillet with a tight-fitting lid and cook for 5 minutes. This steams the centers to a tender consistency without breaking down the seared edges.
- Remove the lid. Give the cornstarch slurry a quick stir and pour it into the bubbling liquid in the center of the pan.
- Stir constantly for 1-2 minutes as the liquid transforms into a thick, professional-grade glaze. The sauce should be translucent and glossy, clinging heavily to the apples as seen in the image.
- Remove from heat immediately to prevent the apples from overcooking. Serve warm as a side dish, or as a topping for oatmeal or vanilla ice cream.
Notes
- For the best results, use firm apples like Granny Smith or Honeycrisp. Serve warm over vanilla ice cream, oatmeal, or as a side for pork chops.


