
Let’s talk about dinner dilemmas, shall we? For years, I struggled with making saucy chicken dishes. It seemed like no matter what I did, the chicken pieces would end up sad, dry, and completely lacking that juicy tenderness you dream of. Sound familiar?
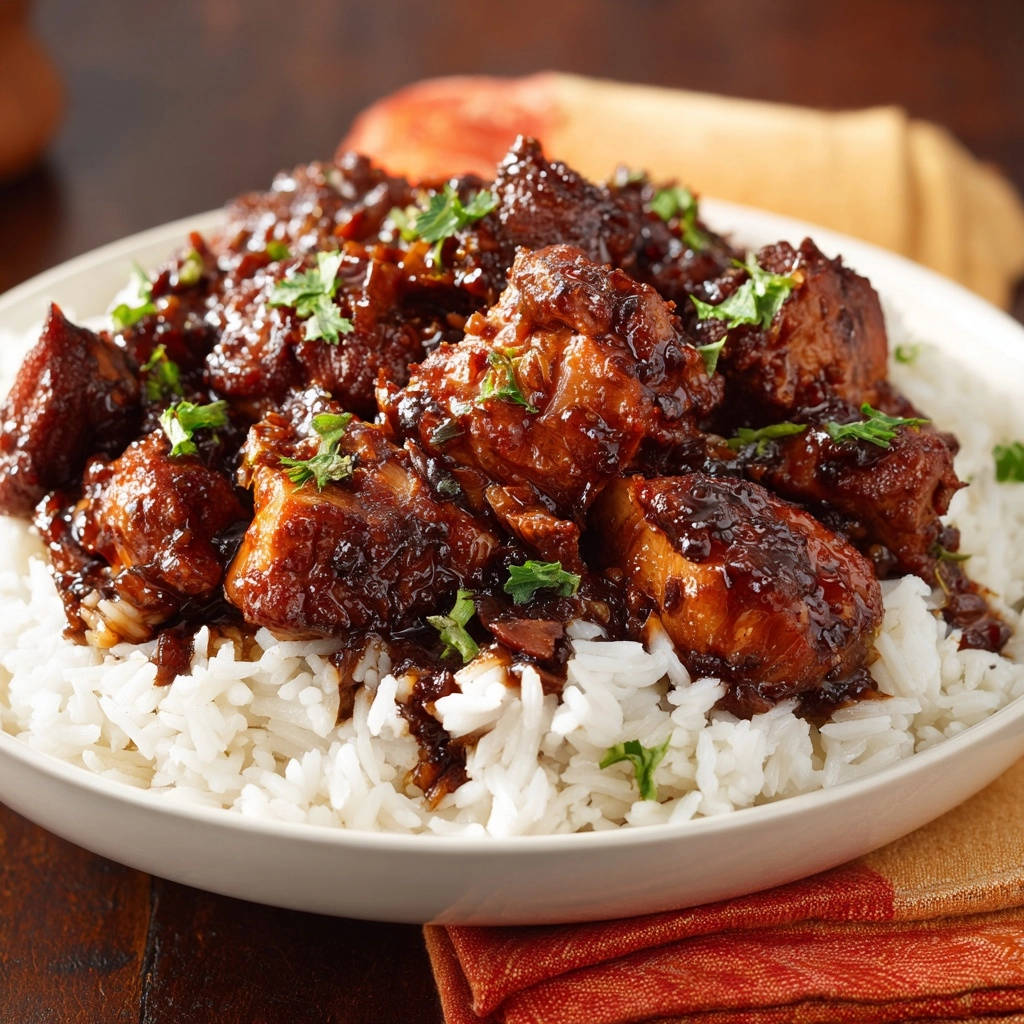
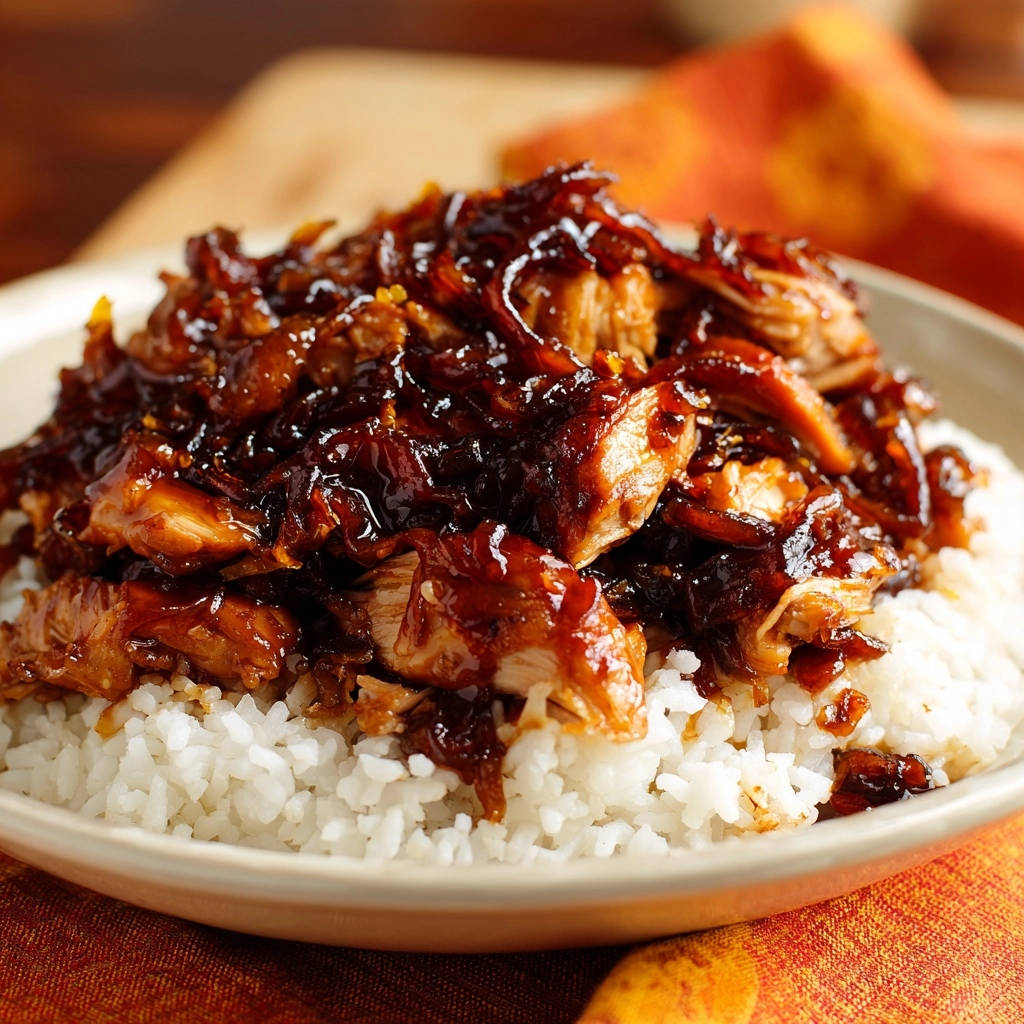
But then, something magical happened. I stumbled upon a simple technique and a killer sauce recipe that changed everything. This Sticky Glazed Chicken and Rice is the result of that discovery! It’s become a weeknight superhero in my kitchen, delivering consistently tender chicken coated in a rich, glossy, unbelievably delicious glaze.
For a similar sweet and savory kick, check out these crispy sesame chicken bowls.
If you’re tired of dry chicken and want a recipe that delivers on flavor and texture, you are in the right place. Get ready to fall in love with chicken thighs all over again!
For extra crispy chicken, explore the double-fry secret in crispy sweet & savory chicken with rice.
Why You’ll Love This Sticky Glazed Chicken and Rice
Seriously, what’s not to love? This recipe isn’t just about dinner; it’s about bringing a smile to your face with minimal fuss.
- Say Goodbye to Dry Chicken: Thanks to using chicken thighs and a specific cooking method, the meat stays incredibly moist and tender.
- That Irresistible Glaze: It’s the perfect balance of sweet, savory, and tangy, coating every piece of chicken beautifully.
- Quick & Easy: From start to finish, dinner is ready in about 45 minutes, making it perfect for busy evenings.
- Simple Ingredients: You likely have most of these pantry staples on hand already.
- Family Favorite: This sticky glazed chicken is a crowd-pleaser for all ages!
Gathering Your Ingredients for Sticky Glazed Chicken and Rice
The beauty of this recipe lies in its simplicity and the power of just a few key ingredients coming together to create something truly special. We’re building layers of flavor here, from the aromatic base to the perfectly balanced sticky sauce.
Here’s what you’ll need to create this delightful dish:
Boneless, Skinless Chicken Thighs: We’re using 1.5 pounds, cut into 1-inch pieces. Thighs are the secret weapon here! Their slightly higher fat content means they stay incredibly juicy and forgiving during cooking, ensuring you avoid that dreaded dry chicken texture.
Cooking Oil: About 2 tablespoons. Any neutral oil like vegetable, canola, or even avocado oil will work perfectly for searing the chicken and sautéing the aromatics.
Aromatics: This is where the magic really begins! You’ll need 1 small onion, finely chopped, 3 cloves of garlic, minced, and about a 1-inch piece of fresh ginger, grated. These three musketeers create a fragrant, foundational layer of flavor that is essential for our sticky sauce.
Soy Sauce: 1/2 cup. This brings the primary salty, umami depth to the glaze. If you need a gluten-free option, tamari is an excellent substitute and works just as well.
Chicken Broth: 1/4 cup. Adds liquid to the sauce base and helps create a richer flavor than just using water.
Honey or Brown Sugar: 1/4 cup. This is our key sweetener, creating that signature sticky texture and balancing the savory soy sauce. Both honey and brown sugar offer a lovely caramel-like note; brown sugar also adds a touch more moisture.
Rice Vinegar: 1 tablespoon. Provides essential acidity to cut through the sweetness and richness, brightening the overall flavor profile of the glaze.
Cornstarch and Water: 1 tablespoon cornstarch whisked with 2 tablespoons water creates what’s called a “slurry.” This is the thickening agent for our sauce, turning it from a liquid into that gorgeous, glossy glaze we’re after.
Cooked White Rice: For serving. The perfect absorbent bed for all that wonderful sticky sauce and tender chicken. You can use any rice you like, but white rice is a classic pairing.
Fresh Garnish: Fresh parsley or cilantro, chopped. A sprinkle of fresh herbs at the end adds a burst of color and a fresh, herbaceous note that elevates the whole dish. Choose your favorite!
Crafting Your Sticky Glazed Chicken and Rice: Step-by-Step
Ready to turn these simple ingredients into a show-stopping meal? Let’s walk through it step-by-step. Don’t rush, and you’ll be rewarded with perfectly tender chicken and that irresistible sticky sauce.
Get Your Rice Ready: First things first, start cooking your white rice according to the package directions. Doing this at the beginning ensures it’s hot and ready to go when your chicken is finished. If you’re looking for another delicious chicken and rice option, you might enjoy our Juicy Chicken and Rice Bowl recipe too!
Prep the Chicken: This is a crucial step for getting a good sear! Pat the chicken pieces completely dry with paper towels. Moisture on the surface prevents browning, and browning equals flavor! Cut them into roughly 1-inch pieces so they cook quickly and evenly.
Sear the Chicken: Heat the cooking oil in a large skillet or Dutch oven over medium-high heat. You want the pan hot enough to brown the chicken quickly. Add the chicken in a single layer. Don’t overcrowd the pan! Cook in batches if necessary. Let the chicken brown on all sides until golden – this creates delicious caramelized bits. Remove the chicken from the pan and set it aside for later.
Sauté the Onion: Reduce the heat to medium to prevent burning the aromatics. Add the chopped onion to the same pan. Cook, stirring occasionally, for about 3-5 minutes until the onion softens and becomes translucent. This releases their sweet flavor.
Add Garlic and Ginger: Now, add the minced garlic and grated ginger to the pan. Cook for just about 1 minute more. Stir constantly! Garlic can burn quickly, and you want it fragrant, not browned. The smell is incredible at this stage!
Build the Sauce Base: Pour in the soy sauce (or tamari), chicken broth, honey or brown sugar, and rice vinegar. Give it a good stir, making sure to scrape up any browned bits stuck to the bottom of the pan. These bits add so much flavor to the sauce! Bring the mixture to a gentle simmer.
Prepare the Cornstarch Slurry: In a small bowl, whisk together the cornstarch and cold water until you have a smooth, lump-free mixture. This is your thickening agent.
Thicken the Glaze: While the sauce is simmering, slowly pour the cornstarch slurry into the pan, stirring constantly. You’ll see the sauce immediately begin to thicken. Let it simmer for another 2-3 minutes, still stirring occasionally, until it reduces slightly and becomes beautifully thick and glossy, coating the back of a spoon.
Return the Chicken: Add the reserved browned chicken pieces back into the pan with the thickened glaze. Toss gently to make sure every piece is completely coated in the luscious sauce. Cook for just 1-2 minutes more. The goal here is just to heat the chicken through, not cook it further. Overcooking at this point can make it tough!
Serve! Your sticky glazed chicken is ready! Serve it immediately over hot cooked white rice. Garnish generously with fresh chopped parsley or cilantro for a pop of color and freshness. Enjoy!
Tips for Perfect Sticky Glazed Chicken and Rice Every Time
Want to make this recipe even better? Here are a few pro tips I’ve learned along the way to ensure your sticky glazed chicken is always a hit:
Don’t Skip Patting the Chicken Dry: Seriously, this makes a huge difference in getting a proper sear, which means more flavor and better texture. Use plenty of paper towels.
Sear in Batches: Overcrowding the pan lowers the temperature and steams the chicken instead of browning it. Give those chicken pieces space to get golden!
Use Fresh Ginger and Garlic: While powders work in a pinch, fresh aromatics provide a much more vibrant and nuanced flavor to the glaze. Grate the ginger finely so it incorporates smoothly.
Adjust Sweetness/Saltiness: Taste the sauce once it’s simmering before you thicken it. If you prefer it sweeter, add a little more honey or brown sugar. If it needs more savory depth, a splash more soy sauce can help (but be mindful of saltiness!).
Don’t Overcook After Adding Chicken Back: This is the second most critical step for tender chicken. The chicken is already cooked from searing; you’re just warming it up and coating it. A minute or two is truly all you need.
Rest the Chicken (Optional but Recommended): If you have a moment after searing and before adding back to the sauce, letting the chicken rest for 5-10 minutes can help the juices redistribute, leading to even more tender results.
Storage: Leftovers store well in an airtight container in the refrigerator for 3-4 days. Reheat gently on the stovetop or in the microwave.
What to Serve With Sticky Glazed Chicken and Rice
This sticky glazed chicken and rice is a complete meal on its own, but adding a side dish can really round things out. A simple green vegetable is always a great choice to balance the richness of the glaze. Think steamed broccoli, sautéed green beans, or even some crispy roasted Brussels sprouts.
Complementary Dishes for Sticky Glazed Chicken
Round out your meal with these fresh accompaniments that pair well with the sticky glazed chicken.
- For a bright, crisp contrast, try this Spicy Cucumber Edamame Salad, offering a refreshing texture.
- Consider the Lemon Soy Wakame Salad for a light, flavorful option that complements the richness of the chicken.
A fresh, crisp salad with a light vinaigrette also makes a refreshing counterpoint. Or, for something different, consider a simple cucumber salad dressed with rice vinegar and sesame oil.
Your Sticky Glazed Chicken and Rice Questions Answered (FAQ)
Got questions? I’ve got answers! Here are some common queries about making perfect sticky glazed chicken.
Can I use chicken breast instead of thighs?
You can, but chicken thighs are highly recommended for this recipe because they are much more forgiving and stay juicier. If you do use chicken breast, cut the pieces slightly larger and be extremely careful not to overcook them during the searing or when adding them back to the sauce. Cook chicken breast just until it reaches an internal temperature of 165°F (74°C).
How can I make the sauce spicier?
To add a kick, you have a few options. You can add a pinch of red pepper flakes to the pan when you add the garlic and ginger. Alternatively, drizzle some sriracha or your favorite chili garlic sauce over the dish just before serving, or stir a teaspoon into the sauce base (Step 6) before simmering.
What if my sauce doesn’t thicken?
The cornstarch slurry should work like a charm! Ensure you whisked the cornstarch and water together completely before adding, with no lumps. Also, make sure the sauce is simmering when you add the slurry and continue to stir. If after a few minutes it’s still too thin, you can make a tiny bit more slurry (say, half a teaspoon of cornstarch mixed with one teaspoon of water) and add it gradually, stirring constantly, until the desired thickness is reached. Be careful not to add too much, or it can become gluey.
Can I prepare parts of this recipe ahead of time?
Yes! You can chop the onion, mince the garlic, and grate the ginger a day in advance and store them in airtight containers in the refrigerator. You can also cut the chicken pieces ahead of time. The sauce is best made fresh just before serving, as cornstarch-based sauces can sometimes thin out slightly upon reheating.
Is this recipe freezer-friendly?
Cooked sticky glazed chicken can be frozen. Store it in an airtight container or freezer bag for up to 2-3 months. Thaw in the refrigerator overnight and reheat gently on the stovetop, adding a splash of broth or water if the sauce seems too thick. Note that the texture might change slightly after freezing and thawing.
Enjoy Your Homemade Sticky Glazed Chicken and Rice!
There you have it! A simple, reliable, and absolutely delicious recipe for Sticky Glazed Chicken and Rice that guarantees tender, juicy chicken coated in a craveable glaze. It’s proof that weeknight dinners can be both easy and incredibly satisfying.
Give this recipe a try and let me know what you think in the comments below! Did you add any fun variations? What’s your favorite side dish to pair with it? I love hearing about your kitchen adventures!
Sticky Glazed Chicken
Course: Main CourseCuisine: AsianDifficulty: medium450
kcalLearn how to make the best Sticky Glazed Chicken and Rice! Get tender chicken with a delicious, easy glaze in under 45 minutes.
Ingredients
1.5 pounds boneless, skinless chicken thighs, cut into 1 inch pieces
2 tablespoons cooking oil
1 small onion, finely chopped
3 cloves garlic, minced
1 inch piece fresh ginger, grated
1/2 cup soy sauce (or tamari for gluten-free)
1/4 cup chicken broth
1/4 cup honey or brown sugar
1 tablespoon rice vinegar
1 tablespoon cornstarch
2 tablespoons water
Cooked white rice, for serving
Fresh parsley or cilantro, chopped, for garnish
Directions
- Cook rice according to package directions.
- Pat chicken pieces completely dry with paper towels.
- Heat cooking oil in a large skillet or Dutch oven over medium high heat. Add chicken in a single layer, working in batches if necessary, and brown on all sides until golden. Remove chicken from the pan and set aside.
- Reduce heat to medium. Add chopped onion to the pan and cook, stirring occasionally, until softened, about 3 5 minutes.
- Add minced garlic and grated ginger to the pan and cook for 1 minute more until fragrant.
- Pour in the soy sauce, chicken broth, honey or brown sugar, and rice vinegar. Stir to combine and scrape up any browned bits from the bottom of the pan. Bring the sauce to a simmer.
- In a small bowl, whisk together the cornstarch and water until smooth.
- Pour the cornstarch slurry into the simmering sauce, stirring constantly. The sauce will begin to thicken. Let it simmer for 2 3 minutes until glossy and reduced to a thick glaze.
- Return the reserved browned chicken pieces to the pan. Toss gently to coat the chicken completely in the thick glaze. Cook for just 1 2 minutes more to heat the chicken through, making sure not to overcook it at this stage.
- Serve the sticky glazed chicken immediately over hot cooked white rice. Garnish with fresh chopped parsley or cilantro.


