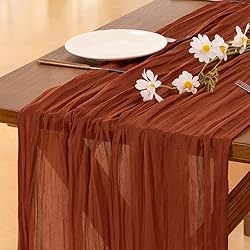
Socomi Thanksgiving Fall Table Runner Terracotta Cheesecloth Gauze Burnt Orange Boho Rustic Farmhouse 120 inch 10FT Cheese Cloth Runner for Wedding Party Baby Shower Home Decor Holiday Decorations
$7.99 (as of November 3, 2025 10:05 GMT +00:00 - More infoProduct prices and availability are accurate as of the date/time indicated and are subject to change. Any price and availability information displayed on [relevant Amazon Site(s), as applicable] at the time of purchase will apply to the purchase of this product.)
BrüMate Era 40 oz Tumbler with Handle and Straw | 100% Leakproof Insulated Water Bottle Tumbler with Lid and Straw | Made of Stainless Steel | Cup Holder Friendly | 40oz (Navy Polka Dots)
$47.99 (as of November 2, 2025 08:53 GMT +00:00 - More infoProduct prices and availability are accurate as of the date/time indicated and are subject to change. Any price and availability information displayed on [relevant Amazon Site(s), as applicable] at the time of purchase will apply to the purchase of this product.)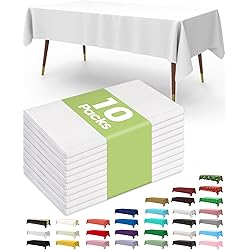
Pureegg Plastic Table Cloth Disposable 10 Pack, 54 x 108 Inch Table Cloths, Party, Picnic, Wedding, Decorative Tablecloths, Rectangle, White Plastic Cover, Leakproof & Sturdy, White
$9.98 (as of November 3, 2025 10:05 GMT +00:00 - More infoProduct prices and availability are accurate as of the date/time indicated and are subject to change. Any price and availability information displayed on [relevant Amazon Site(s), as applicable] at the time of purchase will apply to the purchase of this product.)
Ninja | Air Fryer | 6.5 QT Pro XL Capacity fits 9lbs of Wings | 6-in-1 Max Crisp, Air Fry, Roast, Bake, Reheat & Dehydrate | Nonstick Basket, Crisper Plate & Recipe Guide | Grey | AF181
$89.99 (as of November 3, 2025 10:05 GMT +00:00 - More infoProduct prices and availability are accurate as of the date/time indicated and are subject to change. Any price and availability information displayed on [relevant Amazon Site(s), as applicable] at the time of purchase will apply to the purchase of this product.)
Umite Chef Kitchen Cooking Utensils Set, 33 pcs Non-Stick Silicone Cooking Kitchen Utensils Spatula Set with Holder, Wooden Handle Silicone Kitchen Gadgets Utensil Set (Khaki)
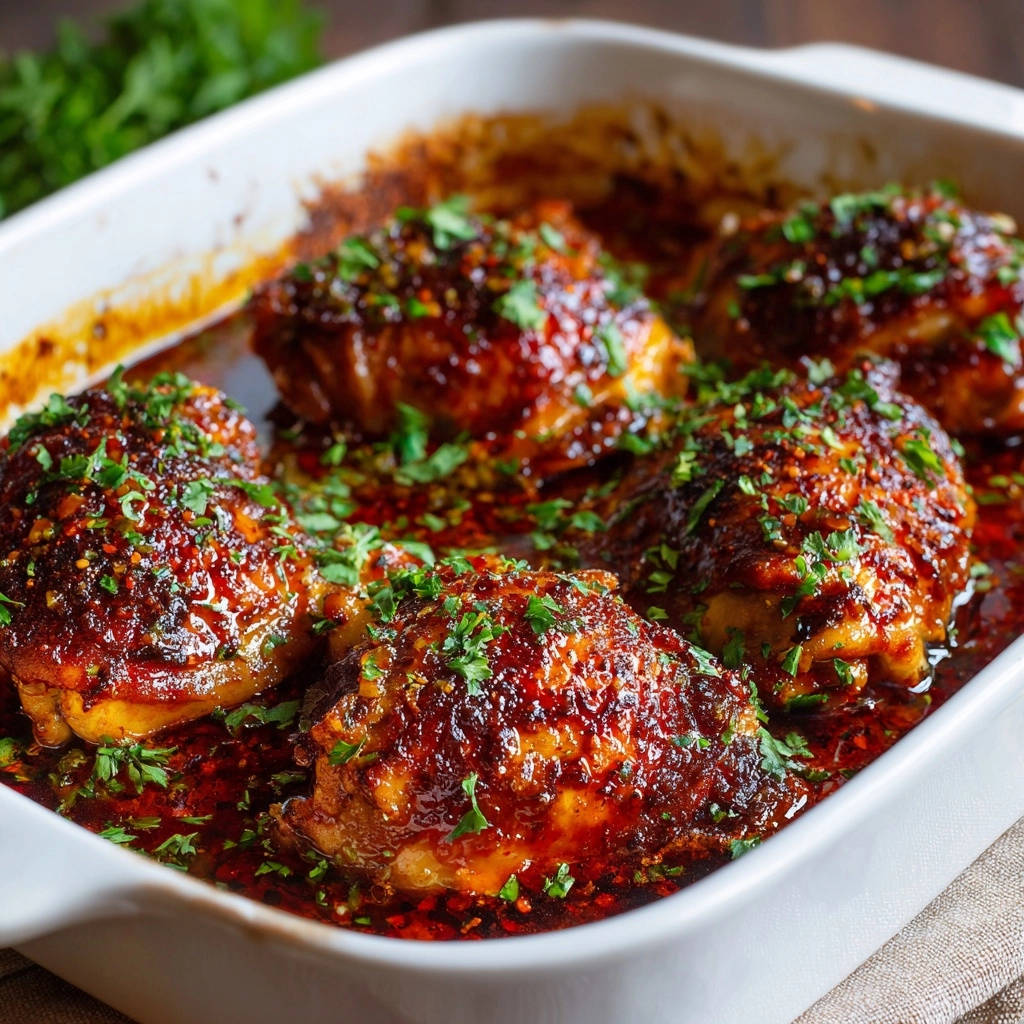
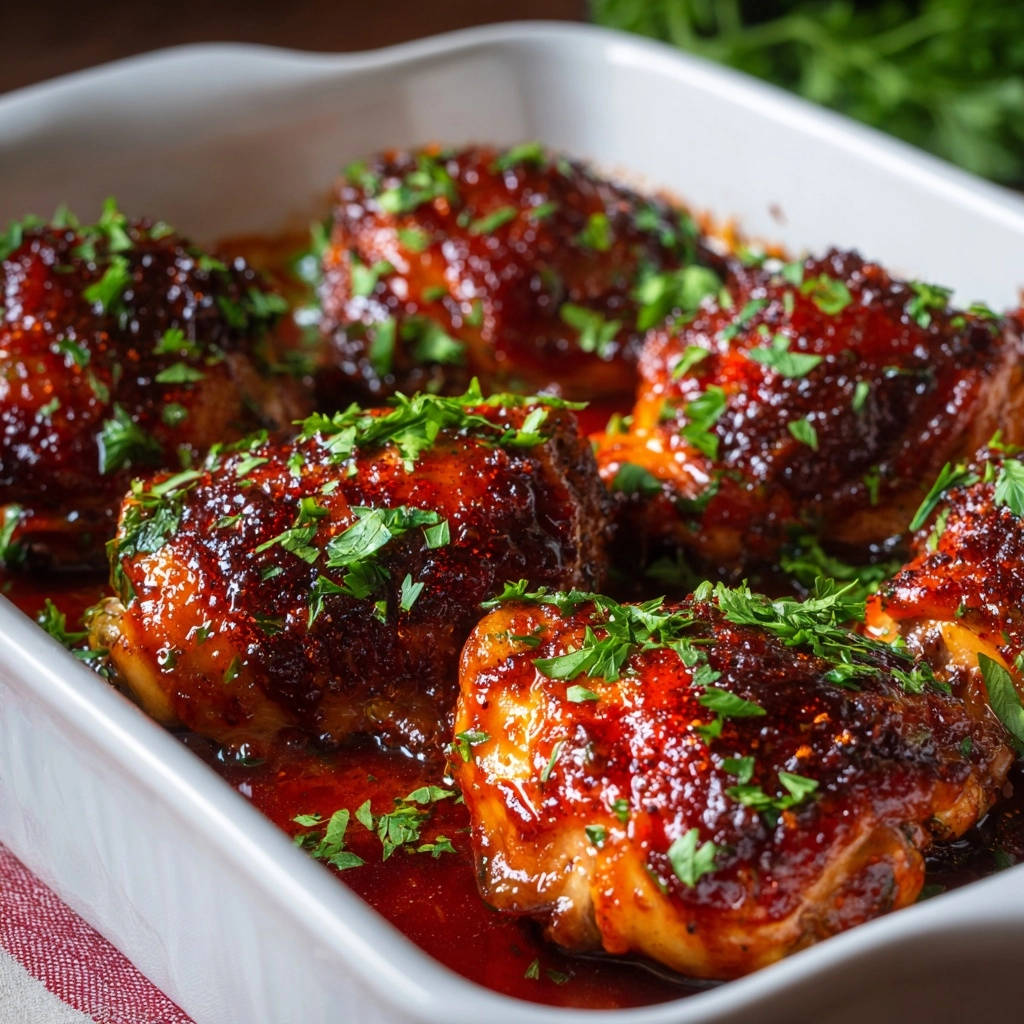
$21.59 (as of November 3, 2025 10:05 GMT +00:00 - More infoProduct prices and availability are accurate as of the date/time indicated and are subject to change. Any price and availability information displayed on [relevant Amazon Site(s), as applicable] at the time of purchase will apply to the purchase of this product.)For years, I found myself baking chicken with good intentions, only to end up with a sauce that tasted flat or simply refused to cling to the meat. That struggle led me to experiment tirelessly, and I’ve finally perfected the method for truly exceptional Sticky Glazed Chicken Thighs.
This recipe transforms a simple cut of chicken into a deeply flavorful, sweet-and-savory masterpiece, coating every piece with an irresistible, caramel-like glaze.
It’s the ultimate solution for a delicious weeknight meal that tastes like it took hours of effort.
Beyond Basic: Why This Sticky Glazed Chicken Thighs Recipe Shines
The Secret to a Clingy, Irresistible Glaze
Many glazes fall short, either running off the chicken or lacking depth. This recipe’s secret lies in a strategic two-stage basting process, ensuring the sauce melds into a rich, glossy coating that adheres beautifully to every succulent thigh.
The result is a deeply caramelized finish, far from any bland or runny alternative.
Effortless Weeknight Dinner, Restaurant-Quality Flavor
Despite its impressive outcome, this recipe is surprisingly straightforward, requiring minimal active cooking time. It delivers complex, restaurant-quality flavor with an ease perfect for busy weeknights.
You can achieve gourmet results without spending hours in the kitchen.
Deeply Infused Flavor in Every Bite
Our method focuses on layering flavors and ensuring they penetrate the chicken, not just sit on top. Through precise seasoning and repeated basting, the rich glaze becomes an integral part of the chicken, rather than just an accompaniment.
This guarantees a burst of deliciousness in every single bite.
The Building Blocks of Flavor: What You’ll Need
The Star: Bone-In, Skin-On Chicken Thighs
Bone-in, skin-on chicken thighs are the ideal choice for this recipe. The bone imparts extra flavor and helps the meat stay moist during cooking.
The skin crisps beautifully and protects the meat, rendering its fat to create even more richness in the pan juices for our glaze.
Key Glaze Ingredients for Unforgettable Taste
Soy Sauce: The Umami Foundation
Soy sauce provides the foundational savory, umami depth that is crucial for our sticky glaze. It contributes complexity and a rich, salty counterpoint to the sweetness.
Sweetness & Shine: Honey’s Role
Honey is essential for achieving the signature sticky texture and beautiful, lacquered shine of these Sticky Glazed Chicken Thighs. Its natural sugars caramelize beautifully, deepening the flavor profile.
Bright Notes: White Vinegar for Balance
White vinegar acts as a critical balancing agent, cutting through the richness and sweetness of the glaze. It adds a subtle tang that brightens the overall flavor, preventing it from being cloying.
Aromatic Powerhouses: Fresh Garlic & Ginger
Freshly minced garlic and grated ginger are non-negotiable for their pungent, aromatic punch. They elevate the glaze with their vibrant, spicy notes, creating a more dynamic flavor.
Optional Kick: Red Pepper Flakes for Heat
Red pepper flakes offer a customizable hint of warmth and mild heat. Including them adds another layer of complexity, providing a pleasant tingle that complements the sweet and savory elements.
Simple Seasonings & Fresh Garnish
Salt & Black Pepper
Basic salt and black pepper are used to season the chicken thighs directly before glazing. This initial seasoning ensures the chicken itself is flavorful, not just relying on the sauce.
Fresh Parsley: The Finishing Touch
Fresh chopped parsley provides a bright, herbaceous counterpoint to the rich glaze. It adds a pop of vibrant color and a fresh finish, making the dish visually appealing and enhancing the aroma.
Gear Up: Essential Tools for Sticky Glazed Chicken Thighs Success
Baking Dish & Whisk
A sturdy 9×13 inch baking dish is perfect for allowing the chicken to cook evenly and for containing the delicious pan juices. A whisk ensures your glaze ingredients are perfectly emulsified, creating a smooth, consistent sauce.
Paper Towels & Meat Thermometer
Paper towels are crucial for thoroughly drying the chicken, which is vital for crispy skin. A reliable meat thermometer is essential for ensuring food safety and perfectly cooked, juicy chicken every time, preventing over or undercooking.
Your Step-by-Step Guide to Sticky Glazed Chicken Thighs Perfection
- Preheat & Prep Your Dish:
Set your oven to 400°F (200°C) and lightly grease a 9×13 inch baking dish.
This ensures even cooking and prevents sticking, making cleanup easier while the oven comes to temperature.
- Prepare the Chicken Thighs:
Pat the chicken thighs thoroughly dry with paper towels, then season lightly with salt and black pepper on both sides.
Drying the chicken is crucial for achieving crispy skin and allows the seasoning to adhere better, laying the foundation for flavorful meat.
Arrange the seasoned chicken thighs skin-side up in your prepared baking dish, ensuring they have some space between them for even cooking.
- Whisk Together the Flavorful Glaze Base:
In a small bowl, combine the soy sauce, honey, white vinegar, minced garlic, grated ginger, and red pepper flakes (if using).
Whisk well to ensure all ingredients are thoroughly mixed, creating the foundation of our rich, balanced glaze.
- Initial Glazing & Bake:
Pour approximately half of the prepared sauce mixture evenly over the chicken thighs, ensuring each piece is well-coated.
Reserve the remaining sauce for the critical second phase of baking, where we build even more flavor.
Bake for 20 minutes to start the cooking process and allow the initial glaze to set.
- The Secret to Unforgettable Flavor: Basting & Finishing Bake:
Carefully remove the chicken from the oven after the initial bake. This is where the magic truly happens for our Sticky Glazed Chicken Thighs!
Spoon a generous amount of the rendered pan juices and the reserved sauce over each thigh, ensuring every surface gets coated.
Return the chicken to the oven and continue baking for another 15-20 minutes, or until the chicken reaches an internal temperature of 165°F (74°C).
During this final baking phase, baste the chicken every 5-7 minutes with the pan juices. This repeated basting helps the sauce caramelize beautifully, deeply penetrate the chicken, and prevents any blandness, ensuring every bite is packed with incredibly rich flavor and a sticky texture.
- Rest & Garnish:
Once cooked, remove the baking dish from the oven. Let the chicken rest for 5 minutes directly in the sauce.
This resting period allows the flavors to meld and the juices to redistribute throughout the meat, resulting in a more tender and supremely flavorful chicken.
Garnish generously with fresh chopped parsley before serving for a pop of freshness and color.
Unlock the Flavor: Expert Tips for Your Sticky Glazed Chicken Thighs
The Importance of Patting Chicken Dry
Patting your chicken thighs thoroughly dry with paper towels is a simple yet critical step. Moisture on the skin prevents it from crisping up properly in the oven, leading to soggy skin.
A dry surface also allows seasonings and the glaze to adhere more effectively, creating a better crust and more even caramelization.
Why Bone-In, Skin-On Matters for Juiciness & Flavor
The bone in chicken thighs acts as a natural heat conductor, helping the meat cook more evenly and retain moisture, resulting in significantly juicier chicken. The skin, as it cooks, renders its fat into the pan juices, enriching the glaze and contributing to a succulent texture and deeper flavor.
Mastering the Basting Technique for Ultimate Glaze Penetration
Basting every 5-7 minutes during the final bake is key to achieving that deep, complex flavor and sticky glaze. Each application of pan juices and reserved sauce allows the layers of flavor to build and caramelize onto the chicken.
This repeated exposure to heat and sauce ensures the glaze isn’t just on the surface but truly permeates the meat, making these Sticky Glazed Chicken Thighs unforgettable.
Don’t Guess: Achieve Perfect Doneness with a Thermometer
An instant-read meat thermometer is your best friend for perfectly cooked chicken. Inserting it into the thickest part of the thigh, away from the bone, ensures the chicken reaches a safe internal temperature of 165°F (74°C).
This prevents both undercooking, which is unsafe, and overcooking, which can lead to dry, tough meat.
The Power of Resting: Juicy Results Every Time
Allowing your Sticky Glazed Chicken Thighs to rest for 5 minutes after baking is crucial. During cooking, muscle fibers contract and push juices to the center.
Resting allows these juices to redistribute throughout the meat, resulting in a significantly more tender, moist, and flavorful bite.
Beyond the Plate: Perfect Pairings for Your Sticky Glazed Chicken Thighs
Classic Side Dishes
These Sticky Glazed Chicken Thighs pair wonderfully with simple, complementary sides. Fluffy white rice or brown rice is perfect for soaking up every last drop of the luscious glaze.
Roasted asparagus, green beans, or a simple garden salad offer a fresh, vibrant contrast to the rich chicken.
Creamy mashed potatoes also provide a comforting and satisfying accompaniment.
Complementary Drinks
For a non-alcoholic option, iced tea with a hint of lemon or a crisp sparkling cider works beautifully. If you enjoy a glass of wine, a light-bodied Pinot Noir or a crisp Sauvignon Blanc can complement the flavors without overpowering them.
Creative Serving Ideas
Beyond a classic dinner, shred leftover Sticky Glazed Chicken Thighs for delicious chicken tacos or sliders, topping them with a crunchy slaw. They’re also excellent cold and diced into a vibrant salad, or served over ramen noodles for a quick, flavorful meal.
Plan Ahead: Storing and Reheating Your Sticky Glazed Chicken Thighs
Can You Make It Ahead?
While best served fresh, you can whisk together the glaze mixture up to 2 days in advance and store it in the refrigerator. This saves a crucial step on busy cooking days.
Refrigeration Best Practices
Store any leftover Sticky Glazed Chicken Thighs, along with their delicious sauce, in an airtight container in the refrigerator for up to 3-4 days. Ensure they cool completely before storing to maintain quality and safety.
Freezing for Future Feasts
For longer storage, freeze cooked chicken thighs and their glaze in a freezer-safe container for up to 2-3 months. Thaw overnight in the refrigerator before reheating.
Reheating for Optimal Flavor
To reheat, place the chicken and sauce in an oven-safe dish, cover loosely with foil, and bake at 325°F (160°C) until warmed through, about 15-20 minutes. You can also gently reheat on the stovetop over low heat, adding a splash of water or broth if the sauce is too thick.
Avoid high heat or microwave reheating to prevent drying out the chicken.
Common Questions & Quick Fixes for Your Sticky Glazed Chicken Thighs
Glaze Not Thickening?
If your glaze hasn’t thickened to a sticky consistency, don’t worry. Continue baking the chicken for a few more minutes, ensuring consistent basting, to allow more reduction. Alternatively, remove the chicken, transfer the pan juices to a small saucepan, and simmer briefly until desired thickness is reached.
A cornstarch slurry (1 tsp cornstarch mixed with 1 tsp cold water) can be whisked into the simmering sauce for a quicker thickening solution.
Chicken Dry or Tough?
Dry or tough chicken usually indicates overcooking. Always use a meat thermometer to ensure the chicken reaches exactly 165°F (74°C) and no more. Resting the chicken after cooking is also crucial for juiciness, as discussed above.
The bone-in, skin-on cut naturally helps retain moisture, so trusting the thermometer is your best defense.
Flavor Not “Popping”?
If the flavor seems subdued, consider increasing the fresh aromatics like garlic and ginger next time. A little extra red pepper flakes can also amplify the overall taste. Ensure your initial seasoning of the chicken with salt and pepper is adequate, as this builds flavor from the inside out.
Your Sticky Glazed Chicken Thighs Questions, Answered!
Can I Use Boneless, Skinless Thighs?
Yes, you can use boneless, skinless chicken thighs, but be aware of a few changes. They will cook faster, so monitor internal temperature closely and adjust baking time, likely reducing it by 5-10 minutes per stage. The absence of skin means less rendered fat and no crispy skin, affecting the overall texture and richness of the glaze, which may be slightly thinner.
How Do I Get Crispier Skin?
To maximize crispy skin, ensure the chicken is patted very dry before seasoning. You can also finish the last 5 minutes of baking under the broiler (watching very carefully!) to achieve an extra-crisp, golden-brown skin, though this method is optional.
Is There a Gluten-Free Option?
Absolutely! Simply substitute the soy sauce with a gluten-free tamari or coconut aminos. Both options will deliver a similar savory depth without the gluten, making these Sticky Glazed Chicken Thighs accessible for those with dietary restrictions.
Can I Adjust the Spice Level?
Certainly. The red pepper flakes are entirely optional and adjustable. For a milder dish, omit them completely. If you enjoy more heat, feel free to add an extra 1/2 to 1 teaspoon to the glaze mixture according to your preference.
What About Marinating Overnight?
Marinating the chicken in the glaze mixture overnight is generally not recommended for this recipe. The vinegar and soy sauce can begin to “cook” the chicken, leading to a slightly tougher texture. The multi-stage basting method ensures plenty of flavor penetration without a long pre-marinade.
Your Turn: Share Your Sticky Glazed Chicken Thighs Success!
There’s immense satisfaction in creating a dish that truly delivers on flavor and texture, and these Sticky Glazed Chicken Thighs are a testament to that. I encourage you to try this recipe, trust the process, and experience the incredible difference a perfectly executed glaze makes.
Once you’ve savored every sticky, tender bite, share your culinary triumph! I’d love to hear how these amazing chicken thighs turned out for you.
Sticky Glazed Chicken Thighs
Course: Main CourseCuisine: Asian cuisineDifficulty: easy4
servings15
minutes35
minutes50
minutesAsian cuisine
Ingredients
6 bone-in, skin-on chicken thighs
1/4 cup soy sauce
1/4 cup honey
2 tablespoons white vinegar
1 tablespoon minced fresh garlic
1 tablespoon grated fresh ginger
1 teaspoon red pepper flakes (optional)
1/2 teaspoon black pepper
1/4 teaspoon salt
2 tablespoons chopped fresh parsley, for garnish
Directions
- Preheat your oven to 400 degrees F (200 degrees C). Lightly grease a 9×13 inch baking dish.
- Pat the chicken thighs dry with paper towels. Season them lightly with salt and black pepper on both sides. Arrange the chicken thighs skin-side up in the prepared baking dish.
- In a small bowl, whisk together the soy sauce, honey, white vinegar, minced garlic, grated ginger, and red pepper flakes (if using). This forms the flavorful base of our glaze.
- Pour about half of the prepared sauce mixture over the chicken thighs, ensuring each piece is well-coated. Reserve the remaining sauce for later.
- Bake for 20 minutes.
- The Secret to Unforgettable Flavor: Remove the chicken from the oven. Spoon a good amount of the pan juices and the reserved sauce over each thigh. Return to the oven and continue baking for another 15-20 minutes, or until the chicken reaches an internal temperature of 165 degrees F (74 degrees C) and the sauce has reduced and thickened into a beautiful, sticky glaze. During this final baking phase, baste the chicken every 5-7 minutes with the pan juices from the bottom of the pan. This repeated basting and exposure to heat will help the sauce caramelize and deeply penetrate the chicken, preventing any blandness and ensuring every bite is packed with rich flavor.
- Once cooked, remove the baking dish from the oven. Let the chicken rest for 5 minutes in the sauce to allow flavors to meld.
- Garnish generously with fresh chopped parsley before serving. Enjoy that deeply flavored, sticky-sweet chicken!

ThermoPro TP19H Digital Meat Thermometer for Cooking with Ambidextrous Backlit and Motion Sensing Kitchen Cooking Food Thermometer for BBQ Grill Smoker Oil Fry Candy Instant Read Thermometer
$13.98 (as of November 3, 2025 10:05 GMT +00:00 - More infoProduct prices and availability are accurate as of the date/time indicated and are subject to change. Any price and availability information displayed on [relevant Amazon Site(s), as applicable] at the time of purchase will apply to the purchase of this product.)
Astercook Deep-Carbonized Bamboo Cutting Boards for Kitchen with Wood Storage Stand, Reversible Charcuterie & Chopping Boards with Juice Grooves and Easy-Grip Handles, Knife-Friendly, Kitchen Gift
$44.99 (as of November 3, 2025 10:05 GMT +00:00 - More infoProduct prices and availability are accurate as of the date/time indicated and are subject to change. Any price and availability information displayed on [relevant Amazon Site(s), as applicable] at the time of purchase will apply to the purchase of this product.)
BNBUN Bamboo Cutting Board for Kitchen, Wooden Cutting Board 3-Piece Set with Non-Slip Mat Deep Juice Groove and Built-In Handles, Wood Cutting Board for Meat Vegetables Fruit Ideal Gift for the Home
$29.97 (as of November 3, 2025 10:05 GMT +00:00 - More infoProduct prices and availability are accurate as of the date/time indicated and are subject to change. Any price and availability information displayed on [relevant Amazon Site(s), as applicable] at the time of purchase will apply to the purchase of this product.)
Sok It JavaSok Iced Coffee & Cold Soda Insulated Neoprene Cup Sleeve (Tidal Treasures, Medium: 22-28oz)
(as of November 2, 2025 08:53 GMT +00:00 - More infoProduct prices and availability are accurate as of the date/time indicated and are subject to change. Any price and availability information displayed on [relevant Amazon Site(s), as applicable] at the time of purchase will apply to the purchase of this product.)