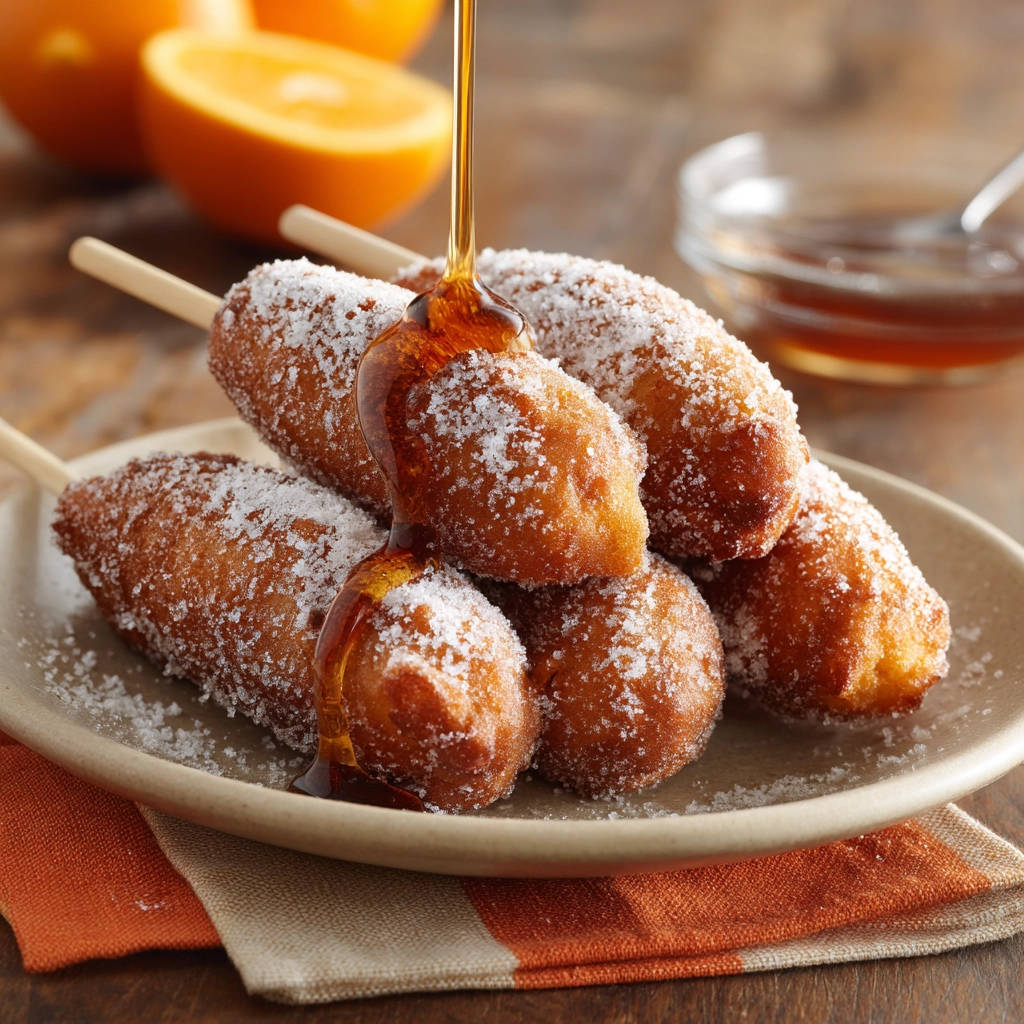
Oh, the joy and the heartbreak of fried dough! There’s truly nothing quite like the warm, sweet goodness of a freshly fried treat, lightly dusted with powdered sugar and ready for dipping. But let’s be honest, who hasn’t experienced that crushing disappointment? You bite into a beautiful, golden-brown fried stick, expecting soft, tender sweetness, only to encounter that dreaded, raw, gooey center. Ugh!
For years, I struggled with this exact problem. My sweet fried sticks would look picture-perfect on the outside, but the inside was a doughy mess. I tweaked ratios, changed cooking times, and scratched my head more times than I’d like to admit. But after countless batches (and a few edible failures!), I finally uncovered the secret. And let me tell you, it’s simpler than you might think! It all comes down to one key technique during the frying process that guarantees a fully cooked, soft center alongside that irresistible crispy, golden exterior.
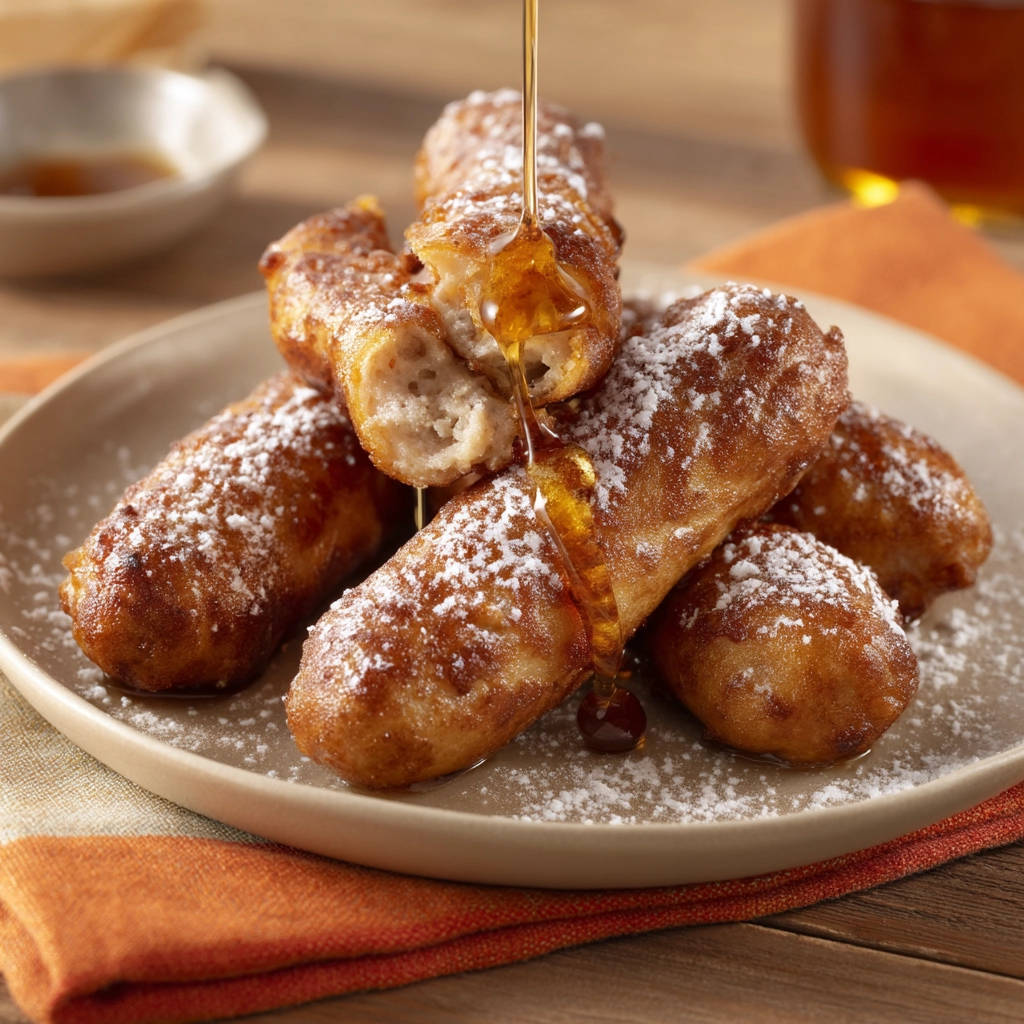
Today, I’m sharing my perfected recipe for Sweet Fried Sticks with no more raw centers! Get ready to master the art of homemade fried dough and enjoy these delightful treats whenever the craving strikes.
Reasons These Sweet Fried Sticks Are a Keeper
Beyond solving the infamous raw center dilemma, this recipe has become a family favorite for so many reasons:
- They are incredibly quick to make. From mixing the batter to dusting with sugar, you’re looking at about 25 minutes.
- The ingredients are pantry staples. You likely have everything you need right now!
- The texture is spot on: wonderfully crispy outside, soft and fluffy inside.
- They are versatile! Perfect for breakfast, brunch, dessert, or just a spontaneous sweet snack.
- Sharing them warm, fresh out of the fryer, is a truly special experience.
Once you make these Sweet Fried Sticks and see how easy it is to get them right, you’ll never go back to worrying about undercooked dough.
Gathering Your Ingredients for Perfect Sweet Fried Sticks
Creating these delightful fried sticks requires just a handful of simple ingredients. Think of them as the building blocks for that perfect balance of sweetness, fluffiness, and a hint of crispness. Each component plays a vital role in achieving that desired texture and flavor.
We start with the dry foundation:
- 1 and 1/2 cups all-purpose flour: This provides the main structure for our dough. Using all-purpose is standard and reliable for this type of batter.
- 2 tablespoons granulated sugar: Adds just enough sweetness to the dough itself and helps with browning during frying.
- 2 teaspoons baking powder: This is our leavening agent. It’s crucial for creating those lovely puffy, light centers as the sticks fry.
- 1/2 teaspoon salt: A little salt is essential, even in sweet recipes. It balances the sweetness and enhances all the other flavors.
Next, we bring in the wet ingredients that bind everything together and add richness:
- 1 large egg: Acts as a binder, helping the dough hold together, and contributes to the richness and tender texture.
- 3/4 cup milk (or non-dairy milk): Provides the necessary liquid to create a pourable batter. Feel free to use dairy milk or any non-dairy alternative like almond, soy, or oat milk; the results will be very similar.
- 1 teaspoon vanilla extract: A splash of vanilla is a must! It infuses the sweet fried sticks with a warm, comforting aroma and flavor. Make sure to use pure vanilla extract for the best taste.
And finally, the essentials for the magic to happen and the perfect finishing touch:
- Vegetable oil, for frying: You’ll need enough neutral-flavored oil like vegetable, canola, or sunflower oil to fill your pot about 2-3 inches deep. The type of oil matters less than having enough and maintaining the correct temperature.
- Powdered sugar, for dusting: The classic finish! A generous dusting of powdered sugar adds sweetness and that iconic look.
- Syrup, for serving: Maple syrup is traditional and utterly delicious, but feel free to use your favorite kind!
Having all your ingredients measured out and ready to go before you start mixing will make the process smooth and enjoyable.
Crafting Your Sweet Fried Sticks: Step-by-Step
Ready to transform these simple ingredients into golden, puffy perfection? The process is straightforward, but paying attention to a couple of key details will ensure your Sweet Fried Sticks turn out perfectly cooked every time. Let’s walk through it together.
- First, let’s get our dry ingredients perfectly combined. Grab a large mixing bowl – big enough to hold all the batter comfortably. Add your 1 and 1/2 cups of all-purpose flour, 2 tablespoons of granulated sugar, 2 teaspoons of baking powder, and that essential 1/2 teaspoon of salt. Give them a good whisking. This isn’t just about mixing; it aerates the flour slightly and, more importantly, ensures the baking powder and salt are evenly distributed throughout. This prevents pockets of unmixed leavening or saltiness later on.
- In a separate, medium-sized bowl, we’ll mix the wet ingredients. Crack in your large egg. Add the 3/4 cup of milk (whichever kind you’re using) and the 1 teaspoon of vanilla extract. Whisk these together until they are well combined and the egg is fully incorporated into the liquids.
- Now, it’s time to bring the two bowls together. Pour the wet ingredients from the medium bowl into the large bowl with the dry ingredients. Grab a spoon or spatula and stir until everything is just combined. This is a critical step: do not overmix! Stirring too much can develop the gluten in the flour, resulting in tough, chewy fried sticks instead of light and tender ones. A few small lumps in the batter are perfectly fine – a slightly lumpy batter is better than an overmixed one. The final consistency should be thick enough to hold its shape briefly when scooped but still pourable.
- While your batter rests for just a moment, let’s get the oil ready. Choose a large, heavy-bottomed pot or use a deep fryer if you have one. Heavy pots help maintain a consistent temperature, which is vital here. Pour in enough vegetable oil to reach a depth of about 2 to 3 inches. Place the pot over medium heat. Now, for the absolute most crucial step to avoid raw centers: heat the oil until it reaches exactly 350 degrees F. You absolutely must use a thermometer to check this temperature. Eyeballing it is the quickest way to end up with raw insides (oil too cool) or burnt outsides (oil too hot). This specific temperature is the sweet spot that allows the outside to brown beautifully at the same rate as the inside cooks through. Maintaining this temperature is key throughout the frying process.
- Once your oil is precisely at 350 degrees F, it’s time to start frying! You have a couple of options for shaping: you can carefully drop spoonfuls of batter into the hot oil, or for more uniform “sticks,” you can transfer the batter to a piping bag or even a sturdy zip-top bag with one corner snipped off (make the opening about 1/2 to 3/4 inch wide). Gently squeeze or drop the batter directly into the hot oil, forming stick shapes. Here is the second golden rule for perfect centers: do not overcrowd the pot! Fry only a few Sweet Fried Sticks at a time. Adding too much cold batter at once will drastically drop the oil temperature, preventing them from cooking through and leaving you with those dreaded raw centers. Give each stick space to fry and puff up properly.
- Let the Sweet Fried Sticks fry undisturbed for about 2 to 3 minutes on one side. They should puff up and turn a lovely golden brown. Use a slotted spoon or a spider (a wire mesh spoon) to gently turn each stick over. Continue frying for another 2 to 3 minutes on the second side, or until they are evenly golden brown and look wonderfully puffy and cooked through.
- Using your slotted spoon or spider, carefully lift the fried sticks out of the hot oil. Allow any excess oil to drip back into the pot for a moment. Transfer the freshly fried sticks to a wire rack that you’ve placed over a plate or paper towels. A wire rack is better than just paper towels directly, as it allows air circulation and helps them stay crispier as they drain.
- These are best enjoyed warm! While they are still hot from the fryer, generously dust them with powdered sugar. The heat helps the sugar adhere perfectly. Serve them immediately with your favorite syrup for dipping. Don’t wait too long – the ultimate joy is that fresh-fried warmth and perfect texture!
Tips for Perfect Sweet Fried Sticks Every Time
Achieving Sweet Fried Stick perfection is easy once you know the tricks. Here are a few extra tips to ensure your success:
- Temperature Control is King: I cannot stress this enough – use a thermometer and monitor your oil temperature constantly. If it drops below 350°F, pause frying until it heats back up. If it creeps too high, turn the heat down or briefly remove the pot from the heat. Consistent temperature is the #1 factor for success.
- Don’t Rush the Heat: Heat the oil over medium heat. High heat will cause the outside of the oil to heat too quickly, potentially scorching it before the inside even starts to cook.
- Avoid Overcrowding: As mentioned in the steps, frying too many sticks at once is a major culprit for raw centers. Fry in batches, leaving plenty of space between each stick.
- Shape Matters: Spooning creates more rustic, fritter-like shapes. Using a piping bag or snipped zip-top bag gives you more uniform sticks, which can cook slightly more evenly. Choose whichever you prefer!
- Drain Properly: Don’t skip the wire rack! Letting them sit directly on paper towels can trap steam and make the bottoms soggy.
- Dust While Warm: Powdered sugar adheres best to warm surfaces. Dusting right away gives you that beautiful, even coating.
- Serving Alternatives: While syrup and powdered sugar are classic, try tossing warm Sweet Fried Sticks in cinnamon sugar for a churro-like twist! You could also dip them in chocolate sauce or serve alongside fresh berries.
What to Serve With Your Sweet Fried Sticks
These versatile sweet treats can fit into many meal occasions! For a fun breakfast or brunch spread, they pair wonderfully with fresh fruit, classic blueberry scones, or even alongside savory items like bacon and eggs for a sweet and salty contrast. If you’re serving them as a dessert, consider offering a variety of dipping sauces like melted chocolate, caramel, or a berry compote. They are also a fantastic addition to a dessert platter featuring other delightful treats like perfect creamy cheesecake or easy apple crumble.
Your Sweet Fried Sticks Questions Answered (FAQ)
Here are some common questions people ask when making Sweet Fried Sticks at home:
Why are my sweet fried sticks raw in the middle?
The most common reasons for raw centers are the oil temperature being too low (below 350°F) or overcrowding the pot. When the oil isn’t hot enough, the outside takes too long to brown, and the inside never reaches a temperature high enough to cook through before the outside burns. Overcrowding drops the oil temperature significantly, leading to the same issue. Always use a thermometer and fry in small batches!
Can I make the batter ahead of time?
While you could technically make the batter a little bit ahead (maybe an hour or two), it’s best to make it fresh just before frying. The baking powder starts reacting as soon as it gets wet, and letting it sit for too long can result in less puffiness in the finished product. Mixing it right before frying gives you the best texture.
What kind of oil is best for frying?
A neutral-flavored oil with a high smoke point is ideal. Vegetable oil, canola oil, sunflower oil, or peanut oil all work well. These oils won’t impart unwanted flavors to your sweet treats and can handle the necessary frying temperature without breaking down.
Can I bake or air fry these instead of frying?
This specific recipe is formulated for frying to achieve that particular crispy-outside, soft-inside texture that comes from cooking in hot oil. While you might be able to adapt it for baking or air frying, the results will be different in texture and appearance. If you prefer a non-fried treat, you might look for a recipe specifically designed for baking or air frying dough, as they often require different batter consistencies or leavening agents.
How do I store and reheat leftover Sweet Fried Sticks?
Sweet Fried Sticks are definitely best enjoyed immediately. Leftovers can be stored in an airtight container at room temperature for a day or two, but they will lose their crispness. To try and revive them, you can briefly reheat them in a toaster oven or air fryer until warmed through (avoid the microwave, which will make them rubbery). They won’t be quite as good as fresh, but they’ll still be tasty!
Enjoy Your Homemade Sweet Fried Sticks!
Say goodbye to raw centers and hello to perfect Sweet Fried Sticks! With this recipe and the simple trick of using a thermometer and minding your oil temperature, you’re well on your way to making delicious, crispy, and soft-centered fried dough right in your own kitchen. They’re surprisingly easy, quick, and guaranteed to bring smiles.
Give this recipe a try, and let me know how they turn out in the comments below! Did you use syrup, cinnamon sugar, or another favorite topping? Happy frying!
Sweet Fried Sticks

Ingredients
- 1 and 1/2 cups all-purpose flour
- 2 tablespoons granulated sugar
- 2 teaspoons baking powder
- 1/2 teaspoon salt
- 1 large egg
- 3/4 cup milk (or non-dairy milk)
- 1 teaspoon vanilla extract
- Vegetable oil, for frying
- Powdered sugar, for dusting
- Syrup, for serving
Directions
- In a large bowl, whisk together the flour, granulated sugar, baking powder, and salt.
- In a separate medium bowl, whisk together the egg, milk, and vanilla extract.
- Pour the wet ingredients into the dry ingredients and stir until just combined. A few lumps are okay, do not overmix. The batter should be thick but pourable.
- Add vegetable oil to a large, heavy pot or deep fryer, filling it about 2-3 inches deep. Heat the oil over medium heat until it reaches 350 degrees F. Use a thermometer to check the temperature; this is the crucial step to ensure the insides cook properly.
- Carefully drop spoonfuls or use a piping bag or zip-top bag with the corner snipped off to shape the batter into sticks directly into the hot oil. Do not overcrowd the pot; fry only a few at a time. Overcrowding the pot will lower the oil temperature and prevent the centers from cooking through.
- Fry for 2-3 minutes per side, or until the sticks are golden brown and puffy. Turn them gently with a slotted spoon or spider.
- Use the slotted spoon or spider to remove the fried sticks from the oil and place them on a wire rack set over paper towels to drain excess oil.
- While still warm, dust generously with powdered sugar. Serve immediately with your favorite syrup for dipping.