
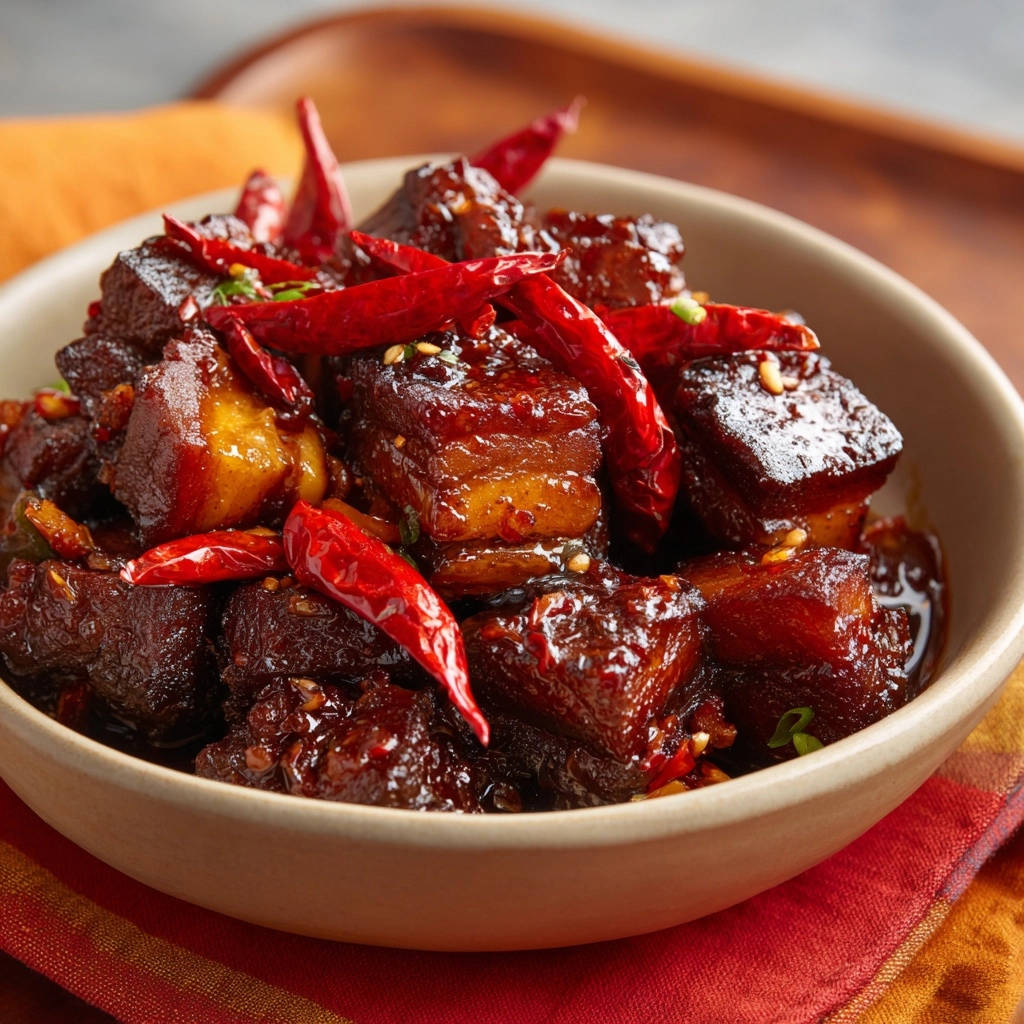
I remember a time when my braised dishes were just “good,” never quite hitting that magnificent, fall-apart tender mark. But after years of perfecting the technique, I finally cracked the code to achieving truly succulent, melt-in-your-mouth tender braised beef. This recipe for Sweet & Sticky Braised Cubes is that breakthrough.
It’s not just about cooking meat; it’s about transforming humble beef chuck into a comforting masterpiece bathed in a rich, glossy, savory-sweet sauce. You’ll be amazed at how simple it is to get that perfect texture every single time, making it an ideal choice for a comforting weeknight meal or a show-stopping weekend dinner.
The “Melt-in-Your-Mouth” Magic: Why This Recipe Stands Apart
Unlocking the Secret to Fall-Apart Tenderness
The core of this recipe’s success lies in its commitment to a true low-and-slow braise. This specific method gently breaks down tough connective tissues.
It results in beef cubes so incredibly tender, they practically dissolve on your tongue, ensuring maximum comfort in every bite.
Beyond Basic: A Symphony of Sweet, Savory, and Spicy
This dish masterfully balances classic Asian-inspired flavors, creating a profile that’s complex yet incredibly approachable. The interplay of brown sugar, soy sauce, and a hint of chili creates an irresistible sticky glaze.
Every element contributes to a deeply satisfying umami experience, making these Sweet & Sticky Braised Cubes far from ordinary.
Effortless Elegance: Simple Steps, Stunning Results
Despite its luxurious taste and texture, this recipe is designed for straightforward execution. It simplifies the braising process, guiding you through each crucial step.
You’ll achieve restaurant-quality results at home with minimal fuss, proving that exceptional flavor doesn’t require complicated techniques.
Gather Your Flavor Arsenal: Key Ingredients for Sweet & Sticky Braised Cubes
The Star of the Show: Beef Chuck Selection
Beef Chuck: This cut is ideal for braising due to its excellent marbling and abundance of connective tissue. When cooked slowly, this tissue breaks down into gelatin, creating an incredibly tender, juicy result.
Opt for a well-marbled piece and cut it into uniform 1½-inch cubes. Uniform size ensures even cooking and tenderness across all pieces.
Aromatic Foundations: Ginger, Garlic, and Chili
Fresh Ginger: Use fresh ginger for its pungent, citrusy, and slightly spicy notes, which are essential for the sauce’s depth. Slicing it maximizes surface area for flavor release.
Garlic: Smashed garlic cloves infuse the oil and sauce with a foundational savory aroma. Smashing them lightly releases their oils without burning them too quickly.
Dried Red Chilies: These add a subtle, warm heat and a beautiful aroma without overpowering the sweet and savory elements. The whole chilies impart flavor gently.
The Sticky Sweet Sauce Trio: Soy, Brown Sugar, and Vinegar
Low Sodium Soy Sauce: This forms the savory backbone of the sauce. Using low sodium gives you better control over the final saltiness of your Sweet & Sticky Braised Cubes.
Packed Brown Sugar: Essential for the “sweet” and “sticky” aspects, brown sugar also aids in caramelization. Packing it ensures you get the correct amount for the right balance.
Rice Vinegar: This brightens the sauce and cuts through the richness, providing a necessary tangy counterpoint. It prevents the sauce from becoming cloyingly sweet.
Essential Liquids: Water or Broth
Water or Beef Broth: The braising liquid is crucial for tenderness. While water works, beef broth adds an extra layer of savory depth to your braised cubes.
Choose good quality broth if using, as its flavor will concentrate as the sauce reduces.
Finishing Touches: Sesame Oil & Garnishes
Sesame Oil: Added at the end, a touch of sesame oil imparts a distinct nutty, aromatic finish. Its flavor is potent, so a small amount goes a long way.
Chopped Green Onions & Toasted Sesame Seeds: These are not just for looks; green onions add a fresh, pungent bite, while sesame seeds provide a delightful textural crunch and extra nutty aroma, enhancing the overall experience of your braised cubes.
Essential Tools for Braising Bliss
The Mighty Dutch Oven (or Heavy-Bottomed Pot)
A heavy-bottomed pot or Dutch oven is indispensable for this recipe. Its ability to retain and distribute heat evenly is crucial for achieving a perfect sear and maintaining a consistent, low simmer.
This even heat prevents scorching and ensures the beef braises uniformly, leading to consistent tenderness.
Beyond the Basics: Useful Kitchen Aids
Beyond your main pot, a few simple tools will make this process seamless. Good quality paper towels are essential for drying the beef thoroughly before searing.
A sturdy wooden spoon is invaluable for scraping up those flavorful browned bits from the bottom of the pot, a step known as deglazing, which enriches your sauce immensely.
Your Step-by-Step Journey to Perfect Sweet & Sticky Braised Cubes
- Mastering the Sear:
Pat the beef cubes thoroughly dry with paper towels. This crucial step removes surface moisture, allowing the beef to brown deeply instead of steaming, which is vital for a robust flavor.
Heat the neutral cooking oil in your large heavy-bottomed pot or Dutch oven over medium-high heat until it shimmers. Add the beef in a single layer, working in batches if needed, to avoid overcrowding. Overcrowding drops the pan temperature, preventing a proper sear.
Sear on all sides until deeply browned, about 3 to 4 minutes per side. This browning, or Maillard reaction, creates complex, savory flavors that form the foundation of your dish. Remove the seared beef and set it aside.
- Building the Aromatic Base:
Reduce the heat to medium. Add the whole dried red chilies, smashed garlic, and sliced ginger to the pot. Cook for 1 to 2 minutes until incredibly fragrant, stirring constantly.
This step infuses the remaining oil with their aromatic compounds, contributing to the sauce’s layered flavor profile. Be careful not to burn the garlic or ginger, as this can make them bitter.
- Deglazing for Depth:
Carefully pour in the soy sauce, brown sugar, rice vinegar, and water or beef broth. Bring this mixture to a gentle simmer, then immediately use a wooden spoon to vigorously scrape up any browned bits from the bottom of the pot.
These ‘fond’ bits are packed with flavor from the beef sear and aromatic sauté. Deglazing dissolves them into the liquid, adding incredible depth and richness to your sauce.
- The Tenderizing Simmer:
Return the seared beef cubes to the pot, nestling them into the liquid. Ensure the liquid mostly covers the meat; if not, add a little more water or broth to ensure even braising.
Bring the liquid back to a gentle simmer, then immediately reduce the heat to very low. The liquid should be barely bubbling, just a gentle whisper. Cover the pot tightly with a lid. This very low and slow cooking is the undisputed secret to achieving that melt-in-your-mouth tenderness.
Let it braise for at least 2 hours, or until the beef is fork-tender. Check periodically to ensure the liquid is still gently simmering and add a splash more if it seems to be reducing too quickly, which can lead to dry meat.
- Thickening the Sticky Glaze:
Once the beef is fork-tender, remove the lid and increase the heat to medium-high. Let the sauce simmer uncovered for about 15 to 20 minutes, stirring occasionally. The goal is for it to thicken to a glossy, syrupy consistency that coats the back of a spoon.
This reduction concentrates the flavors and caramelizes the sugars, transforming the braising liquid into an irresistible sticky glaze that clings beautifully to the Sweet & Sticky Braised Cubes.
- The Final Flavor Infusion:
Remove the pot from the heat and stir in the sesame oil. Adding it at the very end, off the heat, preserves its delicate, nutty aroma and flavor, which can become bitter if cooked for too long.
- Garnish and Serve:
Serve your Sweet & Sticky Braised Cubes hot. Generously garnish with fresh chopped green onions for a vibrant color and fresh, pungent bite, and toasted sesame seeds for an added layer of nutty flavor and delightful crunch.
Chef’s Secrets & Pro Tips for Unforgettable Braised Cubes
The Ultimate Dryness Factor: Why Patting Beef Matters
Patting your beef cubes completely dry with paper towels is non-negotiable. Excess moisture on the surface of the meat prevents the Maillard reaction, which is the browning that creates rich, complex flavors.
A truly dry surface allows the meat to caramelize and form that desired savory crust, locking in juices and building flavor for your braised cubes.
The Power of the Perfect Sear: Flavor Beyond Compare
Don’t rush the searing step! A deep, dark brown crust on all sides of your beef cubes is where the foundational flavor of your Sweet & Sticky Braised Cubes develops. Work in batches to avoid overcrowding the pot.
Give each side enough time to develop a beautiful crust, resisting the urge to move the beef too soon. This patient browning directly impacts the richness of your final sauce.
Mastering the Low and Slow Braise: Your Key to Tenderness
The secret to truly fall-apart, melt-in-your-mouth beef is a very gentle, barely-there simmer. If the liquid is boiling vigorously, the muscle fibers will tense up, resulting in tough meat. Aim for just a few bubbles breaking the surface, a “gentle whisper” of a simmer.
This prolonged, gentle heat slowly breaks down the collagen in the beef chuck, transforming it into gelatin, which makes the meat incredibly tender and succulent.
Achieving that Irresistible Sticky Glaze
After braising, the sauce reduction is where the magic happens. Simmer the sauce uncovered until it coats the back of a spoon. This process not only thickens the sauce but also concentrates and caramelizes the sugars and savory notes.
Stir occasionally to prevent sticking and ensure even reduction, resulting in a gloriously glossy and intensely flavored sticky glaze for your Sweet & Sticky Braised Cubes.
Flavor Boosters & Customization Ideas
For an extra layer of complexity, consider adding a star anise or a cinnamon stick to the braising liquid. Remove them before serving for a pure flavor profile.
A splash of Shaoxing wine (Chinese cooking wine) can also add depth if you have it on hand and wish to enhance the aromatic profile even further.
Solving Common Braising Blunders
Why Is My Beef Still Tough?
The most common culprit for tough braised beef is a simmer that’s too vigorous. Ensure your heat is truly set to very low, with the liquid barely bubbling. Another reason could be insufficient braising time.
Beef chuck needs at least 2 hours, and sometimes up to 3 hours, at a gentle simmer to become fork-tender. Patience is key for these Sweet & Sticky Braised Cubes.
My Sauce Isn’t Thickening!
If your sauce remains thin after braising, it simply needs more time to reduce. Increase the heat to medium-high (after removing the beef, if desired, to prevent overcooking) and continue to simmer uncovered.
Stir more frequently during this stage to encourage evaporation and achieve that desired glossy, syrupy consistency that clings to your braised cubes.
The Flavor Is Lacking Something…
A bland sauce often indicates a missed or insufficient searing step, or not properly deglazing the pot. The browned bits are flavor powerhouses.
Ensure you’re using fresh, potent aromatics like ginger and garlic. A final pinch of salt or a splash more soy sauce at the very end can also wake up the flavors.
Help! My Sauce Is Too Salty!
If your sauce turns out too salty, there are a few fixes. You can add a splash more water or unsalted broth to dilute it slightly. A small amount of sugar can help balance the saltiness, as can a squeeze of fresh lime juice or a touch more rice vinegar for brightness.
Always taste the sauce as it reduces, especially before the final reduction, and adjust seasonings gradually.
Beyond the Pot: Perfect Pairings for Your Braised Cubes
Classic Companions: Rice and Noodles
The rich, sticky sauce of these Sweet & Sticky Braised Cubes is designed to be absorbed by a neutral base. Fluffy steamed jasmine rice is a classic choice, soaking up every drop of that delicious glaze.
Alternatively, serve over wide egg noodles or fragrant toasted coconut rice, allowing them to carry the robust flavors beautifully.
Vegetable Sides to Complement the Richness
Balance the richness of the braised beef with fresh or lightly cooked vegetables. Steamed broccoli or blanched green beans provide a vibrant green contrast and a slight crispness.
Roasted carrots or sweet potatoes also make an excellent pairing, their sweetness echoing the sauce, and their texture adding another dimension to the meal.
Fresh Elements for Balance and Brightness
A simple side of creamy mashed potatoes can offer a comforting textural contrast. For a refreshing counterpoint, a quick cucumber salad with a light vinegar dressing or some lightly pickled daikon can cut through the richness beautifully.
The fresh green onions and sesame seeds aren’t just garnishes; they provide essential textural and flavor contrast to each bite of your savory Sweet & Sticky Braised Cubes.
Make-Ahead, Storage, and Reheating Your Braised Masterpiece
Preparing Ahead: Your Future Self Will Thank You
Sweet & Sticky Braised Cubes are an ideal make-ahead meal, as the flavors often deepen and meld beautifully overnight. You can prepare the entire dish a day or two in advance.
Simply complete all the steps, allow it to cool, and store it in the refrigerator. Reheating usually enhances the tenderness and flavor even further.
Proper Storage for Maximum Freshness
Once cooled to room temperature, transfer any leftover braised cubes and their sauce to an airtight container. Store in the refrigerator for up to 3-4 days.
Ensure the container is well-sealed to prevent drying out and absorb odors from other foods in the fridge.
Reheating for Resurrected Deliciousness
To reheat, gently warm the braised cubes and sauce in a saucepan over low heat on the stovetop. Add a splash of water or broth if the sauce has become too thick during refrigeration.
Stir occasionally until heated through. The low and slow reheating process helps maintain the beef’s tenderness, making your leftovers just as delicious as the first serving.
Can You Freeze Sweet & Sticky Braised Cubes?
Absolutely! These Sweet & Sticky Braised Cubes freeze beautifully, making them perfect for meal prepping. Allow the dish to cool completely before transferring it to freezer-safe containers or heavy-duty freezer bags.
It can be frozen for up to 3 months. Thaw overnight in the refrigerator before reheating gently on the stovetop for another delicious meal.
Your Sweet & Sticky Braised Cubes Questions, Answered
Can I Use a Different Cut of Beef?
While beef chuck is highly recommended for its ideal fat-to-connective-tissue ratio, you can substitute with other cuts suitable for braising, such as boneless short ribs or brisket. Note that cook times may vary slightly.
Regardless of the cut, ensuring a good sear and a truly low and slow braise remains critical for tenderness, similar to techniques used in other tender beef stews.
Is This Recipe Spicy?
The 6 dried red chilies in this recipe primarily contribute a subtle warmth and aromatic depth, rather than intense heat. Most of the heat stays within the whole chilies themselves.
If you prefer more spice, you can crush a few of the chilies to release more capsaicin, or add a pinch of red pepper flakes with the aromatics. For less heat, reduce the number of chilies or omit them entirely.
Can I Make This in a Slow Cooker or Instant Pot?
Yes, this recipe is adaptable! For a slow cooker, follow the searing and aromatic steps on the stovetop, then transfer everything to the slow cooker and cook on low for 6-8 hours or high for 3-4 hours, until tender.
For an Instant Pot, use the sauté function for searing and aromatics, then cook on high pressure for about 45-55 minutes with a natural release, followed by the sauce reduction step.
How Can I Make This Gluten-Free?
To make your Sweet & Sticky Braised Cubes gluten-free, the primary adjustment is to use a gluten-free tamari instead of regular soy sauce. All other ingredients are naturally gluten-free.
Always double-check labels on ingredients like beef broth or sesame oil to ensure they don’t contain any hidden gluten-containing additives.
What if I Don’t Have Rice Vinegar?
If you don’t have rice vinegar, you can substitute it with apple cider vinegar or white wine vinegar. Keep in mind that apple cider vinegar has a slightly fruitier, more assertive flavor, while white wine vinegar is a bit sharper.
Start with a slightly smaller amount and taste as you go, adjusting to achieve the desired balance of sweetness and acidity in your sauce.
Ready to Create Your Own Sweet & Sticky Braised Cubes Masterpiece?
There’s a unique satisfaction that comes from transforming simple ingredients into something truly extraordinary, and these Sweet & Sticky Braised Cubes deliver on that promise. From the rich aroma filling your kitchen to that first, incredibly tender bite, this dish is a testament to the magic of patient cooking.
Embrace the process, trust the low and slow method, and prepare to impress yourself and your loved ones. Once you master this comforting dish, you’ll want to add it to your regular rotation, perhaps even alongside a delicious batch of sticky glazed chicken and rice for another easy family favorite. Happy braising!
Sweet & Sticky Braised Cubes
Course: Main CourseCuisine: Asian cuisineDifficulty: easy4
servings20
minutes2
hours120
minutesAsian cuisine
Ingredients
2 pounds beef chuck, cut into 1 1/2 inch cubes
1 tablespoon neutral cooking oil, like vegetable or canola
6 dried red chilies, whole
4 cloves garlic, smashed
2 inches fresh ginger, sliced
1/2 cup low sodium soy sauce
1/4 cup brown sugar, packed
2 tablespoons rice vinegar
1 cup water or beef broth
1 teaspoon sesame oil
2 tablespoons chopped green onions, for garnish
1 teaspoon toasted sesame seeds, for garnish
Directions
- Pat the beef cubes thoroughly dry with paper towels. This is important for a good sear.
- Heat the neutral cooking oil in a large heavy-bottomed pot or Dutch oven over medium-high heat. Once the oil is shimmering, add the beef cubes in a single layer, working in batches if necessary to avoid overcrowding. Sear on all sides until deeply browned, about 3 to 4 minutes per side. This browning step adds immense flavor depth. Remove seared beef and set aside.
- Reduce heat to medium. Add the whole dried red chilies, smashed garlic, and sliced ginger to the pot. Cook for 1 to 2 minutes until fragrant, stirring constantly to prevent burning.
- Pour in the soy sauce, brown sugar, rice vinegar, and water or beef broth. Bring the mixture to a gentle simmer, scraping up any browned bits from the bottom of the pot with a wooden spoon.
- Return the seared beef cubes to the pot. Ensure the liquid mostly covers the meat. If not, add a little more water or broth.
- Bring the liquid back to a gentle simmer, then immediately reduce the heat to very low. The liquid should be barely bubbling, just a gentle whisper. Cover the pot tightly with a lid. This very low and slow cooking is the key to achieving that incredibly tender, melt-in-your-mouth texture. Let it braise for at least 2 hours, or until the beef is fork-tender. Check periodically to ensure the liquid is still gently simmering and add a splash more if it seems to be reducing too quickly.
- Once the beef is fork-tender, remove the lid and increase the heat to medium-high. Let the sauce simmer uncovered for about 15 to 20 minutes, stirring occasionally, until it has thickened to a glossy, syrupy consistency that coats the back of a spoon.
- Stir in the sesame oil.
- Serve hot, garnished with fresh chopped green onions and toasted sesame seeds.
Notes
- The key to tender beef is low and slow braising. Ensure liquid is barely bubbling during braise.


