
Ever bitten into a cookie only to find it dry or disappointingly hard? I’ve been there countless times, but I’ve finally cracked the code to making Tender Salted Caramel Glaze Cookies that are consistently soft and truly melt-in-your-mouth, every single batch.
This recipe offers an effortless path to baking success, transforming simple ingredients into a gourmet delight perfect for any occasion. Prepare to impress with these irresistibly soft, sweet, and salty treats.
Beyond the Ordinary: Why These Cookies Will Be Your New Favorite
The Secret to Unwavering Tenderness
This recipe prioritizes specific techniques that guarantee an incredibly soft, melt-in-your-mouth cookie. Gentle flour incorporation, precise chilling, and mindful baking prevent gluten overdevelopment and ensure a delicate crumb.
You’ll discover how simple adjustments lead to a consistently tender cookie, eliminating common baking frustrations.
A Balanced Symphony of Sweet & Salty
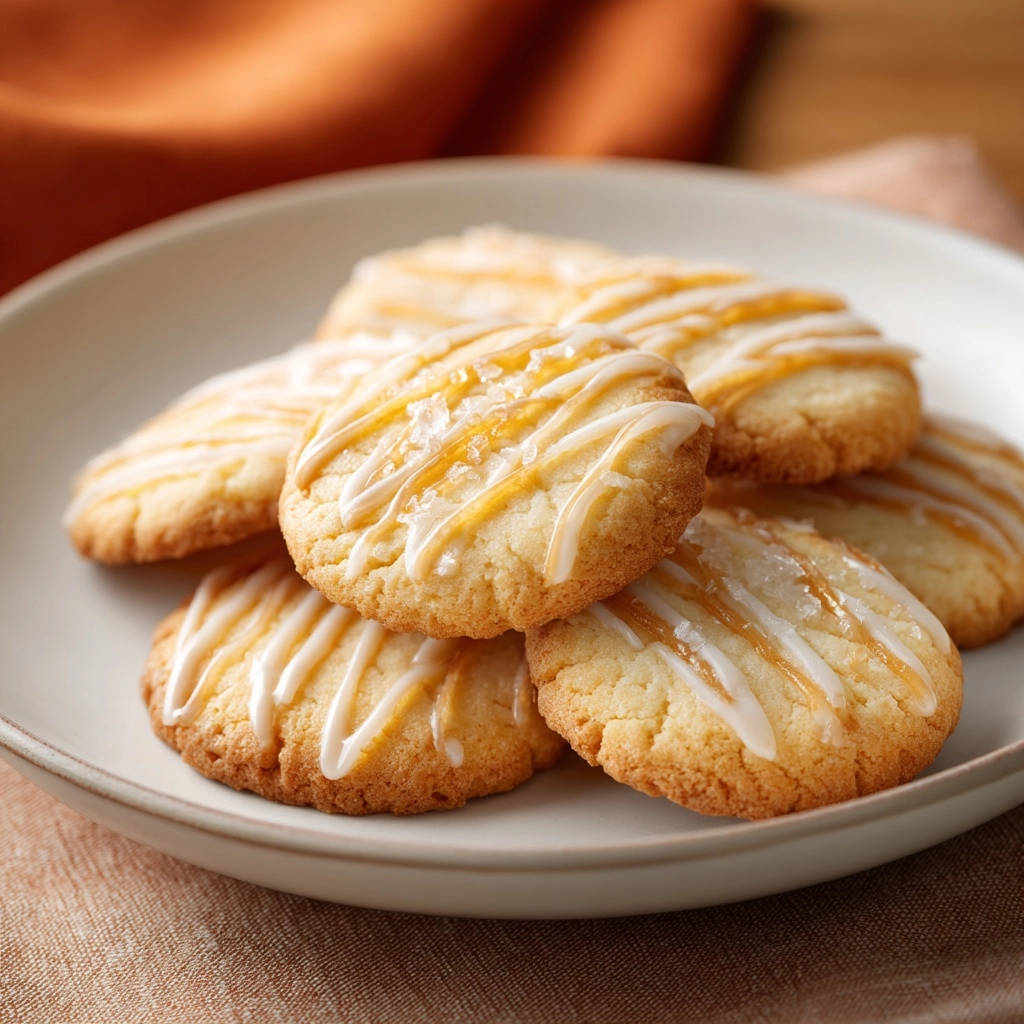
The combination of a smooth white glaze, rich caramel drizzle, and a sprinkle of flaky sea salt creates a harmonious flavor profile.
Each bite offers a perfect balance, where the sweetness is beautifully cut by the subtle saltiness, making these caramel glaze cookies utterly addictive.
Surprisingly Simple, Impressively Delicious
Despite their sophisticated taste and appearance, these Tender Salted Caramel Glaze Cookies are remarkably straightforward to make.
The clear, detailed instructions empower even novice bakers to achieve bakery-quality results with confidence and ease.
Your Baking Arsenal: Essential Tools for Cookie Success
Electric Mixer (Stand or Handheld): Essential for creaming butter and sugar to achieve that light, fluffy texture, which is crucial for cookie tenderness.
Large Mixing Bowls: For combining ingredients without spills and with ease, allowing ample space for mixing the dough and preparing glazes.
Measuring Cups and Spoons: Accuracy is key in baking for consistent results, ensuring the perfect balance of ingredients.
Rolling Pin: To achieve an even 1/4-inch thickness for uniform cookie baking and consistent texture.
2-Inch Round Cookie Cutter: For perfectly shaped, classic cookies that look professional. A glass rim or any preferred cookie cutter can be used as an alternative.
Parchment Paper-Lined Baking Sheets: Prevents sticking, ensures even baking, and makes cleanup incredibly easy.
Wire Cooling Rack: For proper air circulation around the cookies, preventing soggy bottoms and allowing them to cool completely before glazing.
Crafting the Perfect Crumb: Essential Ingredients for Your Tender Salted Caramel Glaze Cookies
The Heart of the Cookie: Butter, Sugar & Vanilla
Unsalted butter, softened: This is the foundation of our cookies, providing richness and tenderness. Softened butter creams beautifully with sugar, incorporating air for a light texture.
Granulated sugar: Provides sweetness, aids in crisping the edges, and helps create that desirable tender crumb when creamed properly with butter.
Vanilla extract and salt: Vanilla enhances the overall flavor profile, adding warmth and depth. A pinch of salt balances the sweetness, elevating all the other ingredients.
Flour Power: The Key to a Tender Crumb
All-purpose flour: The standard choice for cookies, providing structure without making them too dense. The key is how it’s incorporated – just until combined – to avoid overdeveloping gluten.
Overmixing flour leads to tough, chewy cookies, so pay close attention to this step.
Sweet Finishing Touches: The Glaze & Caramel
Powdered sugar and milk (or non-dairy alternative): Form the base of our smooth white glaze. Powdered sugar dissolves easily for a silky finish, while milk adjusts the consistency to a perfect drizzle.
Vanilla extract: Adds another layer of warm flavor to the glaze, complementing the cookie base.
Caramel sauce (store-bought or homemade): Provides the rich, buttery, and slightly burnt sugar notes that are quintessential for these salted caramel glaze treats.
The Pinch of Perfection: Flaky Sea Salt
Flaky sea salt: This isn’t just a garnish; it’s a critical flavor component. Its coarse texture and clean, briny taste provide a delightful contrast to the intense sweetness of the glazes, creating that addictive sweet and salty cookies experience.
From Dough to Drizzle: A Step-by-Step Guide to Cookie Bliss
-
Cream the Butter and Sugar:
In a large bowl, combine the softened unsalted butter and granulated sugar.
Use an electric mixer to beat them together until they are light, pale, and fluffy, a process that typically takes 2-3 minutes. This aeration step is absolutely crucial for incorporating air, which contributes significantly to a tender cookie texture.
Once lightened, stir in the salt and vanilla extract until they are just combined, ensuring even distribution of flavor.
-
Incorporate the Flour Gently:
Gradually add the all-purpose flour to the butter mixture, mixing on low speed.
Mix just until no dry streaks of flour remain in the bowl. This step is critical: overmixing the dough develops gluten, which will inevitably lead to tough cookies rather than the delicate, melt-in-your-mouth ones we’re aiming for.
-
Chill for Tenderness:
Gather the dough into a cohesive ball, flatten it slightly into a disk, and wrap it tightly in plastic wrap.
Refrigerate the dough for at least 30 minutes. This chilling period allows the butter to firm up, which helps the cookies maintain their shape during baking and prevents excessive spreading. It also gives the flour time to fully hydrate, contributing significantly to a more tender final crumb.
-
Prepare for Baking:
Preheat your oven to 375°F (190°C) to ensure it reaches the correct temperature before the cookies go in.
Line a baking sheet with parchment paper. This simple step prevents sticking, ensures even heat distribution, and makes transferring the delicate cookies much easier after baking.
-
Roll and Cut Your Cookies:
On a lightly floured surface, roll out the chilled dough evenly to about 1/4-inch thickness. Avoid making it too thin, which can lead to dry cookies.
Use a 2-inch round cookie cutter (or your preferred shape) to cut out individual cookies, re-rolling scraps as needed.
Place the cut cookies approximately 1 inch apart on the prepared baking sheet, leaving enough space for slight expansion.
-
Bake to Perfection:
Bake for 10-12 minutes, or until the edges are just lightly golden. The centers may still appear slightly soft, but they will firm up considerably as they cool.
Avoid the common pitfall of overbaking, as this is one of the primary causes of hard, dry cookies. If in doubt, err on the side of slightly underbaking.
-
Cool Completely:
Allow the cookies to cool on the baking sheet for 5 minutes immediately after removing them from the oven; they are fragile when hot.
Carefully transfer the partially cooled cookies to a wire rack to cool completely. This prevents steam buildup and ensures the cookies don’t become soggy on the bottom before glazing.
-
Whip Up the White Glaze:
While the cookies are cooling, prepare the white glaze by whisking together the powdered sugar, milk (or non-dairy alternative), and vanilla extract in a small bowl until perfectly smooth and lump-free.
Adjust the consistency as needed: if the glaze is too thick, add more milk a few drops at a time; if it’s too thin, gradually whisk in more powdered sugar. Aim for a pourable, yet not watery, consistency that will coat the back of a spoon.
-
Drizzle the Glaze:
Once the cookies are completely cool to the touch, drizzle them generously with the prepared white glaze. You can use a spoon for a rustic look or a piping bag for more controlled, delicate lines.
-
Add the Caramel Drizzle:
If your caramel sauce is too thick to drizzle easily, warm it slightly in the microwave for a few seconds or in a small saucepan over low heat until it reaches a smooth, flowing consistency.
Artistically drizzle the caramel sauce over the white-glazed cookies, creating beautiful patterns that enhance their visual appeal.
-
Finish with Flaky Sea Salt:
Immediately after applying the glazes, generously sprinkle the flaky sea salt over the top of the cookies while the glazes are still wet and tacky.
Allow the glazes to fully set before serving or storing. This typically takes 1-2 hours at room temperature, ensuring the glazes are firm to the touch.
Unlock the Secrets: Expert Tips for Irresistibly Tender Salted Caramel Glaze Cookies
Don’t Overmix the Dough: This is arguably the most crucial tip for achieving truly tender cookies. As soon as the flour disappears into the wet ingredients, stop mixing. Overmixing develops gluten, which inevitably leads to a tough, chewy texture instead of a delicate one.
Embrace Chilling Time: Do not skip the refrigeration step! Chilling the dough solidifies the butter, which helps the cookies hold their shape better and prevents excessive spreading during baking. It also allows the flour to fully hydrate, contributing significantly to a more tender crumb. For other delicious treats benefiting from chilling, consider these amazing caramel nut squares.
Bake Just Until Golden: Watch your cookies closely. They are done when the edges are lightly golden, even if the centers still look a bit soft and slightly underbaked. They will continue to set as they cool on the baking sheet. Overbaking guarantees a dry, hard cookie, so trust the process!
Master Glaze Consistency: The perfect glaze should be thick enough to cling to the cookie but thin enough to drizzle smoothly without clumping. Adjust with milk or powdered sugar gradually until you achieve the desired flow. A slightly warm caramel also helps with even drizzling and a professional finish.
Flaky Sea Salt for the Win: Don’t underestimate the power of that final sprinkle! The flaky sea salt not only adds visual appeal but provides a crucial counterpoint to the sweetness, elevating the entire flavor profile of these Tender Salted Caramel Glaze Cookies from good to unforgettable.
Baking SOS: Common Cookie Challenges & Quick Fixes
My Cookies Spread Too Much!
This often happens if your butter was too soft to begin with, or if the dough wasn’t chilled long enough before baking. Ensure your butter is softened but still cool to the touch before creaming.
Always chill the dough for the recommended time (or even longer, up to an hour, if your kitchen is particularly warm). You can also try freezing the cut-out cookies for 10-15 minutes before baking for extra insurance against spreading.
Why Are My Cookies Hard or Dry?
The most common culprits for hard or dry cookies are overmixing the flour and overbaking. Mix the flour only until it’s just combined and no dry streaks remain.
Remove cookies from the oven when their edges are lightly golden, even if the centers seem soft; they will firm up as they cool completely.
Glaze Consistency Crisis! (Too Thick or Too Thin)
If your white glaze is too thick to drizzle, add milk a few drops at a time, stirring well after each addition, until it reaches a smooth, pourable consistency. Patience is key here.
If the glaze is too thin and runny, gradually whisk in more powdered sugar, a tablespoon at a time, until it thickens to your desired consistency. It’s easier to add than to remove.
Savoring the Sweetness: Serving, Storage & Make-Ahead Tips
How to Serve Your Tender Salted Caramel Glaze Cookies
These Tender Salted Caramel Glaze Cookies are wonderful on their own, offering a perfect moment of indulgence. They are also ideal with a cup of coffee or tea, or as a delightful treat at parties and gatherings.
Arrange them artfully on a platter to showcase their beautiful glaze and glistening salt topping. They make a thoughtful homemade gift too!
Proper Storage for Lasting Freshness
Store your Tender Salted Caramel Glaze Cookies in an airtight container at room temperature for up to 3-4 days to maintain their softness and flavor.
For optimal freshness and to prevent the glazes from sticking together, you can place small pieces of parchment paper between layers of cookies.
Can I Make Them Ahead of Time?
Absolutely! The cookie dough can be made ahead and stored, tightly wrapped, in the refrigerator for up to 3 days. It can also be frozen for up to 3 months; simply thaw in the refrigerator overnight before rolling and baking.
Baked, unglazed cookies can also be frozen for up to a month. Thaw them at room temperature and glaze just before serving for the freshest look and taste experience.
Your Most Asked Questions About Tender Salted Caramel Glaze Cookies
Can I Use Brown Sugar Instead of Granulated Sugar?
While you certainly can, using brown sugar will result in a chewier cookie and impart a slightly different, molasses-like flavor profile. For the distinctly tender, melt-in-your-mouth texture this recipe aims for, granulated sugar is highly recommended as it contributes to a lighter crumb.
Can I Use Different Flavor Extracts?
Yes, you can absolutely experiment with different extracts to customize your soft caramel cookies! Almond extract or a touch of butter pecan extract would also complement the caramel flavor beautifully. Start with half the amount of a new extract and adjust to your taste preferences.
What if I Don’t Have a Cookie Cutter?
No problem at all! You can simply roll the dough into small balls, about 1.5 inches in diameter, and then flatten them slightly with the palm of your hand or the bottom of a glass before baking. The baking time might need a slight adjustment, so watch them closely for those golden edges.
Are There Gluten-Free or Dairy-Free Substitutions?
For a gluten-free version, you can try using a 1:1 gluten-free baking flour blend, though the final texture might vary slightly. For dairy-free salted caramel glaze cookies, opt for a plant-based butter alternative and a non-dairy milk (like almond or oat milk) for the glaze. Always ensure your chosen caramel sauce is also dairy-free.
Why is Flaky Sea Salt Important, Can I Skip It?
While you technically can skip it, flaky sea salt is highly recommended as it plays a vital role in balancing the sweetness of both the white glaze and the caramel. It provides a crucial burst of salinity that enhances the overall flavor experience, transforming a simply sweet cookie into something truly extraordinary.
Ready to Bake? Your Tender Salted Caramel Glaze Cookies Journey Starts Here!
You now have all the knowledge, expert tips, and precise instructions to confidently create a batch of the most irresistibly Tender Salted Caramel Glaze Cookies. This recipe is more than just a dessert; it’s an invitation to experience pure baking joy and share moments of deliciousness with loved ones.
Don’t let past baking frustrations hold you back. Embrace these simple steps and expert insights, and prepare to be amazed by the melt-in-your-mouth magic you’re about to create. We’d love to see your beautiful creations – share your cookie masterpieces with us on social media and enjoy every sweet, salty bite!
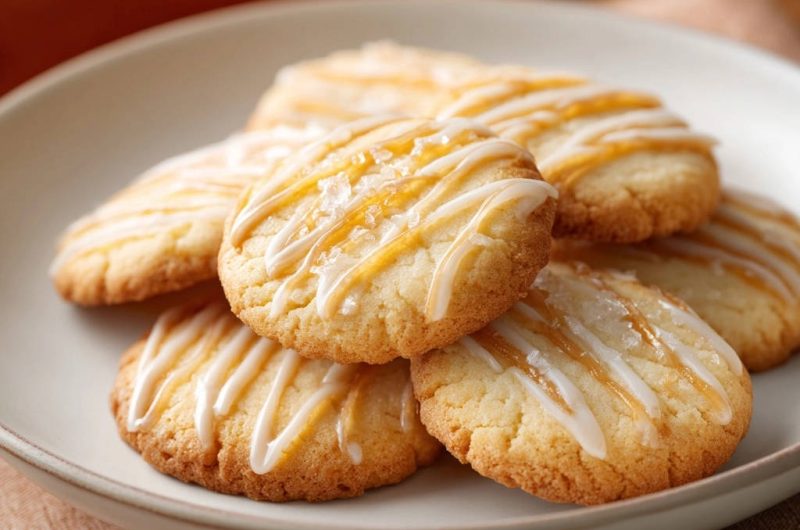
Tender Salted Caramel Glaze Cookies
Course: DessertCuisine: American CuisineDifficulty: easy24
cookies20
minutes10
minutes45
minutesAmerican Cuisine
Ingredients
For the Cookies:
1 cup (2 sticks) unsalted butter, softened
1/2 cup granulated sugar
1/4 teaspoon salt
1 teaspoon vanilla extract
2 cups all-purpose flour
For the White Glaze:
1 cup powdered sugar
2-3 tablespoons milk (or non-dairy alternative)
1/2 teaspoon vanilla extract
For the Caramel Drizzle:
1/4 cup caramel sauce (store-bought or homemade)
For Topping:
1/2 teaspoon flaky sea salt
Directions
- In a large bowl, cream together the softened butter and granulated sugar until light and fluffy. This should take about 2-3 minutes with an electric mixer. Stir in the salt and vanilla extract.
- This is the key to tender cookies: Gradually add the all-purpose flour to the butter mixture, mixing on low speed just until combined. Stop mixing as soon as no dry streaks of flour remain. Overmixing the dough develops gluten, which leads to tough cookies.
- Gather the dough into a ball, flatten it slightly, wrap it tightly in plastic wrap, and refrigerate for at least 30 minutes. This chilling time helps prevent spreading and results in a more tender cookie.
- Preheat your oven to 375F (190C). Line a baking sheet with parchment paper.
- On a lightly floured surface, roll out the chilled dough to about 1/4-inch thickness. Use a 2-inch round cookie cutter to cut out shapes. Place the cookies about 1 inch apart on the prepared baking sheet.
- Bake for 10-12 minutes, or until the edges are lightly golden. The centers might still look a little soft, but they will firm up as they cool. Avoid overbaking, as this is another common cause of hard cookies.
- Let the cookies cool on the baking sheet for 5 minutes before transferring them to a wire rack to cool completely.
- While the cookies cool, prepare the white glaze: Whisk together the powdered sugar, milk, and vanilla extract until smooth. If the glaze is too thick, add more milk a few drops at a time until it reaches a drizzle consistency. If too thin, add more powdered sugar.
- Once cookies are completely cool, drizzle them with the white glaze using a spoon or a piping bag.
- Warm the caramel sauce slightly if it’s too thick to drizzle. Drizzle the caramel sauce over the glazed cookies.
- Immediately sprinkle flaky sea salt over the top of the cookies before the glazes set. Let the glazes fully set before serving or storing.
Notes
- Key tips for tender cookies: Avoid overmixing the dough and ensure adequate chilling time.


