

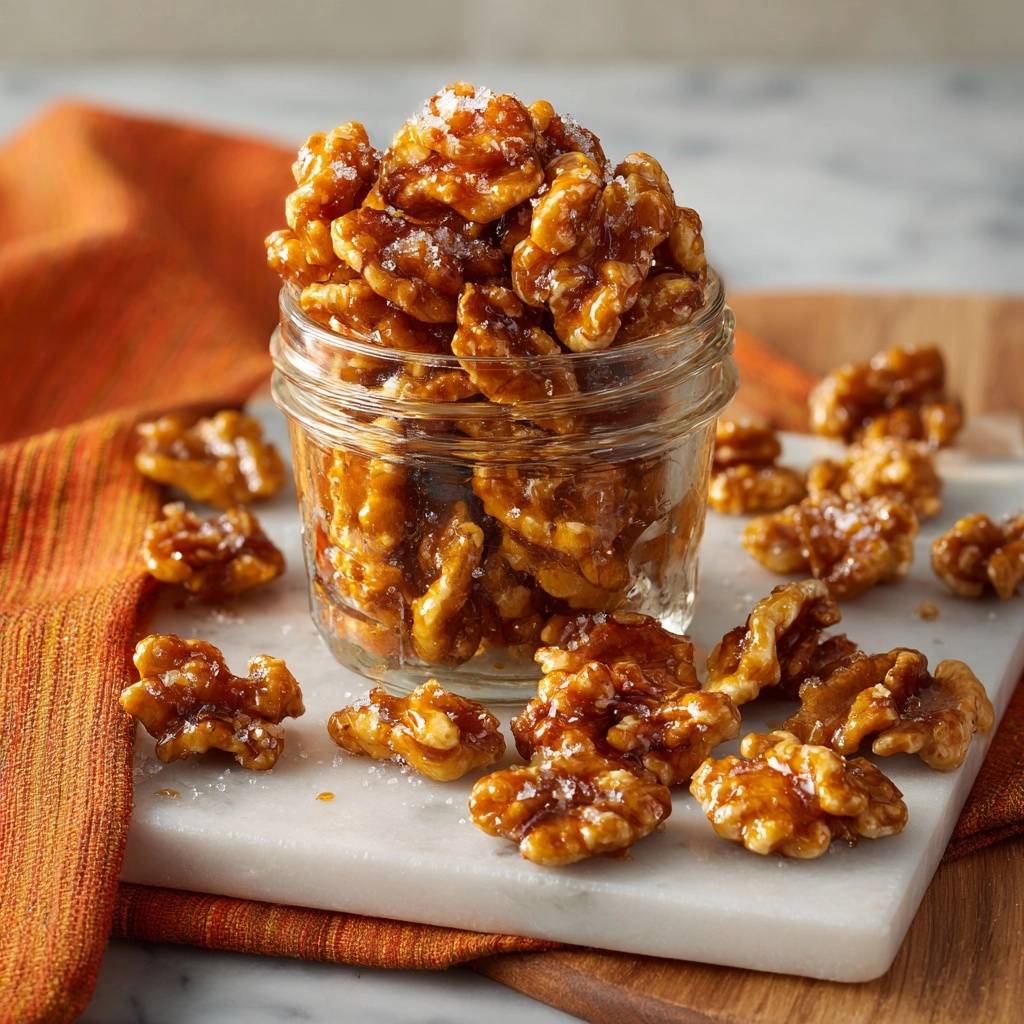
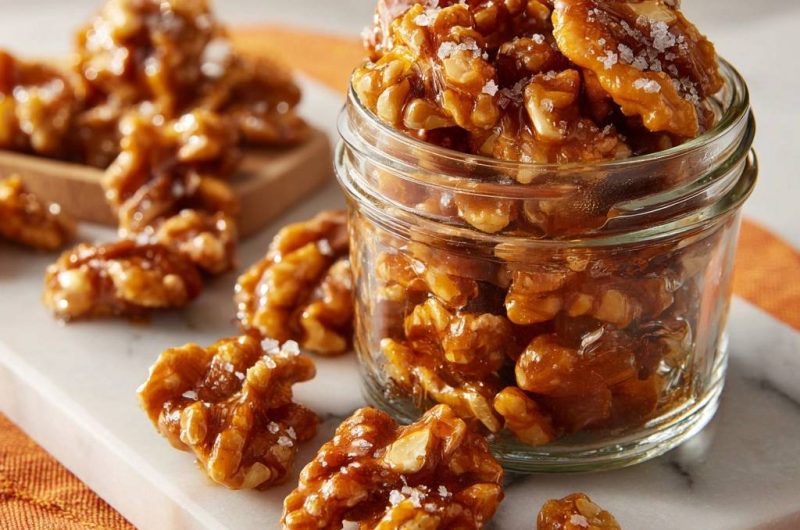
Imagine biting into a walnut and experiencing a shatteringly crisp, glass-like shell that gives way to a perfectly toasted, buttery center. Most homemade glazed nuts end up as a tacky, sticky disappointment that clings to your teeth and loses its crunch within an hour. These Salted Caramel Glazed Walnuts are different because they rely on a specific heat-shock technique to ensure a professional-grade finish every single time.
The secret lies in moving past the “sticky” phase of sugar and reaching the hard-crack stage, where the caramel sets into a firm, shelf-stable coating. By controlling the temperature and moisture, you create a snack that stays crunchy for weeks rather than minutes. It’s the ultimate balance of deep, toasted sugar and sharp flakes of sea salt that makes these completely addictive.
I’ve found that the biggest mistake people make is rushing the sugar or using too much water, which traps steam inside the glaze. To get that signature snap, you must toast the walnuts dry first to pull out their internal moisture. This simple prep step ensures the caramel bonds to a bone-dry surface, creating a permanent, crunchy seal that won’t soften even in humid weather.
Why Most Glazed Walnut Recipes Fail
Sugar is a fickle ingredient that reacts intensely to moisture and temperature. Most recipes fail because they don’t cook the sugar long enough to evaporate the water content, leaving you with a “soft ball” stage syrup. This results in a gummy texture that feels more like a cheap candy coating than a sophisticated glaze.
Furthermore, walnuts contain natural oils and internal moisture that can steam the caramel from the inside out if not handled correctly. If you toss raw, cold nuts into a sugar syrup, the temperature of the pan drops instantly. This prevents the sugar from reaching the hard-crack stage, which is the non-negotiable goal for a crisp, brittle-like exterior.
Crystallization is another common culprit for failure. If you stir the sugar too vigorously before it fully melts, you risk creating a grainy, sandy texture. Understanding the chemistry of how sugar transforms from a solid crystal to a clear liquid, and finally to a deep amber caramel, is the key to mastering this recipe.
Essential Components for Salted Caramel Glazed Walnuts
Quality ingredients are the foundation of this snack, and each one plays a structural role. I always recommend using raw walnut halves rather than small pieces. The large surface area of a half allows the caramel to pool in the ridges, creating more “crunch pockets” and a much better visual presentation for gifting or serving.
Granulated white sugar is the best choice here because it provides a cleaner “snap” than brown sugar. While brown sugar has a lovely molasses flavor, its higher moisture content makes it harder to achieve that glass-like finish. We use high-fat unsalted butter to add a rich, velvety mouthfeel to the caramel, which rounds out the bitterness of the toasted nuts.
Finally, don’t swap the flaky sea salt for standard table salt. Table salt is too fine and will simply dissolve into the sugar, making the whole batch taste salty. Flaky salt provides those distinct, crunchy bursts of salinity that contrast beautifully against the sweet, dark caramel. It’s that “salty-sweet” hit that keeps you reaching back into the bowl.
Selecting the Right Walnut Grade
Freshness is paramount when working with walnuts because their high oil content makes them prone to going rancid. Give your walnuts a quick sniff before you start; they should smell mildly nutty and sweet, not like paint or old oil. If they have a bitter aroma, no amount of sugar will save the batch.
Starting with raw, un-toasted nuts is mandatory for this specific method. Since we are going to toast them in the skillet, starting with pre-toasted nuts would lead to over-browning and a burnt, acrid flavor. Raw nuts allow you to control the exact level of toastiness while the sugar is melting.
The Role of Water and Vanilla in Caramelization
A single tablespoon of water might seem insignificant, but it acts as an insurance policy for your sugar. It helps the sugar melt evenly and prevents individual crystals from scorching before the rest of the pan has caught up. It essentially slows down the process just enough to give you total control over the color.
Vanilla extract adds a sophisticated floral note that bridges the gap between the butter and the sugar. However, vanilla is highly volatile and its flavor compounds break down under high heat. That’s why we stir it in at the very last second, just as the pan comes off the heat, to preserve that rich aroma.
The Heat-Shock Technique: Step-by-Step Instructions
This method is all about timing and sensory cues. You aren’t just following a clock; you are watching for specific changes in color, scent, and texture. The goal is to move the walnuts through a series of transformations that lock in flavor and lock out moisture. Have your parchment paper ready before you turn on the stove, as the final stages happen fast.
Phase 1: Dry Toasting for Internal Moisture Removal
Start by tossing your raw walnuts into a cold non-stick skillet, then turn the heat to medium. You’ll want to stir them constantly for about 3 to 4 minutes. You aren’t just looking for a tan color; you are waiting for that warm, toasted fragrance to fill your kitchen. This step dries out the nut’s surface so the caramel can “grip” it better.
As the nuts heat up, they release their natural oils, which helps them crisp up from the inside. If you skip this, the moisture trapped inside the walnut will eventually migrate into the sugar coating, making it soft and sticky within 24 hours. Once they look golden and smell amazing, push them to the outer edges of the pan to make a “well” in the center.
Phase 2: Achieving the Deep Amber Caramel Base
Drop your butter, sugar, and water into that center clearing. Let the mixture bubble and melt without stirring it into the nuts just yet. You’ll see it turn from a cloudy white liquid to a clear syrup, and finally to a light gold. Keep a close eye on it; the transition from gold to deep amber happens in a heartbeat.
The deep amber color is where the “caramel” flavor actually lives. If the sugar is too light, it will taste like plain sweetness. If it gets too dark or starts to smoke, it will be bitter. You are looking for the color of an old penny. This temperature ensures the sugar will harden into a brittle shell once it cools.
Phase 3: The Hard-Crack Coating Process
Once that amber color is achieved, quickly fold the walnuts from the edges into the bubbling syrup. Stir vigorously for about 60 to 90 seconds. You will notice the syrup becoming thicker and more “glass-like” as it coats the nuts. Every crevice of the walnut should be glistening with that dark, molten sugar.
This is the “heat-shock” moment where the hot sugar meets the hot nuts, creating a seamless bond. The syrup should look clear and smooth, not grainy. If you see the sugar starting to look dry or sandy, you’ve gone a bit too far, so move immediately to the next step to prevent burning.
Phase 4: The Separation and Cooling Protocol
Speed is your best friend here. Pour the molten mass onto your prepared baking sheet immediately. Don’t try to use a spatula to separate them; it’s too clumsy. Instead, grab two forks and quickly pull the walnuts apart so they aren’t touching. If they cool in a big clump, you’ll have to break them apart later, which ruins the beautiful smooth coating.
While the glaze is still tacky and hot, sprinkle your remaining flaky sea salt over the top. The heat will allow the salt crystals to “sink” just slightly into the surface so they stay put. Let them sit undisturbed for at least 20 minutes. As they cool, you’ll actually hear faint cracking sounds—that’s the sound of a perfect, professional-grade crunch forming.
Troubleshooting Common Caramel Coating Issues
If your sugar turns grainy and sandy instead of smooth and clear, it usually means a stray sugar crystal fell into the syrup and triggered a chain reaction. You can sometimes fix this by adding a teaspoon of water and letting it re-melt, but it’s best to avoid stirring the sugar too much in the early melting phase.
If the walnuts come out tacky or stick to your fingers after cooling, the sugar didn’t get hot enough. You can try popping them into a 300°F oven for 5 minutes to see if the glaze will set, but next time, wait for that deep amber color in the pan. If they taste bitter, the sugar or the walnut skins likely scorched; keep the heat at a steady medium rather than high.
Equipment: Why a Non-Stick Skillet is Mandatory
Working with melted sugar is a sticky business, and a high-quality non-stick skillet makes the process much less stressful. It allows the caramel to slide around easily and ensures that you don’t leave half your glaze stuck to the bottom of the pan. Stainless steel can work, but it requires much more precision to prevent sticking and burning.
Parchment paper or a silicone mat is also essential. Never use aluminum foil, as the hot sugar will practically weld itself to the metal, leaving you with bits of foil on your snacks. A silicone mat is the gold standard because it provides the cleanest release and can handle the high heat of the molten caramel without warping.
Flavor Variations and Savory Swaps
Once you master the base technique, you can play with the flavor profile. For a warm, spiced version, stir in a half-teaspoon of ground cinnamon and a tiny pinch of cayenne pepper when you add the vanilla. The heat of the cayenne cuts through the sugar beautifully and makes for a great party snack.
If you want something more savory to pair with a cheese board, try adding finely chopped fresh rosemary and a generous amount of cracked black pepper at the very end. The piney aroma of the rosemary combined with the bite of the pepper transforms these from a sweet treat into a sophisticated appetizer that pairs perfectly with sharp cheeses.
Optimal Storage for Long-Term Crunch
Humidity is the mortal enemy of caramelized sugar. Sugar is hygroscopic, meaning it pulls moisture out of the air. If you leave these walnuts out on a humid day, they will eventually become sticky. To prevent this, wait until they are completely cool to the touch, then move them immediately to an airtight glass jar or container.
Never store these in the refrigerator. The condensation that forms when you take the jar out will turn your beautiful crunchy glaze into a syrupy mess. Kept in a cool, dry pantry, these walnuts will stay perfectly crisp for up to three weeks. If they do happen to soften, a quick 5-minute toast in a low oven can often bring the crunch back.
Serving Suggestions: Beyond the Snack Bowl
While these are incredible on their own, they are also a powerful “texture tool” in the kitchen. Try chopping them roughly and tossing them into a salad of bitter arugula, sliced pears, and a sharp vinaigrette. The sweetness of the walnuts balances the peppery greens perfectly.
They also make a stunning garnish for roasted root vegetables like carrots or sweet potatoes. The crunch provides a much-needed contrast to the soft, roasted texture of the veggies. For a simple dessert, scatter them over a bowl of high-quality vanilla bean ice cream or use them to top a dairy-free chocolate mousse for a professional finishing touch.
Expert Tips for Large Batch Gifting
If you plan on making these as gifts, resist the urge to double the recipe in one small pan. Crowding the skillet makes it impossible to control the sugar temperature, and you’ll likely end up with unevenly coated nuts. It is much better to make two separate batches to ensure the quality remains high.
When packaging for gifts, use cellophane bags or glass jars that can be sealed tightly. If you are shipping them, include a small food-safe desiccant packet in the box if you live in a humid climate. This ensures that when your friends open their gift, they get that signature “shatter” instead of a sticky clump of nuts.
Frequently Asked Questions
Can I use pecans instead of walnuts?
Yes, pecans work beautifully with this exact method. Because pecans have more natural sugar and a slightly softer texture, they may toast a minute faster than walnuts, so keep a close eye on them during the dry-toasting phase. The deep ridges in pecans are excellent for catching the caramel glaze.
Why is my caramel grainy?
Grainy caramel is caused by crystallization. This happens if you stir the sugar too much before it has completely melted into a syrup, or if sugar crystals on the side of the pan are stirred back into the mix. To prevent this, let the sugar melt undisturbed with the water and butter until it is mostly liquid.
How do I clean the hardened sugar off my pan?
Don’t scrub! The easiest way to clean your skillet and forks is to fill the pan with water and bring it to a boil on the stove. The hot water will dissolve the hardened sugar in minutes, making it easy to pour away. This works for any utensils that have become coated in the brittle caramel as well.
Can I use honey or maple syrup instead of sugar?
While you can make glazed nuts with honey or maple syrup, they will not achieve the same “hard-crack” crunch as granulated sugar. Honey and maple syrup stay naturally softer and stickier. If you want that specific glass-like shell that doesn’t stick to your teeth, granulated white sugar is the necessary ingredient.
Why did my salt fall off the walnuts?
The salt must be applied while the caramel is still in its molten, liquid state. If you wait even a minute too long, the sugar will have already begun to harden into a smooth shell, and the salt crystals will simply bounce off. Have your salt ready and sprinkle it immediately after spreading the nuts on the baking sheet.
Salted Caramel Glazed Walnuts
Course: SnackCuisine: AmericanDifficulty: easy8
servings5
minutes10
minutes15
Minutes195
kcalAmerican
Ingredients
2 cups raw walnut halves
1/2 cup granulated sugar
2 tablespoons unsalted butter
1/2 teaspoon vanilla extract
1 teaspoon flaky sea salt (plus extra for finishing)
1 tablespoon water
Directions
- Line a large baking sheet with parchment paper or a silicone mat. This is crucial for a clean release later.
- Place a large non-stick skillet over medium heat. Add the walnuts and toast them dry for 3 to 4 minutes, stirring constantly, until they are golden and smell fragrant. This removes internal moisture to prevent sogginess.
- Push the walnuts to the edges of the pan. In the center, add the sugar, water, and butter. Do not stir the sugar immediately. Let it melt and bubble until it turns a deep amber color.
- Once the caramel is bubbling and dark amber, quickly stir the walnuts into the syrup. Continue to cook for 1 to 2 minutes, stirring constantly to coat every crevice. The key to the crunch is reaching the hard-crack stage where the syrup becomes clear, dark, and begins to smell like toasted sugar.
- Remove from heat and quickly stir in the vanilla extract and 1/2 teaspoon of the flaky salt.
- Immediately spread the walnuts onto the prepared baking sheet. Use two forks to separate them quickly before the sugar sets.
- While the glaze is still hot and molten, sprinkle generously with the remaining flaky sea salt so the large crystals adhere to the surface as shown in the image.
- Let the walnuts cool completely for at least 20 minutes. The glaze will harden into a crisp, professional shell that won’t stick to your teeth or go soft in the jar. Store in an airtight container.
Notes
- The key to the crunch is reaching the hard-crack stage where the syrup becomes clear and dark amber. Use two forks to separate the walnuts immediately after spreading them on the parchment paper to prevent them from clumping together.


