
There’s nothing quite like the communal joy of a vibrant, flavor-packed taco dip at a gathering, but a watery bottom layer can quickly dampen the fun.
I’ve experienced that disappointment too, which is why I’m thrilled to share my perfected recipe for the Ultimate Layered Taco Dip that guarantees a perfectly firm, delicious scoop every single time.
Get ready to impress your guests with this reliable crowd-pleaser, designed for maximum flavor and zero sogginess, turning any game day or party into an instant hit.
Why This Ultimate Layered Taco Dip Wins Every Time
The Undeniable Appeal: Beyond Basic Party Food
Layered taco dip is a quintessential party food, beloved for its interactive nature and irresistible combination of textures and flavors.
It’s the kind of dish that disappears quickly, sparking conversation and bringing people together around a shared bowl.
This particular Ultimate Layered Taco Dip elevates that experience, moving beyond just “basic” to truly exceptional, making it a guaranteed favorite.

Our Secret to a Perfectly Firm, Flavorful Base
The most common complaint about layered taco dip is the dreaded watery bottom, which can compromise both texture and taste.
Our method specifically addresses this by focusing on a critical step: thoroughly draining and pressing the seasoned ground beef.
This ensures a robust, flavorful, and incredibly firm base that holds up beautifully, even after multiple servings, preventing any dreaded sogginess.
Quick Prep, Maximum Wow-Factor
Despite its impressive appearance and complex flavors, this Ultimate Layered Taco Dip is surprisingly quick and easy to assemble.
With a total time of just 35 minutes, you can create a show-stopping appetizer without spending hours in the kitchen.
It’s the perfect recipe for last-minute gatherings or when you need a reliable dish that delivers big on taste with minimal fuss.
Gather Your Fiesta Flavors: Essential Ingredients for the Ultimate Layered Taco Dip
The Savory Foundation: Ground Beef & Seasoning
For the savory base, ground beef (at least 80/20 lean) offers the best flavor and texture, ensuring it browns well.
The taco seasoning mix is your flavor shortcut, providing that classic Tex-Mex profile. Feel free to use a homemade blend for deeper, customizable spice, perhaps even incorporating your own homemade chili powder for an extra layer of authenticity.
Creamy Dream Team: Sour Cream & Cream Cheese
Softened cream cheese is vital for a smooth, spreadable, and rich creamy layer, forming the heart of the dip.
Combined with tangy sour cream, it creates a luscious, velvety texture that perfectly balances the seasoned beef below and the fresh toppings above.
Fresh & Crunchy Toppings: The Vibrant Finish
Crisp shredded iceberg lettuce adds essential crunch and freshness, providing a cool contrast to the warm flavors.
Juicy diced tomatoes, briny sliced black olives, and zesty pickled jalapeños bring vibrant color, tang, and a hint of spice.
Don’t forget the fresh cilantro for that bright, herbaceous garnish that elevates the entire dish.
Optional Flavor Boosters & Customizations
Elevate your dip further with a sprinkle of crispy bacon bits, a dollop of fresh guacamole, or a drizzle of hot sauce for an extra kick.
Consider adding finely diced red onion for pungency, a scattering of corn kernels for sweetness, or a squeeze of lime juice for brightness right before serving.
Essential Kitchen Gear for Your Ultimate Layered Taco Dip Masterpiece
Pans and Dishes: Setting the Stage
A large, sturdy skillet is essential for browning the ground beef efficiently and ensuring even cooking, developing rich flavors.
For serving, a 9×13 inch (23×33 cm) glass or ceramic serving dish is ideal, beautifully showcasing all those vibrant layers.
Mixing and Draining Tools: Precision Matters
A fine-mesh colander is absolutely critical for thoroughly draining the beef, preventing any residual moisture from compromising your dip’s base.
You’ll also need a good mixing bowl for the creamy layer and a sturdy spatula or spoon for spreading each component evenly and carefully.
Crafting Perfection: A Step-by-Step Guide to Your Ultimate Layered Taco Dip
- Brown the Beef to Perfection:
In a large skillet, cook the ground beef over medium heat, breaking it apart with a spoon until completely browned.
Even browning is key to developing deep, savory flavor, forming the delicious foundation of your dip.
- The Crucial No-Soggy Step: Thoroughly Drain the Beef:
This is where the magic happens! Carefully drain ALL of the rendered grease from the cooked ground beef.
Transfer the beef to a fine-mesh colander and press down firmly with a spoon to release any remaining fat and moisture. Allow it to sit and drain for a few minutes.
This meticulous draining is the absolute key to guaranteeing a perfectly firm, non-soggy base for your Ultimate Layered Taco Dip.
- Season and Simmer the Beef:
Return the thoroughly drained ground beef to the skillet. Stir in the taco seasoning mix and 1/2 cup water.
Bring the mixture to a simmer and cook for 5-7 minutes, stirring occasionally, until most of the liquid has evaporated and the meat is well-seasoned and slightly cooled.
- Prepare the Creamy Layer:
While the beef cools slightly, in a medium bowl, combine the softened cream cheese and sour cream.
Mix until the mixture is completely smooth and well combined, ensuring no lumps remain for a velvety texture that’s easy to spread.
- Layer the Foundation:
In a 9×13 inch serving dish, spread the cooled, seasoned ground beef evenly as the bottom layer.
Ensure the beef is cool enough so it doesn’t melt the subsequent creamy layer prematurely, maintaining crisp layers.
- Add the Creamy Heart:
Carefully spread the cream cheese and sour cream mixture over the beef layer.
Take your time here to ensure an even, smooth spread without disturbing the beef layer, preserving the dip’s structure.
- Sprinkle the Cheese:
Sprinkle the shredded cheddar cheese evenly over the creamy layer.
This layer adds a classic savory touch and a hint of extra creaminess, ready for the fresh toppings.
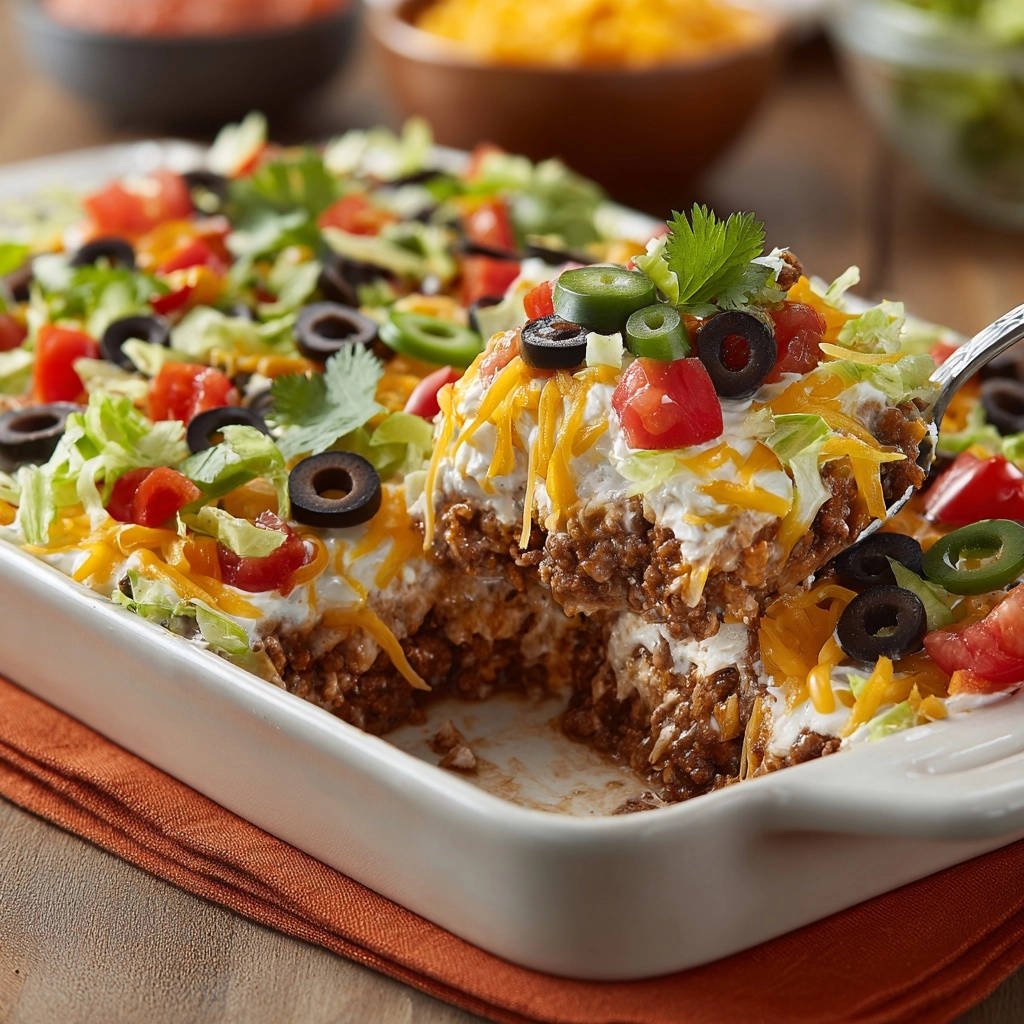
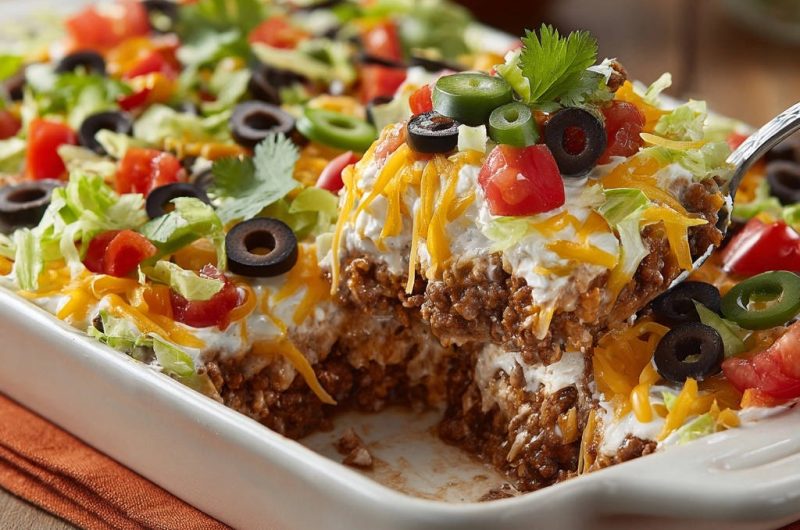
- Top with Freshness:
Finally, top with the shredded lettuce, diced tomatoes, sliced black olives, and sliced pickled jalapeños.
Arrange these vibrant toppings beautifully for an appealing presentation that promises fresh crunch in every bite.
- Garnish and Serve Your Ultimate Layered Taco Dip:
Garnish with fresh cilantro just before serving for an aromatic and colorful finish.
Serve immediately with your favorite tortilla chips, pita chips, or vegetable sticks, and watch this crowd-pleaser disappear!
The Ultimate Layered Taco Dip’s Secret Weapon: Preventing the Dreaded Soggy Bottom
Why Draining the Beef is Non-Negotiable
The primary culprit behind a soggy taco dip is excess moisture from the ground beef, compounded by rendered fat.
As the dip sits, this moisture leaches out, turning the delicious creamy and beef layers into a watery mess, negatively impacting both texture and taste.
Thoroughly draining the beef eliminates this issue, ensuring a stable, firm foundation that remains perfectly delicious from the first scoop to the last.
The Art of Effective Grease Removal
Beyond simply pouring off the grease, truly effective draining involves a few extra steps for maximum dryness.
After browning, transfer the beef to a fine-mesh colander. Use the back of a sturdy spoon to press down firmly on the meat, forcing out any hidden fat and moisture that gravity alone might miss.
Allowing it to rest in the colander for a few minutes ensures maximum drainage, a small effort that makes a huge difference to your Ultimate Layered Taco Dip.
Elevate Your Ultimate Layered Taco Dip: Expert Tips & Chef’s Secrets
Perfectly Softened Cream Cheese: Always start with cream cheese that’s truly at room temperature. This ensures a lump-free, perfectly smooth creamy layer that’s easy to spread and beautifully consistent.
Cool Your Beef: Don’t rush! Allowing the seasoned ground beef to cool slightly before layering prevents the cream cheese mixture from melting and becoming runny, which can lead to messy layers.
The Art of Layering: Spread each layer gently and evenly. Use the back of a spoon or an offset spatula for the creamy layer to avoid disturbing the one beneath it, maintaining distinct, appealing strata.
Chill for Firmness (Optional): While delicious immediately, a quick 15-30 minute chill in the fridge can help all the layers set a bit more, making for cleaner scoops and an even more satisfying texture.
Garnish Smart: Add fresh garnishes like cilantro, extra tomatoes, or a sprinkle of cheese just before serving to keep them looking vibrant and fresh, enhancing both appeal and taste.
Customize Your Ultimate Layered Taco Dip: Endless Flavor Adventures
Spice It Up: Heat Levels & Pepper Choices
For those who love a fiery kick, increase the amount of pickled jalapeños or add a dash of your favorite hot sauce to the cream cheese layer.
A sprinkle of red pepper flakes or a pinch of cayenne pepper in the beef mixture can also intensify the heat, transforming it into a truly spicy taco dip.
Veggie Boosts: More Freshness & Color
Incorporate extra vegetables like sweet corn kernels, finely diced bell peppers (red, yellow, or orange), or thinly sliced green onions for added crunch and vibrant color.
These additions enhance the nutritional value and provide more textual interest, making each scoop a unique experience.
Protein Swaps: Beyond Ground Beef
For a lighter option, substitute ground turkey or chicken for the beef, adjusting cooking times as needed.
Plant-based meat alternatives also work beautifully for a vegetarian twist, ensuring everyone can enjoy this fantastic layered dip.
Dairy-Free & Low-Carb Options
To make it dairy-free, use plant-based cream cheese and sour cream alternatives that are readily available.
For a low-carb version, swap traditional tortilla chips for crunchy cucumber slices, bell pepper strips, or sturdy lettuce cups.
This flexibility allows the Ultimate Layered Taco Dip to fit various dietary needs without sacrificing flavor.
Presentation & Pairings: Making Your Ultimate Layered Taco Dip Shine
The Best Dippers: Chips, Veggies, & More
While classic tortilla chips are a staple, consider offering a variety of dippers for textural contrast and broader appeal.
Crisp bell pepper strips, sturdy cucumber slices, celery sticks, or even toasted pita bread provide excellent alternatives for scooping.
Pretzel thins or hearty crackers can also be a delightful match for this robust, savory dip.
Complementary Sides for a Full Spread
For a complete party spread, serve your Ultimate Layered Taco Dip alongside other crowd-pleasers like amazing loaded lettuce cups or a vibrant fresh fruit salsa.
A simple green salad or a flavorful chili can also complement the rich flavors, creating a well-rounded meal or appetizer selection that satisfies all tastes.
Plan Ahead: Make-Ahead & Storage Tips for Your Ultimate Layered Taco Dip
Preparing Your Dip in Advance
The seasoned ground beef can be cooked and thoroughly drained a day in advance, stored separately in an airtight container in the refrigerator.
The cream cheese and sour cream mixture can also be prepared ahead of time and chilled, ready for assembly.
Chop all your fresh toppings in advance and store them in airtight containers, adding them right before serving to maintain their crispness and vibrant appearance.
Storing Leftovers Safely
Cover any leftover dip tightly with plastic wrap or transfer it to an airtight container to prevent air exposure.
Store in the refrigerator for up to 2-3 days, ensuring it remains safe and flavorful.
Note that the lettuce may wilt slightly over time, but the core flavors will remain delicious, making it a great next-day snack.
Reheating (or Not!) for Best Results
This Ultimate Layered Taco Dip is generally best served cold or at room temperature, as reheating can compromise the fresh toppings and creamy layers.
If you prefer a warmer base, you can gently warm the beef layer separately before assembling the dip fresh with chilled creamy layers and toppings for the best experience.
Solving Common Challenges: Ultimate Layered Taco Dip Troubleshooting Guide
Problem: My Dip Still Seems Watery!
This almost always points back to insufficient draining of the ground beef, allowing residual moisture to pool.
Ensure you’re pressing down firmly in the colander to extract all excess moisture and fat. Next time, allow an extra few minutes for gravity and pressing to do its work, resulting in a firmer base.
Problem: The Layers Are Blending Together
Layers melding typically occurs if the ground beef layer isn’t adequately cooled before the creamy layer is spread on top.
Warm beef will soften the cream cheese, causing it to run. Always let the beef cool completely, or at least until slightly warm to the touch, before assembling, for distinct, beautiful layers.
Problem: Too Bland or Too Spicy?
If your dip is too bland, a sprinkle of extra taco seasoning, a dash of hot sauce, or even a squeeze of fresh lime juice can brighten the flavors effectively.
If it’s too spicy, adding more sour cream to the creamy layer or offering a side of plain Greek yogurt can help to mellow the heat, creating a more balanced and enjoyable profile for everyone.
Your Ultimate Layered Taco Dip Questions Answered
Can I use a different type of meat for this Ultimate Layered Taco Dip?
Absolutely! Ground turkey or chicken are excellent lean alternatives. For a heartier option, slow-cooked shredded beef or even a flavorful cheesy beef pasta bake could inspire a delicious variation, though adjustments to draining and seasoning would be necessary for different proteins.
How far in advance can I make this Ultimate Layered Taco Dip?
For optimal freshness and crispness of toppings, assemble the dip no more than 2-3 hours before serving. The seasoned beef and creamy mixture can be prepped a day ahead and refrigerated separately, then assembled just before your event for maximum freshness.
What’s the best way to transport the dip to a party?
If fully assembled, tightly cover the serving dish with plastic wrap or foil to secure all the layers. For longer journeys, consider assembling only the beef and creamy layers, then transport the fresh toppings in separate containers to add just before serving at the destination. This preserves their texture and vibrant appearance.
Can I make this Ultimate Layered Taco Dip spicier?
Certainly! Beyond increasing the pickled jalapeños, you can stir a pinch of cayenne pepper into the ground beef, add a few drops of habanero sauce to the cream cheese, or offer a side of your favorite hot salsa for guests to customize their heat level exactly as they like it.
Is it possible to make this dip vegetarian or vegan?
Yes, absolutely! Substitute the ground beef with a plant-based meat alternative or seasoned black beans for a vegetarian version. For a vegan option, use dairy-free cream cheese and sour cream substitutes, ensuring all other ingredients like cheese are also plant-based to accommodate dietary needs.
Ready to Create Your Ultimate Layered Taco Dip Masterpiece?
You now hold the secret to crafting the most irresistible, non-soggy Ultimate Layered Taco Dip your guests have ever tasted.
With our proven method and expert tips, you’re not just making a dip; you’re creating a guaranteed party-pleaser that will have everyone asking for the recipe and admiring your culinary prowess.
We can’t wait to see your culinary creations! Share your Ultimate Layered Taco Dip photos and experiences in the comments below, or tag us on social media. Happy dipping!
Ultimate Layered Taco Dip
Course: AppetizerCuisine: Mexican cuisineDifficulty: easy8
servings20
minutes15
minutes35
minutesMexican cuisine
Ingredients
1 pound ground beef
1 package taco seasoning mix
1/2 cup water
8 ounces cream cheese, softened
1 cup sour cream
1 cup shredded cheddar cheese
2 cups shredded iceberg lettuce
1 cup diced tomatoes
1/2 cup sliced black olives
1/4 cup sliced pickled jalapeños
2 tablespoons fresh cilantro, chopped, for garnish
Directions
- In a large skillet, cook the ground beef over medium heat, breaking it apart with a spoon, until it is completely browned.
- This is the crucial step to prevent a soggy dip: Carefully drain ALL of the grease from the cooked ground beef. Transfer the beef to a fine-mesh colander and press down firmly with a spoon to release any remaining fat and moisture. Allow it to sit and drain for a few minutes. This is key for a firm base.
- Return the thoroughly drained ground beef to the skillet. Stir in the taco seasoning mix and 1/2 cup water. Bring to a simmer and cook for 5-7 minutes, stirring occasionally, until most of the liquid has evaporated and the meat is well-seasoned. Remove from heat and let it cool slightly.
- While the beef cools, in a medium bowl, combine the softened cream cheese and sour cream. Mix until smooth and well combined.
- In a 9×13 inch serving dish, spread the cooled, seasoned ground beef evenly as the bottom layer.
- Carefully spread the cream cheese and sour cream mixture over the beef layer.
- Sprinkle the shredded cheddar cheese evenly over the creamy layer.
- Top with the shredded lettuce, diced tomatoes, sliced black olives, and sliced pickled jalapeños.
- Garnish with fresh cilantro before serving. Serve immediately with your favorite tortilla chips.
Notes
- The crucial step is to drain ALL grease and moisture from the ground beef for a firm base.


